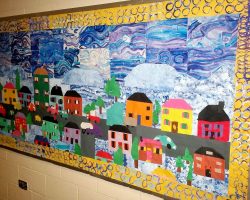
An In expensive Display Board For A Leisure Painter’s Group

An In expensive Display Board For A Leisure Painter’s Group

Why Does An Art Group Need Display Boards.

Do you belong to an art group looking for inexpensive and usable exhibition venues?
Have you thought about making your own display boards to help ease your problems with hanging paintings or craft pieces?
Your own display board can really help to solve the problem of where, and how, a group can hold exhibitions. The greater the choice of venue, the more choice there is for dates and arranging things becomes so much easier. This in turn can lead to saving money, important but especially so for a small group of leisure painters.

The Knowle Art Group is just such a group, we had been running into difficulties deciding where to hold our exhibitions.
The usual local libraries, etc, were getting to be too expensive. The less expensive halls to hire usually meant that there was no where to hang our paintings. They did not cater for groups like ours, wanting to hold an art exhibition. It was possible to hire display boards but again the cost was prohibitive.

The solution was going to be do-it-yourself display boards which we could stand on available tables. The idea came to us after exhibiting in an old Manor House where of course we couldn’t knock anything into the walls and the combined cost renting the room and hiring display boards was too much for us. The original idea was to construct a framework out of rough wooden poles. It worked well in the ancient property but couldn’t be used in other locations. After some thought the idea behind the display boards was arrived at. here is how the boards were made.

The Basic Idea

For Our Display Boards

The display boards were to be used by standing them on tables, which are always available at any hall or room for hire. This meant that they did not have to be large ( heavy and expensive) and waste the bottom two thirds of the available area. the tables could be covered with paper banqueting roll to give a professional appearance. We have since made some white table cloths as one of our members is a seamstress and this gets over the problem of the paper ripping at the slightest provocation.

The idea was quite simple, a board with two hinged side panels would be used to increase the available area for hanging the paintings. In other words we got 50 % extra space compared to the length of the tables. This also had the benefit of giving us a stable configuration. The board was held in place by slotting into two wooden battens ( runners) which were provided with carefully placed slots. A final touch was to hold the rear of the board to the rear runner by using a single screw. This prevented the board from bowing out and again increased the stability.

The Display Boards Are Made From Three Simple Components

The Hinged Back And Two Battens
Here is a photo of the hinged back. The sides are half the width of the center portion so that when it is folded up they do not interfere with each other. Of course the board is stored and moved in the folded condition. The whole thing is painted white, which we felt was appropriate for an art exhibition.

This photo shows the two battens positioned roughly on the table, waiting for the board to be placed in the slots. The paintings around the wall are waiting to be hung. We always have a practice before the day we set up the exhibition so that we can arrange the paintings most efficiently and effectively. This photo was taken at one of these practice sessions which is why there is no tablecloth.

You can see the slots, in this detail photo. We did not have a jig for the ten boards that we made but simply placed the board on the battens and marked the position of the slots which was cut with a saw and widened with a file. The slots are cut about two thirds of the way into the batten to allow the small bolt at the rear to go through the board and through the batten.

The measurements of the boards were to suit , but I will be creating an outline sketch of the three components which will be added to the lens very shortly

A Few More Paintings Waiting Their Turn

This is the first step in arranging the paintings, we put out ten tables (one for each board) and roughly decide which paintings will go on which board. We tend to theme each board; water, mountains, figure, animals, boats,etc. Not really necessary but it gives a great show for the public.

Hanging The Paintings On The Boards

Another Little Secret, Sschhh!!
The way we hang paintnigs on the boards is quite simple. We use brass hooks over the top of the board which support brass chains. For larger paintings, a pair of hooks/chains makes a very stable combination.

Having roughly positioned the paintings on the tables, we can then carefully hang them on the display boards.

The paintings are of course numbered for the catalogue and this identification is used to position them easily on the morning of the actual exhibition opening. And voila, a very professional display at a very inexpensive rate. Once made the boards can be used year after year, with just a new coat of paint.

The Final Outcome

One of Our Exhibitions
Here you can see how the boards can be arranged, and how we also press into service our painting easels for the very large paintings or to get a few more paintings on show.

The Boards Used In A Different Configuration

We Found A New Venue This Year
A view of the hall from above…. showing the boards arranged to take advantage of the natural lighting in the new venue. They also ensure that the visitor has to walk back around the paintings to get a second to the exit which means they get a second look.

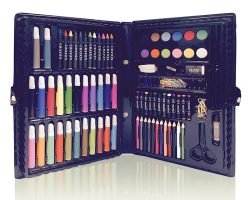
Deluxe Art Set

Deluxe Art Set

Do you know what art is? , If so, are you interested in art?

Visual Art is a great way to increase your creativity skills; one of the best. Generally Art has to do with expressing your emotions. Visual art is one of the most important portions of art in which emotions, thoughts, messages are converted in to visual graphics. Graphics is basically using points, lines, planes and textures to express an idea. In other words, one or more of technologies and findings of human beings are released through art. All these technologies were just an idea in the mind of their inventors.

So, how is an idea is transformed into a product?

This is probably an important equation that you should ask. The first thing is that you have an idea to create a new product; it can be a new crazy house which is constructed out of living plants or paper. This may be quite crazy to think or seems unrealistic. But if you can manage to express and experiment your ideas in graphics, you can realize whatever you can think of. Graphics helps you to find out if something works or not. This is very critical in fields like Architecture and Mechanical Engineering.

Have you ever looked for a complete set of Artists tools?
Darice 80-Piece Deluxe Art Set is made to meet all your desires as an artist. The set is more than enough for a serious artist to make many great water colors, awesome paintings using the included HQ oil paints. The pack is also full of a set of tools including water color, oil paint, sketch pencils, several brushes and many other accessories.

Darice 80-Piece Deluxe Art Set Best qualities
Darice 80-piece deluxe art set- is perfect for a student like me which is interested in Art. This set is an ideal pack for an artist to express his emotions in the way he likes. The type of art an artist can do using this set is a lot. One can just make pencil sketches or comic cartoons only using the color pencils provided. Others prefer to make oil or water paints.

Make your art come alive. Use the right supplies.

Enjoy Art Express your emotions in Art!!

Darice Art set in Youtube

https://www.youtube.com/watch?v=FTRIbnVg_pQ

Brayer Techniques

Brayer Techniques

Brayer techniques in ink and acrylics for art journaling, mixed media, and collage work

My brayer is one of my favorite art tools – it’s incredibly versatile and can provide precision results and serendipitous beauty depending on what brayer technique I’m using. The brayer is an incredibly multi-purpose tool and I’d like to share with you all the brayer techniques I know – so far – and add to this page as I learn more about this amazing artistic tool.

What exactly is a brayer? A quick introduction to brayers…

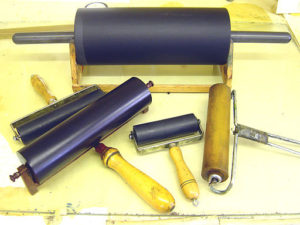
Basically, a brayer is a paint roller. Not the soft, fuzzy kind like for painting walls and ceilings, but similar. They are smaller, handheld tools that are frequently used for printmaking, but are growing in popularity as a scrapbooking, rubber stamping, and mixed media tool.

Mixed Media Brayer Technique with Kaleidacolor Inkpad

I made the colorful layered background on this art print in just seconds. It took me longer to photograph it than to create it! I used a simple brayer technique involving a specialty ink pad called Kaleidacolor. Each Kaleidacolor pad comes with five individual color that snap together to create a lovely rainbow striped stamp pad. The innovative design allows you to unsnap the colors when you’re not using it so that the inks don’t bleed together like they do with other multicolor ink pads.

TIP: Always store any ink pad upside down and wrapped with a rubber band to keep the lid tight. This increases the lifespan of you ink pad by allowing the ink to settle towards the top of the pad, and minimizing evaporation due to a loose lid.

An example of using the Kaleidacolor Brayer Technique

Here’s a video that some one made with a brayer technique very similar to how I created the rainbow poster. She is using a glossy cardstock and going for a smoother, more blended brayer technique but I purposefully left my colors a bit uneven and blocky and brayered on watercolor paper to get more texture and layers. (Also, she stamps a resist image before starting with her brayer technique.) Either way is very fun, and as you can probably tell there is a lot of room for playing around with this technique.

Acrylic Paint Brayer Techniques

Using a brayer with acrylic paints to create amazing layered texture
Acrylic Paints Acrylic paints are pretty much my number one pigment of choice, be it cheap craft paints or the higher-quality, artist-grade acrylic paints. I’m always on the lookout for new and exciting ways to use it. Using a brayer to apply acrylic paints to your artwork can have all kind of interesting effects – it’s a bit of an adventure because it can be very hard to predict exactly what will happen, but I’ve rarely been disappointed. (The only times were when I used too much paint – a little acrylic paint goes a LONG way with a brayer, it can be far too easy to use too much and end up with a muddy mess.)

Probably my first encounter with using a brayer with acrylic paint was during a the first annual retreat for my local ATC group. One of our members led about fifteen of us through the exercise “Mail Art To The Self” from the book Kaleidoscope: Ideas & Projects to Spark Your Creativity. The exercise was created by artist Juliana Coles and I can’t recommend it enough – I’ve done it several times since and it’s always invigorating. Part of the exercise involves applying paint to a large surface as fast as you can, and she suggests using a brayer for that. Our exercise leader let me borrow hers and I was thrilled with the results!

As you can see from the close-up on the left here, the white paint I brayered onto my project picked up and highlighted all the textures on the surface. To achieve that highlighting effect I used a very small amount of paint and not too much pressure when rolling the brayer. You can also see some interesting peaks and valleys in the paint, which I love the look of. That’s another great thing you get with brayering that you can’t really replicate with any other painting tool. The amount of peaks and valleys varies depending on how much paint you use, and thicker, high-quality paint will also give this effect more.

Note that this is an example of what brayering looking like with just one color – the browns and greens you see are the original cardboard surface and the paint I’d applied with brushes and my fingers before I got my hands on the brayer.

Click on the image, it will take you to the full image of this page so you can see all the details.

An art journaling video showing an acrylic paint brayer technique

For a while I ended up forgetting about my brayer – I learned so much in one weekend that it was hard to keep track of it all! But when a friend of mine posted this video to her blog it got me right back to it!

https://www.youtube.com/watch?v=A56wx1v0Fo8

Art Journal Page: Anecdotal Evidence

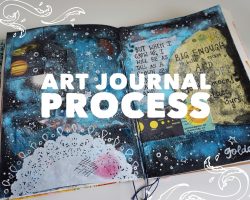
The art journal spread I created using my brayer and bright craft acrylics

If you look closely, you may notice this is where the photo at the top of the page came from!

Here’s the journal spread I created after I watched the above video the first time. I grabbed a handful of my favorite bright colors of craft paint and dripped just a little bit of each color at a time, rolling the brayer back and forth at varying angles each time I added a new color. The brayering process smoothed the paint out so thinly that it dried very quickly and I could add more colors almost instantly without getting muddy results. It probably helped that it was a chilly day and my space heater made my studio nice and dry and warm!

Thanks for stopping by my brayer technique guide!
I hope you found the info you were looking for today, and that I’ve inspired you to go make fun and exciting new art and craft projects using your brayer. Please let me know what you think, and be sure to let me know if there are any brayer techniques I’ve missed! Thanks!

How to Choose the Best Watercolor Paint Sets

How to Choose the Best Watercolor Paint Sets

How to Choose Watercolor Paint Sets

What are the best Watercolour Paint Sets for you to use? And why? If you are a Professional, Student or even a Kid there are great paint sets to suit you. Knowing which one can help your art.

Each one has it’s advantages and disadvantages in cost, quality and use.

Types of Watercolor Paint Sets

Watercolor paint comes in different levels and types.

1. Kids
2. Students
3. Pros

It also comes in

1. Pans &
2. Tubes
3. Pencils

Choosing Students Watercolor Paint Sets

Types of Watercolor Paints Video

https://www.youtube.com/watch?v=Bd0PgwA55gs

Students Watercolor Paint Sets

Choosing Students Watercolor Paint Sets can be a tough one. Do you go for students quality or artists quality colors? Students paints are best for students right? Not necessarily so here’s why.

Students range from complete beginner to advanced.
Paints vary in quality and price therefore a more advanced student may want a better quality paint.
Even newbies may not want their art affected by inferior paints.
Not everyone can afford the more expensive paints. (or brushes for that matter)
And everyone has an opinion and most of those are different!

So where do you go from here? Decide on where you fit in to the mix. Also decide what you can afford. Then buy the best watercolor paints you can afford, either a well known student paint or an artists one.

When starting out getting a set can be the easiest way as you have a good starting range to begin with, then you can add individual pans, pencils or tubes later. This lens will be covering the pros and cons of each type of set too.

Artists & Professional Watercolor Paint Sets

Artists & Professional Watercolor Paint Sets are the better quality paints and therefore carry a higher price, but they have better pigments and last longer than student ranges.

Kids Watercolor Paint Sets

Kids Watercolor Paint Sets quality has improved over the years, but they are still basic.

My niece used to paint sheet after sheet of pictures. Each one looking like a single colored ink blob. The paintings went on fridges and walls and doors and eventually when then next batch of blob paintings came along in the trash. At this stage it just isn’t worth spending out on fancy expensive paints. Kids art gear isn’t too expensive, some isn’t too bad a quality whilst others are rubbish.

Now my niece is 9 and my sister despairs of the large range of art stuff she has. Watercolor paints and pencils, normal pencils, pens etc. As you child grows the paint quality needs to improve. It is no good them having paints that don’t work well this will just ruin their interest. So stick to kid’s paint as they are safer but get something increasingly better quality.

7 reasons why watercolor paints are great for kids.

Here are 7 reasons why watercolor paints are great for kids.

1. Kids love them
2. They are cheap
3. Parents can get the off the walls and clothes easier than oil or acrylic.
4. They are designed for kids so aren’t toxic if they go on the fingers then in the mouth.
5. They are easy to use.
7. They encourage creativity in kids which stimulates the mind and improves thinking.

Leopard Print Stencils for Walls, Nails, Cake, and More!

Leopard Print Stencils for Walls, Nails, Cake, and More!

What Would You Use a Leopard Print Stencil For?

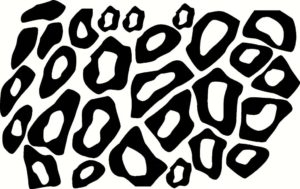
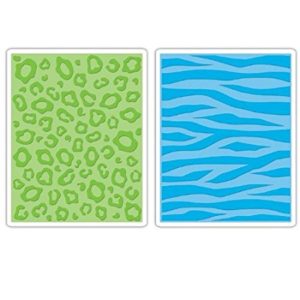
What would you use a leopard print stencil for? There are so many uses to choose from! Whether you want to paint a whole wall with it, or add an accent picture, or do your nails, or make a leopard print cake, a stencil can help you out.

While you can draw the spots free hand, a stencil makes it so much more realistic. And you can find a leopard print stencil for not very much money!

This lens will cover some of the different uses you can put this stencil to, as well as give you some of the best places to find it online. Use the table of contents to hop down to the topic that interests you,or just browse to see what’s out there!

Leopard Print Stencils for Walls

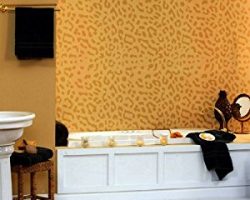
Leopard print can make a great accent wall. You can also use a leopard print stencil for stripes, or you could make a big heart at the top of your bed or around your mirror. If you feel really wild and crazy, you can use it throughout the whole room! Here are a few leopard print stencils for walls that I found.

There are multiple thicknesses that you will note in the description. The thicker the stencil, the more sturdy it will be. However, it will not work as well on curved surfaces. There are also multiple sizes. Dimensions are in inches. The bigger stencils cover a much larger area, but they cost a lot more. I would only recommend them if you are doing an entire room. If you are just using leopard print as an accent, you can go with the smaller stencil. It will take you more time to finish the project, but it will cost you less money.

Leopard Print Decals

If you really want to save time and just accent a room, then these leopard print decals are for you. The first one is available in six different colors.

Leopard Print Stencils for Cakes

If you want to have a wild party, then you may want a leopard print stencil for your cake. This lets you easily add a leopard print design to either the sides or the top of the cake. It’s perfect for bachelorette parties, or birthday parties for the wild girl in your life.

But if you don’t want to add your own leopard print on the sides, you can accent the cake with leopard print in a few different ways. Here are three ideas.

Leopard Print Stencil for the Face and Body

Did you know you could use a leopard print stencil on your face or body as well? It makes face painting a lot easier. Or if you really want to be a leopard for Halloween, you can go all out and use the stencil. You can also use them with airbrushing or henna tattoos.

Leopard Print Stencils for Nails

How about leopard print stencils for nails? The only one I could find on Amazon was for airbrushing. You can, however, do leopard spots with a dotting tool and the right color paint. I’ve included a kit for making animal prints. You can also get leopard spot stickers.

My favorite oil pastel sets from cheap to expensive

My favorite oil pastel sets from cheap to expensive

How to choose your oil pastel set for sketching and serious art work

Oil pastels are one of my favorite painting and drawing medium. Based on my personal experience I want give answers to the question: What is the best oil pastel set to buy or to start with? It depends on the purpose you want to use it for. If you are looking for a set to be given to children you might want to look for a water soluble and more harder oil pastel or wax crayon. Illustrators who mostly do not exhibit their work but store it after scan in a drawer away from light can use a cheaper quality if they prefer a certain brand or set at lower price.

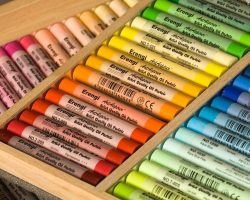
For more ambitious wor the set shown on the image is a portrait set of oil pastels by Sennelier available on amazon.com might be better. It contains those colours best suitable for portrait work i.e. for skin and hair colours. Sennelier is a producer of highest quality oil pastels. Work created with their oil pastels is suitable for long term exposure under normal room daylight, which still contains some of the UV-light that causes colours with less and cheaper pigment load to fade over time.

A fairly good guideline for quality is the price of oil pastels. The competition in this field is very strong especially in the low segment. Therefore you can be sure that a more expensive quality will be the better quality: the sticks last longer, more vibrant colours and better light fastness along with some better properties in handling.

The second reliable criterion is the brand name. Choosing from long established renowned brands will make sure that you get a good quality. That does not say that an unknown brand is not good enough. I try unknown brands on a regular basis if they have colours that seem interesting to me and make a good addition to my sets.

What are the best oil pastels brands

best quality oil pastel brands ,some choices
Of course each artist has his/her own preferences. But when you investigate which brands are used by professional artists or have been used on really stunning art work you most probably will find the same brand names again and again. I do not want to put these brands in a ranking order, it is more about being on that list or not: Sennelier, Holbein, Caran d’Ache, GretaColor for highest qualities and Pentel, Sakura and van Gogh for more price worthy qualities. Most of these brands or companies are known for great colours also in other fields like oil painting or coloured pencil.

The expensive artist oil pastels typically cost around 1-2 $ per small stick, the less expensive ones are very well below 1$ per stick.

Holbein offers an expensive artist oil pastel grade and a less expensive studio quality. Sennelier is famous for their very creamy and pigment rich oil pastels in small and big stick, whereas Caran d’ Ache has developed a range of different grades between soft artist grade named “Neopastel” and less expensive and harder , even water soluble brands named “Neocolor”.

It is possible to use different qualities in the same work, for example a layer of harder pastels as under painting and softer qualities on top.

I have used Caran d’Ache Neocolor for the oil pastel study painting after John Constable’s sketch Dedham lock & mill

Which colours are critical in oil pastel sets ?

Critical colours are those colours that you use more often and in larger quantities than others! The second category of critical colours are those which tend to fade faster than others due to their nature.

1. Colors that you use regularly and which you need in larger quantities

What you need to know before you buy a set is whether colours that are used up can be replaced easily. Is it possible to get that greens you need in spring easily via online order or at your art dealer not to far away? That could limit your choice already quite a bit. Imagine you started a piece and you run out of a certain colour hue. If you need to continue with a different brand your work might not look as good as you wish. I usually need more often natural greens,ochre,all grays and browns, blues and white which are the main colours for landscape work.

2. Which colours are critical due to pigment.

What I have learned from my teachers is that certain colours in pastels as in other colors tend to fade quicker than others due to the nature of the available pigment for those colours. It is commended to use the best quality of colors if possible for work that contain delicate red and pink colour hues. The same applies for orange hues. Therefore artists who specialize on flower still life will pay particular attention to the light fastness of their oil pastels.

The Caran d’Ache oil pastel sets

48 and 96 color sets

Caran d’ Ache 48 color setThese are the sets that I own. The first one is the smaller 48 color set. The colors are ordered in 12 groups of four colors each. This order is very helpful to develop an intuitive understanding of colors and hues, their relations ships and mixing potential. As Plein air painter I appreciated the many shades of green in this selection.

Caran d’ Ache 96 color setThe 96 color set expands the range considerably. There are even two metallic colors, bronze and gold, which are nice to have for special purposes. The consists of two boxes which are stored on top of each other. Cpmpared to the 48 color set the range of greys is large. Also there are very nice hues of “beige”, which I consider warm greys I really appreciate for outdoor painting. In addition to that the range of browns and blues are much bigger.

Thanks for looking .. I hope you will have lots of fun with your new oil pastel set..

Painting Easels For Teens and Adults

Painting Easels For Teens and Adults

Art Easels Can Make Oil and Acrylic Painting Much Easier for Teenage Artists

When shopping for the Painting Easels For Teens you will want to explore the size, materials, features, and portability of each easel you are considering. The smaller size, perhaps a table top (box type), or a folding compact style each have their own benefits.

Consider the lifestyle of the artist. Are they landscape artists needing to take their supplies on the go? If they prefer to be in the studio and stationary the set up can be less portable, but, consider the size of the teen. Find a size that fits the artist. Is the material suitable for outdoor use? As you browse these painting easels for teens you will find the best of each style is represented so you can quickly choose the best for your needs.

What to look for when buying an easel for outdoor use

Obviously, if you intend to use your easel out of doors it needs to be portable. That means buying one that a) fold flat to carry and b) is in a weight you can easily pick up and carry. One other thing you might consider though is how stable it is. Many outdoor easels these days are made of aluminium and fold down much like a photographer’s tripod into a carrying case. These are lightweight and can usually be carried on a shoulder strap. They will easily hold a small canvas and they have the added bonus of being weather proof. Many of them also come with attachments for you equipment like a holder for a water container or brushes.

As an alternative to these are the outdoor easels that are contained within a carrybox that also holds your paints and so on. The box usually has fold down legs and boards that you can easily assemble when you get there. They are generally wood and much heavier than the aluminium ones but you can generally get a harness or straps to carry them as backpacks. Some of these even come with a seat attached but remember anything like this is going to be heavy to carry.

A few other thinks you might consider: how easy it is to assemble or take down, how easy it is to adjust the angle of your drawing board, can you adjust the legs, after all you may not always be on level ground.

What to look for when buying an indoor easel

There are two types of indoor use easels a teenager might need, a free-standing studio easel or a table easel depending on a number of things like the type of art, space and of course budget. You can of course spend thousands on easels but for teens an A frame easel is probably all that he needs to start with. The A frames have the advantage of being able to fold flat quickly for storing away and they have all the stability he needs to be able to hold his work securely. The advantage of studio easels is that he can stand away from his work easily and see it from different angles.

If he is working with watercolors or just prefers to sit and bend over his work a table easel might be the best choice. If you are buying for a teen make sure you know what he is working with before you buy, for example, if his preference is for watercolor painting or amine drawing he will probably want an easel that has a solid board that paper can be attached to rather than one where you have to clamp a canvas to. Make sure it is sturdy enough to stay still while he is working on it, even then there might be small movements so you might want one with protective feet to protect your furniture. To ensure perfect stability of course you can always invest in one that clamps to the table or desk. The best easels can be adjusted to many levels from flat to vertical.

Best Painting Easels Videos

Demonstrations and Tutorials How to use Painting Easels

https://www.youtube.com/watch?v=DxSdep1QLLQ