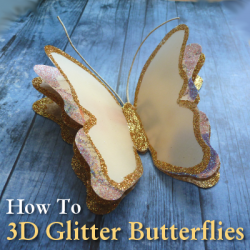
Make Your Own Luxury Layered 3D Butterfly Embellishments from Paper and Glitter
You can buy all kinds of pretty embellishments to adorn your handmade cards and craft projects but most of the time, I prefer to make my own. That’s because, embellishments like butterflies are fun to make and very inexpensive too once you already have a stock of paper and glitter powders to use. You can even opt to use newsprint, magazine pages or sheets torn from old books you no longer want in order to keep costs minimal.
Once you know how this technique works, each piece is easy to assemble. I do recommend making them up in bulk batches because it’s much quicker to make several at a time than just make a single piece each time you want a luxury 3D butterfly embellishment.
All Personal Images belong to the author of this article: Marie Williams Johnstone
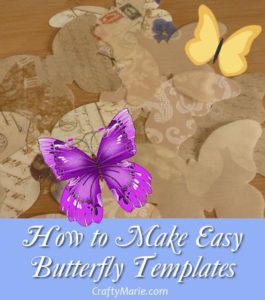
First You Need Paper Butterfly Shapes
Use a Cutting Machine or Make Your Own DIY Templates
I prefer to make my own templates because this way I get the exact style and size of butterfly that I want for the project at hand which means I can fit the finished pieces to fit perfectly on handmade cards, as gift toppers, as DIY napkin rings for special occasions, hanging decor and more.
If you want to create your own beautiful butterflies, I show you a variety of ways which are the exact methods I use:
How to Make Butterfly Shaped Templates for Crafts
You can use paper punches but be aware that even large punches will tend to give you quite small pieces and this 3D, layered version that I’m showing you really is best on a bigger scale. The ones I make are often palm sized and bigger. Cutting machines are capable of making larger versions so this may be a better option if you do not wish to or cannot cut by hand.
The last option is to buy pre-cut paper butterfly shapes from a venue such as eBay or you may even find a seller on etsy that will provide you with what you need. Again, I’d prefer to make my own since I get full control over the paper and design being used.
Some of the Materials You’ll Need
These pretty paper embellishments do not need an abundance of materials in order to make them and you may already have most of what you need. The main component is paper and I like to pick out rather antiqued looking and vintage style papers in creams, pale browns and grungy colors. Extra fine glitter powder is an essential and you can buy large sets of these to use. The tubs they come in tend to look tiny but a little really goes a long way providing you use a tidy tray or paper to collect the stray powder to pop back in the jar – don’t throw it away! Zig glue pens are the ONLY wet glue pen I’d ever recommend because I’ve used these for years.
How to Make Layered 3D Paper Butterflies
In Vintage Style With a Gorgeous Glitter Edging on the Wings
These are the layered 3D butterflies that I’ve been making for a long time now – the shape may vary and the colors of the paper but the styling stays the same. This style screams luxury and they are ideal for topping special gifts and cards for occasions such as weddings, anniversaries, milestone birthdays and heartfelt thank yous. I like them in a antiqued vintage look but you can change this up with papers of your own choice to match the theme. Need to know how to make butterfly shapes? See How to Make Butterfly Templates
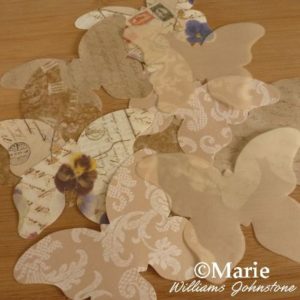
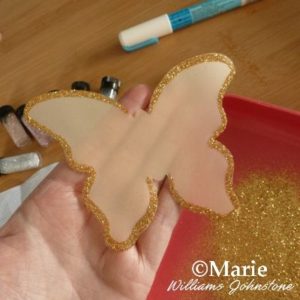
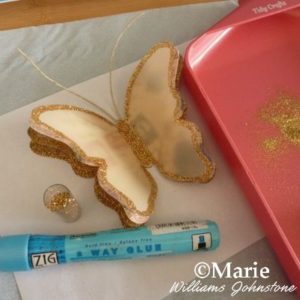
1.You need lots of butterfly shapes cut from the paper of your choice. I like to make my own templates for this and cut by hand but you can use a large paper punch to make smaller versions or a cutting machine. I like to use 4 cut pieces to make a single 3D butterfly but you can choose 3-6 pieces depending whether you want more or less layers. For the top layer of paper, I like to use Vellum which you can partially see through. It just gives a nice effect. With vintage style papers, I opt for a cream color vellum.
2.You can use another brand, but I absolutely recommend a Zig glue pen to draw around the edges of your wings so the glitter has something to stick to. I’ve been using these glue pens for many, many years so I know how good they are. Draw around the edges of one wing where you want with the glue and shake your choice of extra fine glitter over the top. Have a tidy tray or some paper underneath to catch the excess glitter. Turn the butterfly over and tap the back of the wing to remove excess powder.
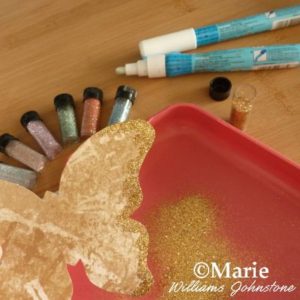
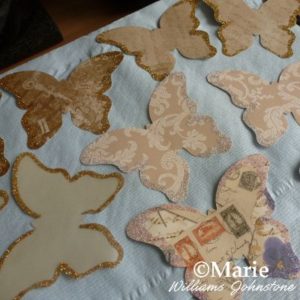
3.Add glittered edges to all the wings. Here’s a tip to save on using too much glitter. For the top layer which I like to choose vellum for, I will glitter all the way around the edges. For layers underneath, I just tend to add glitter right at the sides where it will be seen most. You can see the difference between images in step 2 and step 3.
4.Leave all your pieces of paper to dry. This should not take very long with a Zig glue pen. I spread them out onto sheets of paper or a tray in case of stray glitter.
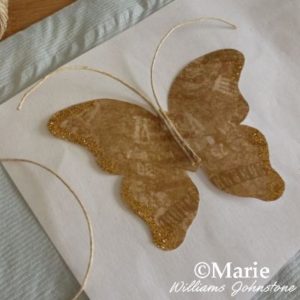
5.Choose a piece for your bottom layer as this needs the antennae stuck to it. For the antennae (or stalks as my daughter calls them) I use a hemp twine which works well with the vintage or antiqued styling. If you’re working with stronger colors, you can get colored cords instead. Cut off two same sized pieces, run some strong adhesive down the middle of the butterfly (I prefer a glue gun for this as it sticks pretty instantly) and stick in the ends of the cord or twine – be careful of hot glue if using a glue gun!
6.Now add on the rest of your layers for the piece. I use 4 altogether with vellum as the top layer. To add them, run a strip of glue or adhesive down the middle of the butterfly and stick the next piece down making sure it lines up with the previous layer.
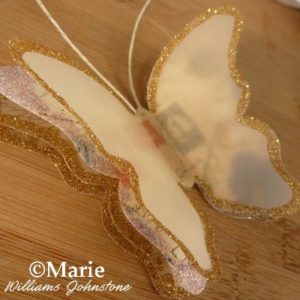
7.When all layers are in place, go back to your glue pen or Zig pen and add this over the middle area between the wings. Now sprinkle over your choice of glitter. If you have a dark brown or black, this can look quite dramatic. Once dry, carefully push up each layer of wings using your fingers underneath to push them up and out. You can see how beautiful the finished versions can look with a large image further down this page. I hope you’ve enjoyed reading my lens or article today, thanks for your visit. Don’t be afraid to change up the color scheme and use colors and patterns to match with the occasion. And have fun.
Tidy Tray Keeps Powder from Going Astray
Glitter powders are gorgeous on handmade crafts but you don’t want to get them anywhere else because they are a real pain to shift. When using these powders, I work over a tidy tray which catches all the excess powder as I work. When done, I use a brush to push the powder through the hole on one side of the tray and back into the glitter jar. If you pop a piece of paper under the jar and any powder misses the jar on its way back, you can pinch one end of the paper to a point and pour the rest in.
Extra Fine Glitters for Gorgeous Shimmer
But You’ll Really Need a Tidy Tray to Contain Them
Most of the time, I opt to use Stickles glitter glue because these little wet glue bottles are great at adding bits of sparkle to handmade projects. However, wet glitter glue when added in big and concentrated amounts, just like in this project all around the edges of the wings, can cause paper to wrinkle and buckle. Extra fine powder glitters are premium glitters and the absolute BEST I’ve ever come across for adding in a real shine and sparkle. They are worth using for special cards, gifts and projects like special celebration birthdays, weddings and where you need to make a real impact.
Some Finished Fluttering Embellishments
The Extra Fine Glitter Really Sparkles and Shines Beautifully
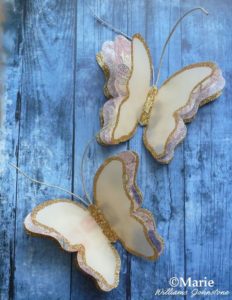 Layered vintage style paper and sheer vellum paper
butterflies with gorgeous glitter edges.
Butterfly Punches and Dies
Great Option if You Don’t Want to Hand Cut
If you’re not keen on paper cutting or you’d prefer a machine to do the work for you, there are options to use paper punches or die cutters for popular machines like the Sizzix. Bear in mind that, even with large punches, your cut shapes are still going to be quite small – the biggest I have found are around 2 inches. Cutting machines can go larger than hand punches. If size is a real issue then cutting your own may be the best option.


