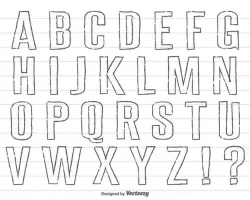
The Do’s And Don’ts Of Drawing Block Letters
There are some basic dos and don’ts when it comes to drawing block letters. First, make sure that the letters are all of equal size. This will ensure that your block letters look evenly spaced and balanced. Second, use a consistent thickness for all the lines in your letters. This will create a more cohesive look. Finally, make sure that the letters are well-proportioned to each other. This will give your block letters a more polished appearance.
When it comes to the don’ts of drawing block letters, there are a few things to avoid. First, don’t make the letters too small. This will make them difficult to read. Second, don’t make the letters too close together. This will make them look cluttered and difficult to read. Finally, don’t make the letters too close to the edge of the paper. This will make them look unbalanced and unfinished.
When it comes to drawing letters, there are a few things you should keep in mind. First and foremost, letters should be legible. That means they should be easy to read, both in terms of the overall design and the individual letterforms.
There are a few key things to keep in mind when drawing letters:
– Make sure the letters are legible.
– Use a consistent lettering style throughout.
– Use simple, clean lines.
– Avoid excessive embellishments.
– Keep it simple!
With those guidelines in mind, let’s take a look at some do’s and don’ts of drawing block letters.
DO:
– Use a consistent width for all of the strokes in your letters. This will help create a cohesive look.
– Make sure the letters are spaced evenly. This will ensure that your letters are easy to read.
– Use a light touch when drawing the letters. This will help create a more refined look.
– Use a ruler or other straight edge to help you create straight lines.
– Take your time!
DON’T:
– Don’t use different widths for the strokes in your letters. This will make your letters look messy.
– Don’t space the letters too far apart. This will make your letters look disconnected.
– Don’t press too hard when drawing the letters. This will make your letters look rough.
– Don’t try to freehand the letters. This will almost always result in messy looking letters.
– Don’t rush!
By following these simple guidelines, you’ll be well on your way to creating beautiful, stylish block letters. So get out there and start lettering!

