How To Capture Amazing Action Shots With Your Camera

How To Capture Amazing Action Shots With Your Camera

Action shots are always impressive, whether it’s a photo of a friend skydiving or a video of a dance recital. But how do you get great action shots with your body camera? Here are a few tips:

Use a high frame rate.

The higher the frame rate, the more frames per second your camera will capture. This is important for action shots because it means you’ll be able to capture more detail and movement.

Use a fast shutter speed.

A fast shutter speed will help to freeze the action, so you don’t end up with a blurry mess.

Use burst mode.

Burst mode is a great way to make sure you don’t miss the perfect shot. When you enable burst mode, your camera will take a rapid succession of photos, giving you plenty of options to choose from.

Use a wide aperture.

A wide aperture will give you a shallow depth of field, which means that the background will be blurred and the focus will be on the subject of your photo.

Use a tripod.

A tripod will help to keep your camera steady, so you don’t end up with blurry photos.

Use manual mode.

Manual mode will give you the most control over your camera settings. This is important for action shots because you’ll want to be able to adjust the shutter speed and aperture to get the perfect photo.

Use a remote shutter release.

A remote shutter release will allow you to take photos without having to touch your camera. This is especially helpful if you’re using a tripod, as you won’t have to worry about jarring the camera and ruining your shot.

Use continuous autofocus.

Continuous autofocus will help to keep your subject in focus, even if they’re moving around.

Use high ISO.

A high ISO will help to brighten your photos, making it easier to capture detail in low-light situations.

Use post-processing.

Post-processing is a great way to fine-tune your photos and make them look their best.

With these tips, you’ll be able to take amazing action shots with your body camera. So go out and start shooting!

How To Get Creative With The Xiaomi Yi Action Camera App

How To Get Creative With The Xiaomi Yi Action Camera App

If you’re a fan of the Xiaomi Yi Action Camera, then you’re probably already aware of the great Xiaomi Yi Action Camera App. This app allows you to control your camera remotely, as well as download and edit your photos and videos.

But did you know that there are some great creative ways to use the app? Here are some of our favourites:

Create a Time Lapse Video

One of the great features of the Xiaomi Yi Action Camera App is the time lapse function. This allows you to set your camera to take a photo every few seconds, minutes or hours, and then automatically stitches them together into a video.

This is a great way to create an interesting video of something that would normally be quite boring, such as a sunset or a cityscape.

Use the App as a Remote Shutter

If you want to take a photo of yourself without having to press the shutter button on the camera, you can use the app as a remote shutter. Simply set up your camera on a tripod or stable surface, and then use the app to trigger the shutter remotely.

This is also a great way to take group photos, as you can be in the photo yourself without having to worry about someone else taking the photo for you.

Take Long Exposure Photos

Another great feature of the Xiaomi Yi Action Camera App is the long exposure setting. This allows you to take photos with a shutter speed of up to 30 seconds, which is great for taking photos of stars or light trails.

To use this setting, simply set your camera to manual mode, and then select the long exposure setting in the app.

Use the App as a Dash Cam

If you’re going on a long road trip, you can use the Xiaomi Yi Action Camera App as a dash cam. Simply mount your camera to your windshield, and then set it to record continuously.

If you have an accident, or witness something interesting on your journey, you’ll have it all captured on video.

Take Photos of Wildlife

If you’re a keen photographer, you can use the Xiaomi Yi Action Camera App to take some great photos of wildlife. Simply set up your camera near a bird feeder or in your garden, and then use the app to trigger the shutter remotely.

You can also use the long exposure setting to take some great night-time photos of wildlife.

So there you have it, five great creative ways to use the Xiaomi Yi Action Camera App. We’re sure you’ll think of many more once you start using the app yourself.

How To Get The Most Out Of Your SLR Digital Camera

How To Get The Most Out Of Your SLR Digital Camera

In this day and age, it’s all too easy to get caught up in the technology of our digital SLR cameras and overlook the basics of photography.

Here are a few tips to help you get the most out of your digital SLR camera:

1. Read the manual

This may seem like an obvious one, but you’d be surprised how many people never bother to read their camera manual. Your digital SLR camera is a complex piece of equipment and it’s important to understand how it works before using it.

2. Use the right lens

One of the great things about digital SLR cameras is that you can interchange the lenses depending on what you’re trying to photograph. If you’re shooting a landscape, for example, you’ll want to use a wide-angle lens. But if you’re trying to photograph a close-up of a flower, you’ll need a macro lens.

3. Shoot in RAW

If your digital SLR camera has the option to shoot in RAW, do it! RAW files are much larger than JPEGs but they contain all the information your camera captures when you take a photo. This gives you much more flexibility when editing your photos later on.

4. Use a tripod

If you want to avoid blurry photos, use a tripod. Tripods are especially important when shooting in low light or using a long lens.

5. Know your camera’s limits

Each digital SLR camera has its own strengths and weaknesses. Some are better in low light, while others have faster shutter speeds. Learn about your camera’s capabilities and limitations and you’ll be able to take better photos.

By following these tips, you’ll be able to get the most out of your digital SLR camera and take better photos.

10 Tips For Shooting Better On Film

10 Tips For Shooting Better On Film

1. Get to know your camera

Before you start shooting on film, it’s important to get to know your camera. Read the manual and familiarize yourself with the different features and settings. This will help you get the most out of your camera and avoid any potential problems.

2. Use a tripod

Using a tripod will help you avoid camera shake and ensure that your photos are sharp and blur-free. It’s especially important to use a tripod when shooting in low light conditions or when using a long focal length lens.

3. Use a remote shutter release

A remote shutter release allows you to take photos without touching the camera, which can help prevent camera shake. If your camera doesn’t have a remote shutter release, you can use the self-timer setting.

4. Use a low ISO

Using a low ISO will help you avoid image noise and produce sharper, higher-quality photos. It’s especially important to use a low ISO when shooting in low light conditions.

5. Use a fast shutter speed

Using a fast shutter speed will help you freeze action and avoid blur. It’s especially important to use a fast shutter speed when shooting sports or other fast-moving subjects.

6. Use a narrow aperture

Using a narrow aperture (higher f-stop number) will help you achieve a greater depth of field, which means that more of your photo will be in focus. This is useful for landscape photos or photos with multiple subjects.

7. Use exposure compensation

If you’re shooting in manual mode, exposure compensation can be used to make your photos lighter or darker. This is useful if the scene you’re photographing is very bright or very dark.

8. Shoot in RAW

Shooting in RAW will give you the most flexibility when editing your photos. RAW files contain all of the data captured by the camera’s sensor, which gives you more information to work with when editing.

9. Use a filter

Using a filter can help you achieve a specific effect or look in your photos. Common filters include polarizing filters, which reduce glare and increase contrast, and ND filters, which reduce the amount of light entering the lens.

10. Experiment

Don’t be afraid to experiment with different settings and techniques. This is the best way to learn and find what works best for you.

Hopefully these tips will help you shoot better on film. If you have any questions, feel free to leave a comment below.

Nikon Coolpix P900 Review

Nikon Coolpix P900 Review

The Bottom Line

There’s no hiding the key feature that we’ll showcase in this Nikon Coolpix P900 review — an almost unbelievable 83X optical zoom lens. At the time of this writing, the 83X zoom lens is the largest one available in the fixed lens camera market, making the P900 a candidate for one of the best ultra zoom cameras. 

And there’s no hiding this feature because it makes the Coolpix P900 a camera that’s larger than even some of the best DSLR cameras on the market. This model weighs almost 2 pounds and measures about 5x5x5 inches with the zoom lens retracted. When the optical zoom is fully extended, the camera measures about 8.5 inches in depth.

So if you need a huge zoom lens, Nikon definitely delivers with the P900. But as with many ultra zoom cameras, sometimes that huge zoom lens can be a detriment. You may have a tough time holding the Coolpix P900 steady when the zoom lens is extended, just because the camera is so heavy and awkward to hand hold with the large zoom lens.

And Nikon only gave this model a 1/2.3-inch image sensor and 16 megapixels of resolution, which will limit your ability to create photos that will result in large and sharp prints. Still, versus other large zoom cameras, the Nikon P900 is a decent performer.

Then there’s the $500-plus price point for the P900. You might be able to find an entry-level DSLR or mirrorless ILC at that price, which will result in far greater image quality. So only those who are sure they need the 83X optical zoom lens will be able to justify the high price tag for this model.

Specifications

  • Resolution: 16.0 megapixels
  • Optical zoom: 83X (24-2000mm equivalent)
  • LCD: 3.0-inch, 921,000 pixels (tiltable)
  • Maximum image size: 4608 x 3456 pixels
  • Battery: Rechargeable Li-Ion
  • Dimensions: 5.5 x 4.1 x 5.5 inches
  • Weight: 1 pound, 15.8 ounces (with battery and memory card)
  • Image sensor: 1/2.3-inch
  • Movie mode: HD 1080p

Pros

  • Huge optical zoom lens at 83X
  • Reasonably good performance speeds even when optical zoom lens is fully extended
  • Offers electronic viewfinder
  • Articulated LCD screen
  • Numerous manual control features

Cons

  • Small image sensor limits image quality results
  • Images aren’t quite as sharp as they should be
  • Maximum ISO is limited to 6400
  • Extremely heavy and large camera
  • Price point is high, approaching that of entry-level mirrorless ILCs

Image Quality

When you think about spending more than $500 for a digital camera, you expect to receive very good image quality. Unfortunately, this is one area where the Nikon P900 lags behind its price point peers, which can include low-end DSLRs. 

The 1/2.3-inch image sensor in the Coolpix P900 is as small in physical size as what you’ll find in a digital camera. Models that cost less than $200 or $150 often have 1/2.3-inch image sensors. Because the physical size of image sensors plays such a key role in determining image quality, having such a small sensor in the P900 makes it tough to justify its high price tag. 

The image quality for the Coolpix P900 might be even worse, other than the fact Nikon gave the camera a very strong optical image stabilization system, which is an extremely important feature to find in an ultra zoom camera. It’s difficult to hand hold a heavy camera steady without a good image stabilization system. Even with such a good IS system, you’ll want to purchase a tripod with this model for best image quality.

Performance

Most ultra zoom cameras operate slower than other types of cameras, especially when the zoom lens is fully extended. You can expect to have problems with shutter lag and shot to shot delays, meaning such cameras don’t have great response times. 

The Nikon Coolpix P900 isn’t a fast performer either, but it does offer faster response times that what you’ll find with most ultra zoom cameras. In fact, the P900 has very little shutter lag when the zoom lens is not extended, which is impressive for this type of fixed lens camera.

Start-up is very fast with this model too, as you should be able to record your first photo a little more than 1 second after pressing the power button. And you can move through the entire 83X zoom range of this camera in about 3.5 seconds, which is an impressive level of speed for the zoom motor.

Battery performance is good with the P900, offering 300 to 400 shots per charge. However, if you choose to use the camera’s built-in GPS or Wi-Fi connectivity, you will receive less battery life.

Design

Nikon gave the P900 quite a few desirable design elements. The inclusion of an electronic viewfinder is great to find in an ultra zoom camera, as it can be easier to hand hold the camera steady when it’s pressed against your face, versus trying to hold it and look at the LCD screen.

If you choose to frame photos using the LCD screen instead of the handy viewfinder, Nikon gave the Coolpix P900 a sharp and bright display screen. And the LCD is articulated, meaning it’s easy to use this model when attached to a tripod by tilting the LCD to match the angle you need. You can even swivel the display screen 180 degrees to allow for selfies.

A mode dial on the top of the camera allows you to work quickly to pick the shooting mode you want. The P900 offers a range of shooting modes, including full manual control, fully automatic, and everything in between. 

There’s a popup flash unit, which is a key design feature for an ultra zoom camera, as it allows the flash unit to gain a good angle to the scene, even when the zoom lens is fully extended. However, Nikon didn’t give the Coolpix P900 a hot shoe to allow for adding an external flash unit.

Must-Have Camcorder Accessories

Must-Have Camcorder Accessories

One from many hobbies that will give you not just satisfaction but also financially that is photography. I know, the cam is not cheap, if you want the best one, but it is worthy.

After dropping a few hundred dollars on a camcorder, you may not be eager to part with any additional cash on accessories. But there are some add-ons that are crucial to protecting and enhancing your camcorder and the videos it’s recording. Here’s a look at some must-have camcorder accessories.

A Case

Courtesy: webimg.secondhandapp.com

A high quality camcorder case is among the most important accessories you can buy for your camcorder. A case will protect your camcorder from the elements and make it easier to carry your camcorder on long journeys. A quality case will have plenty of room for your other extras, such as memory cards, tapes or disks and even personal items such as cell phones, music players and keys.

Extra Memory

Courtesy : keyassets.timeincuk.net

If you own a DVD, Mini DV or Blu-ray disc camcorder, you’ll need to have plenty of extra disks and tapes on hand for storing your recorded videos. Blank DVDs and Mini DV camcorder tape are widely available in a range of retail stores and online. Blank Blu-ray discs are not as widespread, but can be readily found online.

If you use a flash memory camcorder that does not offer internal memory, you’ll need to buy an SD/SDHC card or a Memory Stick Pro Duo card (if you own a Sony camcorder) to store your photo. When shopping for a card, try to buy the highest capacity you can afford. The higher the capacity, the more video it will store.

Tripod

Courtesy : keyassets.timeincuk.net

There’s a reason why professional photographers and videographers use tripods (and single-legged monopods): they’re useful!

Of course, they’re also large and not always convenient to carry around. Still, for certain occassions like long sporting events and recitals, using a tripod can not only make things easier on you arms but also improve the quality of your video.

If you’re filming a game from the top of the bleachers or a concert from the back rows and using your camcorder’s optical zoom lens to get closer to the action, it will be very sensitive to motion. As steady as you think you can hold your camcorder, you can’t hold it steady enough to prevent camera blur (even if you camcorder has optical image stabilization). A tripod will ensure that video is steady.

DVD Burner

Courtesy : http://www.ezpnp.com

No matter what storage format your camcorder uses, burning a DVD of your video is still one the best ways to store it for the longer term. Many camcorder manufacturers sell accessory, standalone DVD burners that connect directly to the camcorder via USB cable or Firewire. A DVD movie of your footage can be burned directly from the camcorder without using a PC.

Many camcorders will feature a dedicated button for burning a DVD when connected to a burner from the same manufacturer. For this reason, it usually makes sense to purchase a burner from the same manufacturer as your camcorder.

Of course, if your computer has a DVD burner built-in, there’s no need to run out and purchase one. So be sure you don’t have an internal DVD burner in your desktop or laptop before buying an external burner.

The best Camera shoulder strap reviewed

The best Camera shoulder strap reviewed

Carry your camera in comfort and style with a camera shoulder strap

Camera shoulder strap reviewed and compared. The camera shoulder strap is by far the best way to carry your digital SLR camera. SLR cameras are big, bulky and heavy and carrying one around all day is going to take its toll. If you want to carry your camera around with you all day, totally pain free the camera shoulder strap is the best option.

There are many different brands and models of camera shoulder strap available, but not all of them are worth buying. There are many cheap camera shoulder straps that are made out of inferior materials. A cheap camera shoulder strap will have no padding hence they are uncomfortable and will cut in to your skin, and will last about five minutes. A digital SLR camera is expensive and scrimping on a cheap camera shoulder strap that could break and let your camera hit the deck at any time, is not worth the risk and could end up costing you a lot of money. It is far better to pay a little more on a good quality camera shoulder strap in the first place.

So, what are the best camera shoulder straps? Carry on reading and you will soon find out since this article reviews and compares the top three camera shoulder straps currently available.

Best camera shoulder strap – Cotton Carrier

Cotton Carrier Vest System For 1 or 2 Cameras

The Cotton Carrier is a chest carrier that goes over your shoulders, but it isn’t a camera shoulder strap per se. Out of all the camera straps I have owned and used, and I have tried many different types, the Cotton Carrier is the best camera strap ever. The Cotton Carrier camera vest allows you to carry your camera safely on your chest, out of harms way, leaving your hands totally free. The Cotton Carrier can securely hold a fully gripped digital slr camera and large telephoto lens, such as my battery gripped 7d and Canon 100 – 400 lens. With the Cotton Carrier I can carry this heavy set up around with me all day, and totally pain free which is brilliant.

Releasing the camera from the Cotton Carrier is quick and easy, and simply involves twisting the camera and pulling upwards. It is possible to get the camera off the vest and up to your eye in a matter of seconds, which means you will never miss a shot.

The Cotton Carrier isn’t cheap, but it is worth each and every cent. Before I bought my Cotton Carrier I did lots of reading and research and was in two minds, partly because of the cost and partly because I couldn’t find many non-professional reviews about the product. However, I finally bit the bullet and purchased one, and I have never looked back. I only wish I bought one sooner, but then hindsight is a wonderful thing isn’t it.

In my opinion, the Cotton Carrier is the best camera holding system currently available and it is well worth buying, especially if you regularly use heavy camera and lens combinations.

Best Camera shoulder strap – Sun Sniper

Sunbounce Sun Sniper Strap Pro, Black

The Sun Sniper is the original camera shoulder strap and, even today, it is one of the most popular amongst all types of photographers, and when you get to see and try the Sun Sniper camera shoulder strap you will soon see why.

The Sun Sniper has a wide strap, which means it doesn’t cut in to your torso. I can confirm the Sun Sniper is exceptionally comfortable to wear and use, even with heavy camera/lens combinations. The strap is made out of good quality materials and is tough and durable, which means it is a camera shoulder strap that is built to last.

The camera is attached to the strap using a small ring that is screwed in to the tripod plate screw of the camera. Once the ring is screwed in to the camera it is totally secure and won’t go anywhere. When using the Sun Sniper you can be sure your camera will remain safely attached to your body at all times. The ring on the strap is a loose fit, which means it easily slides along the strap with little effort. When using the Sun Sniper you can get your camera from your waist to your eye in a matter of seconds, so you will never miss a shot.

Compared to other camera shoulder straps the Sun Sniper is priced at the top end, but it is well worth buying. If you want a camera shoulder strap that will provide years of trouble free service the Sun Sniper is the camera strap for you. It really is an excellent product.

Best camera shoulder strap – Black Rapid RS

Black Rapid RS-7 Camera Strap, black

The Black Rapid is another popular camera shoulder strap amongst photographers. The Black Rapid, just like the Sun Sniper, has a wide strap meaning it won’t cut in to your shoulders, which in turn makes it very comfortable to wear. Even with the heaviest camera/lens combinations, the Black Rapid receives a lot of praise from its users. The Black Rapid is also made from top quality materials, that don’t fray, which means it is going to stand the test of time.

The camera is attached to the Black Rapid via the tripod screw, but unlike the Sun Sniper there is a quick release clip. Some photographers rave about the quick release system, however I am not so sure. I always have my doubts over quick release systems and always think they are going to fail. My camera and lenses are worth a lot of money and I would hate to see them hit the deck and break. As such, I steer clear of quick release systems regardless of how good and secure other users claim they are.

Would I recommend the Black Rapid over the Sun Sniper? Since I ended up buying the Sun Sniper I would have to say no, but I did try the Black Rapid camera shoulder strap. As I previously mentioned, I don’t trust quick release clips. In addition to this, I just found the Sun Sniper camera shoulder strap more comfortable with my set up. That said, there are many people that find the Black Rapid more comfortable than the Sun Sniper.

Other shoulder straps for your digital slr camera

In my opinion the Black Rapid, Sun Sniper and Cotton Carrier are the best camera shoulder straps currently available and having owned and use all three I can guarantee you would be happy with either of them. In order to cover ALL situations I recommend having a Cotton Carrier and the Sun sniper or the Black Rapid.

Travel Tripod Guide | Ultralight Camera Tripods

Travel Tripod Guide | Ultralight Camera Tripods

Better Travel Photo Tip: Get a Small and Lightweight Tripod

Ever wonder why some travel photographers manage to take better travel photos than others? The easy answer is skill, and a lightweight travel tripod. Many experienced photographers would even suggest that a tripod is more important than what camera you have or your level of photographic skill.

Relying on steady hands, built-in stabilization, or cranking up (the grain-producing) iso simply won’t cut it when it comes to for example low light landscape photography. In many situations you want maximum depth of field and if you want the best image quality, you do not want to play with the ISO. The only solution is using a sturdy camera support. .

Until recently though, the problem with tripods was that they were bulky and heavy. Luckily, carbon-fiber and ultralight metals have come down in price and should be within reach of any enthusiast photographer.

of their images. Not being able to maximize depth of field is another big reason. Not taking time to compose and think the image through is another big reason for sloppy tourist snaps. All of these problems are helped by taking a tripod along as you travel.

You don’t have to use a full-size model, any camera support is better than nothing – just make sure that you get something that is built to hold your camera weight in a steady manner.

Tiny supports for compacts and smartphones

Some people think that the smaller the camera the easier it is to keep stable when taking a picture. The fact is that the lighter the camera – the more difficult it is to hold still and shake blur is very common with compacts and smartphones. The simple solution is a small camera tripod or support that fits in your bag – or even pocket!

The Best full Size Carbon Tripod for Travel

I use a Benro Travel Angel, the model that came out before this one and it has seen massive rugged use in the field. It still works like new. The compact Benro shown here is their latest carbon travel tripod which is similar to mine, but also has the feature of being a tripod and a monopod in one. The design is pure genius and you simply detach one of the legs and fasten the ball-head to it. This is also one of the few tripods that become flat when folded down for easier travel packing.

The Benro carbon Travel Flat II Tripod Kit is a extremely compact full-size model and folds down to a mere 16 inches. It takes 17 pound loads, offers almost any angle including ground level, and weighs just 3.4 pounds, which is very low weight for a full sized pro-quality tripod.

Flexible Joby Gorilla Tripods for Different Camera Types

The Gorilla tripods by Joby are extremely popular and the best travel tripod if you look at number of sales. Personally though, I prefer a full-size tripod but that is a matter of taste.

What makes the Gorilla pods so popular are the flexible legs that allow you to wrap around and seek support on almost any surface.

Having owned 2 of these ultra light weight tripods in different sizes, my tip is to not buy too small since the legs do sag a little bit with age. The weight difference is minimal so go for one size bigger than recommended.

See complete line of Joby Gorilla Tripods

Joby has recently also launched a new series of very compact camera micro tripods. Available in three different sizes, the biggest one show here supports cameras up to just under 2 pounds and is perfect for small hybrid superzooms and mirrorless system cameras such as Sony NEX, Olympus PEN and Pansonic G series.

This latest micro tripod from Joby is designed to stay on the camera at all times, when you fold it down it fits under the camera base.
Weighing just 2.3 ounces, this may be the ultimate emergency tripod for all forms of adventure travel where weight and small size is important.

The Mystique of Love – My Photography Class Project

The Mystique of Love – My Photography Class Project

My Experience Doing Outdoor Photoshoot at Night

I joined a photography class for beginner in June 2012 to learn the basic knowledge of this art. At the end of two months course, they gave an assignment to make a photography album consists of at least ten photos. There should be a meaningful story in the album, and the theme of the story is about Indian culture. There is no restriction for the subject of the photos and we should be able to finish this project within one week.

Thus, I decided to do this work, titled “The Mystique of Love”. I worked with two models (actually, they are my friends) to create a story about Indian culture. In this article, I wanted to share some of the photographs for this assignment. I am looking forward to your comments, feedback, and opinions.

The Preparation and Concept

It’s should be about “India”

Creating a photo shoot with a specific theme is not an easy work. You need to allocate a lot of time to do proper research, planning the costumes, locations, and poses. Moreover, I only had one week before the date line of this project. So, I contacted Nooreen and Varsha, two of my friends from Mauritius whom I worked with in a previous photo shoot titled “The Night Song”. I requested their help to participate in this project as models, and luckily both of them had completed their exams, so they could help me.

The story of these photos was created based on a traditional Indian folklore, about a painter who brings her subject to life with a magic power. For this project, I wanted to combine the modern as well as the traditional aspects of Indian culture. Thus, one of the model would wear a modern shirt, symbolizing a modern, liberal woman in the society; and one of the model would wear a traditional “saree”. I also wanted to capture both of the models in a frame, but they should not be aware of other’s existence. There should be no direct contact between the model, just as they live in different dimensions.

The Execution of the Concept

It’s more challenging than my other photo shoots.

To be honest, the pressure to do this work was much higher compared to my other works. It was because a requirement to get at least “B” for this assignment, otherwise I won’t be qualified to get the certificate. I was forced to think some very different concept that I have never done before, and this one should be better than my previous works.

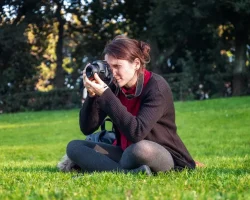
I decided to do something different by doing an outdoor photo shoot at night. We went to Landscape Garden in Osmania University to get the “forest look” for these photos. Unfortunately, we had only less than an hour to complete the work because the garden were closed on 7 PM. I worked in a rush to complete my plan, before moving to another location.

The next location was just outside the garden, near a small tree. I wanted to create some “mythical” and “dream-like” environment without having to work with Adobe Photoshop. So, a tree under the orange bright light of street lamp would be suitable for this concept. Everything seemed well until a group of man who live in that area came and approached me. They watched from faraway, whistled to the models, said something in their local language, and laughed. Thankfully, me and the models did not understand their language, so we could carry on. Nonetheless, it wasn’t the most comfortable condition to work, for both the photographer and the models. Thus, I had to finish the photo shoot as soon as possible to avoid worse situation. Fortunately, we could finish our work in forty five minutes.

I submitted my photos the next morning, and I was very happy to know that they met the requirements of the course. I got a good mark, and happily received my certificate,

Tips to do an outdoor photo shoot at night

If you are a beginner photographer, try to avoid it
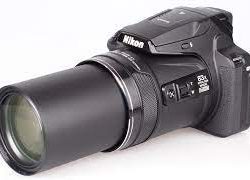
Technically, doing an outdoor photo shoot at night is a very difficult thing, especially for newbie. You will need a very good digital camera that enables you to shoot in high ISO without too much noise in the photo. Sometimes you will also need a very good lighting, as the default camera flash is not good enough for any serious photography work. So, if you can find another theme, just avoid to take photo in this condition.
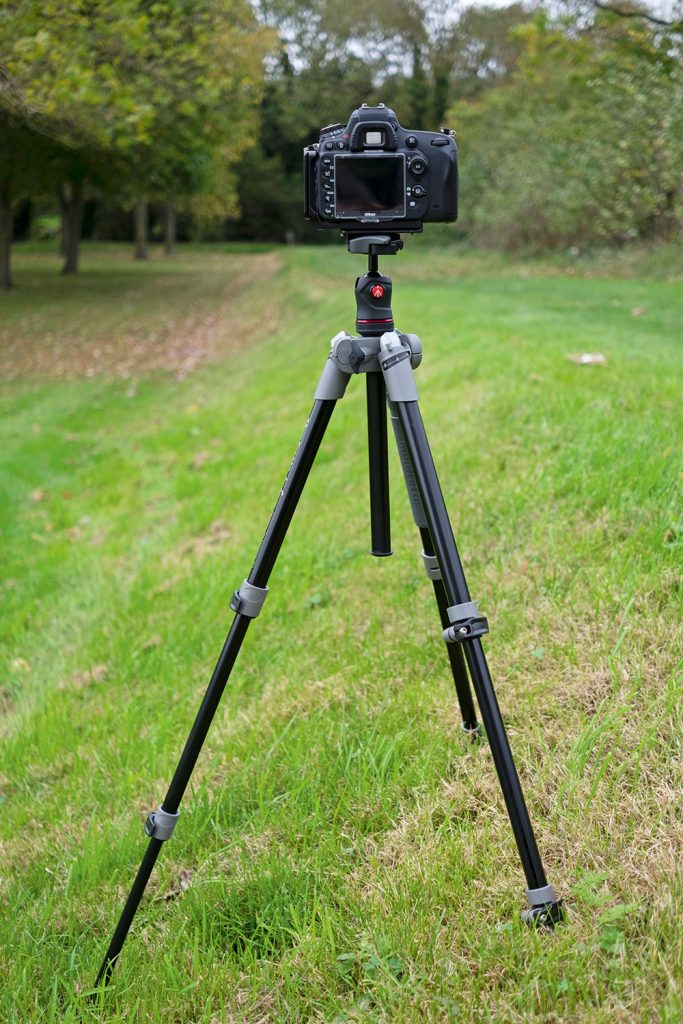
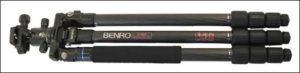
Tripod is a must
You need to make the camera to be stable because small shakes can make your images to be blurry and out of focus. Even with a tripod, this happens a lot. So, tripod is a compulsory thing for any low-light photography.

Think about the environment
Be sure that the place you are going to do the photoshoot is a safe place. Try to do it in a family garden, tourist spot, or university park. Never try to do this kind of work in an unknown place, where you don’t know exactly who is its owner. Always have an assistant, and it would be better if the assistant is the local resident where you do the photo shoot.

Always set your camera to the best image quality
It is recommended taking the pictures in RAW format, so that later you have more freedom to work with the exposure. Post-processing is a vital work whenever you take photos in the dark. You might want to crop, desaturate, or highlight them. Thus, you should always select the highest resolution and highest image detail.

Sweetheart, My Photography About Long Distance Relationship

Sweetheart, My Photography About Long Distance Relationship

My photography project

“Sweetheart” is one of my favorite photography project that I did about a year ago. The concept is simple but the result is very satisfying (at least, for me as the photographer). The process of the photo shoot itself is also very fun. It took about six to seven hours to complete the shoot, but I enjoyed every single second of the work. Not only a set of photos, I managed to create four photos with four different concepts.

In this article, I’d like to show some of my work in a photo set titled “Sweetheart”. This is a set of pictures about a girl who visits her long-distance boyfriend for a short time. I deliberately didn’t put the boyfriend figure in the photo, as I want the viewer to feel that he is the boyfriend. Please let me know your opinion about these pics.

Behind the scenes

Actually, I didn’t plan to create this set of photos. My real intention for this photo shoot is to work on my course assignment, which is about “a girl and an apple” (I also published a lens about it. Feel free to check). At that moment, the model just arrived in the location of the shoot. I tried to established a rapport with her, having small conversation, re-explaining the concept, when suddenly I realized that she wore perfect outfit with the interior in the room. Thus, I decided to take some photos of her when she just arrived at the location. I gave her no instruction, just asked her to continue what she was doing. Surprisingly, the photos turned to be very good.

As I explained in the intro, this set of photo is about a visit from a girlfriend. Thus, I tried to emphasize the romantic feelings by making the color tone to be softer and warmer. I took only about fifteen photos, and surprisingly all of them are very satisfying. From those fifteen, I decided to publish five of them in this Squidoo article.

Let me tell you a brief story about the model. She is one of my old friends in college and we have worked several times for a photoshoot. One day, she called me, asked for my help to do some shoot for her portofolio. Amazing timing. The moment she called me, I was just given an assignment from my course to submit a photo shoot work. Hence, we arranged a place and decided to do one full day work.

The atmosphere of meeting with an old friend and good weather really elevated our mood. We managed to create more than two hundreds photos on that day. I post processed about hundred of them, divided the pictures into four or five categories, and submitted the best for my course exhibition. Although these photos are probably not my best, they are definitely the most satisfying that I have ever created so far.

The photoshoot went very smoothly. I used my favorite Rebel T3i, a tripod, and two different lenses. I also experimented with newly bought lens filter which I used to create the warm, soft color tone. We went straight for three hours work, took an hour lunch break, then continued for the next for hours.

Some tips from me

They might be useful if you want to do a photo shoot

Play music
Good music could help you and the model to be more immersed to the photoshoot. It is also very useful to help you find the mood that you wanted for the photos. It works best, especially for amateur models who don’t know how to pose. Just play the right music, and it will help them a lot in posing in front of the camera.

Take your time
No need to be in a hurry. Make sure that you establish a good rapport with the model before proceeding to the real work. If you can talk to the model and make her to be more comfortable working with you, then it is better. However, if you feel that you are not a good talker, just greet her. You need to interact with her not only during the shoot, but also before it.

Be sure to enjoy your work too. Don’t hesitate to take a break whenever you or the model feel tired. No need to be in a hurry, as I believe that it is better to take ten good photos in a good mood rather than hundreds of photos under extreme pressure.

Take a photo in RAW format
Be sure to set your image quality in your camera in RAW format. It will help you a lot in post-processing stage. I had a very good photo shoot at my early period learning photography, where I was able to take more than fifty great photos. However, I forgot to set my camera in RAW format, which I regret it very much.

So, before starting a photography project, make sure that the image quality in your camera is in RAW. Be sure to bring more than one memory card, as this format will take a lot space in the memory storage.