Tips And Tricks For Using Beverly Hills MD Coupon Codes

Tips And Tricks For Using Beverly Hills MD Coupon Codes

If you’re looking for a deal on Beverly Hills MD products, you’ll want to check out some of the coupon codes that we have here at The Cheat Sheet. Here are a few tips to help you save on your next purchase:

Another great place to look for promo codes is on coupon websites, such as RetailMeNot and Couponvario.com. These websites offer a variety of deals, so be sure to check them out.

Check out our continually updated blog for great deals on Beverly Hills MD products! We post new deals all the time and you’ll never know what you’ll find.

Use our FREE shipping offer to get your purchase delivered to your door fast!

Use our search bar at the top of the page to find the perfect Beverly Hills MD product for you. We have a wide variety of products to choose from, so you’ll be sure to find the perfect deal!

Use our “Coupon Code” feature to get even more Savings. This will allow you to get a discount on your entire purchase, without having to enter any special codes.

Finally, be sure to check out our reviews to see what other Customers have had to say about their Beverly Hills MD experiences. This will help you decide if this is the right product for you!

If you’re looking for some great deals on Beverly Hills MD services, you can use our codes below. We’ve compiled a list of the best Beverly Hills MD coupons so you can get the best deal possible.

First, make sure to check the company’s website for their current promo codes. This will allow you to get a discount on your service.

Next, be sure to read the reviews of the Beverly Hills MD services. Some customers are very happy with their experience and others didn’t find the service very good.

Finally, be sure to compare the prices of the services. Sometimes the Beverly Hills MD coupon codes can get you a discount on the entire service, while other times you might only get a part of the discount.

Finally, be sure to ask the Beverly Hills MD staff about the best way to save money. They may have special deals or discounts that you haven’t found yet.

How To Create A Secret Fairy Garden And Attract Real Fairies This Summer

How To Create A Secret Fairy Garden And Attract Real Fairies This Summer

Fairies Do Exist

I couldn’t believe my eyes. For weeks, At first I thought it was a nest of fire flies. I never knew where they lived and I like taking pictures of bugs so I got out my camera and waited. For what seemed an eternity I hid behind the tree and was as quiet as I could be. Eventually the tree lit up and I snapped a picture quickly.

I nearly fell over when I saw what was on the screen. It was a real life Fairy and she was living in my tree. How lucky could I be.

If You Want To Attract A Secret Fairy You Must Give her A Place To Live – Fairy Cottages

Fairies love a nice place to live and if you want to attract a Fairy to come live in your garden you must provide a safe place to live. They love cute cottages and beautiful flowers. They are very shy so make sure it is in a spot that is quiet and private.

The Fairy Spoke For The First Time

The day after I gave her the blanket I peeked into the hole and she walked right up to the door. She smiled at me and I smiled at her. That’s when she spoke for the first time. She said “Thank you” and backed up into the tree. She didn’t know I had bought her a new house to live in.

I told her to come out and see what else I had for her. She was very shy, but came back to the opening.

I place a very cute cottage by the tree and told her it was for her. She lit up very brightly. She flew down to the house and walked inside. I could tell she was very excited. The next thing I knew she was flying back and forth between the hole in the tree and the new house. She didn’t own very much so it didn’t take long for her to move in. She told me her name was Madeline.

Next I Bought Her Furniture

Madeline loved all the new things I bought for her. She told me that Fairies live all over and she wasn’t the only one. She said that they are very shy and usually live in tree holes. She was the only Fairy she knew that had her own house. The other Fairies were very jealous so I bought a few more houses and hoped to attract more.

Fairy Furniture

Once you buy your Fairy a house you must get her lots of furniture. The cuter the furniture the faster a Fairy will choose your garden to live in

My Indoor Fairy Garden


Fairy Babies Love Driftwood


Fairies love drift wood so it’s no surprise that they would leave their babies sleeping peacefully on top of it or next to it. They love things that sparkle so if you really want to attract Mama Fairies with their little ones then you will love this.

I like to make the drift wood I put in my yard comfortable and keep it from drying out in the sun. I also don’t like bugs eating it so I get new piece I will sand it down, remove much of the loose bark, stain the wood with a soft cloth and some wood stain and then spray seal it. This will keep the wood from absorbing water from rain.

Once I am finished I add a drop of Rub N Buff to bring out the color. I love dark wood with a brass finish as in this photo.

New Cottages

These charming cottages are perfect for indoor or outdoor Fairy gardens. They are realistic and work well with any of the Primrose Fairy figures.

Fairy Number 3, Glenda

A month later Glenda moved in. She grew up with Tina and were friends since they were babies. Of course she had a house right next to Tina. Glenda is very out going. She loves to tease my dog and when he gets barking at her she giggles and throws cheese at him. I think my dog secretly likes the teasing because he gets very excited when he sees her.

Fairies Love To Garden

If you attract Fairies into your yard you can expect it to have a beautiful garden because it what Fairies do best. The love to make the garden grow. With Valentine’s Day on the way why not attract a bunch of Fairies for that someone special in your life.

This Little Fairy Looks Sad

This Fairy Is Only 1 Inch And Has All The Details Of Her Bigger Sisters

Do you believe in Fairies. Are they living in your garden. Let me know what you have done to attract them.

Great Easy Acrylic Painting Projects

Great Easy Acrylic Painting Projects

Find Great Easy Acrylic Painting Projects

Find easy acrylic painting projects. It has great ideas and acrylic painting projects and access to other painting projects too. Discover the joy of painting in acrylic and explore this great medium with these projects.

Finding an Easy Acrylic Painting Project

Finding things to paint can be a trial sometimes. But it need not be. There are things to paint all around. For instance did you know that Vincent van Gogh spent months and months painting nothing but flowers. It doesn’t matter that he used oils it was the dedication to finding a subject no matter how difficult the task.

Often us painters cannot see what to paint, we are too busy looking for that amazing landscape or capturing rare lighting which is all great. But in doing so we miss the little things. We forget that it is the beauty in what we see and paint that makes it amazing.

Below are projects for you to try. Depending on where you are in the world will depend on when and if you have winter, summer or seasons or monsoons. But there is no reason why you cannot adapt each project for your own needs. OK here goes.
Find Great Acrylic Painting Projects on Amazon
Finding great acrylic painting projects is a great idea as it expands your learning and techniques and gives you plenty of ideas. Below are some project ideas for your acrylic painting

Easy Acrylic Painting Project 1

Project 1

For this project we are going back to basics. For those of you who haven’t done any color mixing start here.

Watch this video on basic color mixing as you will need to be able to mix colors for future projects.
Then practice until you can confidently get most of the basic colors.
Orange
Green
Purple etc

Easy Acrylic painting project 2

painting project Two

Van Gogh may not be to everyone’s taste, however his work was based on feeling and color. If you are a beginner without much experience it is important for you to get the feel of the paint, how it works, how quickly it dries and what it looks like. The best way to do this is to play.

To do this project we are stepping into Van Gogh shoes. We are aiming not for an artistically correct piece, but one with color and feeling. Using your new found color mixing skills from project one we are going to create a simple painting.

1. Pick a subject that you love. Make sure it is fairly simple to do. Try to keep it natural. Flowers in a bottle or vase would be great, your favorite part of a garden, a cliff a tree etc. If you think a vase is too much keep it to one flower. Painting outside can be a challenge so only do this if you feel comfortable. Remember this isn’t about making a perfect picture but playing with color. do not paint from a picture or photo from other artists.
2. Gather together all your art colors and canvases and brushes.
3. Spend time looking at your image. Break your image down into both color and light.
4. Just paint the very basic shapes and basic colors. Don’t worry about detail just the overall image.
5. Make sure your colors are over vibrant and your paint thick. Keep your brushes larger to prevent fussiness.

Project 3 – Simple Acrylic Winter Landscape Project Challenge

Project 3

This is a lovely painting to do, it reminds me much of the Bob Ross style which is well known for bringing art to everyone. So challenge yourself to get out those brushes and explore the colors of winter!

Easy Painting Project 4 – A Simple Landscape

Project 4

This is a beautiful little painting to do. Not only is it a project but it also teaches you techniques all done by a 3 hour video tuition after which you should have some useful knowledge to apply to any local landscape painting you might fancy doing.

Project 5 – Fun Cave Horse Painting

This Comes With a Popularity Warning

One of my favorite projects was one I didn’t think I would enjoy but it was really fun. This is the cave horse painting. This is a beginners project however lots of people af all skill levels love to do this one. You recreate the stone walls by building up the paint much as you would for any other painting though it is designed to look really messy! The cave horse is painted much as the cave men would have done and he looks fats and dumpy.

Cave horse and other cave animal pictures are on the open domain if you want to get one.

WARNING: Very Popular. I didn’t think anyone would like a picture of a cave horse, but have found that it is very popular. My sister napped mine when my tiny house got crowded with art. Then my other sister wanted one too and I have to repaint one for me! So be warned you might have to do more than one! It isn’t a problem it is fun to do and can be done quite quickly.

Lots of Painting Projects for the Beginner to Advanced Painter

This is absolutely amazing! I came across this site while searching for inspiration and wow did they give it. This site has to be the best and most comprehensive site for art courses on the net. If you don’t agree and have found another one feel free to pop it on the comments as I am always in search of the best information and ideas out there. But I think this will be very hard to beat!

This is definitely the site by artists for artists of all levels and skills. These guys cover everything from easy acrylic painting projects like the one above right through to the more complicated projects and courses. If in doubt they do a free course and a free magazine just to get you started – these should keep you occupied for a while. However if you want to plunge right in there are some great courses and they start at low prices or you can buy modules.

Me and My Musicals: Maybe I Should Have Taken Those Singing Lessons

Me and My Musicals: Maybe I Should Have Taken Those Singing Lessons

ME AND MY MUSICALS

10. That’s how old I was when I saw my very first live play on stage and perhaps more importantly, my very first ever musical ? Miss Saigon, to be exact. At that age I loved every single second of it from the songs to the dancing to the sheer magnificence of watching those talented people perform in front of you live! But the songs, interspersed with the plot, was my very favorite part of the entire experience. As a Disney movie lover seeing real life people break into song like it was part of everyday was a delicious experience!

So Maybe My Playlist Isn’t Like Yours

But I like it anyway

From Sarah Brightman in the Phantom of the Opera to the award-winning Stephen Sondheim I scour record stores, secondhand video shops for any obscure CD, DVD of anything related to Musicals. At the advent of the internet, online shopping and, dare I say it, Youtube, I’ve had more opportunity to enjoy the wonderful world of musicals.
While my peers in high school and college filled their mp3 players with mainstream and pop songs I flooded mine with an eclectic collection of Sarah Brightman’s maddeningly gorgeous voice, Rodgers and Hammerstein’s catchy tunes, Sondheims masterpieces and everything else in between. You should have seen the looks I got on the tram when I would accidentally sing a part out loud – didn’t happen too often but I didn’t really care overmuch.

Those Singing Lessons

Maybe I really should have taken them after all
The Gloried Microphone by Tom8115 @flickr When my mother went to New York about 2 years back I was still in college so she made the painful decision of not bringing me along. When, in tears, I asked her why she hadn’t brought me along she answered simply that I would sing at her to death until we went to Broadway. She was probably right. But it still hurt.

I am one of those shower divas, meaning I can only sing in the shower and never anywhere else. When I was a child and one of my brothers had given me the ‘Cats’ soundtrack on cassette tape I was too in love with it to be embarrassed about singing in front of other people. When my mother suggested that I get a singing lesson I was too embarrassed to have some ‘expert’ tell me how to sing it. Again, she was probably right. Who knows, maybe I could have been in my own musical. (Or not.)

It’s All Heart

And a great deal of dancing
My limited exposure to musicals means that I don’t know much about it. Even with the internet I can’t see anything live although I try to get as much shows as I can locally. I never profess to be an expert, in fact I’m probably the exact opposite to that. But, for me, musicals whether I watch them or just listen to them, are an integral to me as a person. When I want to cry or when I simply feel lazy a simple listening or watching session is enough to energize my life. And, in the end, that’s the most important thing.

A band being Blue Man Group for Halloween

A band being Blue Man Group for Halloween

How we turned a band into Blue Man Group for Halloween

This page shows how one of my bands went dressed as Blue Man Group for Halloween. It starts with the background, tells some of the issues we ran into, tells how we did the makeup, and more! This is a reprint off my website www.susanszoocrew.com

The beginning.

We were scheduled to play at a big Halloween party and were told we *had* to play in costume. Only makes sense to play in costume at a Halloween party, right? We wanted to do something where all three of us were the same theme but couldn’t decide. It had to be something we could relatively comfortably play/sing in, that wouldn’t get all over our instruments, and that didn’t require a huge outlay of time since we had to set up equipment and all. This is a little harder than it may seem to come up with! At our last practice before the gig I was showing a video of Blue Man Group doing part of one of the songs we were covering. My guitar player looked at it and say, Hey, that’s it! Let’s go as the Blue Man Group! Considering that two of us are women, and all three of us play guitar, it was a bit of a stretch! Blue Men with figures and no PVC tubes? Well, we all have a good sense of humor so that sounded like fun! In the days before the gig it rained…and rained..all around town outdoor gigs were being cancelled or shortened. So I didn’t have high hopes for staying dry at the party even though we were on a covered porch. As it turns out, the porch faced west and the rain would come from the east so even in the rain we would be dry. Wet costumes and equipment would not have been fun! To our collective delight, the rain held off for the rest of the night and we stayed nice and dry.

We had decided that setting up equipment is hard enough working without trying to keep makeup on, so we headed out and set up the equipment first. This ended up being a really good idea, allowing us to just come in and start playing. We did discover one bad feature about a house that was between the river and the ocean: bugs. Not just bugs, but biting bugs. I’ve lived in Florida almost my whole life and have never been eaten alive by no-see-ums so fast! They were even eating through bug spray! After being nibbled on for a while, we were finally all set up.

Makeup!

For the rest of this story, Keith = guitar player and Evelien= the singer. 🙂

Then it was back to the house to put on the makeup. Keith had ordered liquid latex from an online supplier, with the idea that it would be flexible and we could paint our faces and the bald caps with it at all once. We all changed into our outfits (black long sleeved turtlenecks and black pants) and got ready to put on the makeup. When Evelien and I opened the jar, we were wondering what the layer was on top%u2026 then we realized that it was dried latex. Hoping that what was underneath was useable, we pushed aside the top layer. What was underneath was chunky and definetly not liquid, more of a cream-not good. We tried using it anyway, even tried diluting some of it with water-no go. The brand new, freshly ordered paint was no good! Here it is, almost time to leave, and no latex and no blue men/women.

Luckily, since none of us knew how the liquid latex would stay on while singing, we had a backup plan. I had bought two cakes of blue greasepaint and brought with me a can of blue spray paint that matched the greasepaint. Keith and Evelien picked up some hair dye spray in case that worked better. I had some experience with grease paint from watching clowns do their makeup and participating in talent contests, so I knew a few methods of working with it and knew we’d be able to play and sing in it.

We decided to put on the baldcaps first, which took a bit of doing. Cutting out the ear holes was a bit of an adventure in trying not to give unexpected haircuts to each other! We decided to do Evelien’s costume first, so with a few dabs of spirit gum and judicious tucking in of hair, Evelien had her bald cap on. Keith went off to figure out which paint would work best, figuring we’d spray the other two caps before putting them on. Meanwhile, I painted Evelien a nice shade of blue%u2026 ears and all! The hardest part is getting the paintee to relax while fingers are smearing makeup around near their eyes.

Working with greasepaint isn’t bad, you just have to watch how much you put on. The fun part was setting the makeup..you use baby powder and pat it all over the greasepaint. Evelien wasn’t quite sure how baby powder was supposed to work and seemed a bit reluctant at having it put on. As we were running out of time, there wasn’t much room for discussion. So, I got to poof Evelien’s face with baby powder%u2026%u2026.judiciously! It was a bit tricky keeping it off the black turtlenecks, even with a towel, but it brushes off pretty well. Just make sure that the person brushing off the baby powder isn’t the same person applying the blue greasepaint or you’ll have black and blue clothing (oops). Also make sure the powderee doesn’t breathe in while being powdered, powder between breaths.

Keith came back with the paint results during the powdering process-we’d have to paint the caps after they were on or the paint would flake off. Keith asked why Evelien was blue and white- I explained that the powder sets the top layer of makeup but not the bottom so it stays flexible and doesn’t crack; although we might have to repowder as we sweat because it will get shiny. I showed Evelien how to flick off the extra powder and pretty soon she was all blue with no white. Powder discussion over, it was time for painting Evelien’s baldcap… soon to be another lesson in trusting the people doing your makeup.

We quickly found out four hands are better than two, one person holds a sheet over the parts you don’t want to paint while the other carefully but quickly sprays the baldcap%u2026 and the paintee holds their breath so they don’t breathe fumes. We ended up using hands to covers ears but a bit of blue spray paint on our fingers just added to the costumes. We managed to keep most of the spray paint off Evelien’s skin. Once Evelien was done, we surveyed the results%u2026%u2026.not bad! Then it was mine and Keith’s turn. We had a bit trickier of a time with putting on the bald caps due to having long hair. We ended up not gluing the backs down and just ran our ponytail/braid down the backs of the turtlenecks. Long hair makes the spraypainting harder too, the flap of cap down the back has to be sprayed away from the hair. Somehow my cap was a different construction than theirs and had a lot less side flap-this worked out fine because I needed to wear my glasses and the extra material would’ve made this tricky. We quickly got our makeup on and powdered each other up. I did learn it’s easier to powder someone who is sitting down than someone who is standing up when they are taller than you!

By now it was time to go, so we grabbed the spirit gum in case anyone came loose and everyone piled into the truck.

The gig!

We quickly got to the party, and since it was time to play walked straight on stage and grabbed our instruments. Our percussionist was a friend named Andy who had come in a giant bunny costume. So we had three blue men/women and a bunny! Bunny didn’t last too long because Andy couldn’t see to play, so we used the dolly and set it up next to the bass amp. We did find one awesome side effect of our costumes-since there wasn’t much skin exposed the bugs pretty much left us alone, attacking only bare parts of the feet.

The show itself went off well and everyone had a great time. It was funny to see how many people mixed up Evelien and I in the blue faces when talking on breaks%u2026..considering that I wear glasses and she doesn’t you wouldn’t think it was possible! The makeup ended up working out well, the caps stayed on and only needed minor touchups at the end of the night behind the ears mostly. By the end of the night some of the blue makeup had worked its way onto the turtle necks, but not as much as I had thought we would have had. It was rather amusing watching grownups dancing around in costumes%u2026..watching men dressed as fairies sing along %u2026.. people trying to drink / eat through masks%u2026

After the show we packed up the equipment and headed out to a local place (Jetty Lounge) to join the rest of the crowd. Once we were through there (the full moon brings out some interesting people%u2026) we headed back to the house to remove the makeup. It had been a while since I had to take the makeup off, but I knew I’d always used baby wipes, baby oil, and baby shampoo-I just couldn’t remember which order. Evelien was first, and the baby shampoo didn’t do much. Then I remembered the right way, and we finished getting the makeup off. You take a baby wipe, dump a little oil on it, and smear it on the makeup. Pass number two wipes off the makeup and you repeat until wipe is full of color. Grab another one and keep going! The hardest part is getting it out of your ears%u2026..I think we all had some left over the next day.

All in all we had a great time, learned a few lessons along the way (always have a backup plan!) and got to play some awesome music for appreciative people and friends. What more could a band ask for? Except fewer bugs that is ….. 🙂

The Story of Dragon and Angel – My Photographs of Two Contrasting Beauties

The Story of Dragon and Angel – My Photographs of Two Contrasting Beauties

The Story of a Dragon Princess and an Angel

In this article, I would like to tell a story of my third photo shoot project in India titled “The Story of Dragon and Angel”. I did this work just a month after I published my photography work titled “The Dragon Princess”. This is a sequel of my previous work, and my main idea was to expose two different types of beauties those are contrasting each other.

Compared to the previous photo shoot, I felt that the photos I created are more satisfying. I tried different techniques that I’ve never tried before and went a little bit more extreme in post-processing the images. Besides the photographs, I also want to talk about my concepts and preparation of this photo shoot. I am looking forward for your feedback and comments, as always.

The concept

A little story behind the photo shoot
The Story of Dragon and Angel After publishing my first photography work titled “The Dragon Princess”, I felt that I wanted to create something more impressive. Thus, I came with the concept of juxtaposing two different kinds of beauty; the traditional and the modern style. However, I still wanted this work to have relation with my previous work because I felt there was something “unfinished” from the story of The Dragon Princess.

Thus, I contacted Pema, my classmate from Bhutan who is also the model of the previous photo shoot. I explained about her concept, and asked her whether she has a friend who is suitable with my concept. Then she introduced me to her friend, Disket, Disket is a lovely young lady from Ladakh, a region in the northern part of India. At that time she was still studying in of one of the most famous law schools in Hyderabad.

I talked to Disket about my plan. At that time, three of us were in the middle of our final year examinations, each of us planned to leave Hyderabad right after finishing our exam. Tbus, finding the date for the photo shoot was a little bit difficult as we have very limited time. After long discussion and considering various options, we decided to do the photo shoot in between our exams.

Technically, I didn’t do much preparation for this photo shoot. I just made sure that the battery was fully charged, and focused more on finding good references for an outdoor photo shoot with two models. Besides my favorite Canon EOS 550D, I also brought the Sony NEX-3 as I wanted to compare the image quality of those camera.

The Photo Shoot

It was an extremely hot day
The Story of Dragon and Angel

I arrived at the location of the photo shoot on 3.30 PM after a long drive from my place. It was a very hot day, approximately around 36 degree Celsius, not the best weather for an outdoor photo shoot. It was difficult to us to perform at our best due to the hot weather, especially Pema because she had to wore very thick Kira (a set of Bhutanese traditional dress).

I started by taking photos of each of the model individually in various poses. As I did two previous photo shoots with Pema, it wasn’t so difficult for us to work together. Surprisingly, I didn’t have any problem working with Disket at all, as she looked very photogenic and comfortable in front of the camera. After finishing with the individual photos, I moved to the next stage : posing the models together. I found that it was very difficult for an amateur like me to be able to create a good composition with two main subjects on the screen, and the most difficult thing was to determine the good focus point.

As I explained before, I wanted to juxtapose two completely different styles of beauties. So, I projected Pema with her traditional green-colored Kira to be the one that looks tougher and more dominant, beautiful but and has special power, just as the most oriental princesses in the TV dramas. On the other hand, Disket with her white dress should be more feminine and angelic; just as the characteristics of the most Western princesses in a story.

We tried different poses of the model, with flowers, apples, knife, and blue colored liquid in a glass. I tried to create various metaphors with those properties, and compile a story from those photos. We finished taking all of the pictures in three hours, and it took about three days for me to do the post processing of the image before publishing them online.

Tips for doing an outdoor photo shoot on a hot day

Here are some things that I learned as an amateur from doing a photo shoot on a very hot day. Hopefully they are useful for you.

1. If you are not working with professional models, make sure they know each other well
I was lucky because Pema and Disket are good friends, thus they could be more relaxed during the photo shoot. Because they were good friend, the pressures due to the various uncomfortable cirumstances (including the hot weather) became less because they can freely laugh and express their opinion to each other.

2. Bring your portable devices filled with references photos in case you ran out of idea in the middle of the photo shoot
Especially if you are working alone and doesn’t have style director or assistant during the photo shoot. Try to save all of the references photos that you find online a day before the photo shoot in a device that can be easily carried and viewed. For me, I stored those photos in my iPad. Whenever I feel I run out of idea, I just take my iPad out and refer to the images. Note down also various poses that you want to take.

3. Watch the ISO level
In a bright, sunny day, be sure to set the ISO level as low as possible to reduce the image noise. Always set your ISO manually, and I believe you don’t need to go higher than 200 in a hot day. Also try to use light meter to determine the best level of exposure in your camera.

4. Don’t forget to carry a towel and a bottle of water, for you and the model
You will be surprised to know that you require a lot of energy to take photos. You need to move a lot, and this make you would sweat a lot. A towel and a bottle of water could keep you away from dehidration so you would able to work at your best performance.

5. Take rests
No need to be hurry. If the weather is extremely hot, take 10 minutes a break every half an hour or so, to keep you and your model away from exhaustion. Use the resting period to look for the references, review your photos, and talk to the models to make them feel more comfortable working with you.

The Queen of Fire – My Autumn Photo Shoot Project

The Queen of Fire – My Autumn Photo Shoot Project

A Story About the Worshipper of Fire

I did this photo shoot at the same time I worked on my Halloween photography project, at the same location, with the same model. The only difference is the theme of the photo shoot. In this project, I wanted to create a story of a woman who gains her strength from fire to perform various magic and ritual. I also used some properties such as a dagger and candle to enhance the mysterious atmosphere.

This project was created for my photography class assignment. It was a monthly individual project and has to be submitted to get the certificate. As I had only four days before the date line of submission, the preparation of this photo shoot was very rushed. Fortunately, I managed to get some good pictures.

I wanted to share some of my work in this article, and I am waiting for your comments and critiques about them. Hopefully you like the pics.

The Concept and Preparation

The Lady in Red
I was inspired by Melisandre, the “Red Woman” from Game of Thrones TV series. I am a big fan of this program, and Melisandre is one of my favorite characters. Beautiful, mysterious, hot, wicky, and ambitious; those are the characteristic of the “Red Woman” that I wanted to show in this project.

In order to achieve the scary, mystical, and horror atmosphere; I arranged every elements of the photos in very contrasting composition. The bright, flaming red dress of the model successfully formed a beautiful harmony with the dark lighting, low exposure that can be found in the most of the background of the photos. To enhance the grim, funerel, and horror atmosphere I added some particular properties in the photos such as candle light, knife, and witty mysterious looking doll. This effect is later strengthened by applying blood on the face of the models. The story within the photos can be freely interpreted by the viewers. It can be a story of blood lusting woman, about a girl who performs dark sacrament and turn herself into undead, or maybe a story of ancient ritualof particular clan.

The final result of the combination between the horror, the fashion, and the model is indeed surprising. The photos show a figure of scary, mysterious woman. The models radiate strong horror atmosphere, brings out the feeling of fear to the viewers, reflects her lust for blood; but at the same time she looks very beautiful, attractive, and implies the luxurious gratification of sensuous desires.

Behind the Scene

The process I did for this project

The first time I did for this project was rewatching all the episodes of Game of Thrones where Melisandre strongly influence the plot. I wanted to capture her mysterious beauty and her loyalty to worship the fire. Then I contacted my friend, Dechen, a Bhutanese girl which I found suitable for this role. As I told you that we have very limited amount of preparation, I planned everything almost on the spot.

The location of the photo shoot is only a small room, as I don’t need too spectacular background. I wanted to focus more on the model so I didn’t want the background to distract the viewer’s attention from her. I used two type of lenses for this work, the standard kit lens, and a fixed lens. The whole photoshoot took about three hours, including the make-up and properties preparation. The most interesting thing was an encounter with an old uncle who worked as a professional photographer for National Geographic. He told me that he used to take a lot of photos with his Leica camera, and he gave me a lot of advice about this art.

The post-processing stage was only about an hour. I used Adobe Lightroom, which is very handy for this kind of work. I create an editing template, save it as a preset, then applied to all photos. The next step is just working on the small detail on each photos, which took only about half an hour. In conclusion, I am very satisfied with this project.

My personal photography tips

Some tips to make you enjoy this art more and take better photographs

Be creative
It sounds easy, but kind of hard to do. Being creative is not only about creating something new. It is also about changing the perspective of a people toward something. In terms of photography, creativity connects with innovation. You need to see your subject from different perspective, frame them into an unexpected composition, and attempt to surprise people who view your photos.

Be passionate
Passion is very important in any kind of arts. In photography, you need to have passion if you want to succeed. Try to enjoy every moment of practice and every moment of learning. Think that every time you press your shutter camera button, you are a step closer toward your dream. The more images you click, the happier you are. Thus, if you have passion, it’s only a matter of time to be successful.

It’s not about the camera, but the person behind it
Don’t ever think not to take picture because you don’t have a good camera. Indeed, good camera is important to help you take good pictures, however it is not a compulsory thing. An okay (or even poor) camera can take a lot of beautiful pictures if it is used by a good photographer. In the contrary, a good camera would never create even a single beautiful photo if the person behind it has no passion, knowledge, and creativity.

Always try to have fun in photography
Be happy whenever you take photos, and those photos would make you happy. As simple as that. Have fun, then you could create amazing photography works within no time.

The Night Song – My Tips for Doing Budget Photo Shoot

The Night Song – My Tips for Doing Budget Photo Shoot

The Night Song

Have you ever wanted to create good, artistic photos but you only have limited amount of money? In this article, I would like to share my experience of doing a photo shoot with two models with very limited budget, in a very normal location with lighting from house lamps, and taken with cheapest entry level DSLR. This photo shoot was also my first experience working with models and DSLR camera. Could you imagine how limited was my knowledge about photography during this photo shoot?

I would like to emphasize that the most important thing in photography is not your gears. It’s your passion and creativity, and those two are the best weapon to create great photos. I am also looking forward to your comments and feedback so I could improve my works in the future.

The Concept

The story behind the scene
The Night Song

I bought my first DSLR camera in January 2012. My initial purpose for buying that kind of sophisticated camera was to make documentary of my final Bachelor of Arts research. Just a week after getting my DSLR, I accidentally found a very interesting video about photography on Youtube, from DigitalRevTV. The man in the video seems enjoying himself very much, taking photos of beautiful model with very cheap camera. Suddenly I felt that I wanted to create some photography works too.

The first thing came to my mind was about finding the models. As I was an amateur and didn’t have enough experience of handling DSLR camera, I decided to ask for help from my friends to be the model for my photography project. So, I contacted Nooreen and Varsha, two of my beautiful friends from Mauritius and offered this opportunity. Luckily, they agreed.

I wanted to talk a little bit about the model. Nooreen and Varsha are two students from Mauritius, a very beautiful small island in southern part of Africa. Mauritius used to be a colony of British and France. When the British ruled India, they sent some local Indian workers to work in Mauritius. At that time, there was no people on this island. Only jungles and animals. So, those Indian workers were the first colony in Mauritius, and they live, create a family, and until now inhibit this beautiful island.

After some years, British Empire decided to give Mauritius to France. Thus, under France regime, those Mauritian workers have to speak in France. The habit of speaking France has become a culture, even after their independence. Today, France is the national language of Mauritius.

I find that Mauritian people such as Nooreen and Varsha are the luckiest people in the world. They have beautiful, exotic face from their Indian ancestors. They speak Franch, the most beautiful, sexiest language in the world. They inherited the education and political system from British Empire, which is very systematic. Plus, they live in a small island with very beautiful nature; beaches, mountains, and jungle. What a very fortunate nation!

Back to the story of the model. Nooreen and Varsha are very good friends. They live together, study in the same college, and they understand each other very well. I wanted to use these facts to help a strong, artistic, and memorable photos. Thus, I decided to create a theme about intimate relationship between two women.

The Photo Shoot

The execution of the concept

As I told you before, I didn’t have any experience for doing photo shoot with any DSLR camera at that time. Thus, I wanted to focus more on the concept and messages of the photos rather than the technical aspects. I wanted to work as comfortable as possible, so I decided to do the photo shoot in Nooreen and Varsha’s house, in their small living room. I didn’t want to do it outside, because I thought that it was my first experience, and I didn’t want to embarass myself and the model.

The photo shoot took about three hours and it would be faster if I had more practical knowledge about DSLR camera. I spent a lot of unecessary times to adjust the ISO, control the focus, and set the exposure. I did all in manual mode, as I didn’t aware that the Aperture Priority mode would work more efficient. One of my most stupid mistake in this photo shoot was the fact that I forgot to turn on the Image Stabilizer, and at that time I didn’t even have a tripod. Luckily, I was able to take some good shots, and it took me about three hours to select, edit, and publish the photos.

Black Kimono for B&W Photoshoot

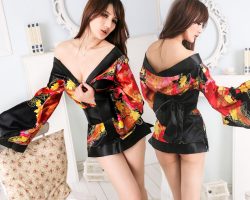
Here are some great kimono, a traditional Japanese dress for black and white photography. The wardrobe of the model is very important, especially if you later want to convert the images into monochrome. I strongly suggest that you find some dress with interesting pattern, especially for a photo shoot with plain background. Be sure to find a dress that looks cute and elegant.

Tips to do budget photo shoot

1. Find a strong, solid concept that can be executed in an empty room
Instead of focusing on the properties of the photo shoot, you should focus more on the model. Exploit your creativity and push it to its limit so that you can create good photos by only framing the model and a plain background. For this concept, you will need model who has strong, memorable expression. If the model also have beautiful and exotic face, it would be very helpful as well.

2. Try to find good references
Watch videos, read books, or go to photo exhibition. Read also about various article and tutorial about creating beautiful photos with cheap camera and limited budget. I strongly recommend that you watch “Pro Photographer Cheap Camera Series” from DigitalRevTV channel on Youtube.

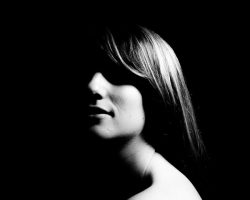
3. Make it black and white
Black and white photos always appear to be more artistic, and by desaturating the color you can focus more on the subject. Simple photos with an empty background also look better in black and white rather than in color. For a better result, you can play with the contrast, brightness, exposure, and clarity of the photos during the post-processing.

4. Remember, your passion and creativity are more important than the physical aspects of the photos
It is you who can make the photos look great. Not the camera, not the place of the photo shoot, and not the dress worn by the models. Of course they will help you create something better and more beautiful, but remember that your passion and creativity are your main weapon.
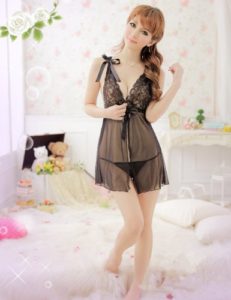
The Black Dresses

Here are some alternative dresses that would be suitable for your model if you are planning to do a simple photo shoot with plain background. My advice: don’t choose a type of dress that has too much distracting patterns. Try to stick with a type of dress that look simple, elegant, and slightly hot.

Sweetheart, My Photography About Long Distance Relationship

Sweetheart, My Photography About Long Distance Relationship

My photography project

“Sweetheart” is one of my favorite photography project that I did about a year ago. The concept is simple but the result is very satisfying (at least, for me as the photographer). The process of the photo shoot itself is also very fun. It took about six to seven hours to complete the shoot, but I enjoyed every single second of the work. Not only a set of photos, I managed to create four photos with four different concepts.

In this article, I’d like to show some of my work in a photo set titled “Sweetheart”. This is a set of pictures about a girl who visits her long-distance boyfriend for a short time. I deliberately didn’t put the boyfriend figure in the photo, as I want the viewer to feel that he is the boyfriend. Please let me know your opinion about these pics.

Behind the scenes

Actually, I didn’t plan to create this set of photos. My real intention for this photo shoot is to work on my course assignment, which is about “a girl and an apple” (I also published a lens about it. Feel free to check). At that moment, the model just arrived in the location of the shoot. I tried to established a rapport with her, having small conversation, re-explaining the concept, when suddenly I realized that she wore perfect outfit with the interior in the room. Thus, I decided to take some photos of her when she just arrived at the location. I gave her no instruction, just asked her to continue what she was doing. Surprisingly, the photos turned to be very good.

As I explained in the intro, this set of photo is about a visit from a girlfriend. Thus, I tried to emphasize the romantic feelings by making the color tone to be softer and warmer. I took only about fifteen photos, and surprisingly all of them are very satisfying. From those fifteen, I decided to publish five of them in this Squidoo article.

Let me tell you a brief story about the model. She is one of my old friends in college and we have worked several times for a photoshoot. One day, she called me, asked for my help to do some shoot for her portofolio. Amazing timing. The moment she called me, I was just given an assignment from my course to submit a photo shoot work. Hence, we arranged a place and decided to do one full day work.

The atmosphere of meeting with an old friend and good weather really elevated our mood. We managed to create more than two hundreds photos on that day. I post processed about hundred of them, divided the pictures into four or five categories, and submitted the best for my course exhibition. Although these photos are probably not my best, they are definitely the most satisfying that I have ever created so far.

The photoshoot went very smoothly. I used my favorite Rebel T3i, a tripod, and two different lenses. I also experimented with newly bought lens filter which I used to create the warm, soft color tone. We went straight for three hours work, took an hour lunch break, then continued for the next for hours.

Some tips from me

They might be useful if you want to do a photo shoot

Play music
Good music could help you and the model to be more immersed to the photoshoot. It is also very useful to help you find the mood that you wanted for the photos. It works best, especially for amateur models who don’t know how to pose. Just play the right music, and it will help them a lot in posing in front of the camera.

Take your time
No need to be in a hurry. Make sure that you establish a good rapport with the model before proceeding to the real work. If you can talk to the model and make her to be more comfortable working with you, then it is better. However, if you feel that you are not a good talker, just greet her. You need to interact with her not only during the shoot, but also before it.

Be sure to enjoy your work too. Don’t hesitate to take a break whenever you or the model feel tired. No need to be in a hurry, as I believe that it is better to take ten good photos in a good mood rather than hundreds of photos under extreme pressure.

Take a photo in RAW format
Be sure to set your image quality in your camera in RAW format. It will help you a lot in post-processing stage. I had a very good photo shoot at my early period learning photography, where I was able to take more than fifty great photos. However, I forgot to set my camera in RAW format, which I regret it very much.

So, before starting a photography project, make sure that the image quality in your camera is in RAW. Be sure to bring more than one memory card, as this format will take a lot space in the memory storage.

Persian Band Concert

Persian Band Concert

My experience taking photographs in a live concert

Taking photograph of a live concert is not an easy work. You need good camera, good lenses, and good position near the stage to be able to take the best pictures. One of the assignment in my photography course was to take good photos of live music concert. Considering the fact that I didn’t have those great equipments, I decided to come to a music concert that was held in a small auditorium. Thus, the distance between me, the stage, and the musician won’t be too large, and I could take decent photos with my fifty millimetres lenses.

The concert was held in one of the university in Hyderabad. The performers named”Persian Band”, a group consists of Iranian and Indian musicians. In this article, I would like to share some of the best photos that I successfully took during the concert. Please kindly give me your feedback and comments.

About the concert of Persian Band

It was a small, but very memorable concert
The concert of Persian Band was held in April 2012, just a week before the deadline of my concert photography assignment for my diploma course. I found the concert as a perfect opportunity for a beginner photographer like me to sharpen my skill. It was impossible for me to take a photos of a band who performs in big venue, as I didn’t have appropriate zoom lens to take a good close-up photos. Thus, this concert was my only hope to complete my assignment.

Luckily, the organizer gave me a journalist seat, a place near the stage which allows me to take good photographs. They even said that I could approach the stage if I need better angles. As the size of the stage was not very large (approximately only ten by twenty meters), it wasn’t a big problem for me to take the photos of the concert.

The Persian band consists of three members: two female vocalists, three guitarists, a bassist, and a drummer. Three of the members are from Iran, and the rests of them are from India. The concert lasted about one and half hour, and during that much period I focused on taking close-up pictures of each band member. I wanted to take some photos from different angles and want to make the viewers of my photo feel the music within the photos. The images that I took should look dynamic and dramatic

Taking the photographs

It is not as easy as it seems
Believe me, taking photos of a musician performing on stage is not as easy as taking photos of a model. You need to always put your eyes on the viewfinder and be ready to click the shutter button on the right moment. When you miss the best moment, it is gone forever. I almost couldn’t enjoy their performance because I was too busy with my camera, struggled to capture the most memorable moments from the concert. However, judging from the audience’s big applause, I thought the band performed very well.

I also had to move a lot, from one side to another. Sometimes, I missed a good moment because I was on the move and was not ready to click my camera. Sometimes when I got the perfect angle and moment, I missed the focus point so the image was very blurry. Indeed, it takes a lot of hard work and efforts to be able to take good photographs of a live concert.

Fortunately, I managed to take around twenty good photos. I submitted those images as my assignment in my photography course. Some of them (which I couldn’t publish on this lens due to copyright issues) were selected to be featured in a local magazine and exhibited at a university exhibition. Based on my experience, I strongly suggest all beginner photographers who read this lens to go to a small concert and try to take as many good photos of the performers as possible. It is a very challenging task, but when you successfully accomplished the task, your skill and confidence as a photographer would significantly increase.