Improve your action images with the best camera for sports photography
The best camera for sports photography will improve your sports and action images no end. If you are looking for the best camera for sports photography you have come to the right place since this article focuses solely on the best camera for sports photography as well as all the lenses and accessories you are going to need to capture those awesome sports and action photos.
Sports is an excellent subject to photograph but due to the speed and fast nature of sports capturing those stunning images can be a real challenge. If you want to increase your hit rate and the number of “keepers” you need the best camera for sports photography. This is obvious, but what is the best camera for sports photography? Carry on reading, and you will find out.
So, if you are looking to improve your sports photography and need a new camera make sure you read this article before parting with your hard earned cash.
When choosing the best camera for sports photography there are a couple of key things you need to consider.
Sports and action photography is fast and quick moving. In order to increase the number of usable images, i.e. your hit rate, you need a camera with a high burst rate. The more photographs you can take in quick succession the higher the chance of getting the shot.
Full frame digital cameras with a high burst rate are very expensive and can cost several thousand dollars. Many people simply don’t have this amount of money to spend on the best camera for sports photography, or can’t justify spending this amount of money on a digital camera. Fortunately, there are some very good crop sensor digital slr cameras with burst rates that offer great image quality and are far more affordable. If you want the best value for money, and want to get the most bang for your buck these crop sensor cameras are the ones to buy.
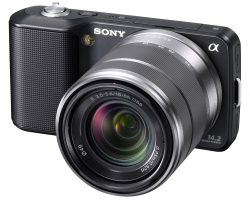
If you want a camera specifically for sports and action photography a digital slr camera is the only digital camera you should consider, so don’t even bother investigating point and shoot cameras or micro four thirds and mirrorless cameras.
All the major camera manufacturers sell at least one digital SLR camera that is ideal for sports and action photography, so there is something for everyone. For the best sports photography cameras take a look at the products below:
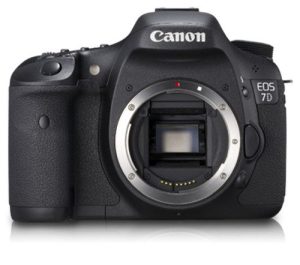
In my opinion the Canon 7d is the best camera for sports photography for the masses. The Canon 7d is tough, durable and, what I consider bulletproof. The magnesium body and seals ensure it is dustproof, waterproof and shockproof, which makes it ideal out in the field
The Canon eos 7d
The Canon 7d has an impressive 18MP sensor that allows you to capture high levels of detail and images that can be blown up real big. This makes it possible to crop and enlarge every photo taken, which is ideal for subjects that you consider “too small” in the frame because they were just a bit too far away for the focal length of lens used to take the photograph.
The Canon 7d has an impressive 8fps burst rate that allows you to fire off loads of shots all in one go, so you will never miss the action again. Just remember you are going to need to have plenty of spare and make sure you have some backup batteries.
The Canon 7d is affordable and the best camera for sports photography for budding sports photographers on a budget. The Canon 7d is an awesome camera and I highly recommend it, and it is for the reasons above I consider it the best camera for sports photography.
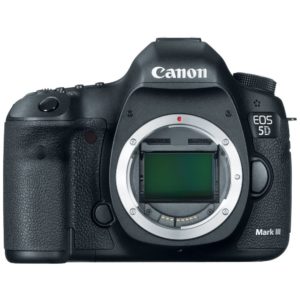
Best camera for sports photography – Canon 1DX
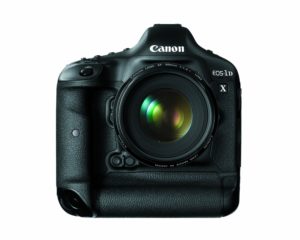
Best camera for sports photography – Canon 1DX
The Canon eos 1DX is the flag ship of the Canon dslr range and when you look at the specifications of the 1DX it is easy to see why, I mean 18MP full frame sensor, dual-digic 5 processors for a staggering 12fps burst rate, tough magnesium alloy body and an ISO range of 100 – 51,200 (which is expendable to 204,800) is jst some of the features.
Whilst I don’t own a Canon eos 1DX I have been fortunate to use one and I can say it is an awesome camera. The 1DX is bullet proof, the burst rate is something else (although it does eat memory cards), and the images it produces are exceptional, but would I pay the $6,000 + asking price?
If I were a professional photographer and could make a living out of sports photography I would, but as I am not there is no way I could justify the cost. Buying the 1DX is one thing but then there are the lenses to go with it. The 1DX doesn’t have a crop factor so if you need a lens over 400mm you are going to have to buy a lens extender (which is not ideal for sports photography because it leads to a loss of light and hence slower shutter speeds) or spend a few thousand bucks on a long reach lens, such as the EF500mm.
The Canon 1DX is a camera for professional photographers or enthusiasts with exceptionally deep pockets. A cheaper alternative, and one that is best suited to enthusiasts.
Nikon D7000
A popular camera for sports photography
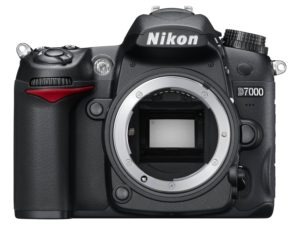
Best camera for sports photography – Nikon D7000
The Nikon D7000 is a popular camera with sports photographers and it is easy to see why. The first thing you will notice about the Nikon D7000 is the build quality, which is superb. This is a tough and durable camera that is built to last, which is a good job given sports photographers spend a lot of time out in the field.
With a 16.2MP sensor the Nikon D700 is a powerful camera that is capable of capturing some stunning sports images that will impress family and friends. Sports photography requires a lot of cropping and with this impressive sensor it is possible to get 100% crops and still get excellent image quality.
The 39 point auto focus points helps to ensure the Nikon D700 finds the target, locks on and stays locked on and it does this very well. The Nikon D700 has a fast Expeed 2 processor which is essential for sports photography. This sensor allows for 6fps, so you can fire off a lot of images in quick succession, which is vital to ensure you don’t miss the shot.
One of the best things about the Nikon D700 is the twin SD card slots, which means you don’t have to faff around swapping over memory cards and can continue to capture the action as it unfolds instead.
Overall the Nikon D700 is an excellent camera and therefore has to be included as a best camera for sports photography.
Top Sports lenses for your digital slr camera
Capturing awesome sports and action photographs requires more than the best camera for sports photography. Oh yes, if you want to capture the best sports photographs possible you also need the right lens.
When capturing sports photographs you are likely to be quite far away from the action, therefore a long reach telephoto lens is needed. If you want to “freeze” the action and still get sharp shots you also need a fast lens, which allows you to keep the shutter speeds up.
There are plenty of great sports photography lenses available for all brands and models of digital slr camera. It doesn’t matter whether you shoot a Canon, Nikon, Pentax, Sony or Olympus, there is the perfect sports lens for your particular digital slr camera.
For some of the best sports and action photography lenses currently available check out the lenses below:
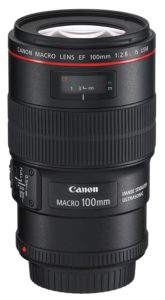
Best Canon lens for sports photography – Canon 100mm – 400mm L IS USM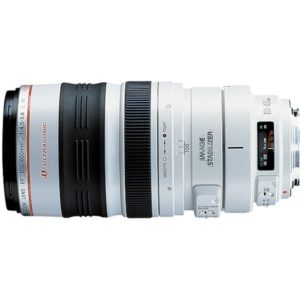
Canon 100mm – 400mm L IS USM Lens
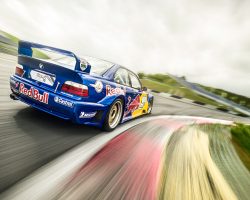
My most used lens for motorsports photography is the Canon 100mm – 400mm f4.5 – 5.6L IS USM lens, which is awesome. This lens is tough, durable and built to last. This lens is also fully sealed, which means it is weatherproof making it excellent for out in the field. This lens isn’t particularly fast but then given the affordable price tag this is to be expected. Besides, the image stabilization technology is awesome and helps to ensure tack sharp shots each and every time.
One of the best things about the Canon 100mm – 400mm is the push/pull zoom which makes it super quick and easy to change between focal lengths. With this lens it is possible to zoom right in close and personal or pull back to capture more of the background.
The image quality of this lens is simply superb and it is possible to capture some awesome images. If you want the best sports photography lens to go with your Canon digital slr camera the Canon 100mm – 400mm f4.5 – 5.6L IS USM lens is the lens to buy.
Top rated Nikon sports lenses
If you shoot a Nikon digital slr camera there are a few long reach zoom lenses available to buy, although the best (and most popular) are detailed below.
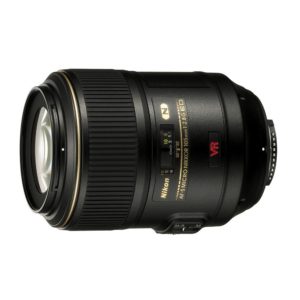
nikon 70 – 200 2.8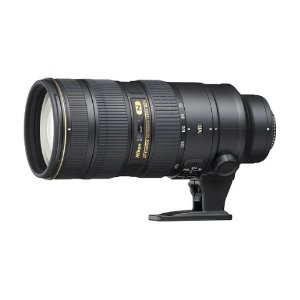
nikon 80 – 400nikon 
nikon 300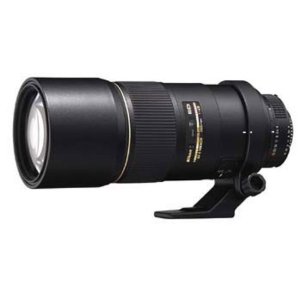
Top rated Sigma sports lenses
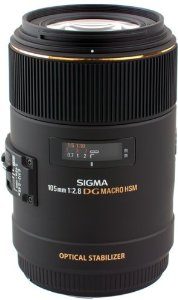
Canon and Nikon branded tele lenses are expensive however there is a cheaper alternative, which is a Sigma lens. Sigma lenses are tough, durable, well made and the image quality is very good. Sigma produces lenses that will fit both Canon and Nikon digital slr cameras, so it really doesn’t matter what you shoot.
For the best Sigma sports and action photography lenses check out the products below, all of which are worth looking in to if you want to buy a Sigma sports photography lens.
Sigma 70 – 200Sigma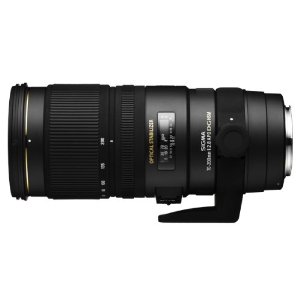
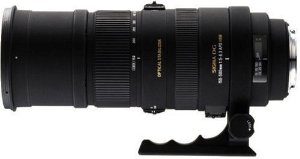
Sigma 150 – 500 Sigma
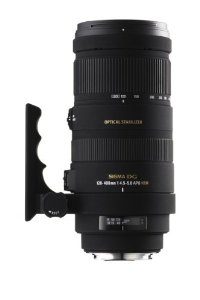
Sigma 120 – 400Sigma
An essential bit of kit of sports photography
The Monopod
Sports photography with big zoom lenses requires some support, otherwise you are going to experience camera shake and get some blurry photos. There’s no doubt about it, a tripod is the best type of camera/lens support you can buy however a tripod is not ideal for sports photography. Focusing on a moving object using a tripod is nigh on impossible, besides most sports venues prohibit the use of tripods.
The best camera/lens support for sports photography is the monopod, which is an upright pole that screws in to the bottom of the camera or the lens ring. The foot of the pole is place on the ground, hence providing a support for big and heavy lenses. The monopod is small (when collapsed), light and easily transportable, which makes is a doddle to carry around all day long. The monopod is a simple but very effective product that doesn’t cost much but will improve your sports photography photos no end.
Compared to other types of photography monopods aren’t expensive however it does pay to get the best one you can afford. Cheap monopods are heavy but made out of inferior materials that tend to flex and bend once loaded up with a heavy camera/lens combo. The best monopods are made out of carbon fibre and these are both lightweight, but most importantly strong.
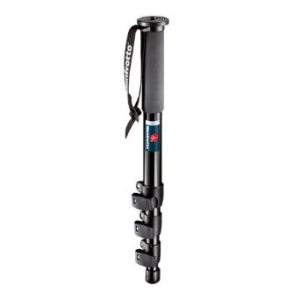
Manfrotto are well known for making top quality tripods and their range of monopods is equally as good and the 680B is one of Manfrotto’s top rated monopods. This monopod is very strong and can easily support the heaviest of camera/lens combinations. I always use a fully gripped 7d combined with a 500mm prime (a seriously heavy set up) and the 680B can easily cope with this and never bends or flexes.
The weak part of all monopods is the joints, however this is not the case with the 680B . The joints on this monopod are second to none. The isn’t the cheapest monopod but it is worth every cent.


 are one of the most popular types of cameras on the market. They are loved by professional photographers and serious amateurs for their image quality,…)
. When TVs converted to high definition, it wasn’t long before high definition…)