Tips For Furnishing And Decorating Your Art Studio Apartment

Tips For Furnishing And Decorating Your Art Studio Apartment

Your art studio apartment is your creative haven. It’s a place where you can let your imagination run wild and create something beautiful. But, if your studio is feeling a little cold and uninviting, it can be tough to get inspired.

If you’re an artist, chances are you’re also on a tight budget. But that doesn’t mean your art studio apartment has to look like a college dorm room. With a little creativity and some thrifty shopping, you can turn your studio into a stylish and functional space that reflects your personality and creativity.

Tips for furnishing and decorating art studio

Here are some tips for furnishing and decorating your art studio apartment on a budget:

Get creative with your furniture

Just because you’re on a budget doesn’t mean you have to settle for boring, mass-produced furniture. Get creative with your furniture choices and look for pieces that double as both art and functional items. For example, a vintage dresser can be used as a buffet table for hosting parties, or an old door can be repurposed into a unique coffee table.

Shop at thrift stores and flea markets

If you’re looking for unique, one-of-a-kind pieces, thrift stores and flea markets are great places to find them. You can often find furniture and home decor items for a fraction of the cost of what you would pay at a traditional store.

DIY it

If you’re handy, why not DIY some of your own furniture and decor? There are plenty of easy and inexpensive DIY projects that even the most novice do-it-yourselfer can handle. Check out Pinterest or your favorite DIY blog for some inspiration.

Get creative with your wall decor

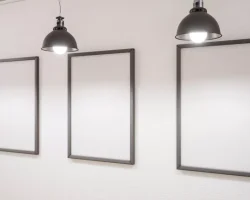
Your walls are a blank canvas for you to get creative with. Hang up some of your own artwork, or frame interesting found objects like old maps or antique postcards.

Use lighting to your advantage

Proper lighting can make a big difference in the feel of a room. If your studio doesn’t have a lot of natural light, make sure to invest in some good quality artificial lighting. String lights are a cheap and easy way to add some ambiance to your space.

How to make your art studio apartment cozy and inviting

Here are a few simple tips to make your art studio apartment feel cozy and inviting:

Bring in some plants

Adding some greenery to your studio will not only make it feel more inviting, but it will also help purify the air. Choose plants that are easy to care for, so you can focus on your art, not on your plants.

Add some cozy blankets and pillows

Making your studio cozy doesn’t have to be expensive. Simply adding a few blankets and pillows can make a big difference. Choose cozy fabrics in colors that complement your artwork and make you feel happy.

light some candles

Candles add both warmth and ambiance to any space. Choose candles with scents that make you feel relaxed and inspired, like lavender or citrus.

Play some relaxing music

Having some soft, relaxing music playing in the background can help you get into a creative mindset. Make a playlist of your favorite calm songs to help you focus on your art.

Hang some artwork

Of course, no art studio is complete without some artwork on the walls. Choose pieces that inspire you and make you feel happy. Seeing your own artwork on the walls will also help you feel proud of your accomplishments.

With a little creativity and some thrifty shopping, you can turn your art studio apartment into a stylish and functional space that reflects your personality and creativity.

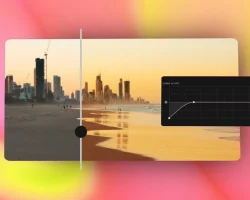
How To Use Teal And Orange Lut For Video Editing

How To Use Teal And Orange Lut For Video Editing

If you’re looking for a versatile and stylish addition to your video editing toolkit, look no further than teal and orange lut. These two colors are perfect for adding a pop of color to any footage, and they can also be used to create a sleek and professional look. Here’s how to use teal and orange lut for video editing:

Start by adding some basic video editing tools to your toolkit. Once you’ve got everything you need, use the video editor’s tools to add basic luts to your footage. For instance, you can use the video editor’s crop tool to resize and adjust the footage, or the video editor’s focus tool to make the video look brighter or darker.

Next, use the lut creator to create custom luts. This tool allows you to create custom luts that are specific to your footage. For example, you can create a lut that alters the color temperature of the footage, or a lut that adjusts the amount of light that’s being used in the clip.

Next, use the lut editor to create and manage your luts. This tool allows you to create and edit luts, as well as manage and export your video footage. To create a new lut, simply click on the “New Lut” icon and enter the information you need.

Finally, use the video editor’s exporting tools to create and export your video luts. To export your footage to a video file, first select the “Export” tab and select the “LUTs” option. Then, enter the information you need for your luts. For example, you can choose a filename, or you can choose to save the footage in a format that can be played on a variety of devices.

Are you looking for a way to add a pop of color to your videos? Well, look no further than teal and orange lut for video editing! These colors are perfect for adding a bit of excitement and life to your videos, and they can be used in a variety of ways to create stunning results.

If you’re looking to add a pop of color to your videos without spending a fortune, teal and orange lut are a great option. They can be used in a variety of ways to create stunning results, and they’re relatively affordable too. So, if you’re looking for a way to add a pop of color to your videos, look no further than teal and orange lut!

When it comes to editing video, there are two main colors you can use: teal and orange. both colors can be very versatile in terms of how they can be used to add interest and brightness to a video. Here are a few tips on how to use both colors toedit your videos:

Use teal to add a Space Invaders-inspired feel to your videos. Use a light blue or green color to help contrast against the orange of the video.

Use orange to add a warm and inviting feel. Use a light yellow, green, or blue color to help contrast against the teal of the video.

Both colors can be used for different purposes, so experiment and see what works best for you. By using both colors in your videos, you can add a lot of personality and interactivity to your videos that you may not have been able to achieve with just one color.

When you want to add a bit of color to your video editing workflow, there are a few things you can do. One option is to use teal and orange lut to add a pop of brightness and color. However, there are a few things to keep in mind when using this type of lut.

When using teal and orange lut, you want to create a clean and crisp image. This is because the colors will be used in a specific order and will be blended together. You should also be aware that the colors will be dominant and will be used more in the center of the image than on the sides.

When using teal and orange lut, it is important to make sure that the colors are used in a way that is consistent with the rest of your video editing workflow. For example, if you are working on a video that is centered around a bright light, then you should use a more orange color to help balance the image.

When using teal and orange lut, it is also important to use a careful technique when editing. For example, if you want to make a video that is theatrically stylish, then you should not use teal and orange lut. Instead, you should use a more subdued color to help make the video look more professional.

How To Download The Best Frequency Separation Actions For Streaming Media

How To Download The Best Frequency Separation Actions For Streaming Media

Do you want to be able to stream media at any time without having to worry about buffering? If so, you need to use frequency separation actions to make sure that your video is played at the correct speed. This will help to avoid buffering and help to keep your media consumption down.

There are a few different frequency separation actions that you can use to achieve this. One is to use a progressive scan action. This will ensure that all the video is played at once, even if it takes a while. Another is to use a fast forward or reverse action. This will help to keep the media moving quickly and avoiding any buffering.

There are a lot of different settings that you can use to get the best results. Experiment and find what works best for you. You may be surprised at how effective frequency separation actions can be for streaming media.

If you’re someone who loves to stay in touch with loved ones, then you need to set up a frequency separation plan! Frequency separation is a key way to keep communication open and avoid conflict. By setting a schedule for communication, you can minimize the amount of time you spend on each call. Here are a few tips on how to set up a frequency separation plan:

Decide the type of communication you want to avoid.

Communication that is urgent or emotional should be avoided at all costs. For example, if you want to avoid phone calls during family time, then set a schedule for communication where you call each other once a day at a specific time.

Decide the time of day you want to call each other.

If you want to call your loved ones at different times of the day, then you’ll need to set a schedule for communication. For example, if you want to call your loved ones at night, then you’ll need to set a schedule for communication where you call each other once a night.

Set a time limit for each call.

If you want to avoid talking for hours on end, then you’ll need to set a time limit for each call. For example, if you want to avoid talking for hours on end, then you’ll set a time limit for each call of no more than 30 minutes.

Make sure you have a frequency separation plan in place.

If you don’t have a frequency separation plan in place, then you’ll need to make sure you have regular communication with your loved ones. For example, if you’ve been married for 10 years, then you should make sure you keep in touch with your wife every month.

One effective way to improve frequency separation is to use a frequency separation action. This is a step-by-step guide that will help you select the best frequency separation action for your specific situation.

There are many different types of frequency separation actions, but some of the most popular are:

Grouping: grouping the frequencies together will help to create a clear separation of channels. This can be done by using a frequency band, or by using a specific frequency range.

Fading: fading frequencies will help to create a sense of space between the channels. This can be done by using different frequencies, or by using a specific time period.

Filtering: filtering frequencies will help to add or subtract frequencies from the incoming signal. This can be done to create a specific sound or frequency range.

Amplification: Amplification will help to add more power to the incoming signal. This can be done to create a stronger signal, or to improve the sound quality.

Phase: phase can be used to create a specific sound or frequency range. This can be done by using a specific phase angle, or by adding or subtracting phases.

EQ: EQ can be used to change the sound of the incoming signal. This can be done to create a more balanced signal, or to improve the sound quality.

Mute: mute the channels will help to reduce the noise on the channels. This can be done by using a mute button, or by using a different frequency range.

Rejection: rejection will help to reduce the amount of noise on the channels. This can be done by using a rejection filter, or by using a different rejection angle.

EQ: EQ can be used to change the sound of the incoming signal. This can be done to create a more balanced signal, or to improve the sound quality.

Mute: mute the channels will help to reduce the noise on the channels. This can be done by using a mute button, or by using a different frequency range.

There are many different ways to use frequency separation actions, and it is important to find the right one for your specific situation. By following the steps in this guide, you can create a frequency separation action that will help to improve the quality of your signal.

If you want to improve your frequency separation actions, then you will need some knowledge and some tools. There are a few different ways to go about learning how to do frequency separation actions, but one of the most common is to buy a simple frequency separation tool like a VHF or UHF spectrum analyzer.

One of the most important things to remember when using a frequency separation tool is to keep it clean. This means not using any sharp edges or points on the tool, and always using a gentle, even pressure on the antenna.

When using a frequency separation tool, it is also important to make sure that the antenna is properly aligned. This means verifying that the antenna is pointed in the right direction and that the waveforms are consistent.

Finally, be sure to keep a lookout for interfering signals. This means checking the frequency, amplitude, and waveform of any interfering signals. If you notice any unusual behavior, then you can try adjusting the antenna or the tool.

How To Use A 3D Pen To Create Amazing Art

How To Use A 3D Pen To Create Amazing Art

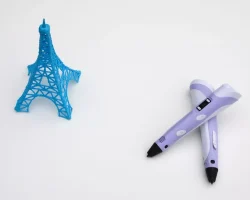
3D printing technology has come a long way in recent years, and 3D pens are now available to anyone who wants to create 3D art. 3D pens are easy to use and allow you to create any shape or design you can imagine. In this article, we will show you how to use a 3D pen to create amazing art.

First, you will need to choose the right 3D pen for you. There are many different 3D pens on the market, so it is important to do your research and find the pen that is right for you. Once you have chosen your pen, you will need to choose the right filament. Filament is the material that is used to create the 3D art. There are many different types of filament, so you will need to experiment to find the type that works best for you.

Once you have your pen and filament, you are ready to start creating. 3D pens work by melting the filament and then extruding it through the tip of the pen. You can use the pen to draw any shape or design you can imagine. To create a 3D effect, you will need to build up layers of filament. Start by drawing a simple shape or design, and then build up the layers until you have the desired effect.

3D pens are a great way to create unique and amazing art. With a little practice, you will be able to create any design you can imagine.

3D pens are becoming increasingly popular among artists and crafters, and it’s easy to see why. These versatile tools allow you to create three-dimensional art and objects with ease. In this guide, we’ll show you how to use a 3D pen to create amazing art.

1. Choose your material.

3D pens can be used with a variety of materials, but the most popular choice is plastic filament. Filament comes in a variety of colors, so you can choose the perfect shade for your project.

2. Preheat the pen.

Most 3D pens require you to preheat the tip before use. This helps the filament flow smoothly and prevents clogs.

3. Load the filament.

Once the pen is preheated, it’s time to load the filament. Most pens have a lever or button that you can use to feed the filament into the pen.

4. Start drawing.

Now you’re ready to start drawing! Use the tip of the pen to draw your design on a flat surface. As you draw, the plastic filament will be extruded from the pen.

5. Add details.

Once you’ve created the basic shape of your design, you can start adding details. Use the pen to add texture, color, or anything else you can think of.

6. Let it cool.

Once you’re happy with your design, let it cool completely. This will help the plastic harden and prevent your design from warping.

And that’s all there is to it! With a little practice, you’ll be creating amazing 3D art in no time.

How To Create 3D Pen Art

How To Create 3D Pen Art

3D pen art is a type of art that is created using a 3D pen. These pens are special pens that allow you to draw in three dimensions. This type of art is becoming increasingly popular, as it allows you to create unique and intricate designs.

If you’re interested in creating 3D pen art, then you’ll need to purchase a 3D pen. These pens are available from a variety of different retailers. Once you have your pen, you’ll need to choose a design to create.

There are a few things to keep in mind when choosing a design for your 3D pen art. First, you’ll need to make sure that the design is not too complex. If the design is too complex, it will be difficult to recreate with a 3D pen.

Second, you’ll need to make sure that the design is something that you’re passionate about. This will help to ensure that you’re motivated to create the best possible art.

Third, you’ll need to make sure that the design is something that you have the time to create. Creating 3D pen art can be time consuming, so you’ll need to make sure that you have the time to dedicate to the project.

Once you’ve chosen a design, you’ll need to gather the supplies that you’ll need to create your art. This includes the 3D pen, as well as the filament that you’ll use to create your art. The filament is the plastic that is used to create the 3D designs.

You can purchase filament from a variety of different retailers. Once you have your filament, you’ll need to load it into your 3D pen.

To load the filament into your 3D pen, you’ll need to follow the instructions that came with your pen. Once the filament is loaded, you’ll need to choose a color.

You can use any color of filament that you’d like. Once you’ve chosen a color, you’ll need to turn on your 3D pen.

To turn on your 3D pen, you’ll need to press the power button. Once the pen is turned on, you’ll need to press the button that controls the flow of filament.

This button is typically located on the side of the pen. Once you’ve pressed the button, the filament will start to flow from the pen.

You’ll need to hold the pen vertically while the filament flows. Once the filament has stopped flowing, you can start to create your art.

To create your art, you’ll need to start by drawing a line. Once you’ve drawn a line, you can start to build up the line by adding additional layers.

You can add as many layers as you’d like. Once you’ve created your art, you can allow it to cool.

Once the art has cooled, you can remove it from the 3D pen. You can then display your art or give it as a gift.

3D Wall Art: The Perfect Way To Personalize Your Space

3D Wall Art: The Perfect Way To Personalize Your Space

3D wall art is the perfect way to add a personal touch to your home or office. Whether you’re looking for something unique to hang above your fireplace or want to create a statement piece in your living room, 3D wall art is a great way to achieve this.

There are a variety of 3D wall art pieces available on the market, from abstract sculptures to realistic images. No matter what your style or budget, you’re sure to find something to suit your taste.

3D wall art is a great way to add interest to a plain wall. It can also be used to create a focal point in a room. Whether you hang it above your bed or in your living room, it’s sure to be a conversation starter.

If you’re looking for a way to make a big impact in a small space, 3D wall art is the perfect solution. It’s also a great way to add a personal touch to your office or workspace.

Whether you’re an art lover or simply looking for a unique way to personalize your space, 3D wall art is a great option. With so many pieces to choose from, you’re sure to find something that fits your style and budget.

3D wall art is the perfect way to personalize your space. You can find 3D wall art in a variety of styles and colors to match your home’s décor. 3D wall art is also a great way to add a personal touch to your office or workspace.

3D wall art is made from a variety of materials, including metal, glass, wood, and even paper. You can find 3D wall art in a variety of shapes and sizes. You can also find 3D wall art that is illuminated, which is perfect for adding a dramatic touch to your space.

3D wall art is relatively easy to install, and you can find a variety of 3D wall art kits online or at your local home improvement store. You can also find a variety of 3D wall art templates online that you can print out and use to create your own 3D wall art.

If you are looking for a unique way to personalize your space, 3D wall art is the perfect solution. You can find a variety of 3D wall art online or at your local home improvement store.

Real Food Fast: Creamy Pumpkin Mac & Cheese

https://youtube.com/watch?v=WDtLQWCC4-s

In the season of turkey and pie, try adding this savory and delectable pumpkin Mac & Cheese to your plate. It’s traditional turned easy gourmet. Your cute little taste buds are begging!

Find more HisXHers on our Babble Video Channel.

Get more HisXHers! Come kick it in our crib. It’s all blinged out for you, baby. More tricks, tips, and behind the scenes peeks at Eldon and Brooke’s latest adventures.

Three Fresh Ideas for Holiday Decorating

Three Fresh Ideas for Holiday Decorating

Decorations really set the mood for the holiday season. As soon as trees start popping up in store display windows and every house on the block begins donning multicolored lights, you can feel the spirit of the season in the air.

While every family has their own special traditions, token decorations, and collection of ornaments, there’s nothing wrong with adding some new decorations to your assortment and extending the decorations to every room in the house. Try these tips for decorating this holiday season!

In the living room

If you’re bored by the same ol’ tree and ceramic Santa that you put up every year, try sprucing up your living room with a themed tree. All the rage this season, themed trees are cute and easy to assemble. Some of the most popular themed trees are the “Grinch” tree, modeled after the classic holiday movie, and the snowman tree, complete with snowman head, bulb buttons and boots. Both trees are a great option for spicing up your holiday decor, and everyone (especially the kids!) will love them.

In the kitchen

Decorations don’t have to stop with the living room—embrace the holiday season by adding a touch of Christmas to every room. Hang a string of classic white lights above your kitchen cabinets for a romantic feel, or purchase festive red and green dish towels, wash cloths or oven mitts. Add the aroma of chocolate cookies baking in preparation for Santa, and the kitchen might become your favorite room in the house!

In the bedroom

Who says you can’t have a tree in your bedroom? Add a smaller tree in your bedroom (and the kids’ rooms, too!) so you can stay in the holiday spirit even after hours. If space is limited, purchase a pencil tree or a tabletop tree. If you’re really committed to the holiday spirit, having a separate set of bedding that is just for the holidays is a great way to decorate your sleeping quarters. Red sheets, green pillow shams and a decorative comforter will keep you warm and merry all night long.

My favorite paint brushes that can be purchased online

My favorite paint brushes that can be purchased online

Find Artist Brushes and Why I Like Them.

I had joined the Rocket Moms group on Squidoo, and our second weekly assignment was to write about a prized possession. We were to take a walk around the house and determine what was really valuable to us.

I’m glad I took that walk. My first thought of what I thought would be my most prized possession, while still sitting in front of the computer, was different than what I actually picked.

So walking around the house, I opened up to what it could possibly be.

I browsed upstairs. There was the piano which I very occasionally play. No, that wasn’t singing to me. Could it be the great knives on the dining room table that I purchased as part of a new selling program I was going to do? No, that wasn’t cutting it. So I took a trip downstairs to the basement. Ah, I saw it! My art studio. That’s where I get creative; other than when I’m making lenses on Squidoo. What is it that I would take with me. My artist brushesartist brushes. I have a bunch, and I have favorites, ones that are my first choices to use. Yes, I would pick my artist brushes. They are one of my favorite tools of creativity.

The Rounded Art Brush

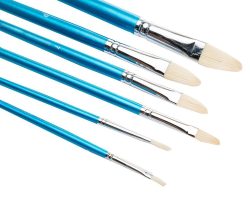
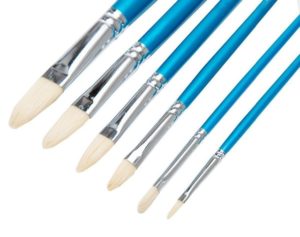
My first favorite is a flat filbert brush. It is a flat brush with a rounded edge. It comes in great for laying down backgrounds, and blending colors while having a more rounded touch to the background. They’re great for creating clouds.

I also use it for filling in and adding successive layers. I really like that rounded touch.
I have this brush in at least four sizes, that I can think of right now.

Filbert Paint Artist Brush

The Liner Brush

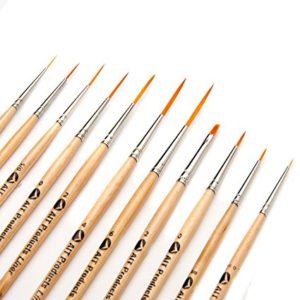
My next favorite brush is the liner brush. I use it a lot for adding details and fine lines, Teeth just wouldn’t be the same without a liner brush! Huh, you’d have to take that smile to the dentist! Yes, I do like the liner brush. Oh, I probably have a good six or so liner brushes. Lines do come in various sizes, you know.

Liner Paint Brush

Paint Brush Cleaning Tips

Use cool to cold water for cleaning paint brushes.
Finish with a bit of soap to press on the end to help maintain the shape of the brush.

The Painting Knife
My next favorite isn’t a brush at all, it’s my painting knife. Sad to say, I haven’t used it much for painting at all, at least not up to this point. I use my painting knife quite a bit for mixing the paint.

I used to use a brush, but then I had to rinse the brush, and watch wasted paint get diluted in the water. Heaven forbid! I wanted my paint to last longer than that! Then I started using my knife for mixing. This one with the rounded part of the handle works great. I’ve also used painting knives that were flat, handle and all, and the handle laid too close to the mixing surface. The rounded stem of the handle keeps my fingers up off the painting, mixing surface, and the narrow tip allows me to grab just the right amount of paint color that I want to mix into the other.

So two thumbs up for the painting knife being a mixing knife! I can also dab paint right off the knife with my brush. Aaah, I get to use my extra paint up. Now, that’s a sweet song in my heart.

This is the whole kit and kaboodle!

Except for the one’s I’ve recently used. I lay them out flat to dry before adding them back into the mix. I keep them sorted, all the rounded brushes together, all the liner brushes together, all the straight edge brushes together, etc.

I have my painting knives in the smaller container. I received that little flower container as a pencil holder when I was a clerical person. I think it’s much happier now holding my artist painting supplies. : )

Magic the Gathering Altered Art Cards

Magic the Gathering Altered Art Cards

An Introduction to Altered MTG Cards

What are altered art cards for Magic The Gathering, & where do they come from?? First let me say these should never be counterfeits! They are legitimate copies, simply painted over to change the picture. Many are changed to extend the artwork, removing those boring black or white borders. Others can end up very different from original image. Artists have added things like flames, cartoon characters peeking out from the corners, or other wacky additions.

Add Flare to Your Deck!

altered-mtg-cards-demon-vampire-art A well made acrylic painted card is a mini work of art! Nobody will have the same one painted the same way. Maybe you’re looking to spice up your deck with something different and original. Or perhaps you want to impress your gaming friends. Then you may consider adding a few alters to your deck. They can also make a neat gift idea for that special magic geek in your life!

What Shops Carry Altered Cards?

Look online for the best prices and availabiliy
altered-MTG-shop You probably won’t see these pieces for sale at your local hobby shop. If you want to buy one you’ll most likely need to turn to
the internet. You can find them easily on eBay, but sites like Etsy also have custom MTG sellers. Some sellers have even created small businesses by painting and selling their creations for profit, as well as taking commissions for collectors with special requests. It’s also becoming more common to see people painting away at the large MTG tournaments and comic conventions, where you may be able to find someone selling their wares to the hungry competitive players.

(Altered “duel lands” (c) Marta Molina)

Cheapest Custom MTG Work Online

FAQ: Are Painted Cards Against Copyright Law?

altered art mtg angel card These cards are perfectly legal to create and own!

Painted Magic cards are 100% legal to create, own or play with as long as they are actually painted on top of the original copies. As you may have already seen examples of, some people get very creative, adding a lot to the original work. The paint changes the look and feel, which in copyright terms is considered a “derivative work” meaning it becomes a new copyright work owned by the painter.

Restoration Angel by “Slatts Alters”

Are Painted MTG Cards Tournament Legal?

altered mtg cards DCI More players are starting to bring these cards in to sanctioned tournaments, and DCI judges have taken notice. There are now
some guidelines to follow if you intend to play in tournaments. One thing is certain, you must ask the head judge to
rule for permission before each tournament or else you risk being disqualified!

The main thing to qualify for DCI tournament play is the issue of the gameplay text. The text must still clearly be visible, showing the name, mana casting cost, expansion set symbol, and rules text cannot be obscured. Which means sadly most full art alters probably won’t be allowed in tournaments, unless you have a lenient judge.

Fear not, as most judges do allow these in to tournaments. While there are a handful who frown upon it, they seem to be in the minority. As long as the gameplay bits remain intact you should have nothing to worry about when playing in tournaments.

What About Additional Card Weight?

altered art mtg force of will Some people worry that these will make it easy to cheat or be cheated against, since surely the painting must make them more heavy. Factors that contribute to added weight are how much paint was used, and what type of gloss it was coated with. When put into sleeves and shuffled into a deck it’s impossible to tell the difference. Nobody can cheat by adding these to the deck, so don’t get any funny ideas!