Foreshortening in the art of drawing

Foreshortening in the art of drawing

What is foreshortening? Some answers and drawing examples and video tutorial

What is foreshortening? Foreshortening in the arts refers to a specific way to depict three dimensional objects on the two dimensional paper planes. One of the most famous examples of foreshortening in visual arts is the painting by Andrea Mantegna, the mourning of Christ. The painting on wood shows the dead body of Christ from an extreme perspective. The viewer is put on the same eye level as the mourning figures at the side in close distance at the very end of the bed near the feet.

The painting was done in the 15th century in Italy, a period called Renaissance. During that time depiction of three dimensional spaces was fully explored and displayed in visual arts with almost scientific “correctness”.

Foreshortening in this painting means the perspective compression of the body and it’s proportions to a fraction of the actual size. Feet and head come very close together; the limbs are foreshortened in perspective. Mantegna created a stunning and very dynamic piece by choosing this extreme perspective.

Foreshortenings are inseparable connected with the depiction of illusionist three dimensional spaces. Until the 13th century pictures were mostly flat, at least space often was not depicted “correctly” and thus lacked the illusionist effect. Since Mantegna and others renaissance artists drawing and painting foreshortenings has become the standard of illusionist painting.

Andrea Mantegna – the mourning of Christ

An impressive example for foreshortening in visual arts

Image credit: Wiki media commons An impressive example for foreshortening in visual arts

Using a grid to draw foreshortening


The image above is from the 18th century. In the old days using grids in drawing was the state of the art method to produce exact perspective drawings. The draughtsman has a paper with the same grid proportions on his drawing table. All he has to do is to transfer important points where outlines in the scenery cut the vertical grid on the grid on his paper. Then he can connect those points to reproduce the outlines of trees and other objects in the drawing to get an exact flat projection of his view on the drawing paper.

There is a very famous illustration by Albrecht Dürer in his tutorial on how to measure in drawing. It illustrates perfectly how foreshortening in perspective drawings of the human body can be obtained. There is also the vertical grid used to transfer a flat projection of a there dimensional space on the flat surface of the drawing paper.

The effects of foreshortening in drawing

Extreme perspective with foreshortening effect changes a couple fo things. What are the effects of foreshortening in drawing?

1. Foreshortening changes geometric forms: circles will change to elliptic forms, squares will change to rectangles and cylindrical subjects change to a more conical shape for example

2. Foreshortening changes proportions: foreshortening on the human body will change the proportions for example. Parts which are closer to the viewer’s eye can appear much bigger than from a “standard” figure drawing. Limbs might look much shorter, hands or feet might look bigger.

Super retro comic hero thinks about a fly

Video lesson in drawing foreshortening

In this video lesson you can see an example of a manga or cartoon figure stretching the hand directly to the viewer in extreme perspective. As the hand is much closer to the viewer than the body the hand is bigger in size than the head of the figure. This is one of the dynamic effects of an extreme perspective look. The artist shows in real time how he develops the position of hand, palm and fingers in relation to the perspective extremely shortened arm. The video demonstrates the characteristics of foreshortening very well.

Drawing Tutorial: Foreshortening
by markcrilley

Extreme foreshortening as means of a drawing composition

Foreshortening in drawing, charcoal drawing, houses and street

This charcoal drawing of mine (Basic tips for charcoal drawing) uses an extreme perspective with foreshortening as dynamic composition concept. The viewer is massively forced to follow the fence line from the foreground in to a mad dash down the road to the center of the image.

Foreshortening applied in a street sketch

foreshortening in a street sketch
This is a detail of one of my humble sketches of the city of Stuttgart. In the center there are some cars parked and the effect of foreshortening is compressing the outlines of the chassis. It is rather difficult to draw the wheels not as circles but as flat ellipses and the wheel wells so very narrow to shorten the sideview of the vehicle according to the perspective. It helps a lot to close one eye to observe and see the object as it would look as flat projection on paper.

Exercises to learn foreshortening in drawing

One can think of many exercised to learn foreshortening. The first one I did was taken from Bert Dodsons classic book “Key to drawing”. He request the reader to draw is/her own hand with the fingers pointing towards the viewer. It sounds easy but it is a quite tricky thing to do.
Drawing still life subjects like bottles , that are lying flat on a table for example, are also good exercises. Foreshortenings on the human body are a great challenge to

Drawing books that can help to understand foreshortening

In architecture drawing the term foreshortening is rarely used. Foreshortening mostly is mentioned in connection with drawing the human body. Here are two books that deal among others with this topic. especially in comic drawing foreshortening is an often used means to create dynamic and stunning sceneries.

The batman comics are well knwon for their extreme vertiginious perspective views of skyscrapers and the comic hero moving within this environment

Foreshortening in a tree sketch

This sketch is an exercise in drawing foreshortening. The base of old treet trunk pointed towards me. As a result the branches are very close together and the shape of the trunk appears to become a lot thinner from base to top.

Draw people in a landscape

Draw people in a landscape

Landscapes with people how to draw them

I love to draw and sketch outdoors and my favorite subject is the landscape. A landscape picture changes a lot when you add the human figure. Often paintings and drawings require figures. Learn here some tricks how to depict people in clothes as they appear every day,moving around on the streets or in the landscape. Be prepared when someone shows up in your landscapes drawing on a sunny morning like the guy with the hunters hat in mine. He has not been there on the previous days, but suddenly he showed up and walked through my picture in a minute.

I want to pass on some of the skills which might help to get those figures into the landscape easier and I want to propose some easy exercises which might help you to be prepared when someone steps into your drawing ! Most important: do not hesitate, start drawing people today !

There is also a list of the best rated books on drawing people or the human figure. Drawing People: How to Portray the Clothed Figure helps you to improve your skills in drawing people as they apear everyday in their clothing.

The proportions of a human figure

Some very basic facts about the proportions of the human body
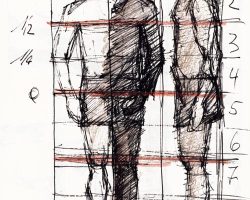
There are a few easy to remember guidlines about the proportions of the human figure that help to draw people. Click on the images for enlarged views.

A fact that is often ignored is that the head of a human is only about 1/8 of the full body length or 1/4 of the upper half. Of course individual measures deviate from this rule.
how to draw people – proportions of the human body
The eyes are located in the middle of a frontal view of the head. The distance between eyebrowns, tip of the nose and chin are almost equal. Looked at a head from the side it fits into the shape of a square.

It is a good exercise to draw figures in different positions from imagination using the basic knowledge of the proportions of the human body.

Figure Studies in the public

drawing people in public places
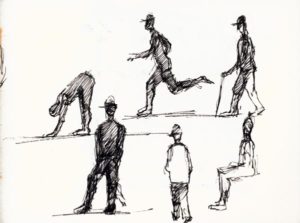
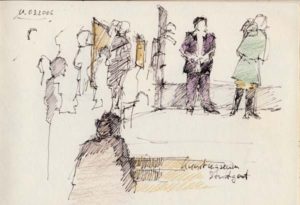
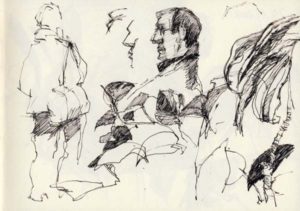
Drawing people in public places is thrilling for many reasons and not easy to do. I admire sketchers who are able to capture people in movement. In the beginning it might be helpful to choosea place where people do not walk by, but stop standing or sit. I used the situation in a museum for some studies of visitors and staff. Usually I start with the head and work down my way over shoulders to the feet of the person.

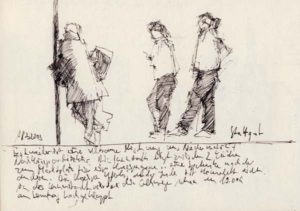
Also sketching at the busstop or at the train station is a good choice as you will find people who do not move around that fast.

I always have a sketchbook with me because waiting lounges in hospitals and other maybe more pleasant public places are great for drawing and sketching people. Waiting time goes by much faster.

How to draw people in a landscape with watercolor

This video demonstrates how the draw or paint simple figure shapes to represent people in a landscape with watercolor

More proposals for studies of the human figure

It is not necessary to go out into the public to draw people.
For exercise purposes you might consider also:

drawing from photographs – your family album
drawing from a TV film or a video

Especially drawing from video is great because you can stop and repeat a sequence that you like.

Learn how to draw a female body with the proportions

video tutorial
This is agreat tdemonstratioon haow to draw a femal teenager body with the right proportions. It start already with an important feature for drawing kids. The teenager bodey is about 6 heads high, whereas the adult body is about 8 heads high. The younger the child the bigger is the head compared to the body.

How to Draw Female Body Proportions: Teenager to Kid, Manga Style

Art supplies for figure drawing

anatomical models for drawing studies at home
Anatomical models can be very helpful for studies on the human body. The limbs can be moved and fixed on almost any position and the model can be drawn from various viewpoints.

So how does it work to draw people in a landscape ?

After some time spent with life studies you will develop a good eye and memory for the position that a human has taken in the scenery in front of you. Even if you could not finsish the specific figure you will be able to reconstruct the situation later. I often only mark the position of the heads and “hang the bodies” later. You can even complete the drawings at home or continue after you have moved to another place. For example the person you started to draw was sitting on a bench,but now stands up and walks away. You can wait until someone else will sit down or you move to another place where people are still sitting on a bench.

Before I place a figure in an empty landscape I sometimes do some trial drawings in the sketchbook to make sure I get he right size and proportions. Then I might use a transparent paper laid over the sketch to trace an exact copy of the draft. Then I can move the draft on transparent paper over the landscape study until I find the right position.

Book Review: Figure It Out! by Christopher Hart

Book Review: Figure It Out! by Christopher Hart

Christopher Hart’s book, “Figure It Out!” is basically a beginners guide to drawing the human form. It’s not an advanced book of everything you ever wanted to know about drawing the human body, but it is a book that will get most artists comfortable drawing the human figure. He’s got his own techniques, and a few unique examples for demonstration, and the most important thing about this book is simplification.

Christopher Hart has built himself a virtual empire when it comes to How-To drawing books. If you search Amazon for his name, literally thirty or more titles will be returned, in the search. Go to any bookstore, and the drawing section will be dominated by his name. He has garnered a bit of criticism, however, due to the fact that his drawing instruction is geared more towards the comic artists, than those looking to represent realism. He’s also been criticized for not doing all of his own drawing. Many of his books are filled with the art of other artists. However, much of the art is superb. Hart himself is not a recognized comic book artist, and he will routinely employ artists that are. However, what he does well is he covers all of his bases.

For me in particular, the book, “Figure It Out!” took me from being very tentative with my drawing of the human form, to feeling like I could conquer just about any pose. His instruction begins with the head as a basic shape, and then moves on to the body. He states that the body is more or less all about nailing down the torso, and he gives a great analysis about how to layout the torso with a few main angles. He then goes on to demonstrate the process by showing human poses using only stick figures. Simplification is his key.

Remember when you were a kid, and you’d draw stick figures? Well, guess what? You were, apparently, right to do this. Hart demonstrates this by nailing down intricate stick figures of the human form. He shows that this is all that’s necessary to get the form down. One of the chapters, called “Body Dynamics,” is dedicated to drawing dozens and dozens of stick figures, and by the end, I felt like I had a handle on manipulating the human form. Each successive chapter goes into more detail on fluffing up the human form, as in adding the muscles and the clothing. The book finishes with some fairly unique poses, that demonstrate the human form in all sorts of angles, specifically showing things like foreshortening, and hiding appendages, and some other complex poses.

The book isn’t an end all be all book of drawing the human form. It’s a starting point to get the confidence for the hard stuff, and it was all I needed to help me get over the hump, and help me feel more comfortable about tackling what I had up until that point felt was the overly complex human form. After reading the book, there are still things that may be out of my reach, but I certainly don’t feel like I need to shy away from anything either. In fact, most poses, I can bang out fairly quickly.