Best Drawing Tools

Best Drawing Tools

Only the Best Materials Needed for Drawing

This is a list of my best drawing tools. This collection is by no means the Cadillac of art supplies, but in the mid to high range price point. While I don’t have the money for the super expensive stuff, I don’t like to compromise on quality.

I’ve drawn most of my life and have been perfecting my craft for years. As time goes on and I try new stuff I may tweak the list a bit.

I also believe that most of these drawing supplies are great for beginners. My reasons, there’s no use in handicapping yourself with crumby equipment. Thankfully, drawing isn’t like oil paints in that even the best doesn’t cost a fortune. Aside from that, experimenting with a variety of supplies always gets the creative juices flowing.

The Best Pencil For Sketching And Travel

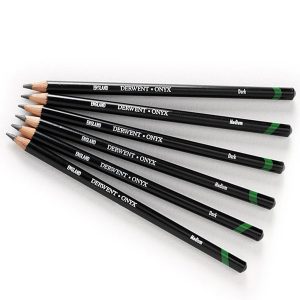
Derwent’s Onyx pencils

The best sketching pencil so far, that’s not

even the best as pencils go, is the Derwent onyx pencil.

It’s remarkably strong, and it’s capable of some pretty black shades. No, not as good as carbon or charcoal because it is still graphite that will get shinny if you overdo it.

I’ve used it in serious finished work, like this here Anubis puppy, and I thought it was an ok serious pencil, but I haven’t made up my mind yet. It’s kind of an odd ball, or “black sheep” of my pencils.

One thing I want to note, I don’t think it would make a good pencil to learn how to draw with. Only reason is that it doesn’t give me that feeling a soft graphite does. I wouldn’t want someone to miss that experience because of my recommendation. It’s just too hard of a lead that I think would make an absolute beginner frustrated.

Now, on the doggie drawing over on the right, a good many of pencils came into play to create this, including my woodles pencils, but I wanted to state where I used the onyx. The little scratching texture effect on the blanket. Those are the little wispy lines. There is also a great deal on his snout, and pretty much any of the blackest blacks that are in the work.

The Best Drawing Pencils

CreateAcolor Graphite Pencils

The pencils that stuck out the most for me were the CreateAcolor’s professional grade pencils. They just seemed a cut above Derwent, although I’ve used derwent for years and it’s not a bad pencil.

They create beautiful, smooth lines, I don’t think I’ve ever experienced any gritty spots.

I no longer need to buy the big tin, just single pencils to replace the ones I’ve used up, but if you buy the big tin of 24 there is a schematic on the top of the lid, much like a box of whitman’s chocolates. This has pictures of pencil marks to show you how dark that particular pencil grade gets. This is one of those things I wish I had when I decided to quit dabbling and really learn to draw.

Sadly I haven’t been able to find the 24 count tin in my travels in a good while. If you happen to find it, better hop on that sucker, or if you find that the 12 count tin has the awesome schematic, please let me know. 🙂

The Best Drawing Paper

Portrait drawing on stonehenge paper, created by, Shannon FleetLet’s get down to the foundation of sketching and drawing. Paper is oftentimes more important than people think. Drawing can be done on just about any paper, or with any tool that makes marks, but good paper makes a huge difference, sometimes the difference between success and failure depending on which drawing media you’re using.

On the flip side, the best paper makes for a better creative experience. Your pencil will also respond differently to different paper, this will either be frustrating, or give you a wonderful feeling. For artists who work with colored pencils, they need a paper with enough tooth to build layers of color that doesn’t fill up too fast. On the other hand, artists who use charcoal or pastels need a paper that is super toothy or else the powder particles won’t hold.

The paper I speak of here is the stuff you want to create finished work on, I have and use several different varieties since I’m hopelessly addicted to art supplies, but here is both of my favorites.

This drawing was created using Stonehenge paper.

The Best Hand Held Pencil Sharpener

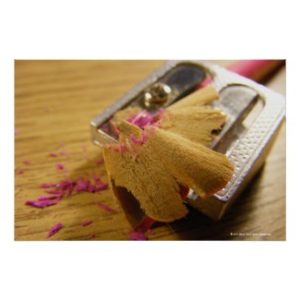
Pencil Sharpener Print by WallJewelry

Those pencils aren’t going to sharpen themselves! This particular issue has always been a problem with me. I’ve tried everything in the past.

I’ve always had romantic notions of the artists that use a knife to hone their pencil tips with care. This, I’ve been told and read is the best way to sharpen your professional pencils. I’ve never liked it.

For me the convenience of a regular, no frills pencil sharpener and a sand paper block was all I could deal with. I just want to get back to work!

Convenient, yes, but sadly most pencil sharpeners suck. They wear out super fast, and when they do wear out they chew rather than sharpen. This creates a ton of waste and frustration. I’ve been known to rage when it snaps the tip off of my lead causing me to stop and grab a 9H pencil to dig it out.

Even worse they are deceptively cheap, so one doesn’t notice the added cost and waste of having to buy a new sharpener just because the blade has worn out. This cost adds up over time.

Of course, there are electric pencil sharpeners. I give you an unprofessional “LOL” at this. You can’t take them with you.

The Best Artist’s Erasers

Some of My Erasers, Plus Some Improvisation

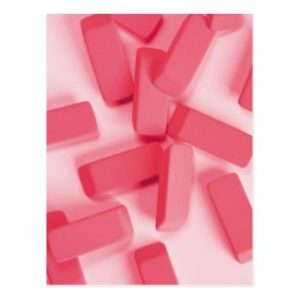
Pink Rubber Erasersby FallSeason

The eraser is also a great drawing tool that’s often overlooked. I use it for the obvious, to fix mistakes, for pulling out graphite from the tooth to lighten the tonal value of an area, and finally I actually use it to draw with.

I like to use three types:

The Kneaded, well it’s not exactly a traditional kneaded, but I’ll explain in a minute. Your trusted kneaded putty will do all sorts of stuff. Clean up, pull out graphite or charcoal, clean any smudges, create shapes. It’s the one that I use the most.

The regular white plastic eraser. For all of those general tasks that the other erasers can’t do. It’s ok to not have the best here, provided it’s not one of those pink erasers. You don’t want it to destroy, or otherwise flatten the tooth of your paper, or even worse, to rip it to shreds. But, the best does exist! I’ll show you below.

The last, is my trusty clicker eraser. The one I like to use is the tuff stuff stick. I used to use the fatter clickers, but they were terrible to draw with, yet not big enough to erase large areas. Plus, with my old clicker if I bore too hard on it I would nip off the top! Took me a long time to find tuff stuff.

UHU’s White Or Blue Tac As An Eraser

Better than any kneaded eraser on the market
Let me explain my substitute for the kneaded eraser. I like to use white tac. It can be pretty hard to find and you have to get it from the UK. lol. It’s the same as blue tac and you can use the blue too! Either one you can get your paws on.

It comes in a larger quantity than real thing, which also makes it cheaper. It’s stronger, lasts longer, and picks up more graphite and charcoal. It makes me hate to have to use the old kneaded putties. This is why I crowned it the best.

About Best Drawing Tools

The drawings and sketches were created and copyrighted by Shannon Fleet. That would be me!

The other images relate to Zazzle and are copyrighted by the artists who created them. A link is provided to the Zazzle site if you’d like more information on their work.

An Art Fair Primer

An Art Fair Primer

Some Basic Information To Get You Started Doing Art/Craft Fairs And Festivals

This lens was created to provide information to those thinking of getting into the art fair circuit. It is designed to cover the fundamentals and the many challenges of doing this kind of event.

I am a working artist who has been marketing my art through art fair venues for over 15 years. I can honestly say that art fairs are what has taken my art from a hobby into a thriving art business.

5 best things that I like about art fairs.
1. Being out in beautiful weather
2. The hauling and toting keeps me in shape (sort of)
3. The positive feedback and high sales (Okay maybe money should have been 1.)
4. Travel. I go to places that I otherwise would not.
5. People. Not only meeting animal people and hearing their stories but also making new artist friends.

Anyone who has read my blog Fur In The Paint has heard me go on and on about the difficulties I face doing the art fair circuit every year. I have been rained on, rained out, hailed on, and once even snowed on! There have been tornadoes. I have suffered from heat exhaustion, freezing temperatures, cranky customers, unprofessional art fair management and the list of atrocities doesn’t end there. This all culminates in the fact that the older I get, the less I like all the hauling and toting as we pack around 1,500 lbs of artwork, displays and tents (yes, we take more than 1 tent.)

5 Worst things about art fairs.
1. Inclement weather
2. All that hauling and toting
3. Emotionally crushing low sales
4. Sales tax collection
5. Obnoxious or rude people

So if your pondering doing fairs and festivals read on as this will give you some idea of what’s in store and how best to handle it.

All copyrights are retained by the artist,
Mona Majorowicz of Wild Faces Gallery.

The artwork or content in this lens may not be used or reproduced, either
in part or in whole, without the express written consent from the artist.
Brookings Summer Art Festival

Finding An Art Fair Venue That’s Right For You

Sorting Through The Sea Of Art Fair Events To FInd A Good Fit For You and Your Work
Okiboji 2009 There are plenty of events out there to choose from and most every small town town has at least one. Small events are good for testing the waters and getting the hang of what actually goes into a successful fair for you. But the real money comes from doing larger events.

Here are some rules of thumb I use for choosing events.
To be clear it doesn’t mean that an event that falls into these rules can’t still be successful, it’s just a whole lot less likely.

* Must have an attendance of at least 30,000 people for the event. Ideally 75,000 to 150,000 is good.

* Event has been running for at least 5 years. Usually new events struggle to advertise adequately. It takes time for a good event to build a client base. That doesn’t mean I don’t do new event, especially if they are local. But I go into it with the thought that I am helping the event take off, not that the event will make me money.

* It’s specifically an art event. Meaning it’s not Apple Days Festival, or Antique Tractor Days or something similar where the main draw is something else and they just are happening to have an art event at the same time. This is true even for things which you might think fit your niche perfectly. Most often when people are attending for something other than buying art, they usually don’t buy. There are some exceptions to this rule, but they are very few.

* Outdoor events make more money than indoor events I know it sounds crazy and messed up, but it’s so true.

Resources For Finding Quality Art Fairs

I have used all of these at one time or another and all provide excellent information. But perhaps the best option is to go to the events you are interested in and talk with exhibiting artists.

The Art Fair Application

Why Submitting Quality Images is Important To The Art Fair Apllication Process
actual application for art fair

So what are the two most important thoughts (as in: what will get me approved) in regards to filling out art fair applications?

1. Submit good images. Scratch that. Submit the best darn images you can create, both artistically and in the reproducing true to the original.

2. Words have power. Be able to write a personal statement intelligently and succinctly, as well as you describe your work to its best advantage.

That’s it. By doing these two little things well, your chances for acceptance just went way up.

Submit quality images

By entering quality images you show the jury that you are a professional and care about your art. You may well say to yourself “This is good enough to give them an idea of my work. Sure it’s a little blurry, but surely they can see that I have talent.”

While this may be true, you are competing against other artists who are submitting great images representative of their work. In the end, the jury will go with the ones who put in the effort.

It is understandable if creating good digital images is not your thing. But if you want to get into bigger and better events you need to either take on the challenge and learn it, or hire a good photographer. Showing your work to it’s best advantage speaks to your professionalism.

What constitutes a good quality image.

1. Clarity. No fuzziness or blurry areas. Also no shadows or glare.
2. Color is true to the original. Too light or dark is not acceptable.
3. Image Only. No framing, matting, glazing, or fingers, grass, carpeting. You get the idea.The nice thing about digital files is this is easy to crop out.
4. Image is square. This means the image is not crooked or fading off into the distance on one end.
5.Your best work only. You will be judged on your weakest work guaranteed. Most applications take 3-4 images. If you have 3 outstanding pieces and one so-so piece. It is the so-so piece that will determine your entrance into the event.

Art Fair Applications: Words Have Power

Knowing The Best Way To Describe Yourself On An Art Fair Application May Mean The Difference Between Getting In And Not

The written word
It is important to be able to write (in brevity) a description of your work. The events I have applied to have requested this supporting information anywhere from under 100 words to just 3 words. (In case your curious “Equestrian & Wildlife Artist”) Something this brief is generally for inside the catalog or map information. Anywhere from 7-25 words is often read to the jury while viewing your work.

Perceptions of Art or Craft
There is usually a great debate around what should be considered “art.” Umm . . . I am definitely not going there. Instead I’ll comment on how the word “art” is perceived differently from the word “craft” and why that may be important to you when filling out applications.The way you describe your artwork has a great impact on how it is perceived

The first thing is to be aware of what the connotations of the word “craft” are. In the December 08 issue of Art Calendar Magazine the article Art or Craft what’s in a name states that in their survey 87.2% felt that a finished creation was perceived as more valuable when classified as “art” rather than “craft.” 68.4% perceived “art” as having superior quality to that of a “craft.”

The magazine suggests the word craft should be avoided completely except when talking about

The word craft should be avoided completely except when talking about “craftmanship.”With the application process how you describe yourself plays an important role in how a jury perceives you. In the same article it tells how many artists are using broader words like “objects,” “creations” or “works” to replace more traditional descriptors like ceramics and sculptures.

A Brief Word About Using Zapp For Art Fair Applications

Also Known As Zapplication: Automated Art Fair Application System
Lately many events have been switching their application process over to Zapplication

This is a pretty straight forward application to use and it does make it easier in some significant ways. But being a bit of an old dog. I’m not fond of learning new things. So Zapp wasn’t exactly embraced by me with open arms.

Also there has been more than one occasion that for some reason rejection notices were sent when they shouldn’t have been. I imagine this could happen in the old way using snail mail as well. But perhaps things being sent out instantaneously isn’t always the best idea.

Things I like About Zapplication
* Relatively easy to set up an account.
* Once an image is uploaded it is archived.
* No messing around trying to get good quality slides.
* You can check out criteria for other shows.
* It allows you to find shows you may not have had access to before.

Things I don’t Like About Zapplication.
* You need to have a good quality digital image.
* Computer monitors color gamut varies. Hard to say what your image will “really” look like to the jury.
* Some shows require payment by credit card. Personally, I don’t like using credit cards for this.
* Events that have switched to Zapp now have way more (as in doubled or tripled) the number of artists applying.
Loring Park Art Fair, St. Paul MN 2009

5 Ways To Know If That Art Fair You Signed Up For Is Really A Craft Fair.

And why it’s important to know the difference.
Riverrsance Festival Of The Arts If want to preface this by saying, I am not an art snob. The reason it’s important to know the difference between being in a craft fair instead of an art fair, is it attracts a totally different set of buyers. Besides doing Art Fairs I have done Art & Craft events as well as just Craft events. But knowing what they “really” were allowed me to pack appropriately, (like lower ticket items for when I do craft events.) In the end, what’s important to me is that I make a certain amount of money. It is usually irrelevant whether I get there by selling original art or by selling notecards.

Initially a way to determine if an event is one or the other is by how the declare themselves and whether they jury. To be clear, Just because an event calls itself an “art fair” doesn’t mean it can’t be crafty. They can and often are. Or that a craft event can’t have great art. They do. This is just another reason that whenever possible you should attend the event as a patron before committing your cash for a booth.

Art Fair Vs. Craft Fair

And The 5 Signs Your In A Craft Fair Are . . .

1. It has the word craft in the title. Okay, so that sounds a lot like an obvious answer. But soooo many artists think that if it is called an Art & Craft Fair that means there will actually be some art available for sale. This is rarely the case. Generally if the word craft is used the event will lean heavily in this direction.

2. “Stuff” on a stick. This in general means yard baubles on a stick. (weather vanes, water gauges, those glass ball sphere thingys.) Though you’d be surprised how well anything sells when attached to a stick.

3. There are far more stock trailers than vans. Huge stock sized trailers often mean metal yard art, though indicates anything bulky. If you’ve got a parking lot filled with big trailers, your at a craft event. For the most part, only crafters can sell a stock trailer full of stuff.

Personally I gotta admire their sales juju. I mean seriously, to know with certainty that you can sell that much of “any” product takes a large set of salesman stones. Don’t you think?

4. Buy/Sell This is where someone purchases something in bulk and then may or may not alter it slightly, and then resell it. This kind of thing is the bane of most art events and perfectly acceptable in a craft event. Even really good art events can take in something like this from time to time. However if the event is heavy in this . . . you are at a craft fair.

5. And finally People ask you where the birdhouses are. Yes this has happened to me. One event the lady was complaining there was just “too much art” and all she wanted was a new birdhouse.

Omaha Summer Art Festival

Artist Vehicles

Passenger Vans vs. Cargo Vans For Hauling Art Fair Equipment
Our Art Fair Vehicle For those of you thinking about getting into doing art fairs, the vehicle you drive is critically important. The exclusion to this is jewelers. They can show up in a compact, if they know how to pack it.

This is our van. Isn’t she a sexy beast. Okay, okay it’s a land whale but here’s why it’s the vehicle of choice for us. This is actually a passenger van that we took the seats out of. Why did we go with a passenger van over a cargo van? Read on.

Cargo Vans
Our van is essentially the same as a cargo van with some important, comfort related distinctions.

Cargo van are often an empty shell on the inside. Literally the raw metal of the vehicle make up the interior. This means the van gets colder in the winter and hotter in the summer. Many artists custom build in an interior for comfort.

Also often cargo tend to have few features Often they don’t usually come with air conditioning (and possibly cruise control) standard. Be sure to check that out if your looking at one.

And lastly most cargo vans have very few windows. This may not be a big deal if you pack it to the ceiling. We pack most of the time so we can see out our windows. This really helps when driving in unfamiliar cities.

How To Choose The Right Van For Traveling The Art Fair Circuit

When It Comes To Hauling Your Artwork To Art Fairs Size Matters

Here’s a few pointers for choosing the right vehicle.

Square is good. The boxier the better. The reason for this is you can pack more stuff in square than you can in a round type of curvy van.

Tinted Windows are nice. They not only keep the interior cooler, but they also kinda hide the fact that your vehicle is packed with “stuff.” Unfortunately this van does not have that feature

Measure your interior and the space between your wheel wells. This is really most important when it comes to your display panels. Most pre-made panels run approximately 3 foot x 6 foot. Display panels are really the most difficult object to pack and make fit.

Note the doors that fully extend open allowing you the maximum space to put large objects inside.

Bigger is better. Our previous van was a Safari which was considerably smaller. We got almost as much in it as our current one but we had to pack it in a specific order to get it all to fit. Which meant we generally had to tear everything completely down so we could put our tents in the bottom, then the display, then artwork, totes, etc. If the weather is nice, this is no big deal. However, if it is driving rain and lightening, having to pack in this way, becomes a noticeably a bigger pain in the arse. Also with the larger size van, we can now do two booths at an event with plenty of inventory for both.

Artist Display Panel Options

The Importance Of Looking Professional At Art Fairs
Armstong Panels So now you’ve got your tent you need something to display your work.. As with all things there are many companies which makes units to fill this function but here are the four most used by the professionals that I know.

All pretty much the same thing which is panels that can be joined to together to form a gallery-like look in your booth. Some are carpet covered which come in a variety of colors. While others are fabric or wire mesh. Most companies offer various accessories like display print bins, shelves, height extenders, half walls and podiums.

The carpeted version really pulls off a gallery look which is pretty amazing when your in the middle of a parking lot.

Pro Panels Probably the most used company. among artists.

Armstrong Panels Pretty much the same thing as Pro Panels but they offer a wire mesh version which is the one I use.

Graphic Display This is the more economy minded version which only comes as a wire grid system.

The Flourish Company They make the non-rigid fabric mesh panels that require little space for storage.

Why I Prefer The Mesh Walls For Outdoor Art Fairs

Mesh panel system I prefer the wire mesh to the carpeted panels for outdoor events because it lets the tent breathe.

* On windy days the wind just rushes through them while it pushes on the carpeted panel walls in some cases tipping them.

* Also for the completely windless days it allows what little breeze to stir through the tents while the carpeted paneled tents are stifling.

What To Pack: Art Fair Essentials

For Indoor Art Fair Events
1. Lights. This has to do with the “S Rule” (Shiny Stuff Sells) The more light the better.
2. Extension cords.
3. Tables with cloths and covers.
4. A rug for the floor is a really nice touch.

Outdoor Art Fair Events
1. Weights and stakes
2. Clamps (An absolute minimum of 10 – preferably 30)
3. Tie downs and Cambuckles
4. Tarps
5. Ice and something cold to drink.
6. Snacks
7. Tents. (of course)
8. Sunscreen, hats or umbrellas for your chairs.

For Either Type Of Art Fair
1 Calculators (at least 2 preferably 3) Heat and cold will fry them.
2. Change. This includes bills. I usually take around $400 worth of 1, 5′s and 10′s.
3. Totes (for storage)
4. Pens, receipt books and bags.
5. Comfortable chairs
6. Guest book to collect names for mailing list.
7. Breath mints preferable to gum because you’re not chewing while talking with patrons.
8. Comfortable Shoes
9. A change of clothing in case you get wet.
10. Display Units, baskets etc.
11. Plenty of Inventory. Nothing torks me off more than running out of something.
12. Zip Ties Excellent for everything from securing your display to binding lighting wires together.
13. Counterfeit money detector pen

A Few Things That Are Nice To Have But Are Not Essential
1. Small broom for sweeping outdoor booth space
2. Blankets
3. Extra tarps
4. Tool Kit complete with zip ties
5. Shims for uneven or not level surfaces

A Word Or Two About Fair Or festival Tents And Canopies

Types Of Art Fair Or Festival Tents
Since Outdoor events almost always have better sales than indoor events, I thought I’d cover the topic of tents and weights.

When choosing a tent you should get only a white tent. It allows in the most light and shows your work to it’s best advantage. Colored tent cast a glow onto the work and at dusk turn your booth into a cave.

Most art fair canopies come in two main types.
1. Craft Hut type (Dome or Hoop top.) Trimline and Lightdome
2. EZ-Up type (pointy top) Other brands are KD Canopy, First Up and Caravan.

The Craft Hut Type tend to be much sturdier and water proof. They are not nearly as easy to assemble and cost between $800-1500 depending on brand, model and features. If they get damaged your parts cost will be high as will your replacement cost.

EZ Up Typeis the most common of its type because it is the easiest to buy as it is available at Sam’s Club for around $200. These tents tend to be very light weight, not all that sturdy and often in a heavy downpour they’re not water proof. (You can buy a water proof spray coat and take care of that yourself.

On the other hand they are quick to set up, though still much easier with two people despite what the box says. And if they do get trashed they are easy and cheap to replace. EZ-Up tents work just fine if you know how to use them. But since often it is newbies who buy them, they often come crashing down.

An Art Fair Tale Of Woe

A Personal Story Detailing The Devastation Left In The Wake Of A Storm
The spot where my both was. See that big barren spot in the foreground where the people are standing? Well that is where my booth was located just one short hour before this photo was taken.

Omaha Summer Arts Festival 2008
Even though it was sunny, clouds could be seen rolling in from the west. I began getting antsy and went over to the artist information booth and asked what the weather was going to do. They promised it was going to miss us but perhaps we may graze the edge and get some rain out of it. They were so very wrong.

By the time the tornado sirens went off we had already begun packing things away because I had a bad feeling about it.. We got all the originals and large framed prints indoors (with help from some of the volunteers.) There wasn’t enough time to get it all so everything else was put into totes and we zippered down and secured the tent as best we could. I was told several times to get inside by the time I was actually heading indoors.

As I was walking to the Landmark Building it was eerily still and stifling but I could feel the change in the atmosphere. I heard the roar of the wind before I felt it or seen the trees move. Once inside we were in the basement for around an hour.

When we finally came up it was shocking to see the mess. Booths were completely gone. My totes had literally blown down the street. Most had their lids popped off and were filled with water. Nearly everything that had been left outside was destroyed. An artist friend of mine who was farther down the street and in a more sheltered location was in good shape. She stayed with me until the wee hours sorting through the wreckage to salvage what we could. (Big Hug! Thank you Belinda!) While Mike was dismantling the tent parts and doing general cleanup.

Our neighbor did silk clothing and their clothes were scattered all over. Their daughter was crying. They packed up that night and left. Of the 135 artists, less than 20 left. All others, even some who lost their tents (including us) carried on. In the end I lost a little over $10,000 worth of inventory and equipment. It could have been much worse. Some artists lost as much as $30,000 and most had no insurance. Fortunately we had insurance since I have an actual gallery. It only covers replacement costs but that is better than nothing.

The Storm
We didn’t actually have a tornado on site, (though there were some in the area) but had anywhere from 80-120 mile winds. That was enough power to move a food tent that had over 2000 pounds of weights over to wipe out 3 other booths. A window of the landmark building was damaged by flying debris. In parts of Omaha they had quarter sized hail and semi trucks and cranes were toppled by the wind. And of course it rained with considerable flooding.

Note: We had over 500 pounds on our tent. This is a ridiculously high amount for any other event. We normally have 300 pounds at all other events, which is far more than most artists use. The art fair actually has an architect and a engineer inspect every artist’s tent to make sure it has sufficient weight on it. The art fair also supplies free sandbags for any artist wishing to add more. This is the only event that does this. It’s the little things like this that show that they really do care about the success of their artists.

Disaster Relief For Artists

And now for some good news.
For any artist that has losses severe enough to be considered career-threatening, you can contact the Craft Emergency Relief Fund (CERF). While CERF generally cannot respond to all weather related claims at outdoor shows, they will certainly consider applications from those most severely hit by the storm. Please contact CERF directly at (802) 229-2306 or at Craft Emergency Relief Fund for more information.

More Information Regarding Art Fairs

Covering everything you’ll need to know about doing art fairs successfully.
So if my story of tragedy and woe at an art fair hasn’t yet put you off to the idea of doing art and craft events as a way to make a little extra cash, then check out my other art fair lenses for even more information on the the how to and why you should consider doing art fairs.
10 Tips to Promoting Creativity

10 Tips to Promoting Creativity

Here are 10 steps to promote creativity in your life and lifestyle.

The truth is I believe everyone has some creative bent; a creative talent or way of expressing yourself. Some people arrange flowers; some sew clothes; some love to bake or cook; some are into interior decorating. Whether you are writing novels or just blogs; drawing portraits or architectural plans, carving wood or jewelry-making, taking creative photographs or taking pi to the next level, everyone is exercising their creativity some way. As creative people, we need to cultivate time, space, and a mindset to allow for that creativity to happen.

Photo credit: Photo of my friend, Merrily McCarthy, a fabulous artist living in the Yosemite Valley in California.

1. Time.

The first thing you must do is carve out the time to allow for creativity to happen. Whether you have toddlers under foot or a corporate job to run off too, you still have to find the time to energize your creative soul. You can carve out time at the beginning of the day or after everyone else has gone to bed, or dedicate a Saturday to your creativity; which ever way you do it, make sure you have a block of uninterrupted time just for you. The truth is we make time for what is a priority in our lives. So the question is, how important is your creativity to you?

2. Space.

With me, as a painter, I find I am energized to paint at the drop of a hat, if there is a space set up for me to close the door and keep the world at bay. For some, it only needs to be a small corner of a table or bench, for others you will need a garage or a separate studio. Whatever the need, make sure your space will accommodate you and your creative work and allow you to step into and out of it with relative ease.

Photo credit: Photo taken by myself of workspace at Sorenson Studio in Fresno CA.

3. Support.

This seems an obvious necessity but sometimes it has to be asked for. Your family needs to know that you NEED this, so ask for their support. It helps to have a spouse or children that will have your back when it is your creative time. You will be happier for the time and they will be happier to have you fulfilled.

Photo credit: Royalty free image from stockxchng.com

4. No Interruptions.

Turn off all electronic devices that may call you away and suck up your creativity time. Turn off your email alarms and twitter feeds. Turn off your phone. You can always get back to people later. That’s what God made messages and voice mail for.

There are times when interruptions are unavoidable, such as children needing you or emergencies. However most interruptions can be avoided by simply turning off ringing devices. Think about it.

Photo credit: Photo I took of my granddaughter playing with the phone.

5. No excuses.

As you build up the habit of taking time for your creativity, you may find you are not in “the mood” every day or every time you have it on your schedule. The funny thing is that if you let that be a good excuse, you will stop keeping your scheduled creative appointments. Make yourself, whether you feel it or not and the feelings will follow. It’s funny how the mood comes as soon as you start creating and not before. I like to read about artists
who overcame great odds and obstacles to create world famous works of art. In light of their sacrifice, I feel I have no room to complain that I’m not in the mood.

6. Make a list.

I don’t always know what to do during my creative time, so I have begun making lists. In the middle of the day or at night an inspiration may hit me. I have started the habit of writing these inspirations down and later when I have the time, I can explore them more fully. Some people tell me they get inspired in the shower or driving. It is as if creativity will hit you most often when you aren’t really thinking about anything. Write it down. You will be excited to see how the list grows.

9. Join a group.

Join a group of like-minded creatives in your area and actually attend meetings. There are writers groups, art groups, woodworkers, drama and theater groups; you name it, there is probably a group somewhere nearby. The benefit of being able to visit like-minded creatives is so varied that I could never list them all. One of the best benefits is the constant inspiration. Every time I come home from a meeting with my art group, I feel inspired to create something new.

Photo credit: Photo I took at my last art group meeting as we watched a demonstration.

10. Share your creativity.

Dean Dallin demonstration There is a certain fulfillment that comes with sharing your creative bent with others. Donate a work of art per year; create something for a family member’s birthday or holiday; share a photo of your work on social media; volunteer to do a demonstration. Wherever you share your work, make sure it is with someone who will appreciate what you have done. Nothing hurts worse than giving a gift of your creativity to someone who doesn’t like your work or doesn’t appreciate you. However those who do appreciate creativity will serve to energize your future work. Create on.

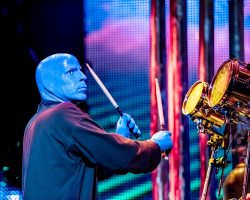
A band being Blue Man Group for Halloween

A band being Blue Man Group for Halloween

How we turned a band into Blue Man Group for Halloween

This page shows how one of my bands went dressed as Blue Man Group for Halloween. It starts with the background, tells some of the issues we ran into, tells how we did the makeup, and more! This is a reprint off my website www.susanszoocrew.com

The beginning.

We were scheduled to play at a big Halloween party and were told we *had* to play in costume. Only makes sense to play in costume at a Halloween party, right? We wanted to do something where all three of us were the same theme but couldn’t decide. It had to be something we could relatively comfortably play/sing in, that wouldn’t get all over our instruments, and that didn’t require a huge outlay of time since we had to set up equipment and all. This is a little harder than it may seem to come up with! At our last practice before the gig I was showing a video of Blue Man Group doing part of one of the songs we were covering. My guitar player looked at it and say, Hey, that’s it! Let’s go as the Blue Man Group! Considering that two of us are women, and all three of us play guitar, it was a bit of a stretch! Blue Men with figures and no PVC tubes? Well, we all have a good sense of humor so that sounded like fun! In the days before the gig it rained…and rained..all around town outdoor gigs were being cancelled or shortened. So I didn’t have high hopes for staying dry at the party even though we were on a covered porch. As it turns out, the porch faced west and the rain would come from the east so even in the rain we would be dry. Wet costumes and equipment would not have been fun! To our collective delight, the rain held off for the rest of the night and we stayed nice and dry.

We had decided that setting up equipment is hard enough working without trying to keep makeup on, so we headed out and set up the equipment first. This ended up being a really good idea, allowing us to just come in and start playing. We did discover one bad feature about a house that was between the river and the ocean: bugs. Not just bugs, but biting bugs. I’ve lived in Florida almost my whole life and have never been eaten alive by no-see-ums so fast! They were even eating through bug spray! After being nibbled on for a while, we were finally all set up.

Makeup!

For the rest of this story, Keith = guitar player and Evelien= the singer. 🙂

Then it was back to the house to put on the makeup. Keith had ordered liquid latex from an online supplier, with the idea that it would be flexible and we could paint our faces and the bald caps with it at all once. We all changed into our outfits (black long sleeved turtlenecks and black pants) and got ready to put on the makeup. When Evelien and I opened the jar, we were wondering what the layer was on top%u2026 then we realized that it was dried latex. Hoping that what was underneath was useable, we pushed aside the top layer. What was underneath was chunky and definetly not liquid, more of a cream-not good. We tried using it anyway, even tried diluting some of it with water-no go. The brand new, freshly ordered paint was no good! Here it is, almost time to leave, and no latex and no blue men/women.

Luckily, since none of us knew how the liquid latex would stay on while singing, we had a backup plan. I had bought two cakes of blue greasepaint and brought with me a can of blue spray paint that matched the greasepaint. Keith and Evelien picked up some hair dye spray in case that worked better. I had some experience with grease paint from watching clowns do their makeup and participating in talent contests, so I knew a few methods of working with it and knew we’d be able to play and sing in it.

We decided to put on the baldcaps first, which took a bit of doing. Cutting out the ear holes was a bit of an adventure in trying not to give unexpected haircuts to each other! We decided to do Evelien’s costume first, so with a few dabs of spirit gum and judicious tucking in of hair, Evelien had her bald cap on. Keith went off to figure out which paint would work best, figuring we’d spray the other two caps before putting them on. Meanwhile, I painted Evelien a nice shade of blue%u2026 ears and all! The hardest part is getting the paintee to relax while fingers are smearing makeup around near their eyes.

Working with greasepaint isn’t bad, you just have to watch how much you put on. The fun part was setting the makeup..you use baby powder and pat it all over the greasepaint. Evelien wasn’t quite sure how baby powder was supposed to work and seemed a bit reluctant at having it put on. As we were running out of time, there wasn’t much room for discussion. So, I got to poof Evelien’s face with baby powder%u2026%u2026.judiciously! It was a bit tricky keeping it off the black turtlenecks, even with a towel, but it brushes off pretty well. Just make sure that the person brushing off the baby powder isn’t the same person applying the blue greasepaint or you’ll have black and blue clothing (oops). Also make sure the powderee doesn’t breathe in while being powdered, powder between breaths.

Keith came back with the paint results during the powdering process-we’d have to paint the caps after they were on or the paint would flake off. Keith asked why Evelien was blue and white- I explained that the powder sets the top layer of makeup but not the bottom so it stays flexible and doesn’t crack; although we might have to repowder as we sweat because it will get shiny. I showed Evelien how to flick off the extra powder and pretty soon she was all blue with no white. Powder discussion over, it was time for painting Evelien’s baldcap… soon to be another lesson in trusting the people doing your makeup.

We quickly found out four hands are better than two, one person holds a sheet over the parts you don’t want to paint while the other carefully but quickly sprays the baldcap%u2026 and the paintee holds their breath so they don’t breathe fumes. We ended up using hands to covers ears but a bit of blue spray paint on our fingers just added to the costumes. We managed to keep most of the spray paint off Evelien’s skin. Once Evelien was done, we surveyed the results%u2026%u2026.not bad! Then it was mine and Keith’s turn. We had a bit trickier of a time with putting on the bald caps due to having long hair. We ended up not gluing the backs down and just ran our ponytail/braid down the backs of the turtlenecks. Long hair makes the spraypainting harder too, the flap of cap down the back has to be sprayed away from the hair. Somehow my cap was a different construction than theirs and had a lot less side flap-this worked out fine because I needed to wear my glasses and the extra material would’ve made this tricky. We quickly got our makeup on and powdered each other up. I did learn it’s easier to powder someone who is sitting down than someone who is standing up when they are taller than you!

By now it was time to go, so we grabbed the spirit gum in case anyone came loose and everyone piled into the truck.

The gig!

We quickly got to the party, and since it was time to play walked straight on stage and grabbed our instruments. Our percussionist was a friend named Andy who had come in a giant bunny costume. So we had three blue men/women and a bunny! Bunny didn’t last too long because Andy couldn’t see to play, so we used the dolly and set it up next to the bass amp. We did find one awesome side effect of our costumes-since there wasn’t much skin exposed the bugs pretty much left us alone, attacking only bare parts of the feet.

The show itself went off well and everyone had a great time. It was funny to see how many people mixed up Evelien and I in the blue faces when talking on breaks%u2026..considering that I wear glasses and she doesn’t you wouldn’t think it was possible! The makeup ended up working out well, the caps stayed on and only needed minor touchups at the end of the night behind the ears mostly. By the end of the night some of the blue makeup had worked its way onto the turtle necks, but not as much as I had thought we would have had. It was rather amusing watching grownups dancing around in costumes%u2026..watching men dressed as fairies sing along %u2026.. people trying to drink / eat through masks%u2026

After the show we packed up the equipment and headed out to a local place (Jetty Lounge) to join the rest of the crowd. Once we were through there (the full moon brings out some interesting people%u2026) we headed back to the house to remove the makeup. It had been a while since I had to take the makeup off, but I knew I’d always used baby wipes, baby oil, and baby shampoo-I just couldn’t remember which order. Evelien was first, and the baby shampoo didn’t do much. Then I remembered the right way, and we finished getting the makeup off. You take a baby wipe, dump a little oil on it, and smear it on the makeup. Pass number two wipes off the makeup and you repeat until wipe is full of color. Grab another one and keep going! The hardest part is getting it out of your ears%u2026..I think we all had some left over the next day.

All in all we had a great time, learned a few lessons along the way (always have a backup plan!) and got to play some awesome music for appreciative people and friends. What more could a band ask for? Except fewer bugs that is ….. 🙂

Things to Do With Pictures

Things to Do With Pictures

What Fun Stuff Can You Do with All of Those Pictures?

You’ve made the step and gone to digital photos. You can view them on your computer, e-mail them to friends, and take them to the store to get prints or maybe even print them at home. But after that you think, what can I do with these images that would be fun or interesting? How else can I enjoy them?

Well, let’s talk about that. There are a lot of great products, activities, services and more that will allow you to use those digital images in so many ways. Read on to learn more.

Photo Sharing Sites That Offer More

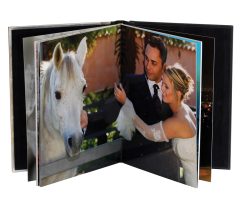
Photo sharing sites give you a place to keep your photos, a place to share them. However, some photo sharing sites offer more things to do with pictures. Shutterfly.com for instance also allows you to make a variety of things using your photos. Photo books, cards, calendars, coasters, tote bags, mouse pads, stickers, canvas prints, mugs, key rings, ornaments, puzzles, keepsake boxes, address labels, and notebooks are just some of the options.

Scrapbooking and collages are another creative way of dealing with your photos. Photomix, Google’s Picasa, Snapfish, and ScrapBlog are just a few that offer this ability.

Get Some Motion from Your Pictures

If you remember the little books you made as a kid by drawing a series of pictures in sequence, stapling them together, and then flipping through them to simulate motion, then you understand this concept.

This is another one of those fun things to do with pictures; make your own, more adult, version of these flip books. There are a number of sites that can produce some pretty nice flip books either from a series of digital photos or the still images grabbed from your camera’s video recordings. Flippies, Glitterfy, and FlipClips are just three of the options.

Of course there are also a number of tutorials out there to help you if you want to go it on your own. Two of the most useful that can be found are at a blog called The Curious and another called Short Courses.

If you’d like to make a 3-D movie from your images you can try Make3D but if you want to make a movie with some great music added you can try Animoto or even Google Picasa.

Wacky Things to Do With Pictures

Your pictures may be sentimental, they may be precious, but they should also be fun. At CaptionBubble you can make a joke of almost any picture by adding captions just like you see in cartoons.

There are a number of fun services at Flickr based BigHugeLabs. You can make a magazine cover, add captions, or make motivational posters among other things with your images.

If you want to really get silly, you can also use a number of sites to distort photos to create that “house of mirrors” effect. Sites like Gooifier allow you to do this without having to even download anything. Or perhaps you would rather insert your face, or the face of someone you know, into a well known picture, on the body of another person, or somewhere else where it doesn’t belong at FaceinHole. However, if you want a lifesized cutout of someone you’ll need to go to PhotoCutOuts or to get a caricature, visit osoq.

If you have kids, another kind of cool project can be found at FlattenMe where you can use your kids pictures to insert them into existing books. Suddenly your son or daughter can be the main character in the storyline.

Getting Artsy with Your Photos

There are a number of more artistic things to do with pictures. Various sites will allow you to change your favorite photos into works of art. PhotoWow can give you some great looking pop art of your favorites, while PhotoFiddle gives you even more options for the style of art you prefer; oil paintings, watercolor paintings, abstract collages, and so forth.

A site called ReColored allows you to colorize your black and white photos. On the other hand, if you just want a photo enlarged and placed on canvas to hang on the wall, you can try CanvasRUs.

For those who prefer a line drawing, there are a number of tools to help get the job done. Here is a Photoshop tutorial for doing just that.

Be Sure You Put Your Photos Best Face On

Digital photo frames have become more interesting and more affordable in the past few years. They offer larger screens with higher resolution in many instances, allowing you to enjoy your photos in their most vibrant splendor. These modern frames are capable of storing more images and can be set up to display slideshows so that you can enjoy more of your photos.

In addition, some frames offer filters for special effects, the ability to add music for a full presentation, and remote controls for convenience. Digital photo frames really are the best way to capitalize on the digital nature of your photos. Because fading won’t occur with the digital file and those images will always be at their best, this is one of the smart things to do with pictures.

Portable Digital Devices That Let You Enjoy Your Pictures Everywhere

A digital camera gives you that potential connection with the other modern devices you may own. Clearly, uploading those photos to a media player or other portable device allows you to take those images with you to share with others or to enjoy while you’re out and about.

On the other hand, some of the traditional ways of enjoying printed images aren’t lost just because you’ve gone digital. In fact many of these just got better because you can tote along more images with less bulk when your photos are in the digital format. For instance, an old picture wallet could hold a handful of 2×3 photos before it became an unwanted bulk. A digital photo wallet on the other hand allows you store many times more pictures and it’s size doesn’t change. Aside from true wallets, there are also wallet sized digital photo albums that are easy to take along; they’re definitely a much lighter load than a traditional photo album which is three or four times the size.

Another item to keep your pictures close at hand is a digital photo keychain. These are affordable little devices and they don’t require much technical knowledge to use. They do best in displaying up close, portrait type shots due to the small screen size but they’re definitely a fun little gadget.

Editing: Making Those Photos Look The Way You Want

Many of us don’t go out and buy the more sophisticated editing tools that are available but instead use whatever came with our camera. However, editing is among the best things to do with pictures if you want to enjoy them.

There are some sites out there than can help you do things with pictures that are a bit fun. Picnik is one of those sites. It allows you to do some editing, which includes adding interesting borders, effects, shapes, and fonts to spice up your images. Of course, one of the best things is that you don’t have to download anything to your computer or take a course to understand it.

Of course there are other online photo editing tools such as FotoFlexer and SplashUp.

Another possibility is to study up a bit and consider some photo editing software to really get the most from your pictures.

Peacock Pictures Including the White Peacock

Peacock Pictures Including the White Peacock

Peacock Pictures, Facts and Gifts

Peacock Pictures and some interesting facts are included here. I took these pictures with my 8 year old grand daughter during a morning hike. The White Peacock is one I hadn’t seen before, and we were lucky to see many magnificent male peacocks fanning their feathers while doing the mating dance.

Peacocks are sacred birds in many parts of the world, as well as the National bird of India. The peacock that most of us know for it’s beautiful coloring of the eye feathers is called the India Blue. This is just one of several kinds of peacocks, and the exact opposite is the all white peacock.

The images here will show both male and female peacocks, as well as answer a few basic questions about Peacocks including why the male peacock is the pretty one. Besides the Peacock Images, there are links to other photos I have taken of nature.

Male India Blue Peacock

Peacock Feather Facts

The Male India Blue Peacock’s feathers are close to 5-6 feet in length when they are mature.The juvenile male is almost as drab looking as the female, as the tail feathers haven’t fully grown in yet. It takes about 3 years for a peacock to mature.

Peacocks have several kinds of feathers besides the eye feathers. There are 3 main sets of feathers:

1. Eye Feathers– these are the ones that are on the tail (train)

2. Wing Feathers– the striped or molted ones on the side

3. Sword Feathers– they are part of the tail, the tall wispy ones

Besides these are the beautiful feathers on the neck area, and the top feathers on their head. But mostly it is the eye feathers of the peacock that people collect. They use them for crafts like masks, earrings, and many other things. Peacocks lose their feathers once a year.

Watching several males from young juveniles to the older males they really reminded me of junior high and high school aged boys…trying to outdo each other for the benefit of a group of girls that acted like they could care less. In some of the peacock photos here you will see a few female peacocks not paying much attention and the male peacock just strutting his stuff.

The male peacock will strut around in full display,fanning his beautiful display of tail feathers, but if there are no females he will strut for the other males, it really is both beautiful and laughable.

What Do Peacocks Eat?

Wild or Domesticated Peacocks, what do they eat?
Peacock images taken by Kathy McGraw

Peacocks are part of the pheasant and turkey families and are used to foraging for their food.

Peacocks eat just about anything that is small and crawls from the insect world like ants, ticks, bugs, worms, termites, scorpions and mice. They also eat flowers, plants, grains, and berries. Peacocks have also been know to like cat food (dry) and chicken feed.
White Peacocks
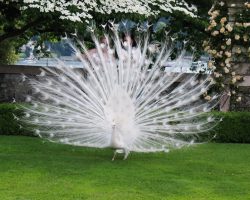
All White Peacocks
White Peacock Picture by Kathy McGraw

White Peacocks have the same feathers as their counterparts except they’re just white.

Many people think the white peacock is an albino, but it’s not. Albinos have pink skin and eyes, but the white peacock has blue eyes. It is also believed they are rare, but again this isn’t true. There are probably more in captivity than in the wild, but they aren’t rare. Also some people believe that the white peacock is magical. This one, I can’t prove or disprove as everyone has their own beliefs as to spirituality and faith.

After following several peacocks around the ranch, we noticed a white peacock in the distance in one of the cages that was fanning his tail feathers, so we rushed over to see it. We were barely able to get this picture before he stopped fanning, and put his feathers down.

White Peacock Feathers

White Peacock Dry Erase Board
The White Peacock is beautiful if you’ve never seen one. No, it doesn’t have the coloring of the India Blue, but just appreciating the difference, and the conversation of “Have you ever seen a white peacock” makes this a great gift.

Peacock Fanning his Trail of Feathers During Mating Season

Male Peacock Fanning his Tail Feathers
Peacock Picture by Kathy McGraw

Why is the Male Peacock the Pretty One?

Male Peacocks have beautiful coloring while females are drab
Female Penhens blend in Image by Soleil

In the animal kingdom most males are the colorful ones, or the ones that have something extra like big antlers on bucks, and huge manes on lions. Why is this? And why do the male peacocks have the beautiful tail feathers while the females do not?

The most important reason the male peacock is prettier is for survival of the species. Males strut their stuff and show off with strength or wit, but it is the female who does the choosing. If a female is interested in selecting him she will let him know and then they mate.

The drab coloring on the female peacock helps her blend in with her surroundings while she is protecting her eggs which usually take about 28 days to hatch. Peacocks have to avoid their natural predators and the male can fly into a tree as he doesn’t have to worry about the eggs or chicks, while the female does.

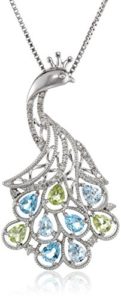
Peacock Jewelry

Beautiful Jewelry With Peacock Themes
Peacock Necklace This genuine 925 Sterling Silver Peacock necklace, with gemstones and box chain, is just one of several peacock themed jewelry items that show off the majestic image of the peacock. Peacock feathers are what give these jewelry pieces their colorful charm.

More Photos by Kathy McGraw

and her grandchildren
I love taking photos and am still trying to figure out how to do them digitally. Most of my cameras are film, with all the lenses and filters. My grandkids also love taking photos and I am so amazed at the eye that a couple of them have. The peacock images were all taken during a morning photo shoot where the youngest and I went out at 5am to get pictures of the sunrise. We did get some amazing shots, and had a wonderful morning. Many of the photos in all of my writings have some of the best memories. And to me, that makes a great photo 😉

I hope you enjoyed learning a bit more about Peacocks

Leave your comments here
My Grand daughter and I had a wonderful time taking these peacock pictures. She is 8 years old, and both of us spent a beautiful morning taking photos in the desert, and these peacocks were just one of the subjects we found that morning. You will notice the lighting…early morning shadows, but that’s as good as it gets when you are visiting somewhere.

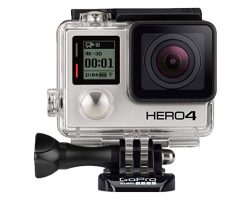
GoPro HERO4 BLACK Review : Make You Pro in An Instant

GoPro HERO4 BLACK Review : Make You Pro in An Instant

GoPro HERO4 BLACK is the new series of GoPro, that, as it names suggest, is a wrist camera that promise of making you a pro filmmaker in an instant. With GoPro it is easier to take picture and create video while doing activities.

GoPro Hero4 features a lens that can capture 4K quality picture. Unlike the previous model that seems to be an action cameras only, this is a flagship camera that promises of a high end camera with professional result worth for footage. GoPro Hero4 includes 12 megapixel camera, and 4K maximum recording resolution in 30 fps and in built microphone. The 1/2.3in CMOS sensor is better than the previous version and can capture picture in quick time.

Why You Should Choose This Product

GoPro HERO4 BLACK is excellent action camera to capture footage. It can be used to capture picture and footage that is not reachable with conventional camera. From sport event to wildlife footage, GoPro works the same as professional camera up to 4K quality. This is an incredible capability since its size is no bigger than matchbox. The in built microphone makes sure the audio is also captured well. The USB port let it be connected to bigger device and is built with editing software.  It is build with wide angle lens, making sure the footage taken is not limited by the space and the position where the camera is placed.

One thing that makes it a little bit difficult, especially for non pro user is it doesn’t include LCD and doesn’t have im built control unless it is connected to other device like smartphone, laptop, or smart watch. GoPro HERO4 BLACK has three versions and so far the Black one is more expensive than the Silver one but actually they don’t differ much. Buying the Silver one may more economical and this is probably not a good move from GoPro who named this device black. Even though it promises of an excellent work of capturing footage, the battery sadly doesn’t always support this. The battery life doesn’t last long.

Where You Can Buy GoPro HERO4?

GoPro is the pioneer of action camera and it is been improving its quality and change of market. This GoPro HERO4 BLACK is a flagship that is intended to live up to this higher improvement. And it does do a good job. The lack of screen may be a little bit hindering but it is all still tolerable, giving its tiny size. Get this GoPro for $404.06 for the Black version by clicking here.