Wacom Bamboo Tablets: Differences and Reviews

Wacom Bamboo Tablets: Differences and Reviews

An Overview of the Different Types of Wacom Bamboo Series of Drawing Tablets

If you’ve never tried a drawing tablet before, but you’re looking to get into the world of graphic art, getting one of the Bamboo drawing tablets made by Wacom is an excellent place to start, because they are extremely functional and easy to use. However, if you’ve been looking around the market at all, you may have noticed that there are a few different types of Bamboo pen tablets out there, and it’s not necessarily that easy to tell the differences between them all unless you really devote some time and energy to research.

I’m here to lay it all out for you, giving you the specifics you need in order to decide which Bamboo drawing tablet is the right one to buy. Whether you’re looking for yourself or as a gift for a loved one, I aim to provide you with enough accurate and detailed information in order to make an informed decision that you’ll never regret. (Hint: you may also want to check out all of The Best Drawing Tablets.)

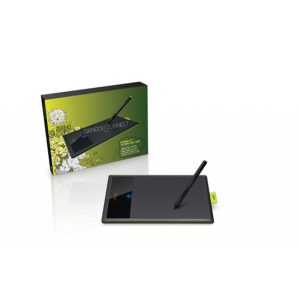
The Bamboo Connect Tablet

Wacom Bamboo Connect Pen Tablet (CTL470)

Key Features
– Size: Small
– Pen Eraser: No
– Multi-Touch: Not compatible
– Wireless Option: Not compatible

Free Bundled Software
Autodesk SketchBook Express

Review of the Bamboo Connect

The simplest and most lightweight Bamboo model in terms of size and functionality, this is excellent for either a beginner artist or someone who needs the ability to write by hand or annotate documents. It’s not great, however, for those who are looking to practice graphic art as a serious hobby or profession. If you’re looking to get your creative child something cool for a holiday or special occasion, this would make a great gift, but be aware that they may soon grow beyond the capabilities of this tablet.

The Bamboo Connect was designed with the professional communicator in mind rather than the professional artist. It is perfect for people who are frequently in meetings online and needs to draw something to the screen. It’s also the perfect tool for making notes in documents, signing signatures, writing annotations, and other activities that require hand-written text.

From an artist’s perspective, it’s quite lacking. There are no extra buttons or shortcut keys in order to quickly move through in-program menus or change tools, and it doesn’t support easy zooming or scrolling control due to the lack of multi-touch. I would however, recommend this to anyone who travels and uses a laptop a lot. Because of its small size and weight, it’s very portable, and it is great for getting out a quick sketch or doodle when inspiration hits.

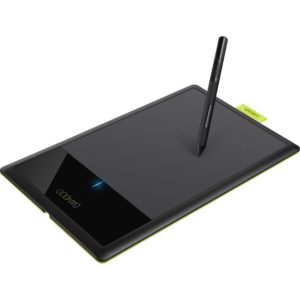
The Bamboo Splash Tablet

Bamboo Splash Summary and Review

Key Features
– Size: Small
– Pen Eraser: No
– Multi-Touch: Not compatible
– Wireless Option: Not compatible

Free Bundled Software
Autodesk SketchBook Express; ArtRage 3 Studio

Review of the Bamboo Splash

I like to think of the Splash as the older brother of the Connect. It can do all the same things and little more. It’s designed to be more of a step in the artistic direction, but the only notable difference is that it includes a copy of ArtRage. Don’t get me wrong, that’s a great deal, and it’s really good for anyone still working on building their skills as an artist. This extra feature may not seem like much, but it allows you to view the tablet in a new light. It teaches the user the basics of art programs (they all can do pretty much the same basic things), and any child who’s given a drawing tablet without an environment to use it in that’s geared towards art will probably be inclined to treat it as a toy instead of the sophisticated tool that it really is.

The size and weight make this just as portable, but it also allows it to be durable. If it gets dropped, thrown, bumped, or anything else, unless it’s been attacked with heavy machinery or dropped from a couple of stories high, there isn’t anything heavy or bulky about it to cause it (or anything else) any damage. This also makes the Splash quite easy to store away when it’s not in use.

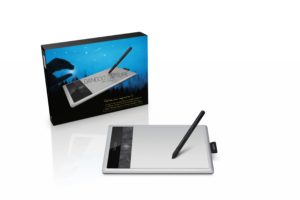
The Bamboo Capture Tablet

Bamboo Capture Summary and Review

Key Features
– Size: Small
– Pen Eraser: No
– Multi-Touch: Compatible
– Wireless Option: Compatible

Free Bundled Software
Adobe Photoshop Elements; Nik Color Efex Pro Filters (Wacom Edition); Autodesk SketchBook Express

Review of the Bamboo Capture

As far as an artist is concerned with the Bamboo line of Wacom tablets, this is where it starts to get interesting. Of course, you can do all the same stuff that you could with the other models (annotating documents, signing papers, etc.), but this is the model where Wacom started to design things specifically for artists.

If you take a look at the software that’s included with this tablet, you’ll notice that there are two new programs: PS Elements, and Nik Color Efex. These programs are specifically designed for more serious photographers who want to spice up their pictures with effects, filters, cleaning tools, and more. As you probably know, Adobe is the industry leader in the field of creative software, boasting a track record that includes Flash CS, Photoshop, Illustrator, inDesign, and a ton more.

If you want to get into photography, image editing, vector art, and other popular design media, this is a great tablet to use to get started. Though, it’s not the perfect fit for you if you’re into digital art that looks more realistic such as painting, drawing, watercolors, and rubber-stamping. And it’s a bit overkill if you’re just looking to get your feet wet and not quite a serious artist yet.

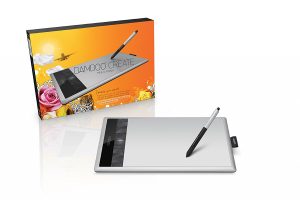
The Bamboo Create Tablet

Bamboo Create Summary and Review


Key Features
– Size: Medium
– Pen Eraser: Yes
– Multi-Touch: Yes
– Wireless Option: Yes

Free Bundled Software
Adobe Photoshop Elements; Corel Painter Essentials; Nik Color Efex Pro (Wacom Edition)

Review of the Bamboo Create
This right here is the mother of all Wacom Bamboo Drawing Tablets. With an active work area of 8.5″ x 5.4″ it has the largest amount of work space you can get. This is definitely something for serious artists to consider, because it scales the best to whatever screen size you’re looking at, and it allows you to use full motions with your drawing.

While it still includes PS Elements and Nik for photography work and image editing, you’ll notice that it also comes with a copy of Corel Painter Essentials, which is an absolutely excellent program for any artist to work in if you’re more interested in classical media. Realistic oil, watercolor, pencil, marker, and other tools allow you to make full use of this tablet when you’re working to create your best works of art.

If you’re familiar with other Wacom tablets, you’ll probably already know about the Intuos series. What you should know is that this models of Bamboo is only a small step below an Intuos in that the only real differences are the potential in size (this only goes up to medium size, when an Intuos can go up to large), and in the shortcut keys. The Create only has a couple of buttons, but if you’re not yet a professional graphic designer or artist (and by that I mean making steady money off your artwork), then this is a fine investment for you to begin with. It will increase your productivity and allow for a vast improvement in the quality of your work, depending on your skill of course šŸ˜‰

Best Drawing Tools

Best Drawing Tools

Only the Best Materials Needed for Drawing

This is a list of my best drawing tools. This collection is by no means the Cadillac of art supplies, but in the mid to high range price point. While I don’t have the money for the super expensive stuff, I don’t like to compromise on quality.

I’ve drawn most of my life and have been perfecting my craft for years. As time goes on and I try new stuff I may tweak the list a bit.

I also believe that most of these drawing supplies are great for beginners. My reasons, there’s no use in handicapping yourself with crumby equipment. Thankfully, drawing isn’t like oil paints in that even the best doesn’t cost a fortune. Aside from that, experimenting with a variety of supplies always gets the creative juices flowing.

The Best Pencil For Sketching And Travel

Derwent’s Onyx pencils

The best sketching pencil so far, thatā€™s not

even the best as pencils go, is the Derwent onyx pencil.

Itā€™s remarkably strong, and itā€™s capable of some pretty black shades. No, not as good as carbon or charcoal because it is still graphite that will get shinny if you overdo it.

Iā€™ve used it in serious finished work, like this here Anubis puppy, and I thought it was an ok serious pencil, but I havenā€™t made up my mind yet. Itā€™s kind of an odd ball, or ā€œblack sheepā€ of my pencils.

One thing I want to note, I donā€™t think it would make a good pencil to learn how to draw with. Only reason is that it doesnā€™t give me that feeling a soft graphite does. I wouldnā€™t want someone to miss that experience because of my recommendation. Itā€™s just too hard of a lead that I think would make an absolute beginner frustrated.

Now, on the doggie drawing over on the right, a good many of pencils came into play to create this, including my woodles pencils, but I wanted to state where I used the onyx. The little scratching texture effect on the blanket. Those are the little wispy lines. There is also a great deal on his snout, and pretty much any of the blackest blacks that are in the work.

The Best Drawing Pencils

CreateAcolor Graphite Pencils

The pencils that stuck out the most for me were the CreateAcolorā€™s professional grade pencils. They just seemed a cut above Derwent, although Iā€™ve used derwent for years and itā€™s not a bad pencil.

They create beautiful, smooth lines, I donā€™t think Iā€™ve ever experienced any gritty spots.

I no longer need to buy the big tin, just single pencils to replace the ones Iā€™ve used up, but if you buy the big tin of 24 there is a schematic on the top of the lid, much like a box of whitmanā€™s chocolates. This has pictures of pencil marks to show you how dark that particular pencil grade gets. This is one of those things I wish I had when I decided to quit dabbling and really learn to draw.

Sadly I havenā€™t been able to find the 24 count tin in my travels in a good while. If you happen to find it, better hop on that sucker, or if you find that the 12 count tin has the awesome schematic, please let me know. šŸ™‚

The Best Drawing Paper

Portrait drawing on stonehenge paper, created by, Shannon FleetLet’s get down to the foundation of sketching and drawing. Paper is oftentimes more important than people think. Drawing can be done on just about any paper, or with any tool that makes marks, but good paper makes a huge difference, sometimes the difference between success and failure depending on which drawing media you’re using.

On the flip side, the best paper makes for a better creative experience. Your pencil will also respond differently to different paper, this will either be frustrating, or give you a wonderful feeling. For artists who work with colored pencils, they need a paper with enough tooth to build layers of color that doesn’t fill up too fast. On the other hand, artists who use charcoal or pastels need a paper that is super toothy or else the powder particles won’t hold.

The paper I speak of here is the stuff you want to create finished work on, I have and use several different varieties since I’m hopelessly addicted to art supplies, but here is both of my favorites.

This drawing was created using Stonehenge paper.

The Best Hand Held Pencil Sharpener

Pencil Sharpener Print by WallJewelry

Those pencils arenā€™t going to sharpen themselves! This particular issue has always been a problem with me. Iā€™ve tried everything in the past.

Iā€™ve always had romantic notions of the artists that use a knife to hone their pencil tips with care. This, Iā€™ve been told and read is the best way to sharpen your professional pencils. Iā€™ve never liked it.

For me the convenience of a regular, no frills pencil sharpener and a sand paper block was all I could deal with. I just want to get back to work!

Convenient, yes, but sadly most pencil sharpeners suck. They wear out super fast, and when they do wear out they chew rather than sharpen. This creates a ton of waste and frustration. Iā€™ve been known to rage when it snaps the tip off of my lead causing me to stop and grab a 9H pencil to dig it out.

Even worse they are deceptively cheap, so one doesnā€™t notice the added cost and waste of having to buy a new sharpener just because the blade has worn out. This cost adds up over time.

Of course, there are electric pencil sharpeners. I give you an unprofessional ā€œLOLā€ at this. You canā€™t take them with you.

The Best Artist’s Erasers

Some of My Erasers, Plus Some Improvisation

Pink Rubber Erasersby FallSeason

The eraser is also a great drawing tool thatā€™s often overlooked. I use it for the obvious, to fix mistakes, for pulling out graphite from the tooth to lighten the tonal value of an area, and finally I actually use it to draw with.

I like to use three types:

The Kneaded, well itā€™s not exactly a traditional kneaded, but Iā€™ll explain in a minute. Your trusted kneaded putty will do all sorts of stuff. Clean up, pull out graphite or charcoal, clean any smudges, create shapes. Itā€™s the one that I use the most.

The regular white plastic eraser. For all of those general tasks that the other erasers canā€™t do. Itā€™s ok to not have the best here, provided itā€™s not one of those pink erasers. You donā€™t want it to destroy, or otherwise flatten the tooth of your paper, or even worse, to rip it to shreds. But, the best does exist! Iā€™ll show you below.

The last, is my trusty clicker eraser. The one I like to use is the tuff stuff stick. I used to use the fatter clickers, but they were terrible to draw with, yet not big enough to erase large areas. Plus, with my old clicker if I bore too hard on it I would nip off the top! Took me a long time to find tuff stuff.

UHU’s White Or Blue Tac As An Eraser

Better than any kneaded eraser on the market
Let me explain my substitute for the kneaded eraser. I like to use white tac. It can be pretty hard to find and you have to get it from the UK. lol. Itā€™s the same as blue tac and you can use the blue too! Either one you can get your paws on.

It comes in a larger quantity than real thing, which also makes it cheaper. Itā€™s stronger, lasts longer, and picks up more graphite and charcoal. It makes me hate to have to use the old kneaded putties. This is why I crowned it the best.

About Best Drawing Tools

The drawings and sketches were created and copyrighted by Shannon Fleet. That would be me!

The other images relate to Zazzle and are copyrighted by the artists who created them. A link is provided to the Zazzle site if youā€™d like more information on their work.

How to Draw by Joy: Baby’s Portrait

How to Draw by Joy: Baby’s Portrait

Step by step baby portrait pencil drawing

I am presently working on drawing this little one at two years old in a illustrations for a children’s book I am creating. Two of the illustrations are included on this drawing tutorial below.

This is a free drawing tutorial by Joy. Pencil drawing is a skill, that to a degree, can be learned. Of course it helps if you have an eye for it, and a creative streak within you. However, the skill of drawing can be learned by anyone with the determination and discipline to practice.

Through drawing, I have improved my photography by learning to see the world around me differently. I have also learned to think “out of the box” and pay attention to the story being told with the drawings and the photos. This seemed to come once I did not have to focus on technique so much. After a while I have become comfortable knowing what to expect out of the pencils and other supplies used in drawing, and I do not have to put effort into trying to get them to do what I want them to do. Now, I seem to be able to focus more on the composition and seeing what I am drawing differently.

I hope you enjoy this tutorial. I have many others with various drawing subjects for you to explore when you are ready.

More Portrait Drawing by Joy

“I Am Fearfully and Wonderfully Made” portrait drawing (Aug. 13, 2012)

I am presently working on writing and illustrating a children’s book. Here is the progress on the first illustration. Just click on the photo to go to “I am my Father’s Child” Squidoo lens to see more illustrations the children’s book I am working on creating.

By the way, this little girl is the baby in the drawing. She is now 2 !/2 years old.

Finished….updated portrait of same child as in baby drawing. – August 14, 2012

Where to begin drawing your baby portrait…

Personally, I began by looking up portraits that I considered well drawn on the internet and took a look the artists who drew them, there styles, the materials they tend to use, and if they had a tutorial on their website, I read it. Some of these included: J D Hillberry, Lee Hammond, Remi Engles, and Diane Cardaci. After studying this for a few days, I gathered my supplies, and began.

Here is a list of supplies I used: graphite pencils (F, 2B, B, mechanical .7mm 2B, mechanical .5mm HB), charcoal pencil (soft, medium), a carbon pencil, tortillions (various sizes), a gummy eraser, a typewriter eraser, a scanner/printer, photopaper (to print the reference photos), strathmoore 300 Bristol (smooth) paper, a sheet of tracing paper to keep over the drawing in progress so that it does not smudge (I tend to need to protect my drawings as I travel and draw at the same time). Most of these products can be purchased at your local hobby store or amazon.com.

Essential Drawing and Sketching supplies:

Here are my favorite basic supplies for pen and ink, graphite, charcoal, and carbon pencil drawing and sketching.

Step 1:
Reference photos and grid

A good reference photo without any blurring is essential. Once obtained, scan it into your computer. Crop it to the portion of the photo that you will be drawing. Print it out in a size that you can easily see well. Next, determine the size of the portrait you will draw. A good size to start is 8″ by 8″ or 8″ by 10″. Once you have practiced a while, drawing larger portraits will not be such a challenge.

After the final portrait drawing size is determined, print out a black and white (grayscale) of the reference photo at the same size you will be drawing.

On the black and white reference photo, draw a 1″ by 1″ grid directly on the reference photo. And, then draw the same grid very lightly with the F graphite pencil on the bristol paper.

From here, begin drawing just the outline of the reference photo, square by square onto the grid. Occasional step back and look at the line drawing as a whole, but for the most part you will draw what you see one square at a time. Draw in only an outline of the reference photo, and do not include detail. If there are major areas of shading or highlights, then dot them in lightly. Here is an example of what I did.

Step 2:


I am left-handed, so I usually begin in the upper right corner of the drawing. This is very important, because you do not want to smudge the drawing with your hands as your progress over the portrait. If you are right-hand, then choose the upper left side of the drawing to begin. I use the black and white reference photo under my hand to prevent smudging my line drawing.

I begin using my graphite pencils here and start shading using the tortillons of various sizes. To figure out where to shade, I pay close attention to the black and white reference photo. There are shading techniques that you can learn from tutorials of the above named artists on their websites or books they have written. If you pay very close attention to the details of the shading on the black and white reference photo, and play around with your totillions and pencils on a scratch paper as you go, you will develop your own technique of achieving the shading in the photo.

Step 3:
The hand and arm…

This proved to be the hardest part of the drawing for me. I had to learn not to draw lines to create the arm and hand. This one is not perfect, I still have work on developing my ability to draw this portion of the portrait. I did learn that I can kind of dot in the hand outline and use shading to bring it out. I closely followed the shading in the black and white reference photo (paying very close attention to each square of the grid, one square at a time). I drew mostly with the toritillions, not the pencil. I would just rub the end of the tortillion on the charcoal pencil and use it to shade according to the reference photo.
My Favorite Essential books for Drawing

In my opinion, anyone who loves drawing should have a copy of these books on their reference shelf. They are full of inspirational ideas and skills to enhance your own drawing performance.

Step 4:
hair and forehead

While I moved on to the hair and forehead, I went back to the blanket and arm and hand regularly, adding darkened areas with my charcoal pencil and carbon pencil. Be sure to do this sparingly, a little dark goes a long way :-).

I learned from the above listed artists that the hair must be built up in layers. So I used the F pencil to lay the foundation, making strokes that followed the hair in the reference photo, but also following the shape of the head. I alternated drawing with pencils, blending with tortillions, and drawing with my kneaded easer in hair-like strokes, until it appeared as close to the reference photo as I could get it. I shaded the forehead the same way as I did the hand and the arm, paying close attention to shading under the hairline, and highlights.

I then began to darken in the eyes, keeping in mind that to create a real eye, the eye is round inside the eyelids, and that the eyelids contain several layers to the edges with dots rather than just a solid line.

Step 5:
The nose and ear…

As I draw, I tend to go back a little at a time, fine tuning what I have already done and adding darks and lights to the drawing.

I continued down the face to the nose, paying particular attention to the fact that a nose is primarily shaded onto the face with very few hard lines. These hard lines are created by the shadows under the nose and around the nose rather than drawn in with the pencil. I primarily used a tortillion that I rubbed on the charcoal pencil as I went along.

I also began shading in the ear, paying very close attention to the dark shaded areas to create the lines rather than my drawing them in. I also added the hair over the fingers here, and began adding more detail to the hair and building the layers in it.

Triumphant – August 18, 2012

This one of her was so fun to draw. She has great facial expression. I also used a few new techniques to get the slide to come forward in the drawing.

Step 6:
Ear and Mouth

I am working my way down the face to the mouth now. I left out the bubbles from the reference photo on the mouth and began shading it in. Here I remembered from the artists listed above, that highlights are very important in creating a realistic mouth and also the deeper shading. I also paid close attention to the lines in the mouth begin careful to shade them in rather than draw them in.

The blanket was shaded in next in layers. The first layer was my 2B pencil, held like a wand and shaded in an up and down direction. Blended with a large tortillion, then shaded in with the same wand like method of holding the pencil, but this time in a side to side direction. Again, blended. Leaving the dots white and using a kneaded easer when the shading bled into it. I used the carbon pencil in spots to bring out the edges and shading in the edges. The charcoal pencils was used on the tortillion to shade in the darker folds of the blanket in the foreground.

Step 7:

In the final stage, I finished up the arm at the left bottom side, and went back to adjust the fingers a bit on the hand. I also went back with my carbon pencil and added a little dark here and there, and did the same thing with the typewriter eraser (very lightly) to add highlights here and there. The darks and the lights should be added sparingly. A little goes a long way. I will keep this drawing up on the easel with the reference photos for a while longer. This way as I see it from time to time, I can touch it up a bit here and there. When finished, I will spay with a fixative to keep it from smudging. Then have it framed and matted at a local store.

Don’t forget…

to have fun!!! Drawing a little bit everyday creates drastic improvements in your drawing. Draw what you enjoy. Post it on your own lens or FB and have fun with your drawing.

Joy Neasley — the Missionary and the Artist

I am a missionary and an artist. I was born in East Texas, but left at age 19. Eventually, I settled in Tennessee. Over the years, I have raised two children who now live in Tennessee. Missionary training began at RBTC in Oklahoma in September 2005, with graduation from the missions group after two years in May 2007. Then, after returning to my hometown, Clarksville, TN, I began preparations to head out to Northern China, which took place in May 2008.

Drawing is a new skill which started in Spring 2009. During a time of recuperating from an illness for several months, I found ample time to spend in prayer. Out of that prayer time, I began to draw and write cards for various people, in which, I was led to spend time in prayer. Before I was finished with these cards there were a little over 60 of them. They were very rough sketches, but none-the-less, what I was led to do. Through this process, I realized what He was doing, and I continued to draw and develop this skill, and still continue to grow and develop. These drawings are the result. As I travel through China for my primary purpose of ministry, I draw, creating a visual journal of what I see.

I really enjoy the drawing and the purposes for which God has placed this gift in my life. A whole new door has opened, and I am walking through that door, eagerly awaiting to see where the road beyond it leads.

In mid-May of 2009 I moved into Southern China. I love the people and the ministry work here. I still travel around China and work where needed in association with another ministry here, also. This year, to help share the people I meet with my friends and supporters back home I am working on The 110 Faces of China Drawing Project. I have six of these finished, and working hard to get more finished as time permits. I also have started a blog with regular updates about the people, myself, and the drawings. You can check out this and my blog,” What is it like to be a Missionary Today”, in the links on this Squidoo lens. I also have a Fine Arts America website (linked to this lens) where prints and cards of my drawings and photos are made available to everyone.

Thank you for your prayers and support!

Blessings,

joy neasley

P.S. – if you want to support this ministry, the fastest way is to make an Online Donation via www.WorldOutreach.org. Go to “Donate” and select Joy Neasley – Asia. The system can process USA and International cards. Or simply mail your gift to World Outreach Ministries, PO Box B, Marietta, GA 30061, and designate for Joy Neasley Fund.

Gift of God – July 28, 2012