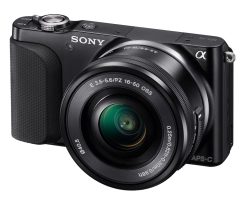
How to Choose a Camera: SLR vs DSLR

How to Choose a Camera: SLR vs DSLR

When choosing either a SLR or DSLR camera, it is important to know which one is better for the type of photographs you plan to take. This article will highlight which is best for certain endeavors. We’ll also show you some of the top rated cameras in each category.

Which is Better SLR or DSLR?

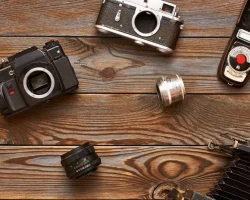
The SLR camera is called as such because it makes use of a mirror and prism, reflex pertaining to the reflection on the mirror (see some examples of an SLR camera here). The reflection allows the user to see the image about to be captured through the viewfinder before actually taking the photo. This is special and different compared to the viewfinder camera which shows a very different image in the frame as compared to what you can see through the viewfinder. When the user hits the shutter button, the mirror moves away and allows light to go past it and hit the film to capture the image.

The main difference between a traditional SLR camera and a DSLR or digital single lens reflex camera lies right in its name, the DSLR is digital and does not make use of film (see some examples of a DSLR camera here). And because it has no film, instead of the mirror moving away for the light to hit the film, the light would, instead, go to the CCD or CMOS imaging sensor. Each camera has its pros and cons and they cater to certain kinds of photographers.

When to buy a SLR Camera

SLR Camera Review Getting a traditional SLR is advised for the more advanced photographer just because your number of shots is limited to how much film you have. The SLR user does not have the luxury of having a nearly unlimited number of frames that the DSLR user enjoys. Some people really do prefer having an SLR over a DSLR because of the quality and texture of film prints.

SLR Camera Reviews

There are very subtle differences between a film and digital print that are visible to the trained eye. One print isn’t better than the other, so to speak. It’s really more a preference. It should be noted that while getting an SLR is cheaper than a DSLR, in the long run, you could save more money with a DSLR because you won’t have to keep buying film. And the ISO, or level of exposure, depends on what kind of film you can buy. You can’t change it until you change film rolls.

SLR Cameras Under $1000, $500 and $250 Dollars

When to buy a DSLR Camera

DSLR Camera Review DSLRs tend to be more expensive but it is highly advisable for beginners to try out an entry level DSLR for a multitude of reasons. First of all, since everything is digital, you don’t have to count how many frames you’ve used because everything goes into a memory card and they can hold and store a large number of photos. And you can just transfer your photos to your computer when you’ve filled up your card and you can start shooting again.

DSLR Camera Reviews

Another great advantage of the DSLR for beginners is the fact that you can see your photo right away. You don’t need to process it before you can check it out and judge it for yourself. There’s more flexibility with digital photographs too. For one, you can change the ISO on the camera itself.

Canon EOS Rebel 18MP T3i DSLR Camera

**Top Choice**
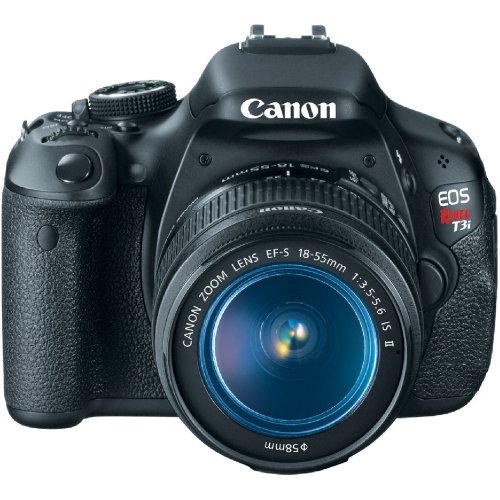
DSLR Cameras Under $1000, $500 and $250 Dollars

SLR vs DSLR Summary

It should be noted that film and film cameras are slowly being phased out. That shouldn’t discourage you from getting a film camera because there’s more to learn with SLRs. To capture a beautiful picture using a film camera, you need a certain level of understanding and knowledge of light, exposure, and film. Using an SLR will allow you to gain more experience, knowledge, and appreciation for photos. But it is more practical to get a DSLR. One isn’t really better than the other in this situation. Deciding which one to buy really depends on your personal preference.

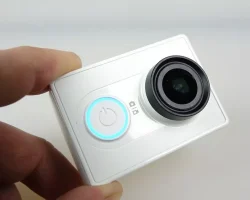
How To Get Creative With The Xiaomi Yi Action Camera App

How To Get Creative With The Xiaomi Yi Action Camera App

If you’re a fan of the Xiaomi Yi Action Camera, then you’re probably already aware of the great Xiaomi Yi Action Camera App. This app allows you to control your camera remotely, as well as download and edit your photos and videos.

But did you know that there are some great creative ways to use the app? Here are some of our favourites:

Create a Time Lapse Video

One of the great features of the Xiaomi Yi Action Camera App is the time lapse function. This allows you to set your camera to take a photo every few seconds, minutes or hours, and then automatically stitches them together into a video.

This is a great way to create an interesting video of something that would normally be quite boring, such as a sunset or a cityscape.

Use the App as a Remote Shutter

If you want to take a photo of yourself without having to press the shutter button on the camera, you can use the app as a remote shutter. Simply set up your camera on a tripod or stable surface, and then use the app to trigger the shutter remotely.

This is also a great way to take group photos, as you can be in the photo yourself without having to worry about someone else taking the photo for you.

Take Long Exposure Photos

Another great feature of the Xiaomi Yi Action Camera App is the long exposure setting. This allows you to take photos with a shutter speed of up to 30 seconds, which is great for taking photos of stars or light trails.

To use this setting, simply set your camera to manual mode, and then select the long exposure setting in the app.

Use the App as a Dash Cam

If you’re going on a long road trip, you can use the Xiaomi Yi Action Camera App as a dash cam. Simply mount your camera to your windshield, and then set it to record continuously.

If you have an accident, or witness something interesting on your journey, you’ll have it all captured on video.

Take Photos of Wildlife

If you’re a keen photographer, you can use the Xiaomi Yi Action Camera App to take some great photos of wildlife. Simply set up your camera near a bird feeder or in your garden, and then use the app to trigger the shutter remotely.

You can also use the long exposure setting to take some great night-time photos of wildlife.

So there you have it, five great creative ways to use the Xiaomi Yi Action Camera App. We’re sure you’ll think of many more once you start using the app yourself.

10 Tips For Shooting Better On Film

10 Tips For Shooting Better On Film

1. Get to know your camera

Before you start shooting on film, it’s important to get to know your camera. Read the manual and familiarize yourself with the different features and settings. This will help you get the most out of your camera and avoid any potential problems.

2. Use a tripod

Using a tripod will help you avoid camera shake and ensure that your photos are sharp and blur-free. It’s especially important to use a tripod when shooting in low light conditions or when using a long focal length lens.

3. Use a remote shutter release

A remote shutter release allows you to take photos without touching the camera, which can help prevent camera shake. If your camera doesn’t have a remote shutter release, you can use the self-timer setting.

4. Use a low ISO

Using a low ISO will help you avoid image noise and produce sharper, higher-quality photos. It’s especially important to use a low ISO when shooting in low light conditions.

5. Use a fast shutter speed

Using a fast shutter speed will help you freeze action and avoid blur. It’s especially important to use a fast shutter speed when shooting sports or other fast-moving subjects.

6. Use a narrow aperture

Using a narrow aperture (higher f-stop number) will help you achieve a greater depth of field, which means that more of your photo will be in focus. This is useful for landscape photos or photos with multiple subjects.

7. Use exposure compensation

If you’re shooting in manual mode, exposure compensation can be used to make your photos lighter or darker. This is useful if the scene you’re photographing is very bright or very dark.

8. Shoot in RAW

Shooting in RAW will give you the most flexibility when editing your photos. RAW files contain all of the data captured by the camera’s sensor, which gives you more information to work with when editing.

9. Use a filter

Using a filter can help you achieve a specific effect or look in your photos. Common filters include polarizing filters, which reduce glare and increase contrast, and ND filters, which reduce the amount of light entering the lens.

10. Experiment

Don’t be afraid to experiment with different settings and techniques. This is the best way to learn and find what works best for you.

Hopefully these tips will help you shoot better on film. If you have any questions, feel free to leave a comment below.

How To Use Your Arlo Pro 2 Camera

How To Use Your Arlo Pro 2 Camera

Arlo Pro 2 is a versatile camera that can be used for a variety of purposes.

Here are some tips on how to use your Arlo Pro 2 Camera to take better pictures:

1. Use the right settings.

There are a few different settings that you can use on your Arlo Pro 2 Camera to take better pictures. If you’re taking pictures of a person or object that is in motion, you’ll want to use the “Action” setting. This setting will help to freeze the action and prevent blurring. If you’re taking pictures of a still object, you can use the “Still” setting. This setting will help to capture all the details of the object.

2. Use the right lens.

The Arlo Pro 2 Camera comes with two different lenses: a wide-angle lens and a telephoto lens. The wide-angle lens is great for taking pictures of large groups of people or objects. The telephoto lens is great for taking pictures of distant objects.

3. Use the right lighting.

The Arlo Pro 2 Camera has a built-in flash that can be used to take pictures in low-light conditions. However, if you’re taking pictures in bright sunlight, you’ll want to use the “Sun” setting. This setting will help to reduce the amount of glare in your pictures.

4. Use the right composition.

When you’re taking a picture, you’ll want to make sure that the subject is in the center of the frame. This will help to ensure that the subject is the focal point of the picture. You’ll also want to make sure that there is some space around the subject. This will help to create a more pleasing composition.

5. Use the right editing tools.

After you’ve taken a picture, you can use the editing tools on the Arlo Pro 2 Camera to make some final adjustments. These tools can be used to crop the picture, adjust the exposure, and even add some special effects.

By following these tips, you can use your Arlo Pro 2 Camera to take better pictures.

GE DV1 Camcorder Review

GE DV1 Camcorder Review

GE DV1 at a Glance

The Good: Low cost, durable, easy to use.

The Bad: So-so video quality.

Video Quality

The GE DV1 records 1080p HD video in the H.264 format via a 5-megapixel CMOS image sensor. Indoors, footage off the DV1 can get noisy but nothing out of the ordinary for a low cost pocket camcorder. There is some noticeable over-exposure, particularly in sunlight, but the colors reproduced crisply. All in all, the video is serviceable, but you shouldn’t expect it to compare with the more expensive Full HD camcorders on the market.

The DV1 offers several quality settings, from 1080p/30 frames per second (fps) to a useful 720p option at 60fps for filming faster action. You can also drop recording quality to 1440 x 1080 and 640 x 480, but there’s no practical reason to do so.

The DV1 also snaps 5-megapixel still photos. If you’re dealing with plenty of ambient light and a still subject, the photos are decent. Otherwise, it’s best to stick to video, as the images will blur. Fairly uniquely among pocket camcorders, the DV1 can also snap 2-megapixel photos while recording. These images are hit-and-miss and you can only take up to six, but the feature itself is nice to have.

Optics

The DV1 packs a 4x digital zoom lens with digital image stabilization. As with all digital zooms on pocket models, this one just ramps up the digital noise so it doesn’t add much.

Design

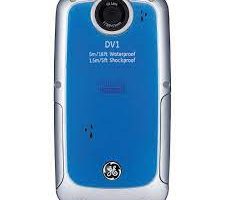
The big selling point with the DV1 is obviously the rugged and waterproof body design. As mentioned above, the DV1 can be submerged in up to 15 feet of water (that’s deeper than Kodak’s Playsport Zx3) but more than that, it can be dropped from a height of 5 feet and it’s sealed against dust.

This makes it one of the more rugged camcorders on the market. If you’re big into outdoor activities, it’s a good choice.

Obviously, a rugged camcorder will impose some trade-offs on the design. To wit: the DV1 is a bit bulkier and heavier than other pocket cams on the market – but not obtrusively so. It can still be slipped into a pocket or purse quite easily. The memory card port, flip-out USB plug and other connectors are housed securely behind latched doors to keep the elements out. But they open easily. While many pocket camcorders have jumped on the touch-screen bandwagon, the DV1 has nice, large tactile buttons for recording, playback, snapping stills, entering the menu and deleting photos. They can all be pressed easily while wearing gloves. The only exception is the power button, which sits rather flush with the side of the camcorder and might present a problem for a gloved hand.

Feature Set

The GE DV1 offers a pretty bare bones feature set, which isn’t surprising given its low cost. You’ll find settings for adjusting white balance (including an underwater mode), a high dynamic range mode for stills and video recording, exposure metering (stills and video), and a continuous shooting mode for photographs at 7fps.

Menu & Display

You’ll access what features the DV1 has through a bright 2-inch display (you can also adjust the brightness manually in the settings). The menu layout is straightforward and easy to navigate, though when you enter it, you’ll start with the still photo features, not the video, which is a bit odd.

While filming, the DV1 uses just the top portion of the display. The bottom is filled with a menu displaying your current settings – such as whether you’re in HDR mode and your resolution. It can also display a histogram while recording, which is pretty rare to see at this price.

Memory

The DV1 records to SDHC cards and comes with no built-in memory. So you’ll need to factor in the cost of a card to the DV1’s bottom line (unless you already have one).

Bottom Line

When it comes to camcorders that can be tossed into the water or survive a fall onto the concrete without shattering, your choices are pretty limited so the DV1 doesn’t have many direct competitors to compare it to. That said, it’s more rugged and can be dunked deeper than Kodak’s PlaySport Zx3 (cheaper too), but doesn’t offer Kodak’s video quality or feature set. So if you need a bare-bones camcorder for a trip to the beach or an outdoor adventure, the DV1 is a good option. At $129, it’s attractively priced to be a good companion video camera to those who don’t want to risk a higher-end model during their death-defying white water rafting trips.

Samsung HMX-Q10 Camcorder Review

Samsung HMX-Q10 Camcorder Review

The Samsung HMX-Q10 is a high definition camcorder that captures 1920 x 1080 video in the H.264 to SDHC memory cards. It offers a 2.7-inch LCD display, 10x optical zoom lens with optical image stabilization and a unique grip which lets you flip the camcorder to film with both the right and left hands.

The Samsung Q10 retails for $299. Full specifications can be found here.

Samsung Q10 at a Glance

The Good: Strong video quality, responsive touch-screen, nice design

The Bad: Awkward zoom lever, no automatic lens cover

Samsung HMX Q10 Video Quality

Samsung’s HMX Q10 records 1920 x 1080 video in the H.264 format. It’s also capable of recording at 720/60 frames per second for capturing fast-moving subjects and at VGA resolution.

Given its lower price tag, the Q10 is competing more with pocket camcorders and it clearly exceeds them in the quality department. While there were instances of over-exposure, with bright sunlight washing out highlights, the Q10 captured mostly crisp, color-accurate video. It did well indoors as well. I took it into a dimly lit aquarium and after a second or two of blur as it sought to establish focus, the Q10 was able to resolve the scene quite well considering the challenging environment.

You can also snap 4.9-megapixel still photos with the Q10, although you should steer clear of taking stills with the Q10 as the results were unimpressive.

Optics

The Q10 packs a 10x optical zoom lens with optical image stabilization – a nice plus not usually found on lower-cost camcorders. There’s also a digital zoom, which, fortunately, can be deactivated. All-in-all, a nice optical package. The only draw back is that there’s no automatic lens cover. However, there is a built-in cover that flips open and closed using a switch on top of the lens barrel – that’s a far better option than a lens cap, but not as good as an automatic cover.

Samsung HMX Q10 Design

The design of the Q10 is pretty spartan, with few external controls outside of a zoom lever/shutter button on the back of the camcorder. Flip open the 2.7-inch display and you’ll see only a home button, which brings you into the camcorder’s internal memory.

With the Q10, Samsung introduced a design innovation called the “Swithgrip” – which essentially lets you film using either your right or left hand. When you switch from right to left, the menu items on the display will automatically orient themselves correctly. Since there are no external controls on the top of the camcorder to operate, the transition from right-handed to left-handed filming is seamless. Left-handed users, rejoice!

Thanks to the use of flash memory, the Q10 is quite light and compact, weighing in at .4lbs and sized at 4.7 x 2.1 x 1.7 inches. It certainly won’t be a drag to carry the Q10 around with you on long trips. Aesthetically it won’t turn many heads but is available in your choice of black and blue. The only real knock on the design is that wrist strap, which is kind of flimsy.

Q10 Features

You’ll find a nice selection of shooting options on the Q10, despite its budget price tag. You’ll have time lapse recording and a selection of digital effects to apply various filters to your video including black and white, sepia, negative, art, noir, western, dazzle, and ghost. You can switch between automatic and manual recording, where you’ll have the ability to focus manually, set white balance, adjust exposure, night mode, and backlit compensation. All in all a very strong feature set for a camcorder at this price.

The Q10 is loaded with Samsung’s Intelli-Studio software, which installs automatically whenever you connect the camcorder to a computer via USB.

Menu and Display

The Q10 offers a 2.7-inch touch screen LCD display. It’s quite responsive and it’s helped along with an icon-driven menu interface. Pop open the display and you’ll see a row of icons indicating your scene mode and then controls for switching between still and video capture, zoom and playback. It’s always better to have more real-estate on a display when working with a touch-screen, but Samsung keeps the number of icons on the display to a minimum so it’s easy to hit the ones you need with your finger. At any point you can hit the “home” key on the exterior of the display and get back into the main menu.

Samsung HMX-Q10 Memory

The Q10 records directly to SDHC memory cards, so you’ll need to factor in the cost of a memory card into your equation. The Q10 cannot record to newer, higher-capacity SDXC cards so you’re memory capacity is limited to 32GB (or eight hours of HD recording).

Bottom Line

If you’re in the market for a low-cost HD camcorder but are leery about the quality and limited feature-set of a pocket camcorder, the HMX-Q10 is definitely a solid choice. It’s slightly more expensive than most pocket models on the market at $300, but delivers a better zoom, better video quality and a more robust feature set. It’s unique “SwitchGrip” design gives both left and right-handed users the ability to hold the Q10 naturally and comfortably. All-in-all a good choice in the budget-end of the HD camcorder market.

The Night Song – My Tips for Doing Budget Photo Shoot

The Night Song – My Tips for Doing Budget Photo Shoot

The Night Song

Have you ever wanted to create good, artistic photos but you only have limited amount of money? In this article, I would like to share my experience of doing a photo shoot with two models with very limited budget, in a very normal location with lighting from house lamps, and taken with cheapest entry level DSLR. This photo shoot was also my first experience working with models and DSLR camera. Could you imagine how limited was my knowledge about photography during this photo shoot?

I would like to emphasize that the most important thing in photography is not your gears. It’s your passion and creativity, and those two are the best weapon to create great photos. I am also looking forward to your comments and feedback so I could improve my works in the future.

The Concept

The story behind the scene
The Night Song

I bought my first DSLR camera in January 2012. My initial purpose for buying that kind of sophisticated camera was to make documentary of my final Bachelor of Arts research. Just a week after getting my DSLR, I accidentally found a very interesting video about photography on Youtube, from DigitalRevTV. The man in the video seems enjoying himself very much, taking photos of beautiful model with very cheap camera. Suddenly I felt that I wanted to create some photography works too.

The first thing came to my mind was about finding the models. As I was an amateur and didn’t have enough experience of handling DSLR camera, I decided to ask for help from my friends to be the model for my photography project. So, I contacted Nooreen and Varsha, two of my beautiful friends from Mauritius and offered this opportunity. Luckily, they agreed.

I wanted to talk a little bit about the model. Nooreen and Varsha are two students from Mauritius, a very beautiful small island in southern part of Africa. Mauritius used to be a colony of British and France. When the British ruled India, they sent some local Indian workers to work in Mauritius. At that time, there was no people on this island. Only jungles and animals. So, those Indian workers were the first colony in Mauritius, and they live, create a family, and until now inhibit this beautiful island.

After some years, British Empire decided to give Mauritius to France. Thus, under France regime, those Mauritian workers have to speak in France. The habit of speaking France has become a culture, even after their independence. Today, France is the national language of Mauritius.

I find that Mauritian people such as Nooreen and Varsha are the luckiest people in the world. They have beautiful, exotic face from their Indian ancestors. They speak Franch, the most beautiful, sexiest language in the world. They inherited the education and political system from British Empire, which is very systematic. Plus, they live in a small island with very beautiful nature; beaches, mountains, and jungle. What a very fortunate nation!

Back to the story of the model. Nooreen and Varsha are very good friends. They live together, study in the same college, and they understand each other very well. I wanted to use these facts to help a strong, artistic, and memorable photos. Thus, I decided to create a theme about intimate relationship between two women.

The Photo Shoot

The execution of the concept

As I told you before, I didn’t have any experience for doing photo shoot with any DSLR camera at that time. Thus, I wanted to focus more on the concept and messages of the photos rather than the technical aspects. I wanted to work as comfortable as possible, so I decided to do the photo shoot in Nooreen and Varsha’s house, in their small living room. I didn’t want to do it outside, because I thought that it was my first experience, and I didn’t want to embarass myself and the model.

The photo shoot took about three hours and it would be faster if I had more practical knowledge about DSLR camera. I spent a lot of unecessary times to adjust the ISO, control the focus, and set the exposure. I did all in manual mode, as I didn’t aware that the Aperture Priority mode would work more efficient. One of my most stupid mistake in this photo shoot was the fact that I forgot to turn on the Image Stabilizer, and at that time I didn’t even have a tripod. Luckily, I was able to take some good shots, and it took me about three hours to select, edit, and publish the photos.

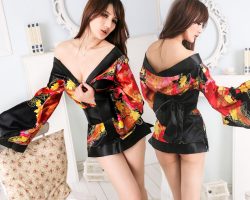
Black Kimono for B&W Photoshoot

Here are some great kimono, a traditional Japanese dress for black and white photography. The wardrobe of the model is very important, especially if you later want to convert the images into monochrome. I strongly suggest that you find some dress with interesting pattern, especially for a photo shoot with plain background. Be sure to find a dress that looks cute and elegant.

Tips to do budget photo shoot

1. Find a strong, solid concept that can be executed in an empty room
Instead of focusing on the properties of the photo shoot, you should focus more on the model. Exploit your creativity and push it to its limit so that you can create good photos by only framing the model and a plain background. For this concept, you will need model who has strong, memorable expression. If the model also have beautiful and exotic face, it would be very helpful as well.

2. Try to find good references
Watch videos, read books, or go to photo exhibition. Read also about various article and tutorial about creating beautiful photos with cheap camera and limited budget. I strongly recommend that you watch “Pro Photographer Cheap Camera Series” from DigitalRevTV channel on Youtube.

3. Make it black and white
Black and white photos always appear to be more artistic, and by desaturating the color you can focus more on the subject. Simple photos with an empty background also look better in black and white rather than in color. For a better result, you can play with the contrast, brightness, exposure, and clarity of the photos during the post-processing.

4. Remember, your passion and creativity are more important than the physical aspects of the photos
It is you who can make the photos look great. Not the camera, not the place of the photo shoot, and not the dress worn by the models. Of course they will help you create something better and more beautiful, but remember that your passion and creativity are your main weapon.

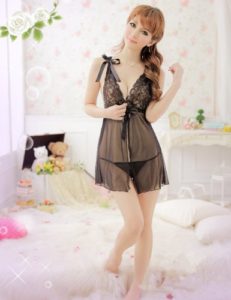
The Black Dresses

Here are some alternative dresses that would be suitable for your model if you are planning to do a simple photo shoot with plain background. My advice: don’t choose a type of dress that has too much distracting patterns. Try to stick with a type of dress that look simple, elegant, and slightly hot.

Lotus – My Photography Work with Mirrorless Camera

Lotus – My Photography Work with Mirrorless Camera

Capturing the Beauty of Lotus

Lotus is one of my first project in the world of photography. When working on this project, I don’t even know some most basic terms such as exposure, aperture, or shutter speed. I merely worked with my instinct and try to manually tweak the lighting. I was very surprised to find out that the result is not as bad as I thought. However, I found a lot of weaknesses that should be improved in my photo. Through this lens, I would like to share my experience working on one of my first photography project. Hope you will enjoy it. I am looking forward for your feedback and comments.

The Concept of “Lotus”

The idea behind the photo shoot
The idea was actually very simple. I wanted to finish this project assignment as soon as possible. The lecturer assigned me to work with Pema, my beautiful friend from Bhutan. At that time, I was very busy with exam preparations and my final research. Thus, I wanted to do a project which I could finish in one day. I didn’t think I am good at poetry or painting, so I decided to do photography.

Surprisingly, this project was my first step to the world of photography. Because of this photo shoot, I developed an interest to photography and digital art. I finally found my passion to create something beautiful for the society.

The title, “Lotus”, came from the translation of the model’s name, “Pema”. “Pema” is a common name that we can find in Bhutan. In Bhutanese language (Dzongkha) it means “lotus”. I also borrowed some concept from a Pearl S. Buck novel’s titled “A Good Earth” where there is a very beautiful character with that name. As I had no experience working with a model before, I just told her to dress with something that can make her look mysterious, beautiful, and graceful at the same time.

The Photo Shoot

My first experience as a photographer
As I already had the concept, at first there was only one thing in my mind: to finish this work as fast as possible. I still had a lot of things to do, and I felt that this thing kind of slowed me down. I didn’t expect that later I really enjoy working as a photographer.

As I arrived in the location, I immediately started my work. During the first ten minutes of working, I felt an excitement that I have never experienced before when making a painting, writing a poem, or in any other art related activities. At that moment, I realized that I fell in love with the world of photography.

The next two hours of working was very fun for me. I enjoyed the moment when I framed the model into different scenes, took her photos from different angles and composition, as well as directed her to pose to fit with my concept. We tried different locations and outfits, and I even did some experiment with some simple properties that I found in the location, such as books, playing cards, and mirror.

I worked with my Sony NEX-3 digital camera, which I am very satisfied with its performance. It can take beautiful images, almost as beautiful as DSLR camera and significantly more stunning compared to point and shoot camera. It also can be operated easily and requires very less knowledge in the world of photography. I set everything in “Auto Mode” as I was really blind about the basic concept such as exposure, ISO, aperture, shutter speed and so on. Later when I have complete understanding of those terms, I found that the image quality of “Auto Mode” for this camera wasn’t disappointing at all.

I completed my work in about four hours, with ten minutes break every hour. I spent about three hours to do little work with post processing. The result was satisfying. We got an “A”, and later some of the photos were featured in Bhutanese Girl Fashion Page.

Tips and thougts to do a photography with mirrorless camera

From an amateur point of view
Don’t hesitate to get a mirrorless camera
Because of the price that is significantly higher than point and shoot camera and slightly lower than DSLR, some people prefer not to buy this type of camera. Believe me, getting a mirrorless camera is a good investment. The image quality is comparable to DSLR, and it is much easier to operate. Moreover, it is cheaper and smaller. So, if you want to take good photos but don’t want to learn too much about technical aspects in photography, mirrorless camera is a perfect choice for you.

Use tripod
The image stabilizer in mirrorless camera is not as good as in DSLR, so using tripod during the photo shoot would significantly improve the quality of your photos. Some cameras such as Sony NEX series also hard to hold (as their center of gravity is in front part of the lens) so that you can get blurry and shaky images if you don’t use any tripod.

It is okay to use the “Auto Mode”
Especially if you are a beginner and don’t understand about when you should use flash, or when you should lower the ISO. The Auto Mode works very well in most of digital camera. Maybe later when you started to understand about some photography concepts, you can do experiment with Semi-Auto Mode or even completely Manual Mode.

Be confident
Although you have very less knowledge about photography, be confident that you can create good photos. Be confident with your camera, no matter how bad it is the quality. And, be confident to your model, trust her, and keep believing that both of you can create a good artworks. Believe it or not, this kind of positive thinking will influence the quality of your photos.