Tips And Tricks For Creating 3D Paper Art

Tips And Tricks For Creating 3D Paper Art

3D paper art is a type of art that is created by folding and cutting paper. This type of art is also known as origami. 3D paper art can be used to create a variety of objects, including animals, flowers, and other objects.

There are a few things that you need to know in order to create 3D paper art. First, you need to choose the right type of paper. You can use any type of paper, but you need to make sure that it is thin and strong. Second, you need to fold the paper in half. You can use a ruler to help you fold the paper correctly.

Once you have folded the paper, you need to cut it into the desired shape. You can use a variety of scissors to do this. Once you have cut the paper, you need to glue it together. You can use a variety of glues, but you need to make sure that the glue is strong enough to hold the paper together.

Once you have glued the paper together, you need to let it dry. Once it is dry, you can add details to the paper. You can use a variety of markers and pens to add details to the paper.

Once you have added all of the details to the paper, you need to cut it out. You can use a variety of scissors to do this. Once you have cut the paper out, you can glue it to a piece of cardboard.

You can also use a variety of other materials to create 3D paper art. You can use paper clips, ribbon, and other materials to create 3D paper art.

If you want to learn more about 3D paper art, you can check out a variety of books and websites. You can also attend a class or workshop.

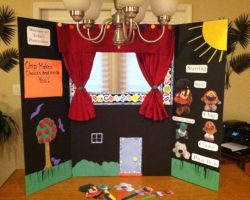
3D paper art is a type of sculpture that is made by folding, cutting, and gluing paper. The finished product can be very intricate and detailed, and it can be used to create both two-dimensional and three-dimensional sculptures.

Here are some tips and tricks for creating 3D paper art:

-Start with a simple design. If you are new to 3D paper art, it is best to start with a simple design. Once you have mastered the basics, you can move on to more complex designs.

-Use a variety of paper types. You can use different types of paper to create different effects. For example, you can use construction paper for a more sturdy sculpture, or tissue paper for a softer look.

-Be creative with your folds. There are no set rules for how you must fold your paper. Get creative and see what kinds of interesting shapes you can create.

-Use a glue stick for a stronger bond. If you are using construction paper or another type of paper that is not self-adhesive, you will need to use a glue stick to hold your paper together.

-Let your imagination run wild. The possibilities are endless when it comes to 3D paper art. So let your imagination run wild and see what you can create!

Setting Up Your Home-Based Arts and Crafts Office

If my clients are any indication of how arts and crafts businesses are managed, many arts and crafts businesses are home based. Even if you need to rent studio space to make your craft, you are probably managing the business aspect of your arts and crafts company out of your home.

If you are thinking about starting an arts or crafts business, operating it out of your home will save on overhead and reduce the amount of startup cash you’ll need. Here are some tips to running your craft business out of your home.

Converting a Spare Room

This is kind of the holy grail of home businesses – that much bally-hoo’d spare room! Many folks new to crafts start a craft business later in life preparing to segue into it full time when they retire. In that case, there just may be a child’s bedroom that is no longer in use that can be converted into a workroom.

I also once owned a house that had a weirdly-shaped two car garage that was very deep – giving an extra fifteen feet by the width of the garage at its front. The prior owners had installed ductwork to have it under heat/air making it a perfect workroom.

After I moved, I purchased a portable rolling floor air conditioner to convert the new garage space into a workroom. The unit was somewhat pricey but it’s paid for itself many times over for both the business and for home use when we’ve had repair issues. The one I purchased does triple duty as a dehumidifier and regular fan too. The only problem is that your garage must have a window to connect the exhaust tubing when using as an air conditioner .

Converting a Closet

Once again, most people just don’t have extra closet space. But if you do, taking the doors off a regular closet will allow you to fit a desk and other equipment inside (I know from experience!). A walk-in closet with a window is ideal.

I find working on my business paperwork without natural light somewhat depressing. I have a large Verilux light that I use at night.

Investigating Unused Space for the Home Office

Look around your home to see where you can setup operations in an unused corner. Here are some suggestions:

  • Basement – it’s been so long since I lived in a house with a basement I almost forgot about it. Still there is the lack of natural light problem. You could try using a Verilux or similar lighting solution.
  • Unused space on stair landing – install a drop-down shelf that leaps into action when you need it and folds flush to the wall when you don’t.
  • Laundry room – you could think about buying a full-sized stacking washer and dryer to free up enough space to install a workstation. Just about any washer/dryer that has a flat top can convert to stacking using the correct kit. Plus most kits have a pull-out shelf for folding the fresh laundry.
  • Stow and go desk – I was in the market for a stow and go work area last year. After hours of searching, I found this great one at Furniturexo.com. We had to put off moving for another year so I’m waiting to buy it until after the move. It seem ideal in many ways. Sturdy, lots of room for storage, somewhat attractive in appearance and folds to a minimal footprint.
  • Expand a windowsill – install a folding shelf to the sill itself or to the wall immediately beneath. This has the extra advantage of all that natural light. You can install sheers to block excess sunlight when the sun is directly at window height.
  • Weirdly walled space – if you have an area of your house that is between rooms anchored by two walls creating wasted space, considering putting your workspace in there and hanging a matchstick shade from the ceiling long enough to extend to the floor to hide the area when you are finished working.

For more ideas, check out your local bookstore magazine stand. Since living in small houses for the last ten years, I have noticed there is just a plethora of magazines devoted to organizing and living in small spaces.

Making a Puppet Stage

Making a Puppet Stage

How to Build a Puppet Theater Out of a Cardboard Box

How do you make a puppet theater that is inexpensive and simple to make and use?
It’s quite easy to craft a simple stage in which your puppets can perform. All you need is a large cardboard box or appliance box, utility knife, paint, glue,and fabric.
Children will need the supervision of an adult for this project.

Transforming a box into a puppet stage

Table top puppet stage in processIt’s easy and inexpensive to build a puppet stage. This one was made out of a large cardboard computer box. It folds up and it’s light and easy to carry. This one was designed to sit on a table. If you want a taller, free-standing one, use an appliance box. Refrigerator boxes make wonderful puppet stages.
Just cut out the top, the bottom and the back of the box, leaving the front section and two sides. If you don’t need a stage that folds up, leave the bottom in as it will add stability. If you need to cut the bottom out so it will fold, you can glue wood strips or molding on for stability and weight so the stage won’t fall over easily.
Cut a square or rectangular opening in the front of the box, closer to the top of the stage than the bottom. Add a prop shelf if you like. Attach a fabric backdrop curtain about ten inches behind the front of the stage opening.
Make two small holes in the upper part of the stage and fit a dowel rod through the holes, like a curtain rod.
Make sure the curtain fabric is lightweight so you can see through it as you sit behind it. You will need to be able to see what the puppets are doing. If desired, you can put a clip-on reading light on the top of the stage. This makes your little actors more visible and makes it difficult for the audience to see the puppeteer.
Decorate your stage with paint or fabric.

Hint: Tacky glue, available at craft stores, is the best kind of glue for a project such as this. It adheres well to fabric and is very strong.

Have a great show!

Make a Cardboard Puppet Theater
Tom Knight gives excellent instructions for building a puppet theater out of a cardboard box.

Cute Puppet Theater

If you go to Google Images, you can find hundreds of ideas for puppet stages. Just enter “puppet theaters” or “puppet stages”
Here is a lovely example of a beautifully decorated home made puppet theater.
Many of the images come from websites with directions for building the stage.

Photo from Google Images

Puppet StagesYou Can Buy

If you don’t have the time or inclination to build a stage, you can buy one!

Build a Puppet Theater
Books on making Puppet Theaters and other cardboard projects that may be adapted for stages or theaters. A castle, for example, makes a great stage for fairy tales.

Decorate Your Puppet Stage with Wall Decals
You can add some decorations to your puppet theater – not too many so that it distracts from the action, but just enough to make it interesting.

Travel Tripod Guide | Ultralight Camera Tripods

Travel Tripod Guide | Ultralight Camera Tripods

Better Travel Photo Tip: Get a Small and Lightweight Tripod

Ever wonder why some travel photographers manage to take better travel photos than others? The easy answer is skill, and a lightweight travel tripod. Many experienced photographers would even suggest that a tripod is more important than what camera you have or your level of photographic skill.

Relying on steady hands, built-in stabilization, or cranking up (the grain-producing) iso simply won’t cut it when it comes to for example low light landscape photography. In many situations you want maximum depth of field and if you want the best image quality, you do not want to play with the ISO. The only solution is using a sturdy camera support. .

Until recently though, the problem with tripods was that they were bulky and heavy. Luckily, carbon-fiber and ultralight metals have come down in price and should be within reach of any enthusiast photographer.

of their images. Not being able to maximize depth of field is another big reason. Not taking time to compose and think the image through is another big reason for sloppy tourist snaps. All of these problems are helped by taking a tripod along as you travel.

You don’t have to use a full-size model, any camera support is better than nothing – just make sure that you get something that is built to hold your camera weight in a steady manner.

Tiny supports for compacts and smartphones

Some people think that the smaller the camera the easier it is to keep stable when taking a picture. The fact is that the lighter the camera – the more difficult it is to hold still and shake blur is very common with compacts and smartphones. The simple solution is a small camera tripod or support that fits in your bag – or even pocket!

The Best full Size Carbon Tripod for Travel

I use a Benro Travel Angel, the model that came out before this one and it has seen massive rugged use in the field. It still works like new. The compact Benro shown here is their latest carbon travel tripod which is similar to mine, but also has the feature of being a tripod and a monopod in one. The design is pure genius and you simply detach one of the legs and fasten the ball-head to it. This is also one of the few tripods that become flat when folded down for easier travel packing.

The Benro carbon Travel Flat II Tripod Kit is a extremely compact full-size model and folds down to a mere 16 inches. It takes 17 pound loads, offers almost any angle including ground level, and weighs just 3.4 pounds, which is very low weight for a full sized pro-quality tripod.

Flexible Joby Gorilla Tripods for Different Camera Types

The Gorilla tripods by Joby are extremely popular and the best travel tripod if you look at number of sales. Personally though, I prefer a full-size tripod but that is a matter of taste.

What makes the Gorilla pods so popular are the flexible legs that allow you to wrap around and seek support on almost any surface.

Having owned 2 of these ultra light weight tripods in different sizes, my tip is to not buy too small since the legs do sag a little bit with age. The weight difference is minimal so go for one size bigger than recommended.

See complete line of Joby Gorilla Tripods

Joby has recently also launched a new series of very compact camera micro tripods. Available in three different sizes, the biggest one show here supports cameras up to just under 2 pounds and is perfect for small hybrid superzooms and mirrorless system cameras such as Sony NEX, Olympus PEN and Pansonic G series.

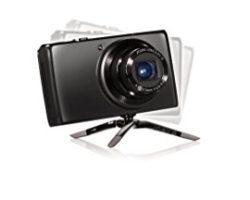
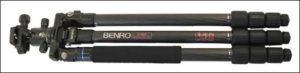
This latest micro tripod from Joby is designed to stay on the camera at all times, when you fold it down it fits under the camera base.
Weighing just 2.3 ounces, this may be the ultimate emergency tripod for all forms of adventure travel where weight and small size is important.