Lotus – My Photography Work with Mirrorless Camera
Capturing the Beauty of Lotus
Lotus is one of my first project in the world of photography. When working on this project, I don’t even know some most basic terms such as exposure, aperture, or shutter speed. I merely worked with my instinct and try to manually tweak the lighting. I was very surprised to find out that the result is not as bad as I thought. However, I found a lot of weaknesses that should be improved in my photo. Through this lens, I would like to share my experience working on one of my first photography project. Hope you will enjoy it. I am looking forward for your feedback and comments.
The Concept of “Lotus”
The idea behind the photo shoot
The idea was actually very simple. I wanted to finish this project assignment as soon as possible. The lecturer assigned me to work with Pema, my beautiful friend from Bhutan. At that time, I was very busy with exam preparations and my final research. Thus, I wanted to do a project which I could finish in one day. I didn’t think I am good at poetry or painting, so I decided to do photography.
Surprisingly, this project was my first step to the world of photography. Because of this photo shoot, I developed an interest to photography and digital art. I finally found my passion to create something beautiful for the society.
The title, “Lotus”, came from the translation of the model’s name, “Pema”. “Pema” is a common name that we can find in Bhutan. In Bhutanese language (Dzongkha) it means “lotus”. I also borrowed some concept from a Pearl S. Buck novel’s titled “A Good Earth” where there is a very beautiful character with that name. As I had no experience working with a model before, I just told her to dress with something that can make her look mysterious, beautiful, and graceful at the same time.
The Photo Shoot
My first experience as a photographer
As I already had the concept, at first there was only one thing in my mind: to finish this work as fast as possible. I still had a lot of things to do, and I felt that this thing kind of slowed me down. I didn’t expect that later I really enjoy working as a photographer.
As I arrived in the location, I immediately started my work. During the first ten minutes of working, I felt an excitement that I have never experienced before when making a painting, writing a poem, or in any other art related activities. At that moment, I realized that I fell in love with the world of photography.
The next two hours of working was very fun for me. I enjoyed the moment when I framed the model into different scenes, took her photos from different angles and composition, as well as directed her to pose to fit with my concept. We tried different locations and outfits, and I even did some experiment with some simple properties that I found in the location, such as books, playing cards, and mirror.
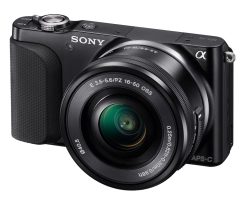
I worked with my Sony NEX-3 digital camera, which I am very satisfied with its performance. It can take beautiful images, almost as beautiful as DSLR camera and significantly more stunning compared to point and shoot camera. It also can be operated easily and requires very less knowledge in the world of photography. I set everything in “Auto Mode” as I was really blind about the basic concept such as exposure, ISO, aperture, shutter speed and so on. Later when I have complete understanding of those terms, I found that the image quality of “Auto Mode” for this camera wasn’t disappointing at all.
I completed my work in about four hours, with ten minutes break every hour. I spent about three hours to do little work with post processing. The result was satisfying. We got an “A”, and later some of the photos were featured in Bhutanese Girl Fashion Page.
Tips and thougts to do a photography with mirrorless camera
From an amateur point of view
Don’t hesitate to get a mirrorless camera
Because of the price that is significantly higher than point and shoot camera and slightly lower than DSLR, some people prefer not to buy this type of camera. Believe me, getting a mirrorless camera is a good investment. The image quality is comparable to DSLR, and it is much easier to operate. Moreover, it is cheaper and smaller. So, if you want to take good photos but don’t want to learn too much about technical aspects in photography, mirrorless camera is a perfect choice for you.
Use tripod
The image stabilizer in mirrorless camera is not as good as in DSLR, so using tripod during the photo shoot would significantly improve the quality of your photos. Some cameras such as Sony NEX series also hard to hold (as their center of gravity is in front part of the lens) so that you can get blurry and shaky images if you don’t use any tripod.
It is okay to use the “Auto Mode”
Especially if you are a beginner and don’t understand about when you should use flash, or when you should lower the ISO. The Auto Mode works very well in most of digital camera. Maybe later when you started to understand about some photography concepts, you can do experiment with Semi-Auto Mode or even completely Manual Mode.
Be confident
Although you have very less knowledge about photography, be confident that you can create good photos. Be confident with your camera, no matter how bad it is the quality. And, be confident to your model, trust her, and keep believing that both of you can create a good artworks. Believe it or not, this kind of positive thinking will influence the quality of your photos.
