5 McGraw Hill Products That Are Worth The Investment

5 McGraw Hill Products That Are Worth The Investment

If you’re looking to improve your productivity, there are few investments better than a good quality reference book.

Here are 5 McGraw Hill products that are definitely worth your money:

1. The Official Guide to the TOEFL Test

This guide is essential for anyone planning to take the TOEFL exam. It contains everything you need to know about the exam, including format, content, and scoring.

2. The McGraw-Hill Dictionary of Business and Economics

This comprehensive dictionary is a must-have for anyone studying business or economics. It covers all the major terms and concepts in both fields, and is an invaluable reference tool.

3. The McGraw-Hill Encyclopedia of Science and Technology

This 10-volume set is an essential resource for anyone interested in science and technology. It covers a wide range of topics in both fields, and is an invaluable reference tool.

4. The McGraw-Hill Handbook of English Grammar and Usage

This handbook is a must-have for anyone who wants to improve their English grammar and usage. It covers all the major grammar rules, and is an essential reference tool.

5. The McGraw-Hill Guide to Effective Business Writing

This guide is essential for anyone who wants to improve their business writing skills. It covers all the major aspects of effective business writing, and is an invaluable reference tool.

1) The Official SAT Study Guide, 2018 Edition: This is the only study guide that comes from the test makers themselves. It includes 4 official SAT practice tests, hundreds of practice questions, and detailed answer explanations. If you’re serious about doing well on the SAT, this is the guide you need.

2) The College Panda’s SAT Math: Advanced Guide and Workbook: This guide goes way beyond the basics, providing detailed strategies and tips for tackling the most challenging SAT math problems. The accompanying workbook is packed with practice problems to help you master the material.

3) Cracking the AP Physics 1 Exam, 2017 Edition: This book from the Princeton Review provides concise review of all the material you need to know for the AP Physics 1 exam, including a full-length practice test.

4) 5 Steps to a 5 on the AP World History Exam, 2017 Edition: This popular study guide from McGraw Hill Education provides an easy-to-follow, step-by-step approach to preparing for the AP World History exam.

5) The Ultimate Guide to SAT Grammar: This comprehensive guide from Kaplan covers all the grammar rules you need to know for the SAT, with practice questions and detailed answer explanations.

How The Blink Outdoor 2 Camera System Can Improve Your Home Security

How The Blink Outdoor 2 Camera System Can Improve Your Home Security

If you’re looking for a home security system that’s easy to install and provides great coverage, the Blink Outdoor 2 Camera System is a great option. This system comes with two wireless cameras that can be installed anywhere around your home, and they’re simple to set up. The Blink cameras are also very affordable, making them a great choice for budget-conscious consumers.

One of the best things about the Blink Outdoor 2 Camera System is that it doesn’t require a monthly fee. That’s right, there are no monthly fees associated with this system. You’ll just need to pay for the cameras up front, and then you can enjoy peace of mind knowing that your home is being protected.

Another great thing about the Blink system is that it offers free cloud storage. That means you can review your footage at any time, from anywhere. And if you ever need to download footage for law enforcement or insurance purposes, you can do so easily.

Finally, the Blink Outdoor 2 Camera System comes with a two-year warranty. That means if anything goes wrong with your cameras, you’re covered.

If you’re looking for an affordable and easy-to-use home security system, the Blink Outdoor 2 Camera System is a great option.

When it comes to home security, many people think that they need to spend a lot of money to get a top of the line security system. However, this is not always the case. The Blink Outdoor 2 Camera System is a great option for those who are looking for an affordable and reliable security system.

The Blink Outdoor 2 Camera System is a great way to improve your home security for a number of reasons. First, the system is very affordable. You can get the system for just $129.99. This is a great price for a security system that includes two cameras.

Second, the Blink Outdoor 2 Camera System is very easy to install. The system comes with everything you need to get started. All you need to do is mount the cameras and connect them to the Blink Sync Module. The Blink Sync Module will then connect the cameras to your home Wi-Fi network.

Third, the Blink Outdoor 2 Camera System is very easy to use. The system comes with a free Blink app that you can download on your smartphone. The app is very user-friendly and it makes it easy to view your cameras, arm and disarm the system, and set up alerts.

Fourth, the Blink Outdoor 2 Camera System is very reliable. The system uses Blink’s proprietary technology to provide you with a clear and reliable video feed. The system also includes a motion detector that will send you an alert if it detects any movement.

Fifth, the Blink Outdoor 2 Camera System comes with free cloud storage. This means that you can access your video footage at any time, from anywhere.

The Blink Outdoor 2 Camera System is a great way to improve your home security. The system is affordable, easy to install, easy to use, and it is very reliable.

How To Keep Your Arlo Pro 2 Camera Working Like New

How To Keep Your Arlo Pro 2 Camera Working Like New

If you’ve recently invested in an Arlo Pro 2 security camera, congratulations! You’ve made a wise decision to protect your home or business with one of the best security cameras on the market. But like any piece of technology, your Arlo Pro 2 camera will require some occasional maintenance to keep it working like new.

Here are a few tips to help you keep your camera in tip-top shape:

1. Keep the lens clean

One of the most important things you can do to keep your Arlo Pro 2 camera working like new is to keep the lens clean. Dust, dirt, and fingerprints can all impede the camera’s ability to take clear pictures or videos. Use a soft, dry cloth to gently wipe the lens clean as needed.

2. Avoid extreme temperatures

Your Arlo Pro 2 camera is designed to withstand a wide range of temperatures, but extreme heat or cold can still cause problems. If possible, try to keep your camera out of direct sunlight or in a shady area to avoid overheating. And if you live in a cold climate, be sure to keep your camera away from any heat sources, like a furnace, to prevent it from getting too cold.

3. Keep the camera dry

It’s important to keep your Arlo Pro 2 camera dry to prevent damage from moisture. If your camera is exposed to rain or snow, be sure to wipe it down as soon as possible to remove any moisture. And if you live in a humid climate, be sure to keep your camera in a dry, well-ventilated area to prevent condensation from building up on the lens or internal components.

4. Update the firmware

Like any piece of technology, your Arlo Pro 2 camera benefits from regular firmware updates. Arlo releases new firmware updates periodically to improve the camera’s performance and add new features. To check for new firmware updates, open the Arlo app and tap the Settings icon. Then, tap Devices and select your camera. If a new firmware update is available, you’ll see an option to update the firmware.

5. Reset the camera

If your Arlo Pro 2 camera isn’t working properly, you may need to reset it to factory defaults. This will restore the camera to its original state and may fix any issues you’re having. To reset your camera, open the Arlo app and tap the Settings icon. Then, tap Devices and select your camera. Finally, tap the Reset button and confirm that you want to reset the camera.

By following these simple tips, you can keep your Arlo Pro 2 camera working like new for years to come.

The eight most efficient drawing tips for landscape drawing

The eight most efficient drawing tips for landscape drawing

How to make fast progress in drawing landscapes (and other things)

After years of drawing, having attended workshops and having studied tutorials and art books I found eight drawing that helped me most to improve my landscape drawing skills efficiently and fast.

Everybody who can write her/his own name on a piece of paper can achieve a high level of drawing skills as writing and drawing require in principle the same capabilities of hand to eye co-ordination. This is a matter of fact. Recently I found another interesting scientific article on the topic which underlines these simple insights: Why Are Some People Better at Drawing than Others?. In the end learning drawing from life is nothing but training,learning and changing your perception of the world as you see it.

If you follow these drawing tips and apply and observe them in regular exercises you will see a dramatic change in your drawing capability in relatively short time of weeks and months.
Doing one drawing exercise of 20-0 minutes a day is already enough. The most important thing is to exercise regularly.

Landscape drawing TIP No.1 – Forget the eraser !

Miles Davis : “Do not fear mistakes, there are none.”

Every line you draw counts and is important. Knowing this will

give your drawings the necessary drive and the motivation to accept your own hand-write. Your own hand-write is the basis for a unique artistic development ! Do you want to erase that ?? Draw with media that cannot be erased as often as possible. My preferred media are ink and pens. The more you exercise the more you will like it. You will gain self-confidence in your lines and marks and you will discover your own drawing style. Your skills to hit the “right” line first will improve fast too.

My top recommendation for Drawing books

When it comes to drawing books Bert Dodson is my favorite. His first book “Keys to drawing” set an unbeaten standard from my point of view.

Landscape drawing TIP No.2 – Blind drawing ..blind drawing….blind drawing

Blind drawing often also called blind contour drawing is a method that occurs in all serious drawing lessons and books.

Blind drawing means that you draw without looking at your drawing paper, but following your subject with your eyes and to make notes of what you see on your paper at the same time. I found it extremely helpful on drawing trees.

Blind drawing is a well known thing in the drawing world, but not many people practise it ! So my advice is don´t forget that, do it and try to remember this each time you start a drawing.

The training effect is absolutely great. Within 2 weeks of 15 minutes of blind drawing per day you can make unbelievable progress! Blind drawing will keep your work vivid.. it is a real ANTI-STIFFENER

Landscape drawing TIP No.3 – Drawing negative forms or space

Imagine you want to draw a net of thick ropes. Drawing negative forms means that you don´t try to draw the outlines of the ropes, but the outlines of the empty space in between the ropes.

Negative forms can be seen almost everywhere. Drawing negative spaces makes things quite often much easier, than following complicated outlines of positive forms. Also drawing negative forms helps quickly to develop stronger observations skills.

Link tipp: DRAWING “NEGATIVE” SPACE
description by Robert Gardiner, the University of British Columbia, Vancouver, Canada

Landscape drawing TIP No.4 – Squinting to see values and simple forms

By squinting with your eyes (remember Dustin Hoffmann
in “Little big man” :).) it is easier to see the different tonalities, the patterns of dark and light forms, the contrast between light and shadows in the scenery in front of you.

Link Tipp:
Squinting, Drawing and Never Forgetting
By R.W. STEVENSON
Published: July 11, 2004

Landscape drawing TIP No.5 – Take measurements !

Handling of the proportions is mostly considered an important issue. “Oh I don´t get the proportions right !” How many times is this said and thought ?

There is a way to eliminate that question. Take measurements and start to train your eye.
Use a little stick or your pencil as reference.
Select an important or clear line in the motif as metrestick. Stretch our your arm as far as you can (in order to get same scale each time) and then measure how long is that roof top for example and how long is that window frame in comparison to that. How tall is the chimney in comparison to your “roof top metrestick” and so on.

As time goes by you won´t need much of measurements anymore. You will get rid of wrong proportions quickly if you decide to use the measurements intensly until you don´t need them anymore.

You will learn quickly to place your drawing in the right size so it fits onto your paper, you will be able to estimate lengths and distances amazingly correct. Fractions like 1:2 ,1:4, 1:3,2:3, etc. will be no problem any more.

Landscape drawing TIP No.6 – Use construction lines

Construction lines are imagined connections between to points in your drawing or an elongation of a line.
If your not sure what the inclination of the roof is for example just elongate the roof edge until it hits another line. Use your pencil or a small stick again to take aim. Thus it is very easy to find a second point in your drawing to confirm the real inclination of lines or planes.

Possible useful constructionlines in this drawing:
If you are not sure about the angle of the church roof just elongate a line (no3) until it hits the vertical no1 almost exactly on the border of the drawing. The elongation of the roof line represented by no.4 hits the church door in the lower right edge of the forth window (left row of windows). Line number 2 connects the balcony of the big building on the right with a prominent edge of a tall building on the left. This way you can develop a grid work that connects the parts of the composition into an image that makes sense to the viewer. Of course it is helpful to understand the theory of perspective, but in practise it is much easier to work with construction lines.

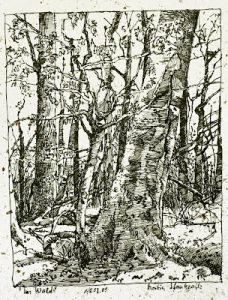
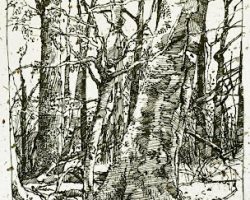
How to draw a tree – a paperback published on BLURB

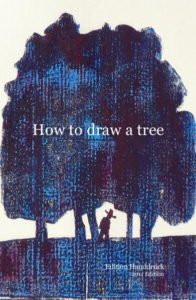
The little book in format 8X5 is based on the content of this lens. It contains

70 black and white images of pen, ink and charcoal drawings. You will find many of the illustrations on this lens, but others also from related lenses on drawing deciduous and coniferous trees and some extra images too in the book.
The book summarizes my experiences in drawing trees. The majority of drawings are deciduous trees, but there is also an explanations about pine tree drwaing and spruce.

Link to the book How to draw a tree There is a full preview available.

Drawing the urban landscape

Exploring the city with a sketchbook
Between April 2006 and May 2007 I have worked on an exhibition project about the urban landscape of the city of Stuttgart,Germany.
I have selected more than 30 drawings for a book now available online at BLURB.
The first 10 pages show panoramic drawings together with the essay about the urban landscape and the experience of drawing such a complex subject. The following pages show two panoramic drawings per page without text.

Drawing TIP No.7 – go into the zoo and get into the flow

With increasing exercise your drawing speed will increase. Also you will find your personal work flow. Most people do not recognize how fast they are drawing when they are in the flow.
To get into the flow while drawing is a wonderful experinece. Everything seems to happen easily without tension just as if you were knitting :).

Drawing moving animals forces you to be fast and almost within minutes most people adjust to the new situation an skip all rational reflections and internal self-dialog and just dive into the visual encounter !
When you come up to the surface again you will feel great ! Drawing a landcape and/ or architecture shortly afterwards is like getting into extrem slow motion and goes much,much easier.

How did I do this drawing:

Everybody who has been watching animals in a zoo knows that animals unfortunate enough to live in cages or aquariums develop an individual moving pattern within the space they can roam.
So instead of trying to draw one fish after the other I worked short sequences on those fish who had taken a specific resting position for a minute or so. When my model moved I looked for the next fish in another resting position. So in fact I always worked on a fish that did NOT move! Some of the fishes are one and the same individual (the big one watched me very interested !)and O.K. the turtle was easy…:).

Drawing TIP No.8 – regular exercise !

If you want to improve your skills repeated exercise is the key. Everybody has his/her own preferences and possibilities to exercise on a regular basis. Similar to sports it is better to practise every day for 15 minutes instead 90 minutes only once a week.

My reading tip : Beginners guide to drawing

Great drawing tip by Michele Weller

The extra tip – 36 pages great sketching advice from 1900

Sketching from nature in line and tone
This is a great find on the net. A fully digitalised version of a book by J. Littlejohns
in the library of the university of San Diego,California. It contains great illustrations and practical advice !

Sketching from Nature
SKETCHING FROM NATURE IN LINE AND TONE
BY J. LITTLEJOHNS, R.B.A., A.R.B.C.

CONTENTS
INTRODUCTION 5,Chapter I. MATERIALS 7,II. HOW TO BEGIN 10,III. DRAWING 16,IV. TREES 19,V. DISTANCE 23,VI. CLOUDS, WATER, AND RE-
FLECTIONS 28,VII. WASH DRAWING 31,VIII. CHALK DRAWING .. ..34

Two awsome stories about people who make their living by drawing

I stumbled into this stories which I can relate to so much. When it come to drawing talent is one thing, but it is not everything. Most people are not prepared to pay the price for aquiring drawing skills: time and practise.

These stories are a great motivation.

Neuland – Dialog: A QUESTION OF WILL MORE THAN TALENT
The story of Jørn Nielsen who was told that he could never make a living out of his drawing skills.

Neuland – Dialog: I do my two favorite things for a living: drawing and thinking.
I do my two favorite things for a living: drawing and thinking.
Interview with Brandy Agerbeck, Chicago

Varsha, My Photography Journal

Varsha, My Photography Journal

Backtracking my photography learning process through a model

I decided to seriously learn photography back in December 2011. I purchased my first digital camera, which was Sony NEX-3, and started to read some photography books. Until today, I have participated in three professional photo shoots and five photo exhibitions. One of the most remarkable person during my learning period of this art is Varsha.

Varsha was my first “unofficial” model. I practiced a lot of basic theory and concept of capturing image with her as the main subject. Sometimes I asked her to pose, but most of the times I took her pictures in candid. Indeed, the photos of Varsha show the progress of my photography learning skill, from a real newbie until now. In this article, I would like to share some of my photographs of Varsha. Please kindly share your comments and feedback about my work.

A story about Varsha

Varsha is a student who studied Bachelor of Arts in Telugu (one of national languages of India) in Hyderabad between 2009 to 2012. She pursued her degree under the scholarship of Indian government in Koti Women’s College Hyderabad. I met her for the first time in 2011 through one of my classmate who also originates from Mauritius.

Varsha is physically very attractive and perfect to be a model for my photos. She is also very friendly, thus it makes me more comfortable in taking her pictures. The first time I took her photo was during a trip to Medak, a remote district about three hours driving from Hyderabad. At that moment, I felt that her face was very camera friendly. Therefore, I decided to take her photos regularly as a part of my learning process.

Varsha originates from Mauritius, a very beautiful island, a paradise on earth. Mauritius is located on the south east of the main continent of Africa. This country is full of amazing beaches, beautiful jungles, and wonderful people. Most people in Mauritius have Indian blood, and they speak French as the first language. I worked with Varsha in two different photo shoot, both of them when my skill was at very newbie level.

Photoshoots with Varsha

I spent a lot of time with my Mauritian friends because they are very good people and student. They invited me a lot to have some lunch, and we went out together to watch movies, concerts, and other interesting spots in Hyderabad. The first time I seriously took photos of Varsha was in November 2011, when I and three of my Mauritian friends (including Varsha) watched Zeb and Haniya concert in Ravindra Bharati, Hyderabad. At that moment, I successfully captured some very great candid photos of her.

After being able to take a bunch of great photos, I successfully convinced her to be a model for my photo shoot titled “The Night Song”. It was my very first photo shoot that I did only two weeks after I purchased my first DSLR camera. She performed surprisingly above my expectation. Her photos that I took during “The Night Song” were really great, and some of them were even selected for my international exhibition in Hong Kong and Singapore.

Another moment when I successfully captured great images of her was during Ugadi, one of the traditional festival for South Indian community. She dressed in saree very nicely, and we went to the temple and visited a lot of friends and relatives who celebrated Ugadi. During our trip, I took a lot of beautiful candid photos of her.

About two months after Ugadi, we worked for our second photo shoot titled “The Mystique of Love”. It was done for my photography assignment in my course and located in landscape garden, Osmania University. The photo shoot was rather challenging for me, compared to the first one due to the technical aspects and my lack of experience as a photographer. But from this work, I really learned a lot of useful things in photography.

Varsha finished her course in summer 2012 and went to her country immediately. Unfortunately, I didn’t have the chance to say my last goodbye and to take more photos of her because I was abroad.

Some tips to improve your photography skill

Try to take photos every day
More photos you take, the better your skill in photography. If you really want to be a good photographer, try to allocate at least half an hour per day for hunting pictures. By taking a lot of good photos, your technical skills, experience, and sensitivity as a photographer would improve. One more thing, try to think this habit as something fun, not as a boring responsibility.

Spend some time to review and select your best photos
Among of those photos you take regularly, you have to carefully select which photo to keep and which to delete. Be selective, and don’t hesitate to delete not so good photos. If you want to publish them in social media or online album, then you have to be more selective. Only publish your best photos, or the one that has special meanings for you.

Use a prime lens
Instead of zoom lenses, it is better to start learning photography by using prime lenses. Prime lenses will make you use your legs more in order to make the subject closer or farther from your camera frame. They don’t have zoom feature so you are forced to move a lot when taking images. By using prime lenses, you will learn how to depend more on your body and eyes rather than the zoom.

Learn to use manual focus
Manual focus is the best way to get the perfect focus. Although in modern days some autofocus of an expensive camera also performs well, but nothing can beat the accuracy of manual focus. Thus, learn to take photos with widest aperture as possible (to enable you detecting the focus point more easily), choose a single subject, then try to get the best focus of a specific part of the subject.

Focus on the eyes of the subject
After learning the principle of focusing, it is advisable for a beginner to practice with a living subject such as human and animal. At your very first few weeks of learning, try to take a close-up photos of the face. When taking photos of living things, the most important thing is to make sure that your camera focus is on the eyes of the subject. When you do it right, your photo will look better.