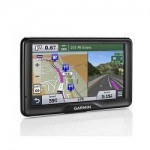
If you are interested in the Garmin RV 760LMT Portable GPS Navigator, then you have definitely come to the right place. Read the rest of this article for an in-depth review. The Garmin RV 760LMT Portable GPS Navigator is a GPS Navigator that has a resolution of 800 x 480 pixels as well as a display that is touchscreen. The display itself is large at 7 inches and the display is WVGA TFT color with a white backlight. Also included in this GPS model from Garmin are “map3” as well as “traffic4” updates which are not only free but for life also. These “map3” and “traffic4” features are things that provide information about services which are specific to RVs, such as normal hours as well as after hours tow services. Examples of other services covered by these “map3” and “traffic4” features are RV specific repair shops.
Key Features: 7 inch display size, 4 hour average battery life, first RV specific Garmin navigator, voice activated navigation, custom routed based on size and weight of your RV1, “Active Lane Guidance”, 800 x 480 pixels; WVGA TFT color display.
Another great feature of this Garmin RV 760LMT is the ability to get customized guidance based on the dimensions as well as weight of the RV that you are driving. There is definitely no ‘one size fits all’ approach to things with this Garmin and it could definitely help to make your journey go more smoothly. If you enjoy talking to your electronic devices then you are in luck, because the Garmin RV 760LMT is voice activated. To be more specific, it actually responds in an intelligent way to the voice commands that you give it. I think you will agree when we say this is much more convenient and it will help you to keep your mind on the road if you are not having to look at something else.
The Garmin RV 760LMT has a weight of 12.5 ounces as well as dimensions of 4.5 x 0.9 x 7.4 inches. The item model number is 010-01168-00 and it comes with 1 Lithium Ion Battery. At the time of writing, the Garmin RV 760LMT is rated 3.7 out of 5 stars over 6 reviews and it can currently only be shipped within the US.
Since this GPS Navigator was designed specifically with RVs in mind it is a ‘niche’ product, but the features that it has such as customized guidance based on the dimensions as well as weight of the RV that you drive help it to fit this niche very well. If you are a RV driver and you are in the market for such a GPS Navigation device then look no further, the Garmin RV 760LMT is definitely the one you want to go for.
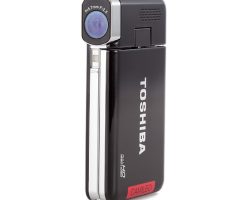
Toshiba’s Camileo S30 camcorder records 1080p HD video in the H.264 format to SDHC/SDXC memory cards. The $179 camcorder features a 3-inch touch screen display and 8-megapixel still photo capture. Full specs for the Camileo S30 can be found here.
Toshiba Camileo S30 at a Glance
The Good: Slim design, good features for the price
The Bad: Touch screen can be unresponsive
Video Quality
The Toshiba Camileo S30 records 1920 x 1080p video in the H.264 format via an 8-megapixel CMOS sensor. It has additional options to record at 720p at 30 frames per second (fps) or at 60fps for capturing fast-moving subjects.
The video quality is definitely passable for a budget camcorder. You’ll notice a bit of over-exposure in bright sun and high contrast areas, but otherwise the S30 holds its own with other low-cost models on the market.
The S30 does offer a video light, which isn’t typically found on models at this price point. It’s useful for closeups but doesn’t have much power beyond that. Plus, it’s placed almost directly where your finger wraps around the camcorder, so you’ll have to be careful to nudge your finger down before activating the light.
In addition to movies, the Toshiba S30 can snap 8-megapixel still photos. However, most of the shots I snapped suffered from a good deal of blur, even when holding the camcorder steady.
Toshiba S30 Optics
The S30 does not offer an optical zoom but there is a 16x digital zoom. However, like all digital zooms, the quality degrades as you use it, so it’s better to avoid it all together. There’s also digital image stabilization, although it’s ineffective for the stills and only marginally useful on the video.
Design
The S30 is one of the few upright camcorders left in the market. At .75 inches, it’s slimmer than a pocket camcorder and has a larger, swing-out LCD display (3-inches) not found on pocket models.
However, it’s a bit larger than some of the smaller models on the market – at 2.3 x 4.3 x .75 -inches. Nevertheless, it’s quite portable.
The controls of the S30 are clustered on the slender body of the camcorder, although they are responsive. At the top is a large shutter button, followed by a lever for the zoom and controls for menu and the video light. Flip open the display and you’ll find large buttons for power (opening and closing the LCD also powers on and off the camcorder), switching between photo and video mode and web button for uploading videos from the camcorder to the Internet when it’s connected to a computer.
Feature Set
The Toshiba S30 has a nice set of features for a camcorder at the price. There’s a motion detect mode, which will begin recording when the camcorder sees motion. There’s also a slow motion option, which will record lower quality video at slower speeds (good for capturing baseball swings to view on the computer but not great for viewing on the big screen). A pre-record function will start recording a few seconds of video before you actually press the shutter, to help you catch all of the action. Finally, a time-lapse feature will capture short bursts of video over pre-set intervals so you can capture change over time.
Menu & Display
The nice thing about the Camileo S30 is its large, 3-inch display. It’s a touch-screen so most of the camera’s features are accessibly through there. Unfortunately, while the menu icons are large enough, the display isn’t all that responsive, nor well executed. Each icon needs a double tap to enter a specific function and sometimes it’s difficult to tell whether you’ve turned something on or off. There are enough features on the S30 that you’ll need to scroll down on the screen with a flick of your finger, but it often takes several flicks to get there.
On the plus side, once you press an icon once a text description of what it is will pop up on the display, but the process of navigating around the menu is more clumsy and time-consuming than it should be.
Memory
The S30 records to SDHC and SDXC memory cards (up to 64GB) which provides ample storage for your video-taking needs. It contains 128MB of internal memory, which is enough for about a minute of HD footage, so a card is a must.
Toshiba Camileo S30: Bottom Line
If you’re in the market for a good budget camcorder, the Toshiba Camileo S30 is a nice choice. Unlike some of its pocket camcorder competitors, it has a larger, swing-out display, which makes it easier to frame your videos. The menu interface needs improvement, and you shouldn’t be expecting ultra-high quality high def recording, but the S30 makes up for it with a nice feature set and a slender, portable design.
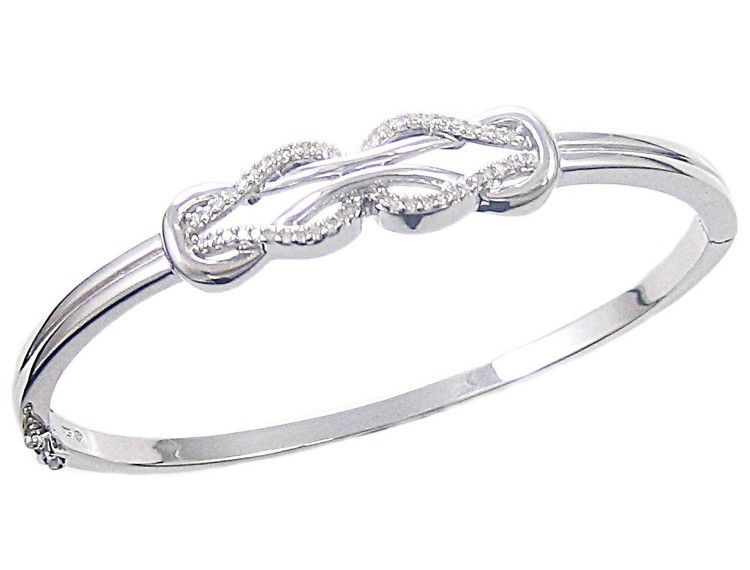
I’ve received quite a few emails about the knotted Figaro sterling
silver charm bracelet shown in my charmed jewelry article. This is one
of my original designs from a few years back and I don’t know where
similar ones are for sale.
I’ve decided to post the DIY instructions on how to make this
sterling silver bracelet. Even for those with minimal craft or jewelry
making skills, this bracelet is extremely easy to make.
1. Supplies and Tools List for the Knotted Charm Bracelet
I purchased all my supplies and tools from Fire Mountain Gems and Beads. You could also find most if not all of the supplies and tools at a craft store such as Michaels.
Here is your supplies and tools list:
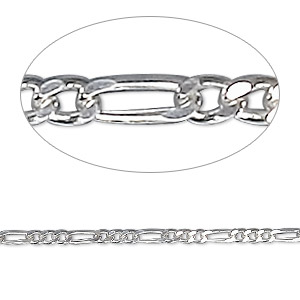
*** Figaro sterling silver 2mm chain by the foot. I purchased mine from Fire Mountain Gem and Beads, which came in a five foot length.
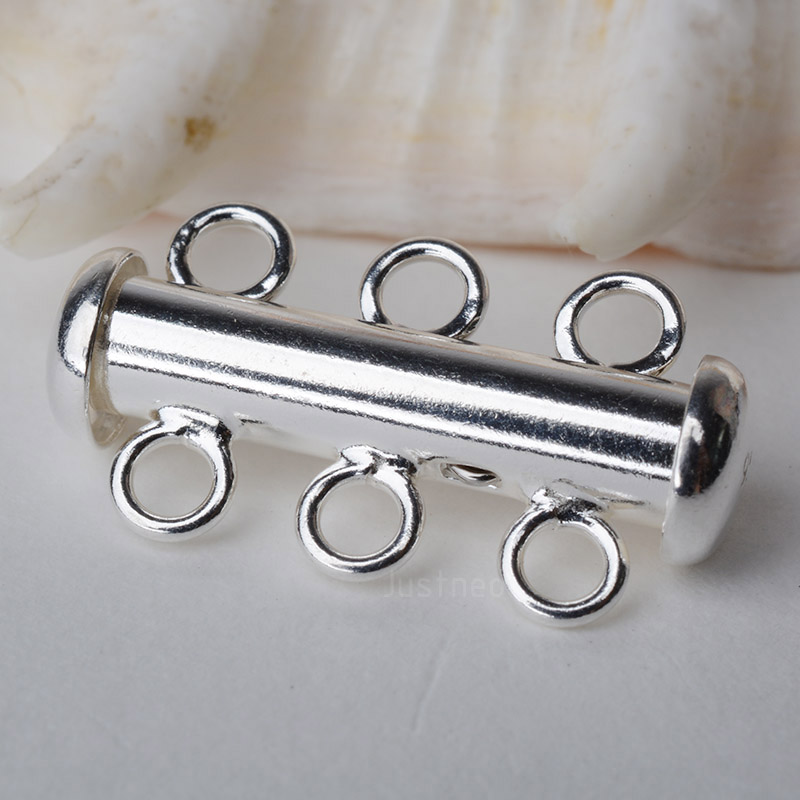
*** 3-strand clasp in sterling silver. You could also use a silver-colored base metal.
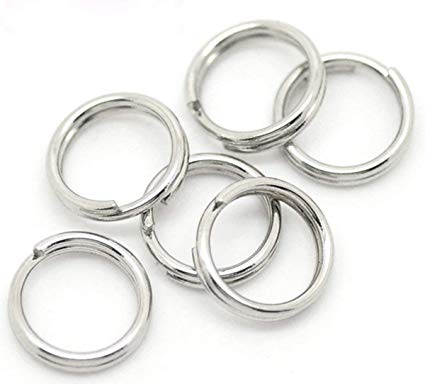
*** 8 sterling or silver-colored split rings in the appropriate size for your clasp.
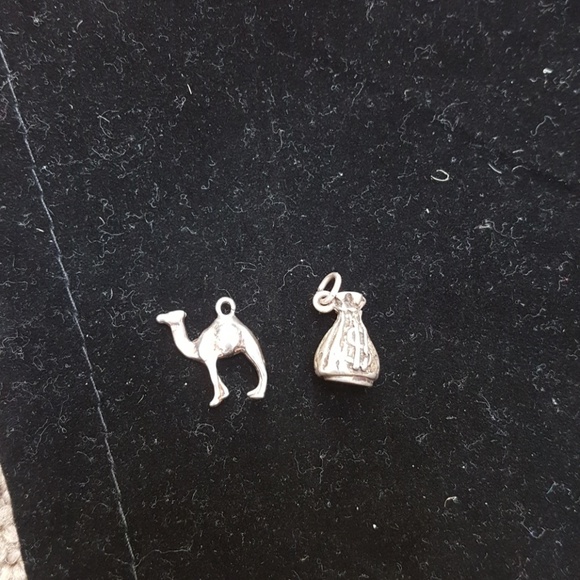
*** 2 sterling silver charms.
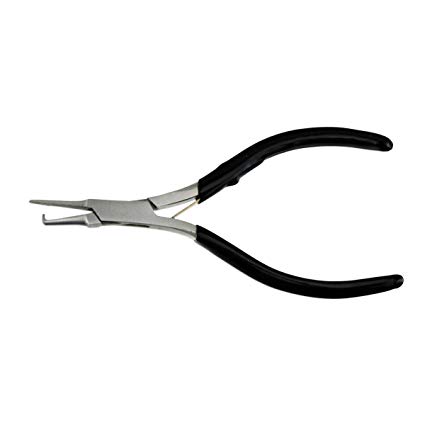
*** Split ring pliers.
2. Knotting the Sterling Silver Chain
Woman’s bracelets in the US are sized at 7.5 inches in length,
including the clasp assembly. Depending on how tight you get your knots,
knotting the chain will use up approximately 2 inch of chain per knot.
To make sure you have the needed length, I recommend you cut three,
twelve inch lengths of sterling silver chain. Matching up the ends on
one side, lay the three strands side-by-side and at the mid-point, knot
all three strands together. Pull tight and use a pin or pick if need be
to tighten the knot.
Do the same at the mid-point between the middle knot and end on both sides.
3. Attaching the Clasp
You’ll be placing the split rings on the oblong section of the Figaro
chain. If need be use your wire cutters to remove any smaller links at
the end of each strand of the sterling silver chain. Then using your
split ring pliers, attach your chains to one side of the three-ring
clasp.
Fire Mountain Gems and Beads has a great video on using split ring pliers. The concept is the same as putting a key on a key ring.
4. Adding Charms to the Figaro Chain
Trim the other side of the three sterling silver chains to the
correct length for the bracelet, making sure to include the length of
the clasp. My clasp/split ring assembly added one inch in length, so I
trimmed my chain to approximately 6.5 inches, making sure that the
oblong part of the chain was at the end of each strand. It’s better to
trim so the bracelet is slightly longer than shorter if need be to
properly place your oblong section of the Figaro chain.
5. Selecting Your Charms
Depending on what type of charms you are using, use a split ring or
the built-in lobster claw to attach your two charms equally spaced
between the three knots.
My charmed theme was phobias. I hate bugs and snakes, so I used a
spider and snake charm. Plus there is plenty of room to add more charms
in the future. I already had a 14K and diamond spider charm in my
findings collection that I used for my phobia charm bracelet.
6. Making it Even Easier!
If knotting the Figaro chain is too much hoop-la for you, purchase a
Figaro bracelet and add the charms to the oblong sections. If a lobster
claw clasp is already attached to the charm, it’s easy to add and move
them on your charm bracelet.
One question I get asked again and again is, ‘What is the best graphics tablet?’ as I’m a digital artist, it seems only natural to ask me.
It’s easy to understand why this is perhaps the most frequently asked question to not just me, but every digital artist. The reason for this is because graphic tablets are a unique and confusing technology!
So, the first step to finding the right graphics tablet for you is to understand the technology that’s being offered!
Thank you to Nekoni for her thoughts as an artist on graphics tablets.
First I’ll explain the words that are used
Then look further down, to find out about sizes.
At the end, I’ve recommended the best tablets, in my opinion, depending on various types of artwork.
Important!
What is a graphics tablet?
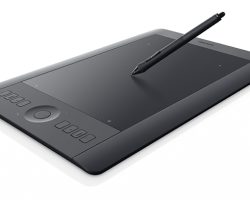
The graphics tablet (or ‘digital design tablet’) is an input device (like a mouse, or keyboard) which acts like a giant and highly accurate touchpad, controlled by a stylus (digital pen). It allows artists to draw directly into their graphics programs on PCs, Macs and Laptops.
What can one do?
TRON – speedpainting by SaZo
Pen-specific technobabble:
The language that is used by graphics tablets sellers is very confusing.
Here is a list of the most popular phrases used in relation to the graphics tablet pens and what they actually mean!
“stylus”
The term specific for digital input pens used with graphics-tablets and other hardware. It’s not always used, but is the actual term. (imagine if you were told your new ipad came with a free ‘pen’? Why would you want a pen? Now imagine you were told it came with a free ‘stylus’? Awesome!) “ergonomic pen” “grip pen” “easy to hold pen”
Almost all graphic tablets today come with a comfortable, easy to use variety of stylus (the exact shape and features vary). These don’t affect the quality of your digital artwork, but they do affect how comfortable you are while using them, and there’s no ‘right’ choice. “cord/cable/wired stylus”
Refers to a stylus that is attached to its tablet by a cable. The stylus is therefore slim and light. It’s pretty rare today, as wireless is the standard for most models. “battery operated stylus”
Sends a signal from the pen to your tablet. The stylus needs to be large enough to contain a AAA battery, but is shaped in a way so that it’s narrower at the point at which you hold it. “battery-less stylus”
The tablet powers the stylus via electro-magnetic resonation, which means these styluses are slimmer and lighter than the battery powered alternatives. “tilt sensitivity”, “tiltability” “rotation””tilt recognition”
What most artists are looking for when they chose a stylus with one of these descriptions is a stylus which has a sense of ‘right way up’ and ‘upside-down’ so that it can make more complex digital brush strokes (this is a great feature, especially for painters!). But these terms also may simply mean that the stylus still works when you’re holding it at an angle, (and I’ve never found a stylus that doesn’t). For this stylus it’s best to rely on reviews, as less scrupulous retailers and second-hand sellers who don’t understand the terms can easily use the wrong term, and lead you to disappointment if you don’t know what you’re buying. “levels of pressure sensitivity”
The range of pressure sensitivity starts at 256 levels of pressure, and reaches 3000. 1024 levels of pressure can be registered by most graphics programs, and only the newest and more advanced programs can register anything higher. Levels of pressure sensitivity literally explains how sensitive your pen is, the more sensitive pens will be able to tell the difference between different pressures, but this will only be shown to have an effect if you’re using extremely large brush sizes (upwards of 1000 pixels, in the latest software), or, in some cases, very light pressure (the quality of the pen’s nib and the drawing surface can effect the pressure you need to apply just as much). I suggest 256 and 512 for the beginner or sketcher, 1024 for the student or professional artist, and 2048 or above for the super-professional or any artist who uses a tablet for poster-sized art-work. “Interchangeable right and left-handed pen”
This is one of those marketing oddities, I assume the companies must say this in order to assure left-handed individuals that they too can use graphics tablets… though I’ve yet to find any evidence of a left-handed pen having ever existed.
Tablet-specific technobabble:
So now you know what they’re saying about the pens… how about the tablet themselves.
The tablets are all important and have their own range of specialist phrases.
Here’s a list of the phrases and their meanings.
“programmable hotlinks/ buttons/ scrollers / wheels?”
Most artists find the wheels/scrollers to be useful for controlling the zoom in graphics programs, and for rotating canvas in those that allow it. But neither they nor programmable hotlinks are a actually a required function on any tablet, they’re more of an extra feature that you can use, if you like, to save time. “lines per inch” or “accuracy”
Much like dpi or dots per inch, this is the sensitivity of your graphics tablet and how accurately it recognizes the location of your pen. Unfortunately, not only is this rarely mentioned, but the effect this number has also changes depending on your computer’s settings, and the size of the tablet itself. The end result is that the pen does not follow the path you draw exactly, or makes your lines jagged. The way to avoid this is to read customer reviews, even if a number is given, and bear in mind that the cheapest of these tablets usually come with this disadvantage. For the beginner, or casual artist, or someone who does not intend to use their tablet for fine art, this isn’t much of a problem. It can usually be compensated by working zoomed in, but that has the disadvantage of letting you see less of your artwork at once, and takes longer to draw the same lines. “work area/ live area”
Pay attention to this, a graphics tablet will be described as 10 by 15 inches, but the actual numbers you need to actually pay attention to those of the ‘work’ or ‘live’ areas, the space on which you can draw, which measure much less- say 5 by 8 inches. These numbers are possibly the most important thing when it comes to buying a tablet! What you need to look for is a graphics tablet that matches the size and ratio of your screen as much as possible.
What happens when you buy a tablet that is much smaller than your screen?
It’s very simple, when you draw in real life, say, on a piece of paper, you draw to a scale of 1:1. The motions you make with your hand equal the size of lines you end up with on paper exactly. When you draw on a graphic tablet, these sizes never match completely, but it’s best to get as close to reality as you can.
An example of a size mismatch:
Here is a small tablet and a large screen. You can see the actual line which is input into a tablet, then the line that comes up on screen.
imput: what is drawn in real life. result A mismatched size also has the disadvantage of being less sensitive.
If your tablet is half the size of another tablet, but only has the same level of sensitivity, your small tablet is only half as sensitive. Then add to that the fact your hand is only so accurate, and you are in effect trying to draw, really, really tiny.
If you’ve ever tried to draw a nice picture, but really, really tiny, then you can see the obvious flaw with that. There’s a limit to just how accurately you can control your hands.
There are ways to compensate for a small tablet, as you can simply zoom in until the size matches, or you can set your tablet to only represent a smaller part of your screen.
However, drawing on a smaller part of your screen has obvious flaws…andjust like with a tablet with low accuracy, drawing while zoomed in isn’t a flawless solutution either.
As well as being unable to see what you’re doing in relation to the rest of your artwork, or being unable to edit it quickly, you will end up taking slightly longer and each and every line. Proffesional artists should try to avoid this.
My own screen is actually 18 by 12 inches, and the tablet is smaller (around 12 by 7.5 inches of work area) but it is a much closer match and easier to draw with than my other tablet, which only has 5 x 3.5 inches of work area.
Another thing to take into account is screen ratio. I have a widescreen monitor. And so, I have a widescreen tablet.
Some tablets allow you to set a ratio for you to use, but remember, they can not ‘expand’ the work area outwards if you need a wider area to match your screen; they can only narrow it, vertically. If you anticipate keeping your screen for a long time, and it’s an unusual shape, try and buy accordingly.
Need help with watercolour? In this short page, I hope to reveal how I use the process of sketching to develop an eye for a subject and a process for capturing what seems a limitless scene. Constant sketching and varying an approach just to see what something looks like will help all artists who are trying to capture landscapes in watercolour.
Do we need another watercolour tutorial? The easy answer is no! But of course there is always room for an experienced artist ( with a modest outlook) to pass on some of that experience to fellow artists who may just be starting out on a journey of discovery.
I intend to create a series of lenses about sketching subjects ( such as trees, skies, sunsets, sunrise and the use of colours) whilst these are taking shape this lens should be considered a work in progress – thanks.
The accompanying sketch shows a still life painted at a meeting of my art group. This and all other images below are sketched and photographed/scanned by myself.
Why Sketch?
shouldn’t you just go for a finished picture?
Even the great artists sketch…. and the more they do this the better they are likely to be. Turner left many sketches to the nation after his death. Even his skimpiest works show how he was approaching issues like skies and landscapes. The constant sketching will more than repay the investment in time for any artist.
A painting simply called watercolour beginning shows a simple Turner sketch which probably would have been completed in the fullness of time. There are many of these in books and galleries but I have not yet located a web link. ( In fact, a brochure from an exhibition of Turner’s works held at the Tate does have a few things to say about the watercolour beginnings). One other example of a sketch by Turner is shown in this Tate Gallery Blog post which also discusses the faded appearance of the watercolour sketch.
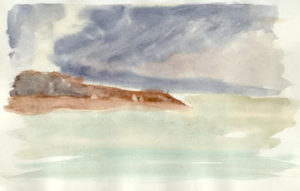
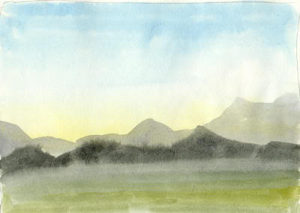
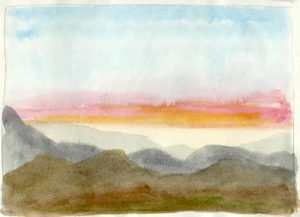
I often simply use up the remains of my palette to create sketches from my imagination – a little like doodling really but it does help to keep my pictorial vocabulary in use and growing. These sketches I call my “Turnerisms”, they show this simplistic doodling approach to landscape subjects. Not something I would frame and hang on the wall but “hey” they were done for fun and practice, and what is life without a little fun now and then. Just for reference they are all from a sketchbook which is about six inches wide, ( the longest dimesion in these sketches).
They were actually done on cartridge paper and so the effect of wet-into-wet washes is not very relevant but having fun and making marks is never a waste of time. In this series of lenses I hope to be showing you many more of my sketches, some in this vein, some looking more like finished works but all have the main objective of teaching me something.
As for the second question above, it is always worth sketching out one or two small thumbnail sketches to decide on compositional features prior to starting any major project/painting. Professionals do it, what makes any amateur think that they don’t need to? read about any major artist and the chances are that he will know what he is going to paint and how he is going to achieve any particular result before he starts. Why take a chance? Of course there are many instances of paintings being changed part way through but by and large even the masters will have made sketches of potential problem areas before the main work is started.
Some examples of what I am saying would be an obvious update to this lens, at the earliest opportunity. watch this space!

