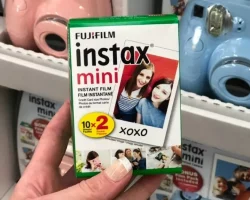
A Guide To Using Fuji Instax Refills
Fuji Instax is a great way to get high quality instant photos. However, the film can be expensive. Here are some tips on how to get the most out of your Fuji Instax refills.
Use the right type of film. There are two types of Fuji Instax film: wide format and mini format. Make sure you use the right type of film for your camera.
Store the film properly. Fuji Instax film is sensitive to light and should be stored in a cool, dark place.
Follow the expiration date. Fuji Instax film has a short shelf life and should be used before the expiration date.
Use a fresh battery. Fuji Instax cameras use a lot of power and the batteries can drain quickly. Be sure to use a fresh battery for best results.
Take your time. Fuji Instax cameras have a tendency to produce blurry photos if you don’t take your time to compose the shot.
By following these tips, you can get the most out of your Fuji Instax refills and take great instant photos.
Fuji Instax refills are a great way to keep your camera running smoothly and efficiently. Here are some tips on how to use them:
Choose the right Fuji Instax refill for your camera. There are different types of Instax refills, so be sure to select the one that is compatible with your camera model.
Follow the instructions on the packaging. This will ensure that you are using the refill correctly.
When inserting the refill into the camera, be careful not to damage the cartridge.
Once the refill is inserted, close the cartridge door and make sure it is locked.
Test the camera to see if it is working properly.
 If you have any problems, consult the Fuji Instax manual or contact customer service.