
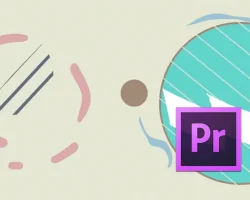
The Benefits Of Using Teal And Orange LUTs In Premiere Pro
The benefits of using Teal and Orange LUTs in Premiere Pro are plentiful. They allow for a more realistic and accurate image, which can give you a more pleasing looking film look. Additionally, they can help to improve the overall workflow and accuracy of your footage.
If you’re looking for a way to improve your video editing process, then using Teal and Orange LUTs is a great option.
If you’re someone who uses Premiere Pro, then you know that there are a lot of different ways to customize your editing process. One of the most popular ways to customize Premiere Pro is to use lUTs.
LUTs are little cascading sets of color filters that can be applied to a video file to change the way it looks. They can be used to change the color of light and dark areas, to add saturation or brightness to videos, and to create a more realistic look.
When used in combination with other filters, lUTs can create a really unique and interesting editing experience. For example, if you want to change the color of a person’s skin in a video, you can use a lUT to change the color of the skin.
Another great thing about lUTs is that they can be used in any video editor, regardless of how you’re used to working with videos. For example, you can use them in Premiere Pro, Final Cut Pro, or even MPEG-4 video editors.
If you’re looking for a way to customize your editing process in Premiere Pro, then you should definitely check out lUTs.
When it comes to video editing, one of the most important aspects is the look of your video. In order to provide a professional look and feel, Premiere Pro users can use the color temperature tools known as LUTs.
LUTs are used to change the color of an image in Premiere Pro. There are a variety of LUTs available, and each has a different effect on the look of your video.
Some of the most popular LUTs used in Premiere Pro are the teal and orange LUTs.
The teal LUT is a versatile and popular LUT. It can be used to change the color of an image in Premiere Pro. When used with other colors, the teal LUT can create a professional look.
The orange LUT is a less popular but equally effective LUT. It can be used to change the color of an image in Premiere Pro. However, like the teal LUT, the orange LUT has a versatile and professional look.
Both LUTs are important in providing a professional look and feel to your video. If you want to achieve a high-quality video, using either of the LUTs is a good way to go.
If you’re looking to improve your Premiere Pro video editing workflow, you may want to consider using teal and orange lut files. These files allow you to change the color of your video footage based on the current color temperature of your camera or device.
Here’s a little more detail on what these files can do for you:
Teal and orange lut files are designed to improve the appearance of videos. When used in conjunction with other editing tools, they can help to change the overall color of a video.
For example, if you happen to be editing a video in a dark room, you can use a teal lut file to give the footage a more overall light color. Conversely, if you’re editing a video in a bright room, you can use an orange lut file to give the footage a more overall color.
Since these files are specific to Premiere Pro, they can help to improve the video editing workflow in your software. In addition, they can be used in other video editing software applications as well.
Overall, using teal and orange lut files in Premiere Pro can give you a more consistent look and feel for your videos. This can be a great way to improve the overall quality of your videos, and it can be a great way to make your editing process more efficient.


