Best Drawing Tools

Best Drawing Tools

Only the Best Materials Needed for Drawing

This is a list of my best drawing tools. This collection is by no means the Cadillac of art supplies, but in the mid to high range price point. While I don’t have the money for the super expensive stuff, I don’t like to compromise on quality.

I’ve drawn most of my life and have been perfecting my craft for years. As time goes on and I try new stuff I may tweak the list a bit.

I also believe that most of these drawing supplies are great for beginners. My reasons, there’s no use in handicapping yourself with crumby equipment. Thankfully, drawing isn’t like oil paints in that even the best doesn’t cost a fortune. Aside from that, experimenting with a variety of supplies always gets the creative juices flowing.

The Best Pencil For Sketching And Travel

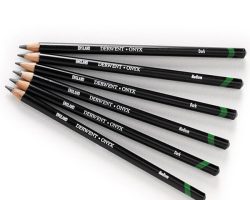
Derwent’s Onyx pencils
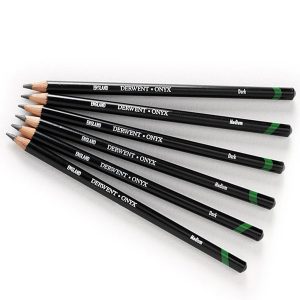
The best sketching pencil so far, that’s not

even the best as pencils go, is the Derwent onyx pencil.

It’s remarkably strong, and it’s capable of some pretty black shades. No, not as good as carbon or charcoal because it is still graphite that will get shinny if you overdo it.

I’ve used it in serious finished work, like this here Anubis puppy, and I thought it was an ok serious pencil, but I haven’t made up my mind yet. It’s kind of an odd ball, or “black sheep” of my pencils.

One thing I want to note, I don’t think it would make a good pencil to learn how to draw with. Only reason is that it doesn’t give me that feeling a soft graphite does. I wouldn’t want someone to miss that experience because of my recommendation. It’s just too hard of a lead that I think would make an absolute beginner frustrated.

Now, on the doggie drawing over on the right, a good many of pencils came into play to create this, including my woodles pencils, but I wanted to state where I used the onyx. The little scratching texture effect on the blanket. Those are the little wispy lines. There is also a great deal on his snout, and pretty much any of the blackest blacks that are in the work.

The Best Drawing Pencils

CreateAcolor Graphite Pencils

The pencils that stuck out the most for me were the CreateAcolor’s professional grade pencils. They just seemed a cut above Derwent, although I’ve used derwent for years and it’s not a bad pencil.

They create beautiful, smooth lines, I don’t think I’ve ever experienced any gritty spots.

I no longer need to buy the big tin, just single pencils to replace the ones I’ve used up, but if you buy the big tin of 24 there is a schematic on the top of the lid, much like a box of whitman’s chocolates. This has pictures of pencil marks to show you how dark that particular pencil grade gets. This is one of those things I wish I had when I decided to quit dabbling and really learn to draw.

Sadly I haven’t been able to find the 24 count tin in my travels in a good while. If you happen to find it, better hop on that sucker, or if you find that the 12 count tin has the awesome schematic, please let me know. 🙂

The Best Drawing Paper

Portrait drawing on stonehenge paper, created by, Shannon FleetLet’s get down to the foundation of sketching and drawing. Paper is oftentimes more important than people think. Drawing can be done on just about any paper, or with any tool that makes marks, but good paper makes a huge difference, sometimes the difference between success and failure depending on which drawing media you’re using.

On the flip side, the best paper makes for a better creative experience. Your pencil will also respond differently to different paper, this will either be frustrating, or give you a wonderful feeling. For artists who work with colored pencils, they need a paper with enough tooth to build layers of color that doesn’t fill up too fast. On the other hand, artists who use charcoal or pastels need a paper that is super toothy or else the powder particles won’t hold.

The paper I speak of here is the stuff you want to create finished work on, I have and use several different varieties since I’m hopelessly addicted to art supplies, but here is both of my favorites.

This drawing was created using Stonehenge paper.

The Best Hand Held Pencil Sharpener
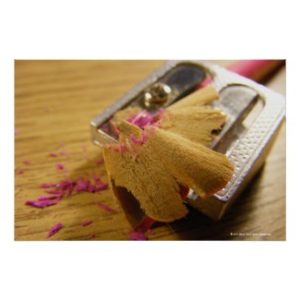
Pencil Sharpener Print by WallJewelry

Those pencils aren’t going to sharpen themselves! This particular issue has always been a problem with me. I’ve tried everything in the past.

I’ve always had romantic notions of the artists that use a knife to hone their pencil tips with care. This, I’ve been told and read is the best way to sharpen your professional pencils. I’ve never liked it.

For me the convenience of a regular, no frills pencil sharpener and a sand paper block was all I could deal with. I just want to get back to work!

Convenient, yes, but sadly most pencil sharpeners suck. They wear out super fast, and when they do wear out they chew rather than sharpen. This creates a ton of waste and frustration. I’ve been known to rage when it snaps the tip off of my lead causing me to stop and grab a 9H pencil to dig it out.

Even worse they are deceptively cheap, so one doesn’t notice the added cost and waste of having to buy a new sharpener just because the blade has worn out. This cost adds up over time.

Of course, there are electric pencil sharpeners. I give you an unprofessional “LOL” at this. You can’t take them with you.

The Best Artist’s Erasers

Some of My Erasers, Plus Some Improvisation
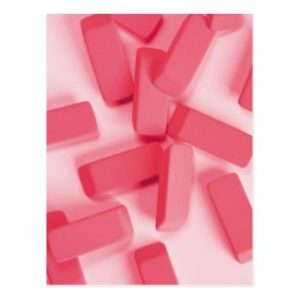
Pink Rubber Erasersby FallSeason

The eraser is also a great drawing tool that’s often overlooked. I use it for the obvious, to fix mistakes, for pulling out graphite from the tooth to lighten the tonal value of an area, and finally I actually use it to draw with.

I like to use three types:

The Kneaded, well it’s not exactly a traditional kneaded, but I’ll explain in a minute. Your trusted kneaded putty will do all sorts of stuff. Clean up, pull out graphite or charcoal, clean any smudges, create shapes. It’s the one that I use the most.

The regular white plastic eraser. For all of those general tasks that the other erasers can’t do. It’s ok to not have the best here, provided it’s not one of those pink erasers. You don’t want it to destroy, or otherwise flatten the tooth of your paper, or even worse, to rip it to shreds. But, the best does exist! I’ll show you below.

The last, is my trusty clicker eraser. The one I like to use is the tuff stuff stick. I used to use the fatter clickers, but they were terrible to draw with, yet not big enough to erase large areas. Plus, with my old clicker if I bore too hard on it I would nip off the top! Took me a long time to find tuff stuff.

UHU’s White Or Blue Tac As An Eraser

Better than any kneaded eraser on the market
Let me explain my substitute for the kneaded eraser. I like to use white tac. It can be pretty hard to find and you have to get it from the UK. lol. It’s the same as blue tac and you can use the blue too! Either one you can get your paws on.

It comes in a larger quantity than real thing, which also makes it cheaper. It’s stronger, lasts longer, and picks up more graphite and charcoal. It makes me hate to have to use the old kneaded putties. This is why I crowned it the best.

About Best Drawing Tools

The drawings and sketches were created and copyrighted by Shannon Fleet. That would be me!

The other images relate to Zazzle and are copyrighted by the artists who created them. A link is provided to the Zazzle site if you’d like more information on their work.

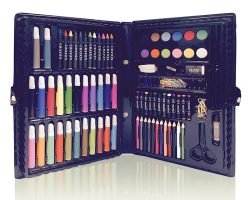
Deluxe Art Set

Deluxe Art Set

Do you know what art is? , If so, are you interested in art?

Visual Art is a great way to increase your creativity skills; one of the best. Generally Art has to do with expressing your emotions. Visual art is one of the most important portions of art in which emotions, thoughts, messages are converted in to visual graphics. Graphics is basically using points, lines, planes and textures to express an idea. In other words, one or more of technologies and findings of human beings are released through art. All these technologies were just an idea in the mind of their inventors.

So, how is an idea is transformed into a product?

This is probably an important equation that you should ask. The first thing is that you have an idea to create a new product; it can be a new crazy house which is constructed out of living plants or paper. This may be quite crazy to think or seems unrealistic. But if you can manage to express and experiment your ideas in graphics, you can realize whatever you can think of. Graphics helps you to find out if something works or not. This is very critical in fields like Architecture and Mechanical Engineering.

Have you ever looked for a complete set of Artists tools?
Darice 80-Piece Deluxe Art Set is made to meet all your desires as an artist. The set is more than enough for a serious artist to make many great water colors, awesome paintings using the included HQ oil paints. The pack is also full of a set of tools including water color, oil paint, sketch pencils, several brushes and many other accessories.

Darice 80-Piece Deluxe Art Set Best qualities
Darice 80-piece deluxe art set- is perfect for a student like me which is interested in Art. This set is an ideal pack for an artist to express his emotions in the way he likes. The type of art an artist can do using this set is a lot. One can just make pencil sketches or comic cartoons only using the color pencils provided. Others prefer to make oil or water paints.

Make your art come alive. Use the right supplies.

Enjoy Art Express your emotions in Art!!

Darice Art set in Youtube

https://www.youtube.com/watch?v=FTRIbnVg_pQ

How to Choose the Best Watercolor Paint Sets

How to Choose the Best Watercolor Paint Sets

How to Choose Watercolor Paint Sets

What are the best Watercolour Paint Sets for you to use? And why? If you are a Professional, Student or even a Kid there are great paint sets to suit you. Knowing which one can help your art.

Each one has it’s advantages and disadvantages in cost, quality and use.

Types of Watercolor Paint Sets

Watercolor paint comes in different levels and types.

1. Kids
2. Students
3. Pros

It also comes in

1. Pans &
2. Tubes
3. Pencils

Choosing Students Watercolor Paint Sets

Types of Watercolor Paints Video

https://www.youtube.com/watch?v=Bd0PgwA55gs

Students Watercolor Paint Sets

Choosing Students Watercolor Paint Sets can be a tough one. Do you go for students quality or artists quality colors? Students paints are best for students right? Not necessarily so here’s why.

Students range from complete beginner to advanced.
Paints vary in quality and price therefore a more advanced student may want a better quality paint.
Even newbies may not want their art affected by inferior paints.
Not everyone can afford the more expensive paints. (or brushes for that matter)
And everyone has an opinion and most of those are different!

So where do you go from here? Decide on where you fit in to the mix. Also decide what you can afford. Then buy the best watercolor paints you can afford, either a well known student paint or an artists one.

When starting out getting a set can be the easiest way as you have a good starting range to begin with, then you can add individual pans, pencils or tubes later. This lens will be covering the pros and cons of each type of set too.

Artists & Professional Watercolor Paint Sets

Artists & Professional Watercolor Paint Sets are the better quality paints and therefore carry a higher price, but they have better pigments and last longer than student ranges.

Kids Watercolor Paint Sets

Kids Watercolor Paint Sets quality has improved over the years, but they are still basic.

My niece used to paint sheet after sheet of pictures. Each one looking like a single colored ink blob. The paintings went on fridges and walls and doors and eventually when then next batch of blob paintings came along in the trash. At this stage it just isn’t worth spending out on fancy expensive paints. Kids art gear isn’t too expensive, some isn’t too bad a quality whilst others are rubbish.

Now my niece is 9 and my sister despairs of the large range of art stuff she has. Watercolor paints and pencils, normal pencils, pens etc. As you child grows the paint quality needs to improve. It is no good them having paints that don’t work well this will just ruin their interest. So stick to kid’s paint as they are safer but get something increasingly better quality.

7 reasons why watercolor paints are great for kids.

Here are 7 reasons why watercolor paints are great for kids.

1. Kids love them
2. They are cheap
3. Parents can get the off the walls and clothes easier than oil or acrylic.
4. They are designed for kids so aren’t toxic if they go on the fingers then in the mouth.
5. They are easy to use.
7. They encourage creativity in kids which stimulates the mind and improves thinking.

How to Draw by Joy: Baby’s Portrait

How to Draw by Joy: Baby’s Portrait

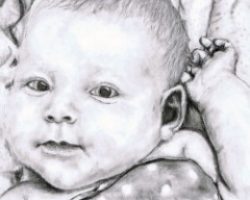
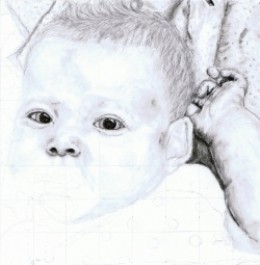
Step by step baby portrait pencil drawing

I am presently working on drawing this little one at two years old in a illustrations for a children’s book I am creating. Two of the illustrations are included on this drawing tutorial below.

This is a free drawing tutorial by Joy. Pencil drawing is a skill, that to a degree, can be learned. Of course it helps if you have an eye for it, and a creative streak within you. However, the skill of drawing can be learned by anyone with the determination and discipline to practice.

Through drawing, I have improved my photography by learning to see the world around me differently. I have also learned to think “out of the box” and pay attention to the story being told with the drawings and the photos. This seemed to come once I did not have to focus on technique so much. After a while I have become comfortable knowing what to expect out of the pencils and other supplies used in drawing, and I do not have to put effort into trying to get them to do what I want them to do. Now, I seem to be able to focus more on the composition and seeing what I am drawing differently.

I hope you enjoy this tutorial. I have many others with various drawing subjects for you to explore when you are ready.

More Portrait Drawing by Joy

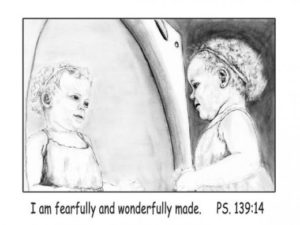
“I Am Fearfully and Wonderfully Made” portrait drawing (Aug. 13, 2012)

I am presently working on writing and illustrating a children’s book. Here is the progress on the first illustration. Just click on the photo to go to “I am my Father’s Child” Squidoo lens to see more illustrations the children’s book I am working on creating.

By the way, this little girl is the baby in the drawing. She is now 2 !/2 years old.

Finished….updated portrait of same child as in baby drawing. – August 14, 2012

Where to begin drawing your baby portrait…

Personally, I began by looking up portraits that I considered well drawn on the internet and took a look the artists who drew them, there styles, the materials they tend to use, and if they had a tutorial on their website, I read it. Some of these included: J D Hillberry, Lee Hammond, Remi Engles, and Diane Cardaci. After studying this for a few days, I gathered my supplies, and began.

Here is a list of supplies I used: graphite pencils (F, 2B, B, mechanical .7mm 2B, mechanical .5mm HB), charcoal pencil (soft, medium), a carbon pencil, tortillions (various sizes), a gummy eraser, a typewriter eraser, a scanner/printer, photopaper (to print the reference photos), strathmoore 300 Bristol (smooth) paper, a sheet of tracing paper to keep over the drawing in progress so that it does not smudge (I tend to need to protect my drawings as I travel and draw at the same time). Most of these products can be purchased at your local hobby store or amazon.com.

Essential Drawing and Sketching supplies:

Here are my favorite basic supplies for pen and ink, graphite, charcoal, and carbon pencil drawing and sketching.

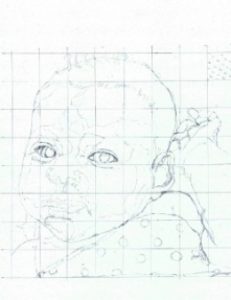
Step 1:
Reference photos and grid

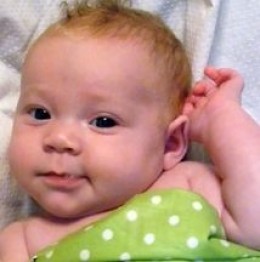
A good reference photo without any blurring is essential. Once obtained, scan it into your computer. Crop it to the portion of the photo that you will be drawing. Print it out in a size that you can easily see well. Next, determine the size of the portrait you will draw. A good size to start is 8″ by 8″ or 8″ by 10″. Once you have practiced a while, drawing larger portraits will not be such a challenge.

After the final portrait drawing size is determined, print out a black and white (grayscale) of the reference photo at the same size you will be drawing.

On the black and white reference photo, draw a 1″ by 1″ grid directly on the reference photo. And, then draw the same grid very lightly with the F graphite pencil on the bristol paper.

From here, begin drawing just the outline of the reference photo, square by square onto the grid. Occasional step back and look at the line drawing as a whole, but for the most part you will draw what you see one square at a time. Draw in only an outline of the reference photo, and do not include detail. If there are major areas of shading or highlights, then dot them in lightly. Here is an example of what I did.

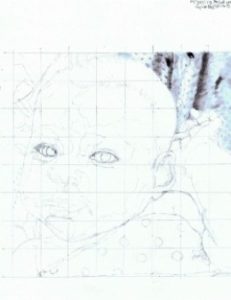
Step 2:


I am left-handed, so I usually begin in the upper right corner of the drawing. This is very important, because you do not want to smudge the drawing with your hands as your progress over the portrait. If you are right-hand, then choose the upper left side of the drawing to begin. I use the black and white reference photo under my hand to prevent smudging my line drawing.

I begin using my graphite pencils here and start shading using the tortillons of various sizes. To figure out where to shade, I pay close attention to the black and white reference photo. There are shading techniques that you can learn from tutorials of the above named artists on their websites or books they have written. If you pay very close attention to the details of the shading on the black and white reference photo, and play around with your totillions and pencils on a scratch paper as you go, you will develop your own technique of achieving the shading in the photo.

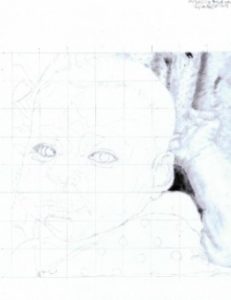
Step 3:
The hand and arm…

This proved to be the hardest part of the drawing for me. I had to learn not to draw lines to create the arm and hand. This one is not perfect, I still have work on developing my ability to draw this portion of the portrait. I did learn that I can kind of dot in the hand outline and use shading to bring it out. I closely followed the shading in the black and white reference photo (paying very close attention to each square of the grid, one square at a time). I drew mostly with the toritillions, not the pencil. I would just rub the end of the tortillion on the charcoal pencil and use it to shade according to the reference photo.
My Favorite Essential books for Drawing

In my opinion, anyone who loves drawing should have a copy of these books on their reference shelf. They are full of inspirational ideas and skills to enhance your own drawing performance.

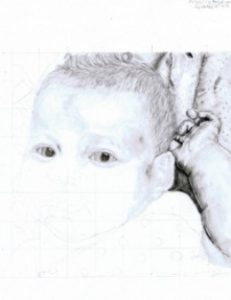
Step 4:
hair and forehead

While I moved on to the hair and forehead, I went back to the blanket and arm and hand regularly, adding darkened areas with my charcoal pencil and carbon pencil. Be sure to do this sparingly, a little dark goes a long way :-).

I learned from the above listed artists that the hair must be built up in layers. So I used the F pencil to lay the foundation, making strokes that followed the hair in the reference photo, but also following the shape of the head. I alternated drawing with pencils, blending with tortillions, and drawing with my kneaded easer in hair-like strokes, until it appeared as close to the reference photo as I could get it. I shaded the forehead the same way as I did the hand and the arm, paying close attention to shading under the hairline, and highlights.

I then began to darken in the eyes, keeping in mind that to create a real eye, the eye is round inside the eyelids, and that the eyelids contain several layers to the edges with dots rather than just a solid line.

Step 5:
The nose and ear…

As I draw, I tend to go back a little at a time, fine tuning what I have already done and adding darks and lights to the drawing.

I continued down the face to the nose, paying particular attention to the fact that a nose is primarily shaded onto the face with very few hard lines. These hard lines are created by the shadows under the nose and around the nose rather than drawn in with the pencil. I primarily used a tortillion that I rubbed on the charcoal pencil as I went along.

I also began shading in the ear, paying very close attention to the dark shaded areas to create the lines rather than my drawing them in. I also added the hair over the fingers here, and began adding more detail to the hair and building the layers in it.

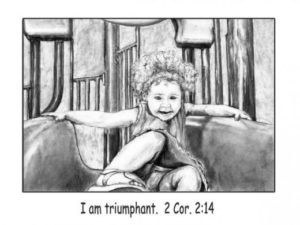
Triumphant – August 18, 2012

This one of her was so fun to draw. She has great facial expression. I also used a few new techniques to get the slide to come forward in the drawing.

Step 6:
Ear and Mouth

I am working my way down the face to the mouth now. I left out the bubbles from the reference photo on the mouth and began shading it in. Here I remembered from the artists listed above, that highlights are very important in creating a realistic mouth and also the deeper shading. I also paid close attention to the lines in the mouth begin careful to shade them in rather than draw them in.

The blanket was shaded in next in layers. The first layer was my 2B pencil, held like a wand and shaded in an up and down direction. Blended with a large tortillion, then shaded in with the same wand like method of holding the pencil, but this time in a side to side direction. Again, blended. Leaving the dots white and using a kneaded easer when the shading bled into it. I used the carbon pencil in spots to bring out the edges and shading in the edges. The charcoal pencils was used on the tortillion to shade in the darker folds of the blanket in the foreground.

Step 7:

In the final stage, I finished up the arm at the left bottom side, and went back to adjust the fingers a bit on the hand. I also went back with my carbon pencil and added a little dark here and there, and did the same thing with the typewriter eraser (very lightly) to add highlights here and there. The darks and the lights should be added sparingly. A little goes a long way. I will keep this drawing up on the easel with the reference photos for a while longer. This way as I see it from time to time, I can touch it up a bit here and there. When finished, I will spay with a fixative to keep it from smudging. Then have it framed and matted at a local store.

Don’t forget…

to have fun!!! Drawing a little bit everyday creates drastic improvements in your drawing. Draw what you enjoy. Post it on your own lens or FB and have fun with your drawing.

Joy Neasley — the Missionary and the Artist

I am a missionary and an artist. I was born in East Texas, but left at age 19. Eventually, I settled in Tennessee. Over the years, I have raised two children who now live in Tennessee. Missionary training began at RBTC in Oklahoma in September 2005, with graduation from the missions group after two years in May 2007. Then, after returning to my hometown, Clarksville, TN, I began preparations to head out to Northern China, which took place in May 2008.

Drawing is a new skill which started in Spring 2009. During a time of recuperating from an illness for several months, I found ample time to spend in prayer. Out of that prayer time, I began to draw and write cards for various people, in which, I was led to spend time in prayer. Before I was finished with these cards there were a little over 60 of them. They were very rough sketches, but none-the-less, what I was led to do. Through this process, I realized what He was doing, and I continued to draw and develop this skill, and still continue to grow and develop. These drawings are the result. As I travel through China for my primary purpose of ministry, I draw, creating a visual journal of what I see.

I really enjoy the drawing and the purposes for which God has placed this gift in my life. A whole new door has opened, and I am walking through that door, eagerly awaiting to see where the road beyond it leads.

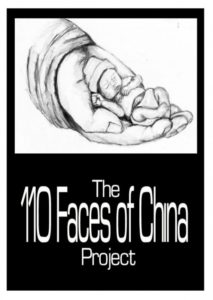
In mid-May of 2009 I moved into Southern China. I love the people and the ministry work here. I still travel around China and work where needed in association with another ministry here, also. This year, to help share the people I meet with my friends and supporters back home I am working on The 110 Faces of China Drawing Project. I have six of these finished, and working hard to get more finished as time permits. I also have started a blog with regular updates about the people, myself, and the drawings. You can check out this and my blog,” What is it like to be a Missionary Today”, in the links on this Squidoo lens. I also have a Fine Arts America website (linked to this lens) where prints and cards of my drawings and photos are made available to everyone.

Thank you for your prayers and support!

Blessings,

joy neasley

P.S. – if you want to support this ministry, the fastest way is to make an Online Donation via www.WorldOutreach.org. Go to “Donate” and select Joy Neasley – Asia. The system can process USA and International cards. Or simply mail your gift to World Outreach Ministries, PO Box B, Marietta, GA 30061, and designate for Joy Neasley Fund.

Gift of God – July 28, 2012

Theater For Children

Theater For Children

Kids Performing Art!

Theater is one of the most exciting and most educational projects you can to do with kids.

Developmentally, it’s hard to top theater. Drama can teach word skills like reading, writing, imaginative composition (fiction they call it, or drama), plus a feeling for the spoken music of words and poetry. Not to mention a smattering of history and literature.

Socially, drama teaches both cooperation AND independence, recognizing and dealing with emotions, empathy, plus the practical skill of speaking in front of an audience. Public speaking is a skill many adults wish we had developed. Music. Dance. Magic tricks. Almost any skill or interest can find a home onstage. There’s a whole branch of theater called improvisation: always useful to learn how to think on your feet. And as children get more involved in what’s called “technical theater” – all the props, costumes, sets, lights, sound etc. – math skills, visual and spacial skills, and handicrafts all come into play. Plus innovation. There’s a LOT of problem-solving in theater.

There’s also a great deal of comradery and joy.

Start small and easy: goof around with puppets, make masks, recite a poem, act out the Three Bears – – – Have fun onstage.

The picture? A set from a children’s production of “Charlie and the Chocolate Factory.” Since I happen to have an abundance of factory-themed children’s sets to decorate this Lens, let’s think of it as a big Drama-Fun Factory! I’ll point out some of the gears and levers that will help you make your own at-home theater. It’s also a factory-in-progress (as all my Lenses are), so please visit again to see what new gears have been added.

Puppet Theater

Always popular with kids
There is something fascinating about puppets. They combine the make-believe and miniature joy of dolls with the expression and story-telling of people – while, best of all, shy performers can hide behind them like a mask. (More on masks later.) Any child can say more, a lot more freely when using a puppet. (As psychologists know.) Puppets are freedom and wild improvisation.

It’s most fun to build your own puppets and puppet theaters, but store-boughten is fun too.

Do It Yourself Puppets

Punch. Where’s Judy? PAPER BAG PUPPETS – Maybe the simplest puppet is the paper bag puppet. Take a plain brown lunch bag and have your child draw the puppet’s eyes and nose on the bottom, so that the fold (where the bottom folds flat) becomes the inside of the puppet’s mouth. Colored markers or poster paint (not too wet!) will look bolder and more effective than crayons or pencils. Adding cut paper elements will make the puppet more exciting: a red construction paper tongue for a snake maybe or great big ol’ cow licks; the cow’s horns or moose antlers; arms and hands; or perhaps a silly mustache or paper wig. Scraps of fabric or fur can be fun. Anything, really. Go to the movies and watch the crazy puppets in the Fandango ads.

Now, how about adding a huge grocery store bag puppet to play the giant?

SOCK PUPPETS – Just as easy to make if you’re up for a little simple sewing: buttons for eyes, scraps of fabric for tongues, ears, hands; wool for hair.

GLOVE PUPPETS – One woolly glove becomes a quintet of actors. Or cut the fingers off (roll-hem the cut edges) and create five separate prima donnas. You could experiment with wool versus cotton versus rubber glove fingers (rubber for aliens maybe? add little teeny antenae) or roll your own finger tubes from any fabric or even stiff paper.

POPSICLE STICK PUPPETS – Almost any picture can be either printed onto stiff card-stock paper or mounted onto cardboard and glued to a popsicle stick. I suggest either adult-applied spray mount (flattest most permanent) or child-applied glue stick for the picture to cardboard gluing, then white glue like Elmers or hot glue (adult again or old enough child) for the picture to stick attachment. Try cutting out arms or heads separately and attaching these to the puppet’s body with old fashioned brass brads so you can change their poses. Suddenly they can emote!

OTHER “STICK” PUPPETS – As with popsicle sticks, almost any stick-like object can turn into a puppet. Try decorating wooden spoons or toilet paper tubes (which make finger puppets). Or how about – new! clean! – toilet plungers? Or spatulas or decorated pencils or pool noodles with drawn-on permanent marker faces?

SHADOW PUPPETS – These can be cut out cardboard shapes very similar to popsicle stick puppets. They needn’t be decorated with color unless you want to, but “decorations” made by cutting holes can be fun. Bring out the hole punch! I imagine you might be able to cut out small areas and then fill these with colored tissue paper or translucent plastic for a stained glass effect. Obviously you’ll need a shadow screen – stretched white fabric or paper – and a strong light to make these work.

MARIONETTES – These are more complicated puppets, but all you absolutely need are two flat sticks fixed together in an X with strings from the four ends that tie to the puppet’s arms, head, and legs or rear (whichever is funnier). The “puppet” could be any loose jointed doll – made of cloth or wood or cardboard tubes.

For older kids with advanced skills and a LOT of patience – and an interest in video – you could try making your own short film. Film puppets in action! (Watch a Muppet movie. Like that.)

Or if VERY patient and motivated, try making clay “puppets” to shot-by-shot act out a brief Claymation film. (Watch a Wallace and Grommet movie to see how masters do this!) But this stop motion filming technique is only for the extremely motivated and patient!

Puppet Videos

Scottish Falsetto Sock Puppet Theatre – Romeo and Juliet Part I
Rated PG – Extra Silly
Meant for older kids as it gets a bit, slightly, um, vulgar as the Bard and Scottish Sock Puppets are so apt to do. Make a nice antidote to classroom reading of this classic! The other vids are suitable for younger children.

Masks

Using and making masks for children

Poof! You’re someone (or something) else. Masks seem magical – a natural development of the baby’s game of peekaboo.

Masks can be made from almost any material: a paper grocery bag; a paper plate plus string; cut cardboard, felt, or craft foam plus elastic; paper mache (lots of goopy fun); or, if you’re ambitious, leather etc.; or there are lots of mask kits, where you start with a pre-formed face shape and decorate and add to it.

PAPER MACHE – Amazingly cheap and simple, though time consuming. Tear or cut newspaper into strips, the thinner, the more detailed you can get. Mix flour and water to make a thick paste, soak the paper in this till sticky but not soggy, then slowly build up your shape. It’s easier if you have a shape to lay the strips over. A kid’s-face-sized balloon can work or a plastic mask. You can add in cardboard to reinforce protruding pieces like ears or tusks – make sure these are well integrated into the face proper so they won’t rip off easily. Allow several days for the paper mache to dry before trying to paint or decorate it.

Photography Poses – A Posing Guide Just For You

Photography Poses – A Posing Guide Just For You

Photography Poses Can Be Hard To Recall On The Spot – Unless You Have Them Written Down

Gathering up all of your favorite photography poses and putting them in a notebook can give you a reliable posing guide that you can take on all of your shoots. Having a notebook like this will not only help you deal with unexpected problems that may come up but also help you plan on exactly what type of image you want to get. It will provide an excellent reference for any model on what pose you want and will speed up the whole shooting process.

There are posing guides out there for sell, but I decided long ago to come up with my own posing guide that has all of the photography poses and notes I find interesting and useful. A guide made especially for me, by me. This lens will show you how I created such an invaluable notebook and exactly what you need to do to create one for yourself. Once you get yours made, I guarantee that you will feel naked on photo shoots without it. You may even have to eventually start another, because odds are good it will fill up very fast with photo poses and notes. Posing for photos is never easy; help yourself and your model by providing a useful reference.

Basic Setup of My Posing Guide

Contents, Photography Poses and Ideas

1-The first thing I did was to buy me a pocket-sized Moleskine notebook. Any notebook is acceptable, but I chose this brand because I wanted something durable.

2-I then decided how I wanted to divide up the notebook.

Section 1-Contents (3 pages).
I made up a few categories that was important to me and whenever a photography pose fit into that category I put its number in it. The categories were photography poses for men, women and both. The image to the right shows you what I’m talking about; the only difference is that each category had their own page. You can even highlight your favorite poses. The next step was to number the pages (starting after the contents). I numbered each page, as I wanted one page to have only one pose on it (front page-1, back of that page-2 and so on).

Section 2-The photography poses and notes (150 pages / bulk of content).

Section 3-Ideas section (30 or 40 pages).
These pages are set aside for interesting ideas that may come to you on your shoot you may want to try at some point in the future.

Image by YellowHammer.

Photo Poses For Couples

Coming up with photography poses for couples is all about letting it happen naturally.

The important thing to remember when posing couples is that less direction is often more. Let the couple do all the work. The interaction between two people who care about one another will always get you some interesting photos. The second most important thing is to get them to feel comfortable showing affection in front of you. A zoom lens is a good idea here, as the closer you are, the more uncomfortable they are likely to be.

One good trick to use is to have one tell what they like or find sexy about the other. They could take turns. Doing this often puts some kind of emotion in the shot, whether it be bad or good. Having them dress up in interesting clothes or putting them in interesting situations is a small part of it, but in my opinion, it’s all about the emotion and body language.

Don’t Want The People In Your Photos To Look So Stiff?

Then consider hiring a professional model.

One huge benefit of using professional models during a photo shoot is that they are used to being in front of a camera. I like to take pictures that don’t look posed. People who aren’t used to getting photos taken of them will often look stiff. The only drawback to using a modeling agency is that you usually have to pay them.

There are some websites such as Model Mayhem, One Model Place or Models.com in which you can sometimes trade time for prints, but not always. I am beginning to realize that hiring a model pays off in the long run, just be sure to know what you want to shoot as most charge by the hour.

Posing Tip #1

When doing portrait photography, try to get the subject to laugh and feel comfortable before the shoot. Try to build a good vibe between the two of you. Poses won’t look as stiff and your pictures will come out much better.

Example Interior Pages of Posing Guide
Photography poses and notes.

First let me start off by saying I made the writing a little too big; most people’s writing won’t be this big unless they’re using a Sharpie pen. The image that you see above is what is in the majority of my notebook. I number each photography pose, draw the figure and then add a few notes. If your the type of person who takes a lot of notes you could always use one side for the sketch and the other for notes in which case you would only have room in you notebook for half as many photography poses.

What you put in your notes will depend on what you like and what type of photographer you are. I like to put whether the image would be better for a male or female (or both), lighting preferences, mood, emotional state of model and clothing ideas. Keep in mind that you don’t have to fill the page; a bare minimum of how you feel when you see the image is all that is really necessary in the beginning. I promise that you’ll add more as you use the poses on shoots.

Sketch Photography Poses
The perfect thing to use in a posing guide.

Although you could use photography poses cut out from a magazine (fastened by tape or glue), I like to sketch stick figures in mine. I found that when I used actual pictures I often sub-consciously copied the style and sometimes even the clothes. With bare-bones sketches you can truly create your own unique image.

If you are dead set on some color, why not use some colored pencils? I often put down what color I would like to use as a background against certain skin tones, and seeing as I don’t know all the proper skin tone names, pencils come in really handy. Use them sparingly, though, or your posing ideas could turn into a bunch of style ideas.

Posing Tip #2

This one is also about making your model feel comfortable. When going out on public shoots take with you some sheets or shower curtains and hangers so you can jury rig a place for your subject to change in private. You don’t want them to change out in the open.

11 Great Photography Poses

Great Photos That You Can Actually Own

Most photos that are actually being sold to the public are fantastic sources for inspiration not only for poses, but point of view and style as well. They will give you all kinds of photo shoot ideas and can help you become a better photographer if you’re willing to study them.

Lucinda in London, 1959 (12 x 12 in. Art Print)
Photo by Georges Dambier

Man Balancing in a Dance, Yoga Pose (16 x 16 in. Photographic Print)
Photo by Monsoon Images

Fashion Model Wearing Amazing Hat (22 x 28 in. Art Print)
By John French

Mountain Biker on Cliffs, Turnagain Arm, Alaska, USA
16 x 12 in. Photographic Print
Photo by Paul Souders

Little Ballerina (9 x 12 in. Art Print)
By David Handley

Cowgirl in Heaven (20 x 16 in. Art Print)
Photo by David R. Stoecklein

Woman Floating In Water / Weeki Wachee Spring, Florida
16 x 16 in. Photographic Print
By Toni Frissell

How to Make You Love Me by Elizabeth May
16 x 16 in. Photographic Print

Cowboy and Cowgirl Silhouetted on a Ridge in the Big Horn Mountains, Wyoming, USA
12 x 9 in. Photographic Print
By Joe Restuccia III

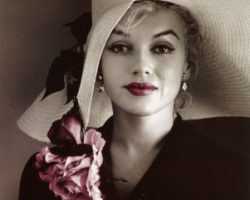
Marilyn Monroe – 24 x 36 in. Poster

Clint Eastwood – 14 x 11 in. Photo

Knowledge – 18 x 24 in. Art Print

A Great Place To Go For Posing Ideas

Wonderful ways to direct your subject.

Pose Maniacs is a website that has thousands of 3-D rendered models that you can actually rotate to get a full all around view of the pose you’re interested in. It is mainly used by artists learning to draw the human form, but I’ve found it perfect for getting good ideas for the camera as well. The only drawbacks are that the models have no skin (so you can see muscles) and in some of the poses there are only subtle differences. Despite this, the site is worth a visit. Below is the link.

Posing Tip #3

Never have more people than you need on a photo shoot and always allow the model to bring someone along if that makes them feel more comfortable. A comfortable model is always more photogenic and relaxed. You are also likely to get more natural poses from them than you would otherwise.

Want To Shoot In Low Light?

You need the right kind of lens.

Ever notice that when you take photos in low light that they are often not as sharp as they should be? One easy remedy to that is to use a lens with a lower f-stop. Either a 1.4 or 1.8 is recommended when shooting people less than ideal lighting conditions. This is the lens you’re going to need for when shooting at dusk, dawn or night, and when combined with a sexy pose will produce an amazing picture. You really won’t believe the difference until you experience it for yourself.