Best Drawing Tools

Best Drawing Tools

Only the Best Materials Needed for Drawing

This is a list of my best drawing tools. This collection is by no means the Cadillac of art supplies, but in the mid to high range price point. While I don’t have the money for the super expensive stuff, I don’t like to compromise on quality.

I’ve drawn most of my life and have been perfecting my craft for years. As time goes on and I try new stuff I may tweak the list a bit.

I also believe that most of these drawing supplies are great for beginners. My reasons, there’s no use in handicapping yourself with crumby equipment. Thankfully, drawing isn’t like oil paints in that even the best doesn’t cost a fortune. Aside from that, experimenting with a variety of supplies always gets the creative juices flowing.

The Best Pencil For Sketching And Travel

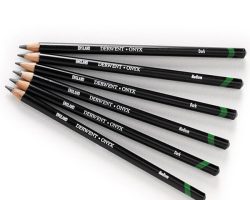
Derwent’s Onyx pencils
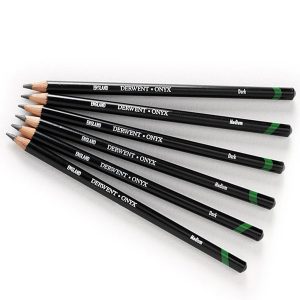
The best sketching pencil so far, that’s not

even the best as pencils go, is the Derwent onyx pencil.

It’s remarkably strong, and it’s capable of some pretty black shades. No, not as good as carbon or charcoal because it is still graphite that will get shinny if you overdo it.

I’ve used it in serious finished work, like this here Anubis puppy, and I thought it was an ok serious pencil, but I haven’t made up my mind yet. It’s kind of an odd ball, or “black sheep” of my pencils.

One thing I want to note, I don’t think it would make a good pencil to learn how to draw with. Only reason is that it doesn’t give me that feeling a soft graphite does. I wouldn’t want someone to miss that experience because of my recommendation. It’s just too hard of a lead that I think would make an absolute beginner frustrated.

Now, on the doggie drawing over on the right, a good many of pencils came into play to create this, including my woodles pencils, but I wanted to state where I used the onyx. The little scratching texture effect on the blanket. Those are the little wispy lines. There is also a great deal on his snout, and pretty much any of the blackest blacks that are in the work.

The Best Drawing Pencils

CreateAcolor Graphite Pencils

The pencils that stuck out the most for me were the CreateAcolor’s professional grade pencils. They just seemed a cut above Derwent, although I’ve used derwent for years and it’s not a bad pencil.

They create beautiful, smooth lines, I don’t think I’ve ever experienced any gritty spots.

I no longer need to buy the big tin, just single pencils to replace the ones I’ve used up, but if you buy the big tin of 24 there is a schematic on the top of the lid, much like a box of whitman’s chocolates. This has pictures of pencil marks to show you how dark that particular pencil grade gets. This is one of those things I wish I had when I decided to quit dabbling and really learn to draw.

Sadly I haven’t been able to find the 24 count tin in my travels in a good while. If you happen to find it, better hop on that sucker, or if you find that the 12 count tin has the awesome schematic, please let me know. 🙂

The Best Drawing Paper

Portrait drawing on stonehenge paper, created by, Shannon FleetLet’s get down to the foundation of sketching and drawing. Paper is oftentimes more important than people think. Drawing can be done on just about any paper, or with any tool that makes marks, but good paper makes a huge difference, sometimes the difference between success and failure depending on which drawing media you’re using.

On the flip side, the best paper makes for a better creative experience. Your pencil will also respond differently to different paper, this will either be frustrating, or give you a wonderful feeling. For artists who work with colored pencils, they need a paper with enough tooth to build layers of color that doesn’t fill up too fast. On the other hand, artists who use charcoal or pastels need a paper that is super toothy or else the powder particles won’t hold.

The paper I speak of here is the stuff you want to create finished work on, I have and use several different varieties since I’m hopelessly addicted to art supplies, but here is both of my favorites.

This drawing was created using Stonehenge paper.

The Best Hand Held Pencil Sharpener
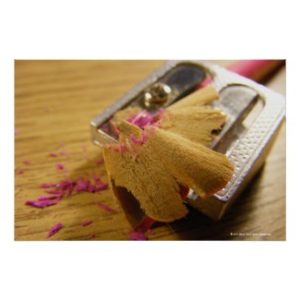
Pencil Sharpener Print by WallJewelry

Those pencils aren’t going to sharpen themselves! This particular issue has always been a problem with me. I’ve tried everything in the past.

I’ve always had romantic notions of the artists that use a knife to hone their pencil tips with care. This, I’ve been told and read is the best way to sharpen your professional pencils. I’ve never liked it.

For me the convenience of a regular, no frills pencil sharpener and a sand paper block was all I could deal with. I just want to get back to work!

Convenient, yes, but sadly most pencil sharpeners suck. They wear out super fast, and when they do wear out they chew rather than sharpen. This creates a ton of waste and frustration. I’ve been known to rage when it snaps the tip off of my lead causing me to stop and grab a 9H pencil to dig it out.

Even worse they are deceptively cheap, so one doesn’t notice the added cost and waste of having to buy a new sharpener just because the blade has worn out. This cost adds up over time.

Of course, there are electric pencil sharpeners. I give you an unprofessional “LOL” at this. You can’t take them with you.

The Best Artist’s Erasers

Some of My Erasers, Plus Some Improvisation
Pink Rubber Erasersby FallSeason

The eraser is also a great drawing tool that’s often overlooked. I use it for the obvious, to fix mistakes, for pulling out graphite from the tooth to lighten the tonal value of an area, and finally I actually use it to draw with.

I like to use three types:

The Kneaded, well it’s not exactly a traditional kneaded, but I’ll explain in a minute. Your trusted kneaded putty will do all sorts of stuff. Clean up, pull out graphite or charcoal, clean any smudges, create shapes. It’s the one that I use the most.

The regular white plastic eraser. For all of those general tasks that the other erasers can’t do. It’s ok to not have the best here, provided it’s not one of those pink erasers. You don’t want it to destroy, or otherwise flatten the tooth of your paper, or even worse, to rip it to shreds. But, the best does exist! I’ll show you below.

The last, is my trusty clicker eraser. The one I like to use is the tuff stuff stick. I used to use the fatter clickers, but they were terrible to draw with, yet not big enough to erase large areas. Plus, with my old clicker if I bore too hard on it I would nip off the top! Took me a long time to find tuff stuff.

UHU’s White Or Blue Tac As An Eraser

Better than any kneaded eraser on the market
Let me explain my substitute for the kneaded eraser. I like to use white tac. It can be pretty hard to find and you have to get it from the UK. lol. It’s the same as blue tac and you can use the blue too! Either one you can get your paws on.

It comes in a larger quantity than real thing, which also makes it cheaper. It’s stronger, lasts longer, and picks up more graphite and charcoal. It makes me hate to have to use the old kneaded putties. This is why I crowned it the best.

About Best Drawing Tools

The drawings and sketches were created and copyrighted by Shannon Fleet. That would be me!

The other images relate to Zazzle and are copyrighted by the artists who created them. A link is provided to the Zazzle site if you’d like more information on their work.

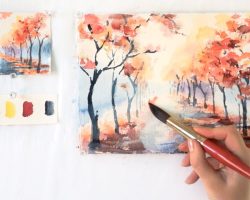
Not Another Watercolour Painting Tutorial

Not Another Watercolour Painting Tutorial

Do We Need Another Watercolour Tutorial?

Need help with watercolour? In this short page, I hope to reveal how I use the process of sketching to develop an eye for a subject and a process for capturing what seems a limitless scene. Constant sketching and varying an approach just to see what something looks like will help all artists who are trying to capture landscapes in watercolour.

Do we need another watercolour tutorial? The easy answer is no! But of course there is always room for an experienced artist ( with a modest outlook) to pass on some of that experience to fellow artists who may just be starting out on a journey of discovery.

I intend to create a series of lenses about sketching subjects ( such as trees, skies, sunsets, sunrise and the use of colours) whilst these are taking shape this lens should be considered a work in progress – thanks.

The accompanying sketch shows a still life painted at a meeting of my art group. This and all other images below are sketched and photographed/scanned by myself.

Why Sketch?

shouldn’t you just go for a finished picture?

Even the great artists sketch…. and the more they do this the better they are likely to be. Turner left many sketches to the nation after his death. Even his skimpiest works show how he was approaching issues like skies and landscapes. The constant sketching will more than repay the investment in time for any artist.

A painting simply called watercolour beginning shows a simple Turner sketch which probably would have been completed in the fullness of time. There are many of these in books and galleries but I have not yet located a web link. ( In fact, a brochure from an exhibition of Turner’s works held at the Tate does have a few things to say about the watercolour beginnings). One other example of a sketch by Turner is shown in this Tate Gallery Blog post which also discusses the faded appearance of the watercolour sketch.

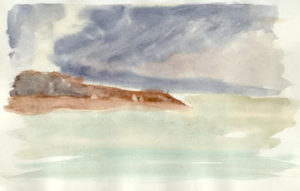
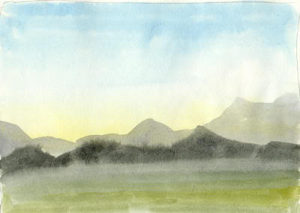
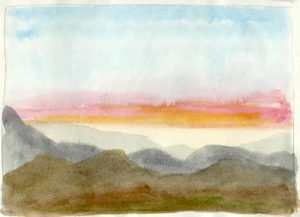
I often simply use up the remains of my palette to create sketches from my imagination – a little like doodling really but it does help to keep my pictorial vocabulary in use and growing. These sketches I call my “Turnerisms”, they show this simplistic doodling approach to landscape subjects. Not something I would frame and hang on the wall but “hey” they were done for fun and practice, and what is life without a little fun now and then. Just for reference they are all from a sketchbook which is about six inches wide, ( the longest dimesion in these sketches).


They were actually done on cartridge paper and so the effect of wet-into-wet washes is not very relevant but having fun and making marks is never a waste of time. In this series of lenses I hope to be showing you many more of my sketches, some in this vein, some looking more like finished works but all have the main objective of teaching me something.

As for the second question above, it is always worth sketching out one or two small thumbnail sketches to decide on compositional features prior to starting any major project/painting. Professionals do it, what makes any amateur think that they don’t need to? read about any major artist and the chances are that he will know what he is going to paint and how he is going to achieve any particular result before he starts. Why take a chance? Of course there are many instances of paintings being changed part way through but by and large even the masters will have made sketches of potential problem areas before the main work is started.

Some examples of what I am saying would be an obvious update to this lens, at the earliest opportunity. watch this space!

Learn how to draw a pine tree

Learn how to draw a pine tree

A drawing of a pine tree – Pinus silvestris

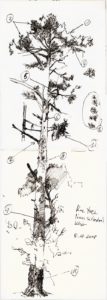
Ten typical features of pine trees are explained and shown in a big size image of a pine tree drawing study. The tutorial explains how to draw the pine from the tree top with needles, the branches to the trunk with different zones of bark. The example drawing has been done in pen on site directly from nature. Learn about drawing a realistic looking pine tree. See more examples, get inspiration for own drawings here.
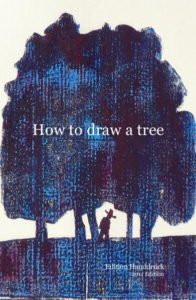
For those who are looking for a cheap book on drawing trees I can recomend my publication on Blurb “How to draw a tree”
If you were looking for botanical information I can recommend another squidoo lens Scots pine

Image credits: All images on this webpage ,if not otherwise stated, are creations by the author.Images and illustrations of products (in affiliate links) are used according to Squidoo TOS.

An example of a pine tree drawing – 10 typical features explained

Pen line drawing
Below there is a sketchbook study from life in pen, showing a pine tree. If you click on the image a large version accompanied with text will open in a new tab. May be you want to download and print out that file (ca. 2MB) and study it. There are ten numbers with explanations marked in the sketch that point out to some typical features of pine trees. Of course the appearance of pine trees vary between different species,age,environment and conditions for growth,but if you understand and reckognize the important features it will be easy to do your own drawing.

Explanations to a pine tree drawing with detail images

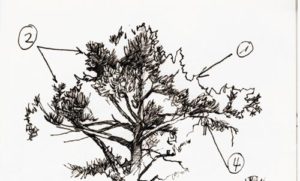
1. I started to draw the pine tree from the top. At first the shape of the tree top was drawn as outline. I looked at the tree, not at my paper and followed the outline I could see against the light sky. That is called blind drawing,if you don´t know about this check the link.


2. Then I tried to identify the pattern,rythm or structure of the pine tree needles and executed these details within the previously drawn outline

3. I noticed 3-4 basic patterns in the needles appearance and made a note of them. You might see things different and may develop your own signs or marks for representation. Perhaps you want to put those on a separate sheet.

4. I recognized that there are thin branches with and without needles at the edges of the bigger clusters. These thin branches look a bit like a spiders web and they contribute to the typical look of a pine tree.

5. Then I continued downwards with the outline of the trunk and added the branches. The branches of pine trees take typical turns, no other trees do it that way. For that reason one can recognize a pine from miles distance.

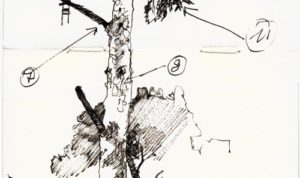
6. There are also many old,short pieces of branches that make for a tyical appearance too.

7. Bigger branches have clearly visible “shoulders” at the junction with the trunk.

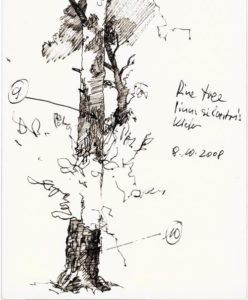
8. A number of branches grows circular around the trunk every year. The yearly growth in height is still visible by the length of the free space between two of those circles,which can be seen by those small dark branch marks in the bark even when the branches are already gone.

The bark of a pine tree changes from top to bottom. in the top area it is bright and sometimes shiny. Then it changes in area of redish surface where the thin soft bark comes of like pieces of old skin.

9. Further down the bark gets darker and rougher with lots of fine lines on the surface.

10. At the bottom the bark is very thick and shows these typical deep cracks and gaps.

11. As comparison I have added a small piece of a spruce tree in the background. By observing and depicting the typical features of a tree it is possible to evoke a realistic impression even if the proportions are not exactly correct.

A pine tree as part of a landscape drawing

This is an India ink drawing which was done on a cold January morning. The young pine tree is an important part of the scenery. It is a different species (Pinus niger) with a more dense tree top. In the detail below one can see how the needle masses were represented by simple strokes in various directions.

How to draw a tree – The book published on BLURB

A field guide to drawing and sketching trees

The little book in format 8X5 is based on the content of this lens. It contains


70 black and white images of pen, ink and charcoal drawings. You will find many of the illustrations on this lens, but others also from related lenses on drawing deciduous and coniferous trees and some extra images too in the book.
The book summarizes my experiences in drawing trees. The majority of drawings are deciduous trees, but there is also an explanations about pine tree drwaing and spruce.

Link to the book How to draw a tree There is a full preview available.

Great examples of pine tree drawings by Artists on FLICKR

The very special tip !!!!!
I am glad that I found these inspiring drawings just by incident. I am glad that meantime the author has added his name. These great drawings are all done by Mike de Weese a professional illustrator..
I write this paragraphs really only to make sure that this link is not overlooked !

Plein air set of ink drawings
This set of Plein air drawings posted by FLICKR user Mike DeWeese contains a series of great drawings, mainly pine trees but also other conifers. The artists has studied all parts of the tree from trunk to tree top, including details and complete forests.
A very inspiring set of work !

How to draw a pine tree – a video instruction

Video for beginners – drawing a pine with ink and brush

Pine – pine tree by yanghaiying

Pine tree drawings online – link list

archive of pine tree drawings

Pine tree – Archives of American Art: Sketchbooks: Curators’ Choice
Worthington Whittredge sketchbook of a trip down the Rhine River 1849 / Worthington Whittredge, artist. Sketchbook : 1 v. : various media ; 15 x 24 cm. Worthington Whittredge papers. Archives of American Art.

Pine Tree Study on Flickr – Photo Sharing!
Nice study by Art*edges on FLICKR
#Loved the wild lines of this pine tree. So full of texture. Watercolors and ink.

Drawing the urban Landscape

Exploring the city with a sketchbook
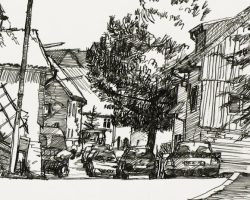
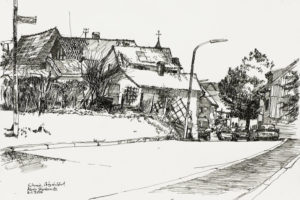
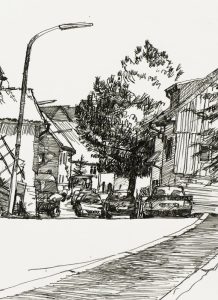
Between April 2006 and May 2007 I have worked on an exhibition project about the urban landscape of the city of Stuttgart,Germany.
I have selected more than 30 drawings for a book now available online at BLURB.
The first 10 pages show panoramic drawings together with the essay about the urban landscape and the experience of drawing such a complex subject. The following pages show two panoramic drawings per page without text.

More drawing lenses by Edition Handdruck

Landscape drawing – improve your skills efficiently and fast !
8 tips how to improve your landscape drawing skills efficiently and fast.Everybody who can write her/his own name on a piece of paper can achieve a high level of drawing skills. Drawing can be learned much more easy than painting and it gives so much pleasure !Link to some of my sketches and drawing

How to draw a tree
How to draw a tree – Find a collection of tree drawings and explanations how they have been done. Get inspired by famous examples and have a look at online drawing tutorials. Find your own way how to draw a tree.

How to draw deciduous trees
This is an introduction to drawing deciduous trees from life.MPM, Monotype printmaker Martin explains how he draws decidous trees with a pen and with charcoal. There are no rules in drawing,every body can develop a very own way to draw a tree. If your looking for some inspirations or ideas have a loo

Artist sketchbooks – little nothings turn into big somethings
For decades artist sketchbooks have only been noticed by a limited specialist audience which got access to those precious resources mostly only after the death of the creator. Excerpts might have been published in print media, but mostly only at the price of damaging or destroying the sketchbooks.

Sketching gear – what does the beginner need ?
Sketching outdoors is a great activity and a rewarding hobby for everyone. This lens is for those how want to start sketching outdoors in the city or in rural landscape. What sketching gear would you need to have with you ? What kind of gear is suitale and what should the quality be like ?

Draw people in a landscape

Draw people in a landscape

Landscapes with people how to draw them

I love to draw and sketch outdoors and my favorite subject is the landscape. A landscape picture changes a lot when you add the human figure. Often paintings and drawings require figures. Learn here some tricks how to depict people in clothes as they appear every day,moving around on the streets or in the landscape. Be prepared when someone shows up in your landscapes drawing on a sunny morning like the guy with the hunters hat in mine. He has not been there on the previous days, but suddenly he showed up and walked through my picture in a minute.

I want to pass on some of the skills which might help to get those figures into the landscape easier and I want to propose some easy exercises which might help you to be prepared when someone steps into your drawing ! Most important: do not hesitate, start drawing people today !

There is also a list of the best rated books on drawing people or the human figure. Drawing People: How to Portray the Clothed Figure helps you to improve your skills in drawing people as they apear everyday in their clothing.

The proportions of a human figure

Some very basic facts about the proportions of the human body
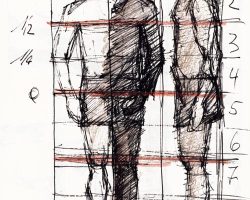
There are a few easy to remember guidlines about the proportions of the human figure that help to draw people. Click on the images for enlarged views.

A fact that is often ignored is that the head of a human is only about 1/8 of the full body length or 1/4 of the upper half. Of course individual measures deviate from this rule.
how to draw people – proportions of the human body
The eyes are located in the middle of a frontal view of the head. The distance between eyebrowns, tip of the nose and chin are almost equal. Looked at a head from the side it fits into the shape of a square.

It is a good exercise to draw figures in different positions from imagination using the basic knowledge of the proportions of the human body.

Figure Studies in the public

drawing people in public places
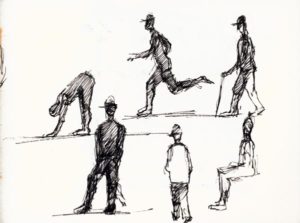
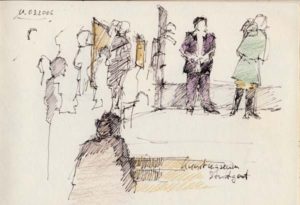
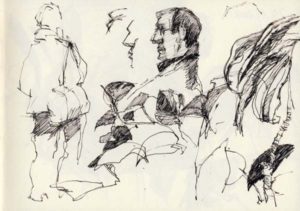
Drawing people in public places is thrilling for many reasons and not easy to do. I admire sketchers who are able to capture people in movement. In the beginning it might be helpful to choosea place where people do not walk by, but stop standing or sit. I used the situation in a museum for some studies of visitors and staff. Usually I start with the head and work down my way over shoulders to the feet of the person.

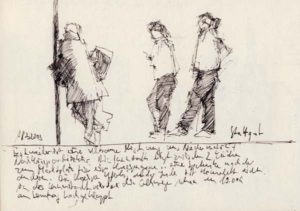
Also sketching at the busstop or at the train station is a good choice as you will find people who do not move around that fast.

I always have a sketchbook with me because waiting lounges in hospitals and other maybe more pleasant public places are great for drawing and sketching people. Waiting time goes by much faster.

How to draw people in a landscape with watercolor

This video demonstrates how the draw or paint simple figure shapes to represent people in a landscape with watercolor

More proposals for studies of the human figure

It is not necessary to go out into the public to draw people.
For exercise purposes you might consider also:

drawing from photographs – your family album
drawing from a TV film or a video

Especially drawing from video is great because you can stop and repeat a sequence that you like.

Learn how to draw a female body with the proportions

video tutorial
This is agreat tdemonstratioon haow to draw a femal teenager body with the right proportions. It start already with an important feature for drawing kids. The teenager bodey is about 6 heads high, whereas the adult body is about 8 heads high. The younger the child the bigger is the head compared to the body.

How to Draw Female Body Proportions: Teenager to Kid, Manga Style

Art supplies for figure drawing

anatomical models for drawing studies at home
Anatomical models can be very helpful for studies on the human body. The limbs can be moved and fixed on almost any position and the model can be drawn from various viewpoints.

So how does it work to draw people in a landscape ?

After some time spent with life studies you will develop a good eye and memory for the position that a human has taken in the scenery in front of you. Even if you could not finsish the specific figure you will be able to reconstruct the situation later. I often only mark the position of the heads and “hang the bodies” later. You can even complete the drawings at home or continue after you have moved to another place. For example the person you started to draw was sitting on a bench,but now stands up and walks away. You can wait until someone else will sit down or you move to another place where people are still sitting on a bench.

Before I place a figure in an empty landscape I sometimes do some trial drawings in the sketchbook to make sure I get he right size and proportions. Then I might use a transparent paper laid over the sketch to trace an exact copy of the draft. Then I can move the draft on transparent paper over the landscape study until I find the right position.