How To Draw A Cat Step By Step Realistic

How To Draw A Cat Step By Step Realistic

Cats are one of the most popular subjects for drawing, and with good reason! They’re cute, they’re cuddly, and they’re just plain fun to draw. But if you’ve never drawn a cat before, they can also be pretty tricky. That’s why we’ve put together this step-by-step guide on how to draw a cat.

With just a few simple shapes and some careful shading, you’ll be drawing cats like a pro in no time! So grab a pencil and a piece of paper, and let’s get started.

Step 1: Draw a Circle for the Head

To start off your cat drawing, use a pencil to lightly draw a circle. This will be the basic shape for the cat’s head.

Step 2: Draw Two Triangles for the Ears

Next, add two small triangles on top of the circle for the cat’s ears. Make sure they’re symmetrical, and that the point of each triangle lines up with the edge of the circle.

Step 3: Draw a Rectangle for the Body

Now draw a rectangle under the circle. This will be the cat’s body.

Step 4: Draw Four Legs

On each side of the rectangle, draw two small rectangles for the cat’s legs. Again, make sure they’re symmetrical.

Step 5: Draw a Tail

Finally, add a small triangle at the end of the rectangle for the cat’s tail.

Step 6: Erase the Lines You Don’t Need

Now that you have all the basic shapes in place, you can start erasing the lines you don’t need. Start with the circle and the rectangles, and then move on to the triangles.

Step 7: Draw the Eyes

Next, add the eyes. For each eye, draw a small circle within a larger circle. Then add a tiny circle in the middle of each eye for the pupil.

Step 8: Draw the Nose and Mouth

Add a small triangle for the nose, and a curved line for the mouth. Then add some whiskers with a few short, straight lines.

Step 9: Draw the Ears

Give your cat’s ears some detail by drawing a curved line along the edge of each triangle.

Step 10: Draw the Fur

To make your cat look extra fluffy, add some curved lines to indicate the fur. Start with the head and work your way down the body.

Step 11: Add the Final Details

For the final touches, add some small circles for the cat’s toes, and some stripes to the tail. Then erase any remaining pencil lines, and your cat drawing is complete!

How To Take Better Photos With Your Samsung Galaxy Camera 2

How To Take Better Photos With Your Samsung Galaxy Camera 2

The Samsung Galaxy Camera 2 is a powerful device that can do a lot more than just take pictures. With its built-in Android operating system, the Galaxy Camera 2 gives you full access to the Google Play store and all of its apps.

Use the rule of thirds

When you’re framing a photo, it’s important to consider the rule of thirds. This rule is a guideline that suggests you should position the main subject of your photo either to the left or right of the frame, or above or below the center. This creates a more visually interesting and balanced photo.

To use the rule of thirds with your Samsung Galaxy Camera 2, simply tap the grid icon in the top left corner of the camera app. This will overlay a 3×3 grid on your camera’s display, making it easy to align your subject with one of the intersections.

Use the Selfie Alarm

The Samsung Galaxy Camera 2 has a great feature called the Selfie Alarm, which is perfect for taking group shots or selfies. To use the Selfie Alarm, open the camera app and tap the timer icon in the top right corner. Then, tap the Selfie Alarm icon and choose how long you want the timer to be (3, 5, or 10 seconds).

When you’re ready to take the photo, simply tap the shutter button and the camera will countdown from the selected time. This gives you enough time to get into position before the photo is taken.

Use burst mode

Burst mode is a great way to capture fast-moving subjects, like kids or pets. To use burst mode, open the camera app and tap the burst mode icon (it looks like a stack of three arrows). Then, simply hold down the shutter button and the camera will take a series of photos in quick succession.

Use the panorama mode

The panorama mode is perfect for capturing sweeping landscapes or large groups of people. To use the panorama mode, open the camera app and tap the panorama mode icon (it looks like a mountain). Then, simply press the shutter button and pan the camera slowly from left to right. The camera will automatically stitch the photos together to create a panoramic image.

Use the night mode

The night mode is perfect for taking photos in low-light conditions, like at a concert or in a bar. To use the night mode, open the camera app and tap the night mode icon (it looks like a moon). Then, simply press the shutter button and the camera will take a series of photos and automatically stitch them together to create a low-light image.

Use the HDR mode

The HDR (high dynamic range) mode is perfect for taking photos with a lot of contrast, like a photo of a sunset. To use the HDR mode, open the camera app and tap the HDR icon (it looks like a sun). Then, simply press the shutter button and the camera will take two photos with different exposures and automatically stitch them together to create a high-contrast image.

Use the macro mode

The macro mode is perfect for taking close-up photos of small subjects, like flowers or insects. To use the macro mode, open the camera app and tap the macro icon (it looks like a flower). Then, simply press the shutter button and the camera will focus on the subject in the center of the frame.

Use the food mode

The food mode is perfect for taking photos of, you guessed it, food! To use the food mode, open the camera app and tap the food icon (it looks like a fork and knife). Then, simply press the shutter button and the camera will take a photo with enhanced colors and saturation.

Use the sports mode

The sports mode is perfect for taking photos of fast-moving subjects, like a runner or a car. To use the sports mode, open the camera app and tap the sports icon (it looks like a running person). Then, simply press the shutter button and the camera will take a series of photos and automatically stitch them together to create a action-packed image.

Not Another Watercolour Painting Tutorial

Not Another Watercolour Painting Tutorial

Do We Need Another Watercolour Tutorial?

Need help with watercolour? In this short page, I hope to reveal how I use the process of sketching to develop an eye for a subject and a process for capturing what seems a limitless scene. Constant sketching and varying an approach just to see what something looks like will help all artists who are trying to capture landscapes in watercolour.

Do we need another watercolour tutorial? The easy answer is no! But of course there is always room for an experienced artist ( with a modest outlook) to pass on some of that experience to fellow artists who may just be starting out on a journey of discovery.

I intend to create a series of lenses about sketching subjects ( such as trees, skies, sunsets, sunrise and the use of colours) whilst these are taking shape this lens should be considered a work in progress – thanks.

The accompanying sketch shows a still life painted at a meeting of my art group. This and all other images below are sketched and photographed/scanned by myself.

Why Sketch?

shouldn’t you just go for a finished picture?

Even the great artists sketch…. and the more they do this the better they are likely to be. Turner left many sketches to the nation after his death. Even his skimpiest works show how he was approaching issues like skies and landscapes. The constant sketching will more than repay the investment in time for any artist.

A painting simply called watercolour beginning shows a simple Turner sketch which probably would have been completed in the fullness of time. There are many of these in books and galleries but I have not yet located a web link. ( In fact, a brochure from an exhibition of Turner’s works held at the Tate does have a few things to say about the watercolour beginnings). One other example of a sketch by Turner is shown in this Tate Gallery Blog post which also discusses the faded appearance of the watercolour sketch.

I often simply use up the remains of my palette to create sketches from my imagination – a little like doodling really but it does help to keep my pictorial vocabulary in use and growing. These sketches I call my “Turnerisms”, they show this simplistic doodling approach to landscape subjects. Not something I would frame and hang on the wall but “hey” they were done for fun and practice, and what is life without a little fun now and then. Just for reference they are all from a sketchbook which is about six inches wide, ( the longest dimesion in these sketches).


They were actually done on cartridge paper and so the effect of wet-into-wet washes is not very relevant but having fun and making marks is never a waste of time. In this series of lenses I hope to be showing you many more of my sketches, some in this vein, some looking more like finished works but all have the main objective of teaching me something.

As for the second question above, it is always worth sketching out one or two small thumbnail sketches to decide on compositional features prior to starting any major project/painting. Professionals do it, what makes any amateur think that they don’t need to? read about any major artist and the chances are that he will know what he is going to paint and how he is going to achieve any particular result before he starts. Why take a chance? Of course there are many instances of paintings being changed part way through but by and large even the masters will have made sketches of potential problem areas before the main work is started.

Some examples of what I am saying would be an obvious update to this lens, at the earliest opportunity. watch this space!

Best camera for macro photography

Best camera for macro photography

The best camera for macro photography for close up images

If you are looking for the best camera for macro photography you have come to the right place since this article focuses solely on the best macro cameras, and macro lenses, currently available to take your macro images to the next level.

Digital cameras, especially digital slr cameras, are expensive so if you want to buy the best camera for macro photography make sure you take a look at the rest of this article before shelling out your hard earned cash. After all, you don’t want to waste it right?

If you really want to get the most out of your macro photography there are other things you need to consider besides the camera. Lenses are one such consideration, and the best macro lenses are also covered in this article.

If your macro subjects consist of moving things, such as insects, butterflies and the like, the best macro camera needs a high burst rate. The top end Canon and Nikon digital SLRs are full frame and have a high burst rate but these are very expensive. Cheaper alternatives include crop sensor cameras with dual processors and these are the best value for money cameras.
macro shot of flower If you take macro images of static subjects, such as flowers and still life things, the best camera for macro photography need not have a high burst rate. In these circumstances the best camera for macro photography is the one with the best image quality, and highest number of pixels.

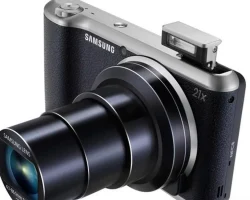
Point and shoot cameras and mirrorless cameras have a macro photography mode however these don’t capture “true” macro photographs. I would not recommend either a point and shoot or a mirrorless camera for macro photography, and the only real options are digital slr cameras, as detailed below;

Best camera for macro photography – Canon dslrs

Arguably you can use any digital slr camera for macro photography however many photographers claim the best camera for macro photography is a full frame slr camera since these have the largest sensors and produce some exceptional images. If you are capturing macro and close up images of flowers and still life subjects then I agree the best camera for macro photography is the full frame digital slr camera.

If, however, you are taking macro and close up images of insects I think the best camera for macro photography is one with the highest burst rate. Capturing images of insects can be tricky and to get the keeper shots you need to fire off a load of shots in quick succession and choose the best. You can buy full frame digital slr cameras with a high burst rate, such as the Canon 1D X, but these cost several thousand dollars and are out of reach of most enthusiasts. There are alternatives, but these are not full frame cameras.

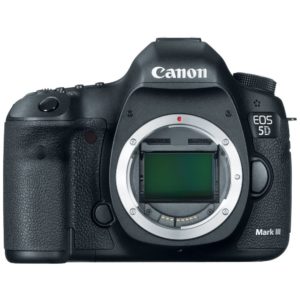
Best camera for macro photography – Canon 5d

If you want an affordable full frame camera the Canon eod 5d is the camera of choice, which is Canon’s top selling digital slr camera of all time and when you get to have a go with this camera it is easy to see why. The 21MP sensor captures a lot of information and the image quality of the 5d is simply awesome. This camera captures images that will impress family and friends, and images that you can easily sell on and make some extra cash.

The Canon 5d is superb. It is a relatively small dslr camera that is tough, durable and well built. Like all Canon dslr cameras the Canon 5d is user friendly, intuitive and all the necessary controls are close to hand, which means you won’t have to go delving through the menu system.
The Canon 5d has a poor burst rate, but then given the cost of the 5d this isn’t surprising. Because of the poor burst rate the Canon 5d isn’t best suited to insect photography. If, however, you want to capture macro images of flowers and still life subjects the Canon 5d is the tool with which to do it.

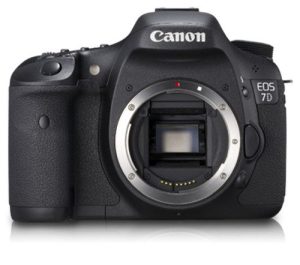
Best camera for macro photography – Canon 7d

When I go chasing insects and mini beasts my camera of choice is the Canon 7d. With an 8 frames per second burst rate the 7d is ideal. The 7d has an 18mP sensor, and whilst it is not quite as impressive as that of the 5d, it is more than enough to capture some stunning macro images.
Like all Canon digital slr cameras the 7d is tough, durable and built to last. It also has a sensible menu system and user friendly interface, which makes it a doddle to use. All settings controls are close to hand, which means there is no need to go through the menu to change anything.
You can also use the Canon 7d for taking macro images of flowers and still life subjects, but it is insect photography where this camera is really good.

Best camera for macro photography – Nikon dslrs
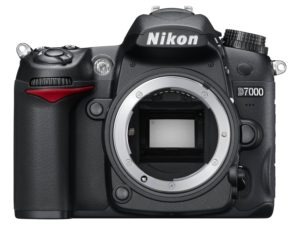
Nikon D7000

If you prefer Nikon branded cameras my recommendation is the Nikon D7000. The Nikon D7000 is a top rated, and very popular, Nikon dslr camera you can use for macro photography. The D7000 has a high burst rate, which makes it ideal for insect photography, however you can also use it for close up and macro photos of flowers and still life subjects.

Like all Nikon dslr cameras the D7000 is a top quality camera that is made out of high quality materials and contains great optics, which means this camera is built to last and is capable of capturing some stunning photographs. If you prefer Nikon branded cameras and need a camera that has a high burst rate the Nikon D7000 is a camera you should look at.

Top macro lenses to get the most out of your macro photography

Macro lens When taking macro images you have to remember that you need a decent macro lens to get the most out of your best camera for macro photography. Macro lenses are prime, i.e. a fixed focal length, fast and very sharp. The image quality of all macro lenses is simply stunning and you won’t be disappointed with any of them. Macro lenses are available in a range of focal lengths from 50mm to 150mm so there is something for all types of macro subjects. Below are the best macro lenses currently available.

Top Canon macro lenses


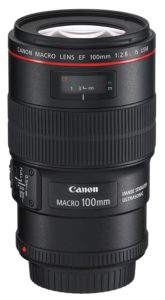
Canon 100mm f2.8L IS USM macro lens

If you shoot a canon dslr camera the Macro lens of choice is the Canon 100mm f2.8L IS USM lens. With a 100mm focal length this lens has a large working distance, i.e. distance between the end fo the lens and the subject, which gives you a lot of room to move and also makes lighting that much simpler.

Being an L series Canon lens the 100mm f2.8L IS USM is bullet proof and built to last. The image quality is second to none and many photographers claim it is Canon sharpest lens of all, and I have to say I agree. The image stabilisation technology helps to keep camera shake at bay, and this technology works exceptionally well. If you want the best macro lens to go on your best camera for macro photography the Canon 100mm f2.8L IS USM lens is the lens to buy.

Nikon lenses for macro photography

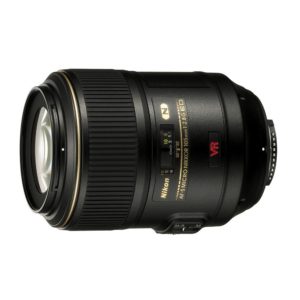
Nikon 105mm f2.8G ED-IF AF-S VR macro lens

If you shoot a Nikon dslr camera the top end macro lens is the Nikon 105mm f2.8G ED-IF AF-S VR lens. This top quality lens is simply awesome and if you are serious about your macro photography this is the lens to buy.

The build quality is great, the image quality is amazing and boy, this is one sharp lens. In fact, many people consider it Nikon’s sharpest lens and I would have to agree. This lens produces images that are tack sharp from the centre to the edges.

The 105mm focal length gives a big working distance, i.e. distance between the end of the lens and the subject, which makes it perfect for insect photography, although this lens can obviously be used for taking macro images of flowers and still life subjects as well. The vibration reduction “VR” technology keeps camera shale at bay and ensures images are tack sharp at all times.

If you want the best Nikon branded macro lens for your Nikon camera you have to have the Nikon 105mm f2.8 lens. It really is an awesome lens that won’t disappoint.

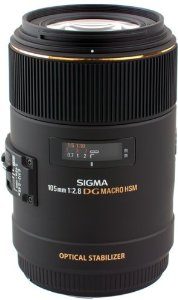
Top Sigma macro lenses

If you want an alternative to a Nikon branded or Canon branded macro lens there are a few third party manufacturers out there, but the best is Sigma by far. Sigma has some excellent lenses and all of them are available in both Nikon and Canon fit.

Sigma 105mm macro

Sigma 50mm macro

Sigma 70mm macroSigma 70mm macro

The Shadow Princess – My Black and White Fashion Photography in Thailand

The Shadow Princess – My Black and White Fashion Photography in Thailand

My Photography Work in Thailand.

The photos in this article were taken during my photography project in Thailand. An art gallery sent me there to do a photo shoot with “Oriental Princess” as a theme. I asked one of my model friend from Bhutan to come along with mein order to accomplish this project. We went there for four night and five days in two different city, Pattaya and Bangkok. I created two series of photo shoot, the first titled “The Empress of Light”, consists of color photographs. The second album, which I want to share in this article is called “The Shadow Princess”, where the photos are darker and were taken in monochrome. Unfortunately, I can’t publish the best photos in this article because they have been published by my sponsor for an art magazine, and should not be published anywhere else. Thus, I could only present some of the photos that weren’t selected by the magazine. Hopefully you like them, and I’m looking forward to your feedback.

The Idea, Planning, and Creating the Concept

My Experience Working in Thailand

We were given only four effective days to work, and as an amateur photographer I found the time limit was very strict. Based on my plan, we had to do the photo shoot in eight different location in two cities, including on the beach and in a popular tourist spot.

We didn’t waste any time as we immediately departed to Pattaya as soon as we landed in Bangkok international airport. The journey took about ninety minutes by taxi. I had to say that Thailand has a very impressive transportation system, broad highway that allows the cab to drive in maximum speed without endangering the life of the driver and passenger. As soon as we reach Pattaya, we did our first photo shoot in the hotel. Based on my plan, I would do “The Empress of Light” photoshoot in the morning and afternoon, meanwhile “The Shadow Princess” would be done in the evening, where natural light were no longer exist.

The concept of this album was to present a beautiful, good looking oriental princess with her royal dress. Although the princess is very beautiful, she is also very cold, kind of cruel, and very proud with her royal blood. She is also very smart, emotionless, and can take important decision only based on her logic for the sake of her own kingdom.

It wasn’t very hard to get the concept correctly, as physically the model has a kind of face that fits with my concept perfectly. She named Pema, and we previously had been working on three different photo shoot. She brought her tradtional dress from her country, Bhutan. The dress was very great, beautifully created, and very lavish. It reflects perfectly the royal dress of an oriental princess.

The execution of the photo shoot

We spent the first night at Pattaya in the Southern Beach. To be honest, the beach was not very impressive compared to Bali, Indonesia or Goa, India. The beaches of Pattaya appear to be wilder and more dangerous compared to the other beaches I have visited before. Somehow, the beach perfectly reflects the personality of the shadow princess that I wanted to present in my photographs. The weather on that night was very friendly, and everything seemed to work properly. Thus, I could finish the shoot in less than an hour.
We spent the next day photo shoot in the hotel garden. It was much more easier compared to the photo shoot on the beach, as I had more freedom to experiment with the surrounding lights. I took about sixty pictures to complete the session.

The next morning, we immediately headed to Bangkok for the “real work”. I have visited Bangkok many times, but I felt this time the city was not as friendly as usual to me. The weather was incredibly hot, even at night. It was very difficult for the model to stay in the mood while wearing such a thick dresses in a hot night. The first night where we did an outdoor shoot was very hard, and took about three hours to get the images I really wanted. Thus, in second and third photo shoots I decided to spend more time indoor, in an air conditioned room.

We completed all of our work in our fourth day, then we had one free day to explore Bangkok before returning to Hyderabad.

Some tips based on my experience

Don’t be afraid to take a close-up image
Your photos would be more interesting if you take a close-up shoot of your subject. Don’t be afraid to put your camera in front of your subject’s nose for an extremely close-up result. Black and white photos always have more impact when the viewers feel that there is only small distance between them and the subjects. However, it is recommended using lens that is not wider than fifty millimeters to avoid distortion.

Focus on the eyes
It’s a classic rule that should be understood by any photographer. Any time you take a photo of a person, be sure that the focus of your camera is on her eyes. When you get it right, the photo will look great.

In the low light, most of the time viewing from LCD is more accurate than from viewfinder
For me, I prefer to put the camera on a tripod and view it from the LCD whenever I have to shoot in a low light condition. It is easier to get the focus by looking at the LCD, because there is a magnifying facility to check whether you really get the perfect focus or not.

It’s all about the subject’s expression
Black and white photos would leave more impact to the viewer if the subject shows a strong expression. Whether it is an anger, a cold stare, a wide smile, or tearful face; try to involve a strong facial expression whenever you take a close-up black and white photographs.