The Hidden Secrets Of Famous Paintings

The Hidden Secrets Of Famous Paintings

If you’re a fan of art, you’re likely familiar with the paintings of great artists like Michelangelo, Leonardo da Vinci, and Vincent van Gogh. However, you may not know about the hidden secrets of these famous paintings, which are often left untranslated or misunderstood. Here are three hidden secrets of some of history’s most famous paintings:

The Mona Lisa is actually a painting of Lisa Gherardini

The Mona Lisa is one of the most famous paintings in the world and is often considered to be the most famous painting ever created. However, the painting is actually a painting of Lisa Gherardini, who was an Italian aristocrat and painter of classical art. The Mona Lisa was commissioned by Leonardo da Vinci, who was then working on a painting of himself. When da Vinci saw the painting, he was so impressed that he decided to make it his own. Unfortunately, the painting is actually only a copy of a painting by Gherardini.

The painting of The Virgin and Child is actually a painting of the Virgin Mary

The Virgin and Child is one of the most famous paintings in the world and is often considered to be one of the most famous paintings of all time. However, the painting is actually a painting of the Virgin Mary, who is actually the mother of Jesus. The painting was commissioned by Pope Clement VII, who was at the time trying to find a painting that would show the world that Christianity was the true way to live. Unfortunately, the painting is actually a painting of the Virgin Mary, who is instead shown as a beautiful woman.

The painting of The Last Supper is actually a painting of the Apostles

The Last Supper is one of the most famous paintings in the world and is often considered to be one of the most famous paintings of all time. However, the painting is actually a painting of the Apostles, who are instead shown as a group of people. The painting was commissioned by Emperor Constantine, who was trying to show the world that Christianity was the true way to live. Unfortunately, the painting is actually a painting of the Apostles, who are instead shown as a group of people who are eating their dinner.

If you’re a lover of art, then you’re likely familiar with the names of some of the most famous paintings. But what about the lesser-known, but incredibly talented artists who have quietly created some of the most stunning works of art in history? In this blog post, we’ll take a look at 5 of the most underrated painters in history, and see how they’ve managed to create the unique and beautiful pieces of art that we see around us every day.

There are many secrets to many famous paintings, but one of the most well-known and well-known paintings is The Mona Lisa. Many people are curious about why this painting is so famous, and some believe that the painting is actually a forgery. However, there are a few secrets to this painting that may help explain its popularity.

One secret is that the painting is actually a copy of a painting by Leonardo da Vinci. The Mona Lisa is based on a painting that Leonardo created known as The Mona Lisa of Leonardo da Vinci. The Mona Lisa is also sometimes called the “Last Supper,” because it is thought that Leonardo painted it as a painting to show to his wife, Lisa Gherardini, who was then living in Florence.

Another secret to The Mona Lisa is that it is actually much older than it seems. The painting was actually created in 1506, and it is thought that the painting was originally meant to be used as a decoration for the tabernacle of the Cathedral of Florence. However, it was eventually given to the Mona Lisa’s current owner, who has kept it in a private collection ever since.

Despite its secrets and popularity, The Mona Lisa is actually a very beautiful painting. The painting is made up of many different colors and tones, and it is also very well-painted. Many people are curious about why it is so popular, and some believe that the painting is actually a forgery. However, there are a few secrets to this painting that may help explain its popularity.

There are a few things that can’t be revealed in a painting. For example, the painting’s composition, the colors and the placement of objects.

But there are some things that are hidden in famous paintings, even though they may not be visible to the naked eye. For example, the hidden messages that the painting may be sending to its viewers.

Some of the famous paintings that have hidden messages include Leonardo da Vinci’s Mona Lisa, Michelangelo’s David and Leonardo da Vinci’s Last Supper.

Some of the hidden messages in these paintings are about the artist’s life, their art and the history of the painting.

Some of the messages in these paintings may also be about love, relationships and the human condition.

If you’re ever curious about what some of the hidden messages in famous paintings are, you can look them up on online databases or in books.

The Difference Between Mass-produced And Handcrafted Goods

The Difference Between Mass-produced And Handcrafted Goods

Both are burgers, but the latter is made with fresh, high-quality ingredients and much more care. The same goes for furniture. Mass-produced furniture is made quickly and cheaply, without much attention to detail. Handcrafted furniture, on the other hand, is made with care and precision, using only the finest materials.

The benefits of handcrafted furniture are numerous. First, because it is made with such care, it is built to last. You won’t have to worry about your furniture falling apart after a few years; handcrafted furniture will last a lifetime. Second, handcrafted furniture is unique. You won’t find another piece like it, because it was made specifically for you. Finally, handcrafted furniture is an investment. It may cost more than mass-produced furniture, but it will increase in value over time.

If you’re looking for furniture that is of the highest quality and will last a lifetime, handcrafted furniture is the way to go.

As mass-production techniques become more efficient, the quality of handcrafted goods suffers in comparison. This is especially true when it comes to clothing.

Clothing that is mass-produced is often made from lower quality materials, and the construction is not as precise as that of handcrafted clothing. As a result, mass-produced clothing does not last as long as handcrafted clothing. Furthermore, mass-produced clothing is often less stylish and less unique than handcrafted clothing.

There are a few reasons for this. First, mass-production techniques allow for less individualized attention to detail. Second, the materials used in mass-produced clothing are often lower quality than those used in handcrafted clothing. And finally, the styles of mass-produced clothing are often less unique than those of handcrafted clothing.

So, if you’re looking for clothing that is of higher quality, more stylish, and more unique, you should consider handcrafted clothing.

The former are designed for the masses, while the latter are designed for those who appreciate quality and craftsmanship. The same is true of the difference between store-bought and home-made food. The latter is usually of a higher quality, and often tastes better, because it is made with love and care.

The same is true of the difference between mass-produced and handcrafted goods. The former are designed for the masses, while the latter are designed for those who appreciate quality and craftsmanship. The same is true of the difference between store-bought and home-made food. The latter is usually of a higher quality, and often tastes better, because it is made with love and care.

The same is true of the difference between mass-produced and handcrafted goods. The former are designed for the masses, while the latter are designed for those who appreciate quality and craftsmanship. The same is true of the difference between store-bought and home-made food. The latter is usually of a higher quality, and often tastes better, because it is made with love and care.

How to Set Prices for Your Decorated Cakes

How to Set Prices for Your Decorated Cakes

Cake Decorating and Pricing Tips

Many people who handcraft their own decorated cakes don’t charge for the time they invest in the cake. Maybe they feel because the cake is made in their own kitchen, that it is not worth the high price of a bakery  cake. For whatever reason, a person who makes cakes in their home often believe their craft is inferior to cakes created in the bakery section of a local store.

But, the cake you bake and decorate is no less a thing of beauty than any cake you find in your local bakery. Decorated cakes can be found in a variety of grocery stores, and they are decorated by hourly wage people that may or may not have had previous decorating experience.

Look at some of the handwriting on store bought cakes. It isn’t perfect, in fact sometimes the words are misspelled or placed incorrectly. On the other hand, you take the time to make everything as perfect as possible, you care about the product you make, and deserve to receive as much compensation for your work than anyone else.

Often, people who are just starting a cake decorating business offer lower prices than bakery shops. This is a big mistake! Actually, your prices should be slightly higher than the ones sold in stores. Most likely you precisely place the decorations on the cake, carefully write the message on the cake, and never take shortcuts when it comes to presenting the customer with a more personable cake than they’d get from a store.

Don’t under price your works of art, and don’t set your prices below the cakes found in bakery shops. Setting low prices might be your way to attract business, but people who are shopping for birthday or wedding cakes will question the low price. In effect, you can be eliminating yourself from the competition with low prices, because customers might think the quality of your cakes will be inferior.

Of course, when you first start in the cake decorating business, you need to set the prices comparable to other cake bakers in your local community. Never, never under price your cakes and set them apart from the going  prices set from specialty bakers. The reason someone comes to you is because they are looking for a better product or a technique that bakers will not or cannot provide. Then as you gain experience and improve your techniques, you can steadily increase the price of your specialty designed cakes.

Setting your cake decorating prices too low, can actually price yourself right out of business! Sure, you might get many orders for decorated cakes, but if you lose money on every one, how long will you be able to stay in business? Your cakes might be beautiful and unique, but if you are not being paid the true worth than you might as well just close your doors.

In addition to supplies, you must be compensated for your time, as well. Before setting a price, you need to take into consideration the time it takes to mix the cake, bake the cake, mix the icing, make the decorations and decorate the cake. For instance, if a customer wants a custom design, then you need to figure the cost of supplies, an hour to mix and make the cake, maybe another two hours to make the decorations, and another hour to decorate the cake. If you believe your time is worth $5 or $10 per hour, then the price of the cake should be a minimum of $40 to $60. Do not under compensate yourself.

Sure, cake decorating might begin as a hobby to present cakes to family members or friends and neighbors. But, before long, the word gets out about your skills and it turns into a business. You need to be smart about what you’re doing or it will become a drain on your time and finances.

In addition to cake and icing ingredients, cake decorating tips, cutters, colors, bags, racks, mixers, tables and classes to learn more or advanced techniques do not come free. You must charge a reasonable amount in order to buy the tools of the trade. No one can tell you how much to charge for a decorated cake. You need to be comfortable with the prices you charge. But, do your homework, learn how much bakers are charging for designed cakes in your community.

Compile a gallery of photos so customers can see the work you’ve done, and can feel confident in the product you have to offer. Here again, if your work is substandard to local bakeries, then why should customers pay  more to buy their cake from you? Photographs, good quality cakes, and unique designs are important in order to set your price a bit higher than store bakeries. Always strive to do better work, maintain good tasting cakes and icings, and give personable, caring service to your customers.

How to paint shadows – basic methods explained

How to paint shadows – basic methods explained

Painting shadows – resources for realistic painted shadows

This site tries to give some help on painting shadows in realistic, representational painting.
To establish the right form of a shadow is one thing, but to get the colour of a shadow “right” is at the centre of mastership in painting, I think.
Imagine a meadow in sunlight and a tree that casts a shadow on it. There will be different shades of green, some in light and some in shadow.

Especially the capability of the human eye to adapt quickly to low light levels adds to the difficulty to draw and paint true shadows. As you look into a shadow it seems to get lighter. When you look back into the sunlit areas the shadows suddenly seems so much darker again.

In the end painting shadows is painting light, a particular form of light: shadows are reflections of indirect light whereas the sunlit parts of a subject are exposed to direct sunlight.

Some basic steps to paint shadows are discussed here from dark to light and vice versa. Depending on the medium used there are limitations and different potentials to depict shadows. Two example paintings in oil colour (Plein Air) and dry pastels (studio still life) are discussed in detail. The tips can be used in studio work as well as in works on site, Plein Air.

Basics of the colour theory are explained together with links for more extensive studies. Finally some comprehensive “how to books” on painting light and shadow can be purchased from this website.

Image credits: All images on this webpage ,if not otherwise stated, are creations by the author.Images and illustrations of products (in affiliate links) are used according to Squidoo TOS.

The theory of light and shadow explained with a pastel still life painting as example

This is a great explanation of the theory of light and shade in drawings.

Understanding the categories of direct light, highlights, form shadow, reflected light and cast shadows can help a lot to see and depict the effects of lights in nature much better.

I lit the still life set above with a strong side light from the left and a weaker top light. With a bright piece of cardboard I reflected light back into the composition from the right side because otherwise those shadows would turn into a massive dark and partly almost black area. This is a method that photographers use a lot in portrait work to reduce the contrast between light and shadow areas.

What categories of light an shadow can be seen in this pastel painting?

1.) In area one there is the brightest part, the area of high light on this particular vessel

2.) In area two you see the darkest form shadow (core shadow) that contrasts the most with the area in direct light. This is partly an optical effect rather than a “true” observation. On curved surfaces you will see a more or less wide zone of transition from the brightest direct light into the form shadow. The core shadow will fade more and more
as you move away from the light source and will finally get brighter again when you get in to area 3

3.) Area three is a form shadow that receives some reflected light, often the reflected light has a different color and it will change the color of the form shadow. In this particular case I added some more red that was reflected from the background panel onto the vessel.

4.) Area four is interesting as a cast shadow falls directly into the zone of bright direct light. That dark shadows cast from the soda bottle is lit up on the lower edge of the other vessel by some reflected light from the lower body of the soda bottle.

5.) The shadow in area 5fice is a special case. There is a soft, somewhat blurry cast shadow with a darker core. That effect occured because I used two sources of light. The darker core is in fact a more precisely cast shadow from the strong side light, whereas the soft broader outer part of the shadow originates from the further away light bulb under the room ceiling.

Light, shade and shadown in drawing and painting a beginners guide

Is there a formula to mix the colour of shadows?

An example in oil colors -Some problems and questions that occur in painting shadows

Artprint plein air landscape painting by editionha
Large format printing by Zazzle

In this plein air oil painting light and shadow are the main features. I did this study because I wanted to find out what is the colour of grass and foliage in sun and in shadow and whether there is a way or maybe a kind of formula how I could get the best or convincing results.

But from which colour or shade should I start from? Should the colour of the grass in sun be the starting point and I would mix from bright to the darker shadow, or should I come from the dark side and establish the colour of the grass in shade first and brighten that colour somehow up to paint the areas in direct sunlight?

The most irritating thing is that the human eye adapts always to the light conditions. When I looked at the grass in sun the shadows seemed to be very dark. But when I studied the areas in shadow it seemed that the shadow was not that dark anymore the longer I looked at it. It seemed to get brighter and many different shades of grass emerged, which disappeared again when I studied the sunlit parts of the landscape. Particularly the border between light and shadow presented a difficulty. The contrast seemed so very strong there, but my logic told me that the amount of light and as a consequence the colour of the grass directly at this border line and a few meters away from it had to be the same. In other words the shadow would not get darker close to the sunlit area and also the sunlit area would not be brighter close to the shadow area. This effect again has to do with the way our eyes handle strong contrasts. There are limits for what our eyes can discern and for that reason leaves of trees observed against a bright sky always seem very dark, almost black even though we know that they are green.

Finally I had to realise that I never would be able to reproduce the very same sensation and experience of seeing light and shadow in my painting. Instead I could try to imitate the “effect” of light. For that reason I painted the grass near the border to the sunlit area in a darker and cooler green than the grass close to the edge of the forest. Also I tried to put in some variations within the sunlit and shadow areas.

Also my idea of a kind of a mixing formula vanished; instead I understood that I needed to establish the right tonal values between light and shadow and that I had to find the true colours of grass or leaves etc in shadow and light. Plein air painters often have a small card board frame with a small hole in it with them. By looking through this hole they can isolate certain spots of colour to determine the true colour of objects. I used the palm of my hand to form a kind of monocular and thus isolated certain spots of the landscape for my eyes to get an idea what the true value and colour. This helped me to establish the basic tonality of the shadow and the sunlit meadow. Then I started from these middle values and expanded the range by mixing slightly lighter and darker colours of dark greens and greens in sun.

Some people mix their shadow colours by adding blue, violet to the colour of the sunlit areas or objects in a rather schematic way. These shadows often look artificial. The same applies for the other method that starts with the object colours in shadow which then is brightened up with white and yellow to imitate the sunlit appearance. Both methods are based on the assumption that shadow or sunlight can be understood as some sort of colour filter. Sunlit areas contain more white and yellow, whereas shadows contain more blue and violet components. of course these basic assumptions are correct and helpful on the way, but for more sophisticated painting one has to drop “recipes” I think.

So how do you mix dark shadow colours with oil colors ?

There are many ways to mix dark colors, in fact the possibilities are endless. However there are only a few starting points.

1. Add black color to your base color
Let’s say you need a dark red. By adding black to red color you can mix a darker red, but the red will get more and more muddy the more black you add. You can tell by the greyish look of a paintings that a lot of black has been used in mixing. If you want that look it is fine, but if you prefer bright colors this method most probably will not be the preferred one

2. Start with a dark version of your base color and add dark blue
If you want to keep your colors bright and virbrant adding dark blue to the base color will give you a dark, but blueish version of the base color

3. Mix a dark color with the three primary colors : magenta,blue and yellow
This is the most demanding version to mix the color as seen from the primary colors. You might want to experiment with dark versions of the primary colors or similar colors for example you could subtitue magenta by burnt siena and use prussian blue instead of a primary blue etc..

4. Use Schmincke van Dyke brown to darken colors
I have used Schmincke van Dyke brown with great success to darken colors, especially for painting shadows on green foliage or very dark foliage.
In fact I consider van dyke bewon the best black you can get. It does not kill the clarity of your base color as black does. In combination with variation of no.2. and 3. one can get great results.

I commend to experiment with all four starting points. The shadows and dark greens in the landscape above were painted by using variations of the no.2–no4.

What is the colour of shadows ?

A bit of colour theory

The colour of an object is determined by the light, or more exactly by the wave length of the light that is reflected by the object.
An object in direct sunlight reflects stronger and different light in comparison to an object that receives no direct light or only a fraction of the available light because some other object is casting a shadow on it by stopping the light from the primary light source. Nevertheless the object receives indirect light from the surrounding, which is reflected light, when in shadow. The colour of this indirect light can vary of course depending where it is coming from especially from where it is reflected or maybe even filtered.

Example1:
Very well known is the effect of blue and grey shadows on snow. Snow in shadow receives mainly indirect light from the sky. As snow is white i.e. without colour or more correctly reflects all colours, the shadows in snow look blue under a blue sky without clouds or greyish on an overcast day with a closed layer of grey clouds.

Example 2:
The shadows under a red sun umbrella are influenced by the colour of the umbrella for example. A blue drinking cup under a red umbrella might change to a violet colour due to additive colour mixing theory : blue + red=violet.

Also it is interesting to observe that the colour of the primary light produces shadows in the complementary colour. If you chose a red bulb as your primary light source in a still life painting the shadows cast by that bulb will have a greenish colour.

How to paint shadows – basic approaches

From light to dark and vice versa

1. From light to dark
In water colour and in acrylics it is a very common method to lay down the colours of an object in “normal light”. Then the artists waits until the colours are dry. In a second step those areas in shadow will be covered with a transparent layer of colour that will darken the original colours in order to get a shadow effect. A similar approach is also used in oil colours by adding blue and darker colours to tone down from light to dark shadows. That way the colour hue of the sunlit area is always present in the colour mix for the shadows.

Usually the primary source of light as the sun contains warm yellow light and the colour of shadows are mixed with blue colours as cool complementary hue.

2. From dark to light
Of course it is also possible to start from the dark side and to establish the colours in shade first. The colours of the sunlit parts are then mixed by adding white and yellow to the shadow colours to brighten up or tone up the shadow colours.

3. Mixing the colours as seen
The other way is to paint the colours as they appear in front of the painter. In principle there is no difference in mixing the colour of the sky and the colours of a wall in sun and in then in shadow. In any case the painter has to observe the colours and to translate his observation into a colour mix.
Very bright hues can be mixed by adding white and if the source of light is “warm” i.e. yellowish, as direct sunlight mostly is, with a little bit of yellow in addition. In general it is wise not to overdo the mixing with white because the result will be washed out or almost bleached colours. Overdone highlights can really ruin an otherwise well done painting.

A major difficulty is to mix dark or very dark colour hues. To know the extreme dark and bright colours that are possible with your medium is very important. The gamut of oil colours and other painting media is just not sufficient to represent the wide range of tonalities which are there in nature. Therefore a very bright light can only be represented by emphasising the contrast with dark colours around.

Painting or drawing shadows with dry pastels

A studio still life study with controlled light

This is a still life in dry pastels on medium rough watercolour paper from life in my basement studio. During a week I studied light and shadow colours in artificial light. I tried to find the right colours as seen on the objects to get the realistic look of light and shadows.

It was very helpful to have different colour shades in the Schmincke set of pastels colors. For example the ochre tonalities in light and shadow on the lamp on the right are only very slightly mixed. For the most part I applied the pastel without mixing in that case.

The green glass bottle in the middle however required quite a lot of careful mixing as the set of pastels colour did not contain greens in a suitable gradation of tonalities. I also used bits of grey or charcoal to darken certain areas. With purpose I avoided to use a lot of white in the brightest areas. I would commend to establish small areas with the brightest colours and the darkest colours very early in the painting process to keep control over the contrast or tonality range. It might be very difficult to establish highlights later if the medium tonalities are to high already. If you set your middle values too dark the deepest darks in shadows can become a problem. I found that it is more difficult to create the darkest darks in pastel than the lightest lights.

As you may observe the tonality varies in shadows, by darkening the shadows close to the contact with the bright areas I tried to imitate the sensation for the eyes when it looks at strong contrasts as described in the previous paragraph. There was a rather complicated mixture of shadows cast by the objects onto themselves and on others as well as effects of reflected coloured light, particularly in the green glass vessel at the centre of the composition.

An Art Fair Primer

An Art Fair Primer

Some Basic Information To Get You Started Doing Art/Craft Fairs And Festivals

This lens was created to provide information to those thinking of getting into the art fair circuit. It is designed to cover the fundamentals and the many challenges of doing this kind of event.

I am a working artist who has been marketing my art through art fair venues for over 15 years. I can honestly say that art fairs are what has taken my art from a hobby into a thriving art business.

5 best things that I like about art fairs.
1. Being out in beautiful weather
2. The hauling and toting keeps me in shape (sort of)
3. The positive feedback and high sales (Okay maybe money should have been 1.)
4. Travel. I go to places that I otherwise would not.
5. People. Not only meeting animal people and hearing their stories but also making new artist friends.

Anyone who has read my blog Fur In The Paint has heard me go on and on about the difficulties I face doing the art fair circuit every year. I have been rained on, rained out, hailed on, and once even snowed on! There have been tornadoes. I have suffered from heat exhaustion, freezing temperatures, cranky customers, unprofessional art fair management and the list of atrocities doesn’t end there. This all culminates in the fact that the older I get, the less I like all the hauling and toting as we pack around 1,500 lbs of artwork, displays and tents (yes, we take more than 1 tent.)

5 Worst things about art fairs.
1. Inclement weather
2. All that hauling and toting
3. Emotionally crushing low sales
4. Sales tax collection
5. Obnoxious or rude people

So if your pondering doing fairs and festivals read on as this will give you some idea of what’s in store and how best to handle it.

All copyrights are retained by the artist,
Mona Majorowicz of Wild Faces Gallery.

The artwork or content in this lens may not be used or reproduced, either
in part or in whole, without the express written consent from the artist.
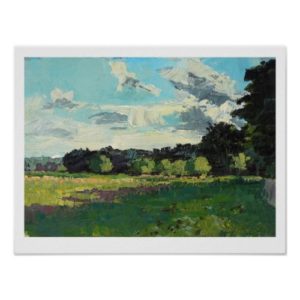
Brookings Summer Art Festival

Finding An Art Fair Venue That’s Right For You

Sorting Through The Sea Of Art Fair Events To FInd A Good Fit For You and Your Work
Okiboji 2009 There are plenty of events out there to choose from and most every small town town has at least one. Small events are good for testing the waters and getting the hang of what actually goes into a successful fair for you. But the real money comes from doing larger events.

Here are some rules of thumb I use for choosing events.
To be clear it doesn’t mean that an event that falls into these rules can’t still be successful, it’s just a whole lot less likely.

* Must have an attendance of at least 30,000 people for the event. Ideally 75,000 to 150,000 is good.

* Event has been running for at least 5 years. Usually new events struggle to advertise adequately. It takes time for a good event to build a client base. That doesn’t mean I don’t do new event, especially if they are local. But I go into it with the thought that I am helping the event take off, not that the event will make me money.

* It’s specifically an art event. Meaning it’s not Apple Days Festival, or Antique Tractor Days or something similar where the main draw is something else and they just are happening to have an art event at the same time. This is true even for things which you might think fit your niche perfectly. Most often when people are attending for something other than buying art, they usually don’t buy. There are some exceptions to this rule, but they are very few.

* Outdoor events make more money than indoor events I know it sounds crazy and messed up, but it’s so true.

Resources For Finding Quality Art Fairs

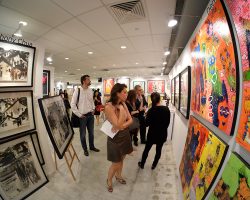
I have used all of these at one time or another and all provide excellent information. But perhaps the best option is to go to the events you are interested in and talk with exhibiting artists.

The Art Fair Application

Why Submitting Quality Images is Important To The Art Fair Apllication Process
actual application for art fair

So what are the two most important thoughts (as in: what will get me approved) in regards to filling out art fair applications?

1. Submit good images. Scratch that. Submit the best darn images you can create, both artistically and in the reproducing true to the original.

2. Words have power. Be able to write a personal statement intelligently and succinctly, as well as you describe your work to its best advantage.

That’s it. By doing these two little things well, your chances for acceptance just went way up.

Submit quality images

By entering quality images you show the jury that you are a professional and care about your art. You may well say to yourself “This is good enough to give them an idea of my work. Sure it’s a little blurry, but surely they can see that I have talent.”

While this may be true, you are competing against other artists who are submitting great images representative of their work. In the end, the jury will go with the ones who put in the effort.

It is understandable if creating good digital images is not your thing. But if you want to get into bigger and better events you need to either take on the challenge and learn it, or hire a good photographer. Showing your work to it’s best advantage speaks to your professionalism.

What constitutes a good quality image.

1. Clarity. No fuzziness or blurry areas. Also no shadows or glare.
2. Color is true to the original. Too light or dark is not acceptable.
3. Image Only. No framing, matting, glazing, or fingers, grass, carpeting. You get the idea.The nice thing about digital files is this is easy to crop out.
4. Image is square. This means the image is not crooked or fading off into the distance on one end.
5.Your best work only. You will be judged on your weakest work guaranteed. Most applications take 3-4 images. If you have 3 outstanding pieces and one so-so piece. It is the so-so piece that will determine your entrance into the event.

Art Fair Applications: Words Have Power

Knowing The Best Way To Describe Yourself On An Art Fair Application May Mean The Difference Between Getting In And Not

The written word
It is important to be able to write (in brevity) a description of your work. The events I have applied to have requested this supporting information anywhere from under 100 words to just 3 words. (In case your curious “Equestrian & Wildlife Artist”) Something this brief is generally for inside the catalog or map information. Anywhere from 7-25 words is often read to the jury while viewing your work.

Perceptions of Art or Craft
There is usually a great debate around what should be considered “art.” Umm . . . I am definitely not going there. Instead I’ll comment on how the word “art” is perceived differently from the word “craft” and why that may be important to you when filling out applications.The way you describe your artwork has a great impact on how it is perceived

The first thing is to be aware of what the connotations of the word “craft” are. In the December 08 issue of Art Calendar Magazine the article Art or Craft what’s in a name states that in their survey 87.2% felt that a finished creation was perceived as more valuable when classified as “art” rather than “craft.” 68.4% perceived “art” as having superior quality to that of a “craft.”

The magazine suggests the word craft should be avoided completely except when talking about

The word craft should be avoided completely except when talking about “craftmanship.”With the application process how you describe yourself plays an important role in how a jury perceives you. In the same article it tells how many artists are using broader words like “objects,” “creations” or “works” to replace more traditional descriptors like ceramics and sculptures.

A Brief Word About Using Zapp For Art Fair Applications

Also Known As Zapplication: Automated Art Fair Application System
Lately many events have been switching their application process over to Zapplication

This is a pretty straight forward application to use and it does make it easier in some significant ways. But being a bit of an old dog. I’m not fond of learning new things. So Zapp wasn’t exactly embraced by me with open arms.

Also there has been more than one occasion that for some reason rejection notices were sent when they shouldn’t have been. I imagine this could happen in the old way using snail mail as well. But perhaps things being sent out instantaneously isn’t always the best idea.

Things I like About Zapplication
* Relatively easy to set up an account.
* Once an image is uploaded it is archived.
* No messing around trying to get good quality slides.
* You can check out criteria for other shows.
* It allows you to find shows you may not have had access to before.

Things I don’t Like About Zapplication.
* You need to have a good quality digital image.
* Computer monitors color gamut varies. Hard to say what your image will “really” look like to the jury.
* Some shows require payment by credit card. Personally, I don’t like using credit cards for this.
* Events that have switched to Zapp now have way more (as in doubled or tripled) the number of artists applying.
Loring Park Art Fair, St. Paul MN 2009

5 Ways To Know If That Art Fair You Signed Up For Is Really A Craft Fair.

And why it’s important to know the difference.
Riverrsance Festival Of The Arts If want to preface this by saying, I am not an art snob. The reason it’s important to know the difference between being in a craft fair instead of an art fair, is it attracts a totally different set of buyers. Besides doing Art Fairs I have done Art & Craft events as well as just Craft events. But knowing what they “really” were allowed me to pack appropriately, (like lower ticket items for when I do craft events.) In the end, what’s important to me is that I make a certain amount of money. It is usually irrelevant whether I get there by selling original art or by selling notecards.

Initially a way to determine if an event is one or the other is by how the declare themselves and whether they jury. To be clear, Just because an event calls itself an “art fair” doesn’t mean it can’t be crafty. They can and often are. Or that a craft event can’t have great art. They do. This is just another reason that whenever possible you should attend the event as a patron before committing your cash for a booth.

Art Fair Vs. Craft Fair

And The 5 Signs Your In A Craft Fair Are . . .

1. It has the word craft in the title. Okay, so that sounds a lot like an obvious answer. But soooo many artists think that if it is called an Art & Craft Fair that means there will actually be some art available for sale. This is rarely the case. Generally if the word craft is used the event will lean heavily in this direction.

2. “Stuff” on a stick. This in general means yard baubles on a stick. (weather vanes, water gauges, those glass ball sphere thingys.) Though you’d be surprised how well anything sells when attached to a stick.

3. There are far more stock trailers than vans. Huge stock sized trailers often mean metal yard art, though indicates anything bulky. If you’ve got a parking lot filled with big trailers, your at a craft event. For the most part, only crafters can sell a stock trailer full of stuff.

Personally I gotta admire their sales juju. I mean seriously, to know with certainty that you can sell that much of “any” product takes a large set of salesman stones. Don’t you think?

4. Buy/Sell This is where someone purchases something in bulk and then may or may not alter it slightly, and then resell it. This kind of thing is the bane of most art events and perfectly acceptable in a craft event. Even really good art events can take in something like this from time to time. However if the event is heavy in this . . . you are at a craft fair.

5. And finally People ask you where the birdhouses are. Yes this has happened to me. One event the lady was complaining there was just “too much art” and all she wanted was a new birdhouse.

Omaha Summer Art Festival

Artist Vehicles

Passenger Vans vs. Cargo Vans For Hauling Art Fair Equipment
Our Art Fair Vehicle For those of you thinking about getting into doing art fairs, the vehicle you drive is critically important. The exclusion to this is jewelers. They can show up in a compact, if they know how to pack it.

This is our van. Isn’t she a sexy beast. Okay, okay it’s a land whale but here’s why it’s the vehicle of choice for us. This is actually a passenger van that we took the seats out of. Why did we go with a passenger van over a cargo van? Read on.

Cargo Vans
Our van is essentially the same as a cargo van with some important, comfort related distinctions.

Cargo van are often an empty shell on the inside. Literally the raw metal of the vehicle make up the interior. This means the van gets colder in the winter and hotter in the summer. Many artists custom build in an interior for comfort.

Also often cargo tend to have few features Often they don’t usually come with air conditioning (and possibly cruise control) standard. Be sure to check that out if your looking at one.

And lastly most cargo vans have very few windows. This may not be a big deal if you pack it to the ceiling. We pack most of the time so we can see out our windows. This really helps when driving in unfamiliar cities.

How To Choose The Right Van For Traveling The Art Fair Circuit

When It Comes To Hauling Your Artwork To Art Fairs Size Matters

Here’s a few pointers for choosing the right vehicle.

Square is good. The boxier the better. The reason for this is you can pack more stuff in square than you can in a round type of curvy van.

Tinted Windows are nice. They not only keep the interior cooler, but they also kinda hide the fact that your vehicle is packed with “stuff.” Unfortunately this van does not have that feature

Measure your interior and the space between your wheel wells. This is really most important when it comes to your display panels. Most pre-made panels run approximately 3 foot x 6 foot. Display panels are really the most difficult object to pack and make fit.

Note the doors that fully extend open allowing you the maximum space to put large objects inside.

Bigger is better. Our previous van was a Safari which was considerably smaller. We got almost as much in it as our current one but we had to pack it in a specific order to get it all to fit. Which meant we generally had to tear everything completely down so we could put our tents in the bottom, then the display, then artwork, totes, etc. If the weather is nice, this is no big deal. However, if it is driving rain and lightening, having to pack in this way, becomes a noticeably a bigger pain in the arse. Also with the larger size van, we can now do two booths at an event with plenty of inventory for both.

Artist Display Panel Options

The Importance Of Looking Professional At Art Fairs
Armstong Panels So now you’ve got your tent you need something to display your work.. As with all things there are many companies which makes units to fill this function but here are the four most used by the professionals that I know.

All pretty much the same thing which is panels that can be joined to together to form a gallery-like look in your booth. Some are carpet covered which come in a variety of colors. While others are fabric or wire mesh. Most companies offer various accessories like display print bins, shelves, height extenders, half walls and podiums.

The carpeted version really pulls off a gallery look which is pretty amazing when your in the middle of a parking lot.

Pro Panels Probably the most used company. among artists.

Armstrong Panels Pretty much the same thing as Pro Panels but they offer a wire mesh version which is the one I use.

Graphic Display This is the more economy minded version which only comes as a wire grid system.

The Flourish Company They make the non-rigid fabric mesh panels that require little space for storage.

Why I Prefer The Mesh Walls For Outdoor Art Fairs

Mesh panel system I prefer the wire mesh to the carpeted panels for outdoor events because it lets the tent breathe.

* On windy days the wind just rushes through them while it pushes on the carpeted panel walls in some cases tipping them.

* Also for the completely windless days it allows what little breeze to stir through the tents while the carpeted paneled tents are stifling.

What To Pack: Art Fair Essentials

For Indoor Art Fair Events
1. Lights. This has to do with the “S Rule” (Shiny Stuff Sells) The more light the better.
2. Extension cords.
3. Tables with cloths and covers.
4. A rug for the floor is a really nice touch.

Outdoor Art Fair Events
1. Weights and stakes
2. Clamps (An absolute minimum of 10 – preferably 30)
3. Tie downs and Cambuckles
4. Tarps
5. Ice and something cold to drink.
6. Snacks
7. Tents. (of course)
8. Sunscreen, hats or umbrellas for your chairs.

For Either Type Of Art Fair
1 Calculators (at least 2 preferably 3) Heat and cold will fry them.
2. Change. This includes bills. I usually take around $400 worth of 1, 5′s and 10′s.
3. Totes (for storage)
4. Pens, receipt books and bags.
5. Comfortable chairs
6. Guest book to collect names for mailing list.
7. Breath mints preferable to gum because you’re not chewing while talking with patrons.
8. Comfortable Shoes
9. A change of clothing in case you get wet.
10. Display Units, baskets etc.
11. Plenty of Inventory. Nothing torks me off more than running out of something.
12. Zip Ties Excellent for everything from securing your display to binding lighting wires together.
13. Counterfeit money detector pen

A Few Things That Are Nice To Have But Are Not Essential
1. Small broom for sweeping outdoor booth space
2. Blankets
3. Extra tarps
4. Tool Kit complete with zip ties
5. Shims for uneven or not level surfaces

A Word Or Two About Fair Or festival Tents And Canopies

Types Of Art Fair Or Festival Tents
Since Outdoor events almost always have better sales than indoor events, I thought I’d cover the topic of tents and weights.

When choosing a tent you should get only a white tent. It allows in the most light and shows your work to it’s best advantage. Colored tent cast a glow onto the work and at dusk turn your booth into a cave.

Most art fair canopies come in two main types.
1. Craft Hut type (Dome or Hoop top.) Trimline and Lightdome
2. EZ-Up type (pointy top) Other brands are KD Canopy, First Up and Caravan.

The Craft Hut Type tend to be much sturdier and water proof. They are not nearly as easy to assemble and cost between $800-1500 depending on brand, model and features. If they get damaged your parts cost will be high as will your replacement cost.

EZ Up Typeis the most common of its type because it is the easiest to buy as it is available at Sam’s Club for around $200. These tents tend to be very light weight, not all that sturdy and often in a heavy downpour they’re not water proof. (You can buy a water proof spray coat and take care of that yourself.

On the other hand they are quick to set up, though still much easier with two people despite what the box says. And if they do get trashed they are easy and cheap to replace. EZ-Up tents work just fine if you know how to use them. But since often it is newbies who buy them, they often come crashing down.

An Art Fair Tale Of Woe

A Personal Story Detailing The Devastation Left In The Wake Of A Storm
The spot where my both was. See that big barren spot in the foreground where the people are standing? Well that is where my booth was located just one short hour before this photo was taken.

Omaha Summer Arts Festival 2008
Even though it was sunny, clouds could be seen rolling in from the west. I began getting antsy and went over to the artist information booth and asked what the weather was going to do. They promised it was going to miss us but perhaps we may graze the edge and get some rain out of it. They were so very wrong.

By the time the tornado sirens went off we had already begun packing things away because I had a bad feeling about it.. We got all the originals and large framed prints indoors (with help from some of the volunteers.) There wasn’t enough time to get it all so everything else was put into totes and we zippered down and secured the tent as best we could. I was told several times to get inside by the time I was actually heading indoors.

As I was walking to the Landmark Building it was eerily still and stifling but I could feel the change in the atmosphere. I heard the roar of the wind before I felt it or seen the trees move. Once inside we were in the basement for around an hour.

When we finally came up it was shocking to see the mess. Booths were completely gone. My totes had literally blown down the street. Most had their lids popped off and were filled with water. Nearly everything that had been left outside was destroyed. An artist friend of mine who was farther down the street and in a more sheltered location was in good shape. She stayed with me until the wee hours sorting through the wreckage to salvage what we could. (Big Hug! Thank you Belinda!) While Mike was dismantling the tent parts and doing general cleanup.

Our neighbor did silk clothing and their clothes were scattered all over. Their daughter was crying. They packed up that night and left. Of the 135 artists, less than 20 left. All others, even some who lost their tents (including us) carried on. In the end I lost a little over $10,000 worth of inventory and equipment. It could have been much worse. Some artists lost as much as $30,000 and most had no insurance. Fortunately we had insurance since I have an actual gallery. It only covers replacement costs but that is better than nothing.

The Storm
We didn’t actually have a tornado on site, (though there were some in the area) but had anywhere from 80-120 mile winds. That was enough power to move a food tent that had over 2000 pounds of weights over to wipe out 3 other booths. A window of the landmark building was damaged by flying debris. In parts of Omaha they had quarter sized hail and semi trucks and cranes were toppled by the wind. And of course it rained with considerable flooding.

Note: We had over 500 pounds on our tent. This is a ridiculously high amount for any other event. We normally have 300 pounds at all other events, which is far more than most artists use. The art fair actually has an architect and a engineer inspect every artist’s tent to make sure it has sufficient weight on it. The art fair also supplies free sandbags for any artist wishing to add more. This is the only event that does this. It’s the little things like this that show that they really do care about the success of their artists.

Disaster Relief For Artists

And now for some good news.
For any artist that has losses severe enough to be considered career-threatening, you can contact the Craft Emergency Relief Fund (CERF). While CERF generally cannot respond to all weather related claims at outdoor shows, they will certainly consider applications from those most severely hit by the storm. Please contact CERF directly at (802) 229-2306 or at Craft Emergency Relief Fund for more information.

More Information Regarding Art Fairs

Covering everything you’ll need to know about doing art fairs successfully.
So if my story of tragedy and woe at an art fair hasn’t yet put you off to the idea of doing art and craft events as a way to make a little extra cash, then check out my other art fair lenses for even more information on the the how to and why you should consider doing art fairs.