The Best Free After Effects Templates For Your Next Video Project

The Best Free After Effects Templates For Your Next Video Project

Looking to get started in After Effects? Check out our selection of the best free templates to get you started. With so many options available, it can be difficult to know which template is the best for your next project. Here are five of the best free After Effects templates to get you started:

There are so many different website to free templates for after effects on the internet, it can be hard to decide which one to choose. But, if you want to get the best website to free templates for after effects, then you should choose the one that is the most reliable and affordable.

1. VideoLabs After Effects Template

This template is perfect for creating professional-looking videos. It has a sleek and modern design, and is easy to use. Plus, it offers a wide range of features, such as built-in audio and video editing tools.

2. Cinema 4D After Effects Template

This template is ideal for creating high-quality video projects. It has a stylish and professional look, and is easy to use. Plus, it offers a wide range of features, such as automatic video editing, sound editing, and more.

3. The Softube After Effects Template

This template is perfect for creating high-quality video projects. It has a sleek and modern design, and is easy to use. Plus, it offers a wide range of features, such as automatic video editing, sound editing, and more.

4. The GIMP After Effects Template

This template is perfect for creating professional-looking videos. It has a sleek and modern design, and is easy to use. Plus, it offers a wide range of features, such as automatic video editing, sound editing, and more.

5. Premiere Pro After Effects Template

This template is perfect for creating high-quality video projects. It has a sleek and modern design, and is easy to use. Plus, it offers a wide range of features, such as automatic video editing, sound editing, and more.

If you’re looking for some free After Effects templates to help with your next video project, then you’re in luck! Here are five of the best free templates out there, all of which will help you create professional-looking videos.

1. Game of Thrones: A Song of Ice and Fire

This template is perfect for any project that needs to capture a feeling of the world of Westeros. It has a wide range of features, including a custom title screen, intro and outros, voiceovers, and more.

2. Harry Potter: Hogwarts School of Witchcraft and Wizardry

This template is perfect for any Harry Potter video project. It has a wide range of features, including a custom title screen, intro and outros, voiceovers, and more.

3. The Hunger Games: Mockingjay Part 2

This template is perfect for any Hunger Games video project. It has a wide range of features, including a custom title screen, intro and outros, voiceovers, and more.

4. The Trap

This template is perfect for any trap project. It has a wide range of features, including a custom title screen, intro and outros, voiceovers, and more.

5. The Avengers: Age of Ultron

This template is perfect for any Avengers video project. It has a wide range of features, including a custom title screen, intro and outros, voiceovers, and more.

There are a variety of After Effects templates that can be used for video projects. Some of the best templates include the Standard After Effects Template, the Animated After Effects Template, and the Super HD After Effects Template. Each template has its own strengths and weaknesses, so it is important to choose the right one for your project.

The Standard After Effects Template is a great choice for a basic video project. It is easy to use and can be customized to your needs. The main downside is that it is not very versatile.

The Animated After Effects Template is a more versatile template. It can be used for a variety of projects, including movies, commercials, and web videos. It is easy to use and has a variety of features, such as automatic animation and motion graphics.

The Super HD After Effects Template is the best choice for a high-quality video project. It is very versatile and can be used for a variety of projects, including movies, commercials, and web videos. It is easy to use and has a variety of features, such as automatic animation and motion graphics.

There are a lot of After Effects templates available for free online. However, the best free templates for video projects are those that are creative, well-made, and easy to use. Here are five of the best After Effects templates for your next video project.

1. Catapult: This template is great for creating professional-looking videos with a quick and easy following.

2. Star: This template is perfect for creating a stylish and professional video.

3. VideoStar: This template is perfect for creating high-quality videos that look great on virtually any device.

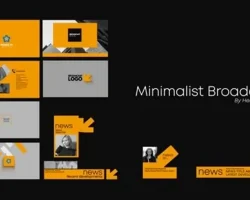
4. Broadcast: This template is perfect for creating professional-looking videos that are easy to follow and use.

5. Cineform: This template is perfect for creating professional-looking videos that are easy to follow and use.

The BW Stretch Font Family – A Versatile Choice For Any Project

The BW Stretch Font Family – A Versatile Choice For Any Project

Do you want to create a professional-looking website or app with the latest font family? If so, then the BW Stretch Font Family is your go-to choice. This versatile font family offers a vast selection of fonts that are perfect for any project you might want to create.

The BW Stretch Font Family was created with design in mind. We wanted to create a family of fonts that would be versatile and easy to use. We have a variety of fonts that are perfect for any project you might want to create. Whether you want to create a website or an app, we have a font that is perfect for you.

We hope you find the BW Stretch Font Family to be versatile and easy to use. We want to make creating a professional-looking website or app a breeze. Contact us today to learn more about our font family and how we can help you get the job done.

The BW Stretch Font Family, a versatile choice for any project! The fonts are designed to provide a clean, modern look, while still remaining flexible and versatile. Our fonts are available in both TrueType and PDF formats, so you can use them in any project you want. Our fonts are available for free, so you can start using them today!

The BW Stretch Font Family is a versatile choice for any project. It is easy to use, versatile, and can be used for a variety of applications. With its smooth, round letterforms, the font is perfect for any type of text. It is also available in a variety of weights, perfect for any font project.

There are many font families that are versatile for any project. The BWStretch font family is a great choice for any project that needs a versatile font. This family of fonts has a variety of weights and styles that can be used for a variety of purposes.

The BWStretch font family is available in a variety of weights and styles. You can use the fonts for a variety of projects, such as logos, headlines, and web fonts. The font family is also easy to use, with a simple and easy-to-use interface.

The font family is available in a variety of languages, so you can use the fonts in any language. The font family is also available in a variety of formats, so you can use the fonts in any format.

The Top 5 Alitide Typefaces For Minimalist Design

The Top 5 Alitide Typefaces For Minimalist Design

There are a few different types of minimalist design, but the most popular and well-known style is called “minimalism.” This style is characterized by using small, simple fonts and using minimalistic colors and shapes. There are a few different types of minimalist fonts, but the most popular and well-known typeface is called Arial.

Arial is a sans-serif font that is often used in minimalist designs. Another popular minimalist font is called Tahoma. Tahoma is a typeface that is often used for headlines and for logos and illustrations. Another popular minimalist font is called Monaco. Monaco is a typeface that is often used for headlines and for logos and illustrations. There are also a few other types of minimalist fonts, but these are the most popular and well-known.

One of the benefits of using a minimalist font is that it can give your design a clear and concise look. It can also be helpful to use smaller typefaces for smaller doses of color and graphics. Additionally, a minimalist font can be more easily read in small sizes, which can make your design more accessible and easier to read. Additionally, a minimalist font can be more easily edited and customized than a regular typeface.

There are a few different types of minimalist design, but the most popular and well-known style is called “minimalism.” This style is characterized by using small, simple fonts and using minimalistic colors and shapes. There are a few different types of minimalist fonts, but the most popular and well-known typeface is called Arial. Arial is a sans-serif font that is often used in minimalist designs. Another popular minimalist font is called Tahoma. Tahoma is a typeface that is often used for headlines and for logos and illustrations. Another popular minimalist font is called Monaco. Monaco is a typeface that is often used for headlines and for logos and illustrations. There are also a few other types of minimalist fonts, but these are the most popular and well-known.

Fonterra Sans

Asymmetric Sans

Universals

Linotype Sans

Adobe Sans

If you’re looking for an amazing and minimalist design style, then you should definitely check out the alitide typefaces. These typefaces are perfect for creating minimalist designs that are both stylish and functional. Here are the five alitide typefaces you should definitely check out:

W3 Total Cache

This typeface is perfect for creating stylish, functional designs. It’s extremely versatile and can be used for a variety of different purposes.

Arial

This is another fantastic alitide typeface that can be used for a variety of different purposes. It’s perfect for creating professional and high-quality designs.

Sans-serif

Sans-serif typefaces are a great choice for creating modern and sophisticated designs. They’re perfect for creating clear, concise designs that are easy to read.

Sans-serif

This typeface is perfect for creating modern and sophisticated designs. It’s perfect for creating clear, concise designs that are easy to read.

Arial

This typeface is perfect for creating professional and high-quality designs. It’s perfect for creating a variety of different designs, including simple and minimal designs.

If you’re a minimalist designer or just looking for a fresh, minimalist approach to your design, you’ll want to check out some of the top 5 alitide typefaces. Alitide typefaces are designed to be simple, clean and timeless. They’re perfect for any type of design project, whether you’re looking to create a modern graphic design style or revive an old font. Here are 5 of the best alitide typefaces for minimalist design:

Swift Gothic

Swift Gothic is a simple, clean and timeless font. It’s perfect for any type of design project, from web designing to creating a new desktop design.

Arial

Arial is another great choice for a minimalist design style. It’s simple, clean and easy to use, and it’s perfect for any type of project.

Helvetica

Helvetica is a versatile font that can be used for a variety of purposes. It’s simple to use and easy to understand, and it’s perfect for any type of design project.

Arial Black

Arial Black is another great choice for a minimalist design style. It’s a versatile font that can be used for a variety of purposes.

Century Gothic

Century Gothic is a modern font that can be used for a variety of purposes. It’s simple to use and easy to understand, and it’s perfect for any type of design project.

How To Use Teal And Orange Lut For Video Editing

How To Use Teal And Orange Lut For Video Editing

If you’re looking for a versatile and stylish addition to your video editing toolkit, look no further than teal and orange lut. These two colors are perfect for adding a pop of color to any footage, and they can also be used to create a sleek and professional look. Here’s how to use teal and orange lut for video editing:

Start by adding some basic video editing tools to your toolkit. Once you’ve got everything you need, use the video editor’s tools to add basic luts to your footage. For instance, you can use the video editor’s crop tool to resize and adjust the footage, or the video editor’s focus tool to make the video look brighter or darker.

Next, use the lut creator to create custom luts. This tool allows you to create custom luts that are specific to your footage. For example, you can create a lut that alters the color temperature of the footage, or a lut that adjusts the amount of light that’s being used in the clip.

Next, use the lut editor to create and manage your luts. This tool allows you to create and edit luts, as well as manage and export your video footage. To create a new lut, simply click on the “New Lut” icon and enter the information you need.

Finally, use the video editor’s exporting tools to create and export your video luts. To export your footage to a video file, first select the “Export” tab and select the “LUTs” option. Then, enter the information you need for your luts. For example, you can choose a filename, or you can choose to save the footage in a format that can be played on a variety of devices.

Are you looking for a way to add a pop of color to your videos? Well, look no further than teal and orange lut for video editing! These colors are perfect for adding a bit of excitement and life to your videos, and they can be used in a variety of ways to create stunning results.

If you’re looking to add a pop of color to your videos without spending a fortune, teal and orange lut are a great option. They can be used in a variety of ways to create stunning results, and they’re relatively affordable too. So, if you’re looking for a way to add a pop of color to your videos, look no further than teal and orange lut!

When it comes to editing video, there are two main colors you can use: teal and orange. both colors can be very versatile in terms of how they can be used to add interest and brightness to a video. Here are a few tips on how to use both colors toedit your videos:

Use teal to add a Space Invaders-inspired feel to your videos. Use a light blue or green color to help contrast against the orange of the video.

Use orange to add a warm and inviting feel. Use a light yellow, green, or blue color to help contrast against the teal of the video.

Both colors can be used for different purposes, so experiment and see what works best for you. By using both colors in your videos, you can add a lot of personality and interactivity to your videos that you may not have been able to achieve with just one color.

When you want to add a bit of color to your video editing workflow, there are a few things you can do. One option is to use teal and orange lut to add a pop of brightness and color. However, there are a few things to keep in mind when using this type of lut.

When using teal and orange lut, you want to create a clean and crisp image. This is because the colors will be used in a specific order and will be blended together. You should also be aware that the colors will be dominant and will be used more in the center of the image than on the sides.

When using teal and orange lut, it is important to make sure that the colors are used in a way that is consistent with the rest of your video editing workflow. For example, if you are working on a video that is centered around a bright light, then you should use a more orange color to help balance the image.

When using teal and orange lut, it is also important to use a careful technique when editing. For example, if you want to make a video that is theatrically stylish, then you should not use teal and orange lut. Instead, you should use a more subdued color to help make the video look more professional.

The Benefits Of Using Teal And Orange LUTs In Premiere Pro

The Benefits Of Using Teal And Orange LUTs In Premiere Pro

The benefits of using Teal and Orange LUTs in Premiere Pro are plentiful. They allow for a more realistic and accurate image, which can give you a more pleasing looking film look. Additionally, they can help to improve the overall workflow and accuracy of your footage.

If you’re looking for a way to improve your video editing process, then using Teal and Orange LUTs is a great option.

If you’re someone who uses Premiere Pro, then you know that there are a lot of different ways to customize your editing process. One of the most popular ways to customize Premiere Pro is to use lUTs.

LUTs are little cascading sets of color filters that can be applied to a video file to change the way it looks. They can be used to change the color of light and dark areas, to add saturation or brightness to videos, and to create a more realistic look.

When used in combination with other filters, lUTs can create a really unique and interesting editing experience. For example, if you want to change the color of a person’s skin in a video, you can use a lUT to change the color of the skin.

Another great thing about lUTs is that they can be used in any video editor, regardless of how you’re used to working with videos. For example, you can use them in Premiere Pro, Final Cut Pro, or even MPEG-4 video editors.

If you’re looking for a way to customize your editing process in Premiere Pro, then you should definitely check out lUTs.

When it comes to video editing, one of the most important aspects is the look of your video. In order to provide a professional look and feel, Premiere Pro users can use the color temperature tools known as LUTs.

LUTs are used to change the color of an image in Premiere Pro. There are a variety of LUTs available, and each has a different effect on the look of your video.

Some of the most popular LUTs used in Premiere Pro are the teal and orange LUTs.

The teal LUT is a versatile and popular LUT. It can be used to change the color of an image in Premiere Pro. When used with other colors, the teal LUT can create a professional look.

The orange LUT is a less popular but equally effective LUT. It can be used to change the color of an image in Premiere Pro. However, like the teal LUT, the orange LUT has a versatile and professional look.

Both LUTs are important in providing a professional look and feel to your video. If you want to achieve a high-quality video, using either of the LUTs is a good way to go.

If you’re looking to improve your Premiere Pro video editing workflow, you may want to consider using teal and orange lut files. These files allow you to change the color of your video footage based on the current color temperature of your camera or device.

Here’s a little more detail on what these files can do for you:

Teal and orange lut files are designed to improve the appearance of videos. When used in conjunction with other editing tools, they can help to change the overall color of a video.

For example, if you happen to be editing a video in a dark room, you can use a teal lut file to give the footage a more overall light color. Conversely, if you’re editing a video in a bright room, you can use an orange lut file to give the footage a more overall color.

Since these files are specific to Premiere Pro, they can help to improve the video editing workflow in your software. In addition, they can be used in other video editing software applications as well.

Overall, using teal and orange lut files in Premiere Pro can give you a more consistent look and feel for your videos. This can be a great way to improve the overall quality of your videos, and it can be a great way to make your editing process more efficient.

How To Create 3d Paper Art

How To Create 3d Paper Art

Paper is a versatile medium that can be used to create art in a variety of different forms. One of the most popular ways to use paper is to create three-dimensional art.

Three-dimensional paper art can be created using a variety of different techniques. One popular technique is to cut paper into shapes and then assemble the shapes into a three-dimensional object. This can be done by hand, or with the help of a cutting machine such as a Cricut or Silhouette.

Another popular technique for creating three-dimensional paper art is to fold paper into shapes. This can be done by hand or with the help of a paper-folding machine.

Once the paper has been cut or folded into the desired shapes, it can then be assembled into a three-dimensional object. This can be done by gluing the pieces together, or by using other methods such as stitching or wire-wrapping.

Three-dimensional paper art can be used to create a variety of different objects, including sculptures, jewelry, ornaments, and more. It is a versatile medium that can be used to create a wide variety of different art forms.

Adding some dimension to your paper crafts is a great way to add interest and depth to your projects. One way to do this is to create three-dimensional paper art. This type of art can be made using a variety of materials, but the most common is paper.

Paper is a great medium to work with when creating three-dimensional art because it is relatively easy to cut and shape. It is also inexpensive, so you can experiment with different techniques without breaking the bank.

There are a few different ways to create three-dimensional paper art. One popular method is to use paper folding techniques, such as origami or kirigami. This type of art is often made by folding paper into intricate shapes and then stacking the pieces to create a three-dimensional effect.

Another way to create three-dimensional paper art is to use paper cutting techniques. This involves cutting paper into shapes and then gluing or taping the pieces together to create a three-dimensional effect.

You can also create three-dimensional paper art by using a variety of different types of paper. For example, you can use construction paper, cardstock, or even recycled paper. By using different colors and textures of paper, you can create a unique and interesting three-dimensional effect.

If you are looking for a creative way to add dimension to your paper crafts, try creating three-dimensional paper art. This type of art is relatively easy to make and can add a lot of interest and depth to your projects.

The Heyday Of 35mm Photography

The Heyday Of 35mm Photography

35mm photography was once the standard format for film cameras. It was popular for many years because it offered a good balance between picture quality and portability. Many professional photographers still prefer to use 35mm cameras, even though digital cameras have become more popular in recent years.

35mm film is a strips of negatives that are 35mm wide. Each frame is 24mm x 36mm. Most 35mm cameras use 135 film, which is wound around a spool inside the camera. 135 film is also known as 35mm film.

When 35mm photography was first introduced, it was a big improvement over the larger format films that were being used at the time. The smaller size made it much easier to carry a camera around and to take pictures in tight spaces. The picture quality was also very good.

35mm photography remained popular for many years, but it has slowly been replaced by digital photography in recent years. Digital cameras offer many advantages over film cameras, such as the ability to take an infinite number of pictures, instant feedback, and easy editing and sharing of photos.

Despite the popularity of digital photography, many professional photographers still prefer to use 35mm cameras. This is because 35mm cameras often produce better quality pictures than digital cameras. The larger size of the negative also allows for more detail to be captured.

If you are interested in learning more about 35mm photography, there are many great resources available. There are also many websites that sell used 35mm cameras and film.

35mm photography was once the standard for taking high-quality photos. But as digital cameras have become more advanced, 35mm cameras have become less popular. Nevertheless, there are still many photographers who prefer to use 35mm cameras, and there are some good reasons for this.

One reason 35mm cameras are still popular is that they produce very high-quality images. Digital cameras have come a long way, but they still can’t match the image quality of 35mm film. If you want the absolute best image quality, 35mm is still the way to go.

Another reason to use a 35mm camera is that they’re very versatile. You can find 35mm cameras that are designed for all sorts of photography, from landscapes to portraits to action shots. No matter what kind of photos you want to take, there’s a 35mm camera that can do it.

Finally, 35mm cameras are just plain fun to use. They’re a lot more analog than digital cameras, and there’s something satisfying about loading a roll of film and taking photos the old-fashioned way. If you’re looking for a more hands-on photography experience, 35mm cameras are the way to go.

So if you’re a photographer who’s looking for the best image quality, versatility, or just a more fun photography experience, consider using a 35mm camera.

3D Wall Art: The Latest Trend In Home Decor

3D Wall Art: The Latest Trend In Home Decor

3D wall art is the latest trend in home decor, and it is easy to see why. This type of art is not only visually stunning, but it also has the ability to transform a space and add depth and dimension.

If you are looking for a way to add a wow factor to your home, then 3D wall art is the perfect solution. Whether you opt for a large-scale piece or a more subtle design, this type of art is sure to make a statement.

When it comes to choosing 3D wall art, there are endless possibilities. You can choose from a range of materials, including metal, glass, wood, and even fabric. And, of course, there are a variety of designs to choose from.

Whether you are looking for something modern or something more traditional, you are sure to find 3D wall art that meets your needs. And, because this type of art is so versatile, it is easy to find pieces that will complement your existing home decor.

If you are ready to add some depth and dimension to your home, then 3D wall art is the way to go. With so many options to choose from, you are sure to find the perfect piece for your space.

3D wall art is the latest trend in home decor. It is a unique way to add dimension and interest to any room in your home. 3D wall art is available in a variety of styles and designs, so you can find the perfect piece to complement your existing decor.

3D wall art is a great way to make a statement in any room. It is also a great way to add visual interest to a room that might otherwise be bland or boring. If you are looking for a way to spice up your home decor, 3D wall art is a great option.

There are a few things to keep in mind when shopping for 3D wall art. First, you need to decide what style you are looking for. There are many different styles of 3D wall art, so you will want to narrow down your options before you start shopping.

Once you have an idea of the style of 3D wall art you are looking for, you need to decide where you want to place it in your home. 3D wall art can be placed in any room in your home, but it is often best to choose a location that is both visible and accessible.

Finally, you need to decide how much you are willing to spend on 3D wall art. 3D wall art can be found at a variety of price points, so you will want to set a budget before you start shopping. By keeping these three things in mind, you should be able to find the perfect piece of 3D wall art for your home.