Packing And Shipping Art

Packing And Shipping Art

How To Pack & Ship Art

As an artist you will have to embrace shipping as a necessary part of your business in order to increase sales potential Many artists with whom I’ve spoken are afraid of shipping. Having a wonderful one of a kind piece of artwork destroyed in transit is a is something every artist loses sleep over. I know I do and I have been shipping my artwork all over the US and occasionally out of it form many years..

As a gallery owner I do a lot of shipping. They key to get your artwork from you to it’s future home is all in the packing. A well packaged item should arrive in mint condition provided something truly unpredictable doesn’t happen with the carrier. I have never had something arrive damaged and need to be replaced. However I’ve had plenty of things arrive at my gallery in a shambles because the original owner just stuck it in a box and handed it over, trusting the carrier to not toss it around like a sack of potatoes.

What You’ll Find On This Page
* Packing & shipping informations regarding using tubes, envelopes and boxes.
* Shipping Supply Companies
* How To Make Your Own Shipping Boxes
* Where To Find Free Recycled Supplies

Common Carriers In The US For Shipping Artwork

Shipping Companies For Your Artwork
Packing and Shipping Supplies I have an order or preference for shipping which is basically relevant to how much they charge to move my package. So my favorite carrier company which is Speedee, just also happens to be the cheapest. But they also make requesting a package pickup, the easiest and they offer services like 24 hour delivery at no extra fee. The downside to them is they only cover part of the country. They deliver to only 6 six states in the Midwest.

So here’s a list of all the carrier companies I do business with regularly, complete with links and what I like about each.

USPS United States Postal Service
usps.com
I actually use the post office for most of my smaller shipping needs. Priority costs are reasonable enough as long as the overall dimension (circumference completely around the width of the package) does not exceed 108″. Once you get past that size the cost go up exponentially and it is in your best interest and pocket book to to find another carrier. And if you want to track a package shipped with USPS click here.

FedEx Federal Express
fedex.com
This has become my second national carrier of choice. I used to do everything with UPS but they had a serious rate increase a year or so back and most days FedEx is about 30% cheaper than UPS when shipping the same package. I almost always check both carriers to see who’ll do the job for the least amount of money. And If you want to track a package via FedEx click here

UPS United Parcel Service
ups.com
This is usually my last choice in carriers these days though I have shipped literally hundreds of packages with UPS and other than them being the most expensive most days, I was very happy with their service. And if you want to track a package with UPS

Speedee Delivery Shipping Carrier

Companies For Shipping Your Artwork

And here’s a little known but excellent carrier for the Midwest
Speedee
speedee.com
I love these guys and ship everything I can with them. They are cheap and they are good. Exactly the combination I like The only downside is they only cover a few states. Iowa, Wisconsin, Minnesota, North Dakota, South Dakota, Parts of Nebraska and Illinois. And if you want to Track a package via Speedee click here

But if you live in this little circle of heaven these are just the guys to move your art and do it well.

Specific Benefits To Using Speedee
* They don’t have any extra fees for home delivery
* I’ve yet to ship a package so large as to incur oversize fees (both FedEx and UPS will charge me extra for the same size that Speedee handles.)
* They will pick up at any location for just $10. And trust me you save far more than that by using with them.)
* The almost invariably deliver within 24 hours again at no extra cost.,

A Story About Carrier Rates To Illustrate My Point
I had three large boxes that needed to go to Rapid City SD from my home town in Iowa. I first took them to UPS. The cost was $94 for all three. I checked out FedEx and it was around $70. I then called Speedee as I hadn’t shipped with them before this. All 3 packages to Rapid City by the next day for $32 and that included the $10 pick up charge from my gallery. Yup been a loyal fan ever since.

Shipping With Mailing Envelopes

Using Mailing Envelopes For Small Shrinkwrapped Artwork or Prints

Shipping artwork using mailing envelopes Shipping small prints either with or without matting is a fairly simple affair. In the above photo I’m using a USPS Priority mailing envelope which is made of a durable yet flexible material. I like these because of the size, which is 11×14. I mat many of my small collectible prints to fit this standard framing size so the envelope is the perfect fit. These come with the price set of usually around $5, so if you have a smaller print (say something that fits in a 9×12 envelope) that doesn’t need to go priority mail you can use your own envelope and save a little money. I tend to do that with ebay sales or sales of that nature. Generally just regular first class is about $2 to give you a comparison.

Shipping With Mailing Envelopes

Using Mailer Envelopes:
* Have print mounted to stiff backer board and shrinkwrapped or put in a protective sleeve. This is not only to prevent moisture damage but also protect the print while being handled.

* Apply a piece of cardboard or backer board over the face of the artwork,* Slip into envelope with invoice.

* Be sure to either write “Do Not Bend!” or apply labels to that effect. You might think that a postmaster would never attempt to bend a stiff envelope but I have had them do so despite the extra cardboard and labels.

Protecting Your Artwork With Sleeves or Shrinkwrapping

Packing Materials And Supplies

Having your artwork covered with either shrinkwrap or a protective sleeve is always a good idea whether your shipping them or not. Once protected your art is now easily handled without fear of damage dents, creases, scratches and dirty hands. Also when in transit a shrinkwrap or sleeve may keep moisture from doing any damage.

These clear envelopes are a great idea for do-it-yourself kind of shrinkwrapping. They come in a variety off sizes and are pretty cost effective, especially if you’re buying in bulk quantities.

My Favorite Supplier Of Protective Sleeves & Envelopes
One of my favorite supplier s for the is www.clearbags.com They have a staggering array of sizes as well as all sorts of packaging and marketing solutions for artists and craftsman. If you have a large variety of sizes to your product line these guys are a great company. I’ve been getting my supplies from them for many years and have always been happy with both the products and the service.

Padded Envelopes and Bubble Envelopes

Packing and Shipping Supplies & Materials
I don’t use these a whole lot because I tend to ship most of my items priority postal so I just use their envelopes. However these have that add little extra cushioning which is always great for mailing your artwork. Despite this you must still be sure to have some sort of cardboard covering on both from and back of your artwork to protect it during transit.

Rugged Mailers

Packing and Shipping Supplies & Materials
Rugged Mailers are also a really good alternative and they come in a nice assortment of sizes. Be aware that they can still get bent but it’s a rarity. Never hurts to add a little extra support of cardboard if there’s room, to these as well.

Packing Larger Shrinkwrapped Artwork or Prints Flat

Once again how much effort you put into packing your larger prints will depend mostly on how badly you want it to arrive at it’s destination in mint condition. If your mailing a one of a kind item that can’t be replaced or even an item that is costly to you to replace go, do the extra effort necessary to ensure it’s chances of arriving safely.

For a print in most cases it is sufficient to just have several layers of cardboard on both top and bottom. Cut these pieces at least 2″ larger than the size of the object being shipped. This is minimally what you’ll want to do to ship a larger shrinkwrapped print flat. This amount of packing will allow for minor denting of the cardboard both on the corners and on the face of the cardboard. It also makes bending pretty much impossible.

The Steps For Mailing Artwork Flat Are:
* Make sure the artwork is sealed in shrinkwrap or a protective sleeve.
* I then slip this in an additional bag with the invoice (on the back side of the backer-board, not on the face of the artwork) tucked in with it.
* Cut a piece of foam or thin bubble wrap to size of the object being shipped. I prefer the foam but bubble wrap will work as well.
* Cut at least 4 pieces of cardboard 2″ larger than object being shipped. Tap lightly to hold everything in place.
* Slip into an additional box frame for extra support.

Now if it’s an important piece of work I may slip a sheet of two of mat board in with the cardboard. Mat board is incredibly dense (unlike cardboard) so it is better at deflecting dents and stabs.

Using Mailing Tubes For Packing Artwork

How To Pack Artwork Using Tubes.
packing and shipping art using mailing tubes *Note: The art print featured in this photo is by Marion Gunderson Arts and was used with permission.

Whenever possible using tubes is my preferred method of shipping prints.
Most of the time I send my medium sized prints (say paper size) flat and in shrinkwrap as this not only makes for a nicer presentation when the customers opens the box, it also helps keep the art in mint condition until either being gifted or framed. But for prints ranging in larger sizes I send in a tube. It’s fast and nearly effortless. 5 minutes time is about all it usually takes.

What You’ll Need To Mail In A Tube
* The Mailing Tube (obviously)
* Plastic bag. (for packing option listed at the bottom)
* Sheet of paper slightly larger than the artwork being shipped. Usually a 1″ allowance all the way around is adequate and cut to fit the tube.

Using Heavy Duty Mailing Tube

The First thing to do is to roll up the print.
Lay your print in the center of you sheet of paper and roll them up together simultaneously. Slip this into the tube. DO NOT tape the paper roll. Just slip into the tube and allow it to expand to fit tightly inside the tube.

The paper serves a couple of functions
* First he keeps the print from sliding back and forth in the tube and potentially denting the print.
* Second most folks really don’t think about how clean their hands are when opening up a package. By having a bit of the paper surround it helps keep the print clear when being removed from the tube.

Be Sure To Include An Invoice Or Address On the Inside Of The Tube
It’s always recommended to have the destination included on the inside of any package you are shipping just in case it gets torn open and become separated from the original shipping contained.

Apply Label And Tape Shut
I always tape my tube ends securely no matter how snugly I think they are sealed.

Using A Reinforced Carriers Light Weight Tube
I have used USPS Priority Mail tubes (as is) for hundreds transit jobs and never had a problem. But then there was this one time that it arrived to the purchaser completely trashed and flattened. It’s rare but it does happen. So if you’re shipping something that’s not easily replaced either use your own heavy duty tube or modify the carrier’s tube.

Since Wild Faces Gallery is also a giclee publishing house we have plenty of extra heavy duty tubes from our rolls of paper. They are of course no end-caps so they are kinda useless as shipping tubes on their own. However they are exactly the extra durability I need when using one of the carriers triangular tubes. So the steps are pretty much the same as above.

The First thing to do is to roll up the print.
Lay your print in the center of you sheet of paper and roll them up together simultaneously. Slip this into the tube. DO NOT tape the paper roll. Just slip into the tube and allow it to expand to fit tightly inside the tube.

Affix Mailing address or label to the outside of the inner stabilizing tube

Slip tube into plastic bag
This has to do with common carrier cardboard triangular tube are made of a light weight cardboard. Occasionally a postal delivery person may leave the tube outside of someone’s home. The bag is just that little bit of extra insurance that if it rains, the print will arrive in perfect condition. And yes this has happened to me.

Slip tube into carrier triangular shipping tube And tape the ends shut.

Packing Framed Artwork

Packing and Shipping Framed Artwork

A Few Things To Consider
I have shipped large framed items from one end of the country to the other and have yet had anything arrive broken. That being said the amount of work involved in shipping a large framed piece of work is substantial and as an artist you must figure out whether the cost of packing materials coupled with the amount of time involved is the worth the “net” value on what you’re earning with framing charge. You may find it is much easier to simply sell only unframed items.

Since we have a full service frame shop in out gallery our net on framing is pretty good so we do ship framed prints and on rare occasion framed originals.

Note: Whenever shipping framed originals I replace the Conservation Clear glass that all my artwork is framed in, with a conservation grade picture framing acrylic. This won’t shatter (unless the shipper runs over it or something, and then you’ve got bigger worries) in transit. Broken glass inside a packing parcel will slice and shred as the box is handled.

Since Conservation grade framing acrylic is expensive you can also use just regular acrylic or plexiglass. Another less desirable option would be to put some sort of masking tape of film over the glazing so if it does happen to break the broken glass won’t be slipping around the box.

Steps For Packing Framed Artwork

Apply Cardboard Corners to the Frame This is sort of an optional step because if you’ve done your job correctly you won’t need them at all.

Wrap The Frame Artwork in copious amounts of bubble wrap How much depends on the kind of bubble wrap your using. If using large pocket bubble wrap you can use less, and the tiny bubble pocket bubble wrap you should use more of. I generally like a good 3″ inches of bubble wrap surround.

Wrap This In An Additional Layer of Either Flexible Foam Wrap Or Corrugated Cardboard Role I use the cardboard role primarily because it’s what I have on hand. The purpose is to add a firmer shell to the bubble wrap and create a tight package.

Write Address or Include it On The Package Once again it’s always wise to include the mailing address inside the package in case the contents ever get separated from the packing box. (Heaven forbid)

The Box Needs To Be Sufficiently Larger than The framed item Most shipping companies like to have a stabbing depth of a couple of inches so bear this in mind when packing. You should have a durable product that will hold your framed item in the center of the box. I often use styrofoam for this as it’s lightweight, stab resistant and cuts easily to fit my needs.

* Cut two sheets foam the size of your box
* Lay Foam Sheet In Bottom of Box
* Set wrapped framed artwork in center of box.
* Cut Strips to tightly fit between package and box wall. If you think it necessary tape in place so package won’t slip.
* Apply Other styrofoam sheet over top
* Put Lid On Box

Tape Shut and Add Mailing Label Packing is very easy to do but rather time consuming. Judge for yourself if it’s worth the effort.

Note: Many art exhibit require you to ship your artwork not only to them but then they need to use the containers and wrapping to return it back to you. And if it’s a traveling exhibition the packing materials need to be sturdy enough to be reused time and again. This often means you need to build a special wood crate. I won’t go into how to do this specifically since different galleries and shows have different requirements for this. Just be aware that simplicity and durability are what is required above all else for this kind of packaging.

Earth Friendly Ideas For Packing Your Art

Recycling Products For Shipping Your Art
Packing & Shipping materials In this economy it forces people to rethink how they can better save money in areas where they won’t feel the pinch. Packaging your artwork is one of those areas. I pack and ship a fair amount of stuff, (about 100 good sized boxes a year) which could potentially be a huge expense in packing materials. Not to mention we’re all getting more Earth conscious and knowing that so much packing materials just wind up in the landfill after just one use. This strikes me a kind of appalling.

Anyone who has ever bought a role of bubble-wrap at your favorite business supply store knows that boxes, and bubble-wrap can add big costs to your bottom line if you do ship often. So I’m going to share a little free packing supply secret …well it’s not really a secret, it’s just no one ever asked me) Yup I get much of my packing and shipping stuffs free.

So I’m going to share a little free packing supply secret … (well it’s not really a secret, it’s just no one ever asked me.)I reuse much of the packing materials that I get in my gallery most of which comes in from my framing orders. But the bulk of my packing supplies comes from other sources. The absolute best place for excellent packing materials that are free? A furniture store.

At one time I had an artist friend who worked at a furniture store and when he was doing a delivery in my home town, he’d pull the truck around and drop off a truckload (literally) of huge sheets of bubble-wrap and flexible foam sheeting. Most furniture stores throw tons of it away and it just sits in our landfills. The furniture store he worked for was thrilled because that was a little less that they had to pay to get hauled to the landfill. And of course I was thrilled because it saved me fortunes (the savings of which I passed on to my customer.) And frankly, I have no way of buying huge sheets of wrap like that. (Picture blanket sized for wrapping up beds and couches. Lovely, glorious packing stuffs.)

Also, our local vet clinic is very green oriented. They get in heavy duty air packing pillows and sheets that from their delicate bottles of medicine they receive. Our small local vet clinic can usually supply me a 30 gallon garbage bag full of the stuff in a week. These tend to be smaller bits which work well for shipping smaller works or dimensional items.

So I guess the point of this is if you are looking to save a little money and are willing to be creative with who you approach, you may well save a substantial amount in your packing materials costs. Plus a little less goes in the landfill because it was recycled at least once. This way the landfills, the furniture store, my customers and I, all win.

Free Shipping Supplies Sent To Your Door

Free Materials & Supplies Available From The Common Carrier Companies
The big name shipping companies like UPS and USPS provide free boxes and envelops that will be delivered to your door … yes for free.

Magic the Gathering Altered Art Cards

Magic the Gathering Altered Art Cards

An Introduction to Altered MTG Cards

What are altered art cards for Magic The Gathering, & where do they come from?? First let me say these should never be counterfeits! They are legitimate copies, simply painted over to change the picture. Many are changed to extend the artwork, removing those boring black or white borders. Others can end up very different from original image. Artists have added things like flames, cartoon characters peeking out from the corners, or other wacky additions.

Add Flare to Your Deck!

altered-mtg-cards-demon-vampire-art A well made acrylic painted card is a mini work of art! Nobody will have the same one painted the same way. Maybe you’re looking to spice up your deck with something different and original. Or perhaps you want to impress your gaming friends. Then you may consider adding a few alters to your deck. They can also make a neat gift idea for that special magic geek in your life!

What Shops Carry Altered Cards?

Look online for the best prices and availabiliy
altered-MTG-shop You probably won’t see these pieces for sale at your local hobby shop. If you want to buy one you’ll most likely need to turn to
the internet. You can find them easily on eBay, but sites like Etsy also have custom MTG sellers. Some sellers have even created small businesses by painting and selling their creations for profit, as well as taking commissions for collectors with special requests. It’s also becoming more common to see people painting away at the large MTG tournaments and comic conventions, where you may be able to find someone selling their wares to the hungry competitive players.

(Altered “duel lands” (c) Marta Molina)

Cheapest Custom MTG Work Online

FAQ: Are Painted Cards Against Copyright Law?

altered art mtg angel card These cards are perfectly legal to create and own!

Painted Magic cards are 100% legal to create, own or play with as long as they are actually painted on top of the original copies. As you may have already seen examples of, some people get very creative, adding a lot to the original work. The paint changes the look and feel, which in copyright terms is considered a “derivative work” meaning it becomes a new copyright work owned by the painter.

Restoration Angel by “Slatts Alters”

Are Painted MTG Cards Tournament Legal?

altered mtg cards DCI More players are starting to bring these cards in to sanctioned tournaments, and DCI judges have taken notice. There are now
some guidelines to follow if you intend to play in tournaments. One thing is certain, you must ask the head judge to
rule for permission before each tournament or else you risk being disqualified!

The main thing to qualify for DCI tournament play is the issue of the gameplay text. The text must still clearly be visible, showing the name, mana casting cost, expansion set symbol, and rules text cannot be obscured. Which means sadly most full art alters probably won’t be allowed in tournaments, unless you have a lenient judge.

Fear not, as most judges do allow these in to tournaments. While there are a handful who frown upon it, they seem to be in the minority. As long as the gameplay bits remain intact you should have nothing to worry about when playing in tournaments.

What About Additional Card Weight?

altered art mtg force of will Some people worry that these will make it easy to cheat or be cheated against, since surely the painting must make them more heavy. Factors that contribute to added weight are how much paint was used, and what type of gloss it was coated with. When put into sleeves and shuffled into a deck it’s impossible to tell the difference. Nobody can cheat by adding these to the deck, so don’t get any funny ideas!

Photography Poses – A Posing Guide Just For You

Photography Poses – A Posing Guide Just For You

Photography Poses Can Be Hard To Recall On The Spot – Unless You Have Them Written Down

Gathering up all of your favorite photography poses and putting them in a notebook can give you a reliable posing guide that you can take on all of your shoots. Having a notebook like this will not only help you deal with unexpected problems that may come up but also help you plan on exactly what type of image you want to get. It will provide an excellent reference for any model on what pose you want and will speed up the whole shooting process.

There are posing guides out there for sell, but I decided long ago to come up with my own posing guide that has all of the photography poses and notes I find interesting and useful. A guide made especially for me, by me. This lens will show you how I created such an invaluable notebook and exactly what you need to do to create one for yourself. Once you get yours made, I guarantee that you will feel naked on photo shoots without it. You may even have to eventually start another, because odds are good it will fill up very fast with photo poses and notes. Posing for photos is never easy; help yourself and your model by providing a useful reference.

Basic Setup of My Posing Guide

Contents, Photography Poses and Ideas

1-The first thing I did was to buy me a pocket-sized Moleskine notebook. Any notebook is acceptable, but I chose this brand because I wanted something durable.

2-I then decided how I wanted to divide up the notebook.

Section 1-Contents (3 pages).
I made up a few categories that was important to me and whenever a photography pose fit into that category I put its number in it. The categories were photography poses for men, women and both. The image to the right shows you what I’m talking about; the only difference is that each category had their own page. You can even highlight your favorite poses. The next step was to number the pages (starting after the contents). I numbered each page, as I wanted one page to have only one pose on it (front page-1, back of that page-2 and so on).

Section 2-The photography poses and notes (150 pages / bulk of content).

Section 3-Ideas section (30 or 40 pages).
These pages are set aside for interesting ideas that may come to you on your shoot you may want to try at some point in the future.

Image by YellowHammer.

Photo Poses For Couples

Coming up with photography poses for couples is all about letting it happen naturally.

The important thing to remember when posing couples is that less direction is often more. Let the couple do all the work. The interaction between two people who care about one another will always get you some interesting photos. The second most important thing is to get them to feel comfortable showing affection in front of you. A zoom lens is a good idea here, as the closer you are, the more uncomfortable they are likely to be.

One good trick to use is to have one tell what they like or find sexy about the other. They could take turns. Doing this often puts some kind of emotion in the shot, whether it be bad or good. Having them dress up in interesting clothes or putting them in interesting situations is a small part of it, but in my opinion, it’s all about the emotion and body language.

Don’t Want The People In Your Photos To Look So Stiff?

Then consider hiring a professional model.

One huge benefit of using professional models during a photo shoot is that they are used to being in front of a camera. I like to take pictures that don’t look posed. People who aren’t used to getting photos taken of them will often look stiff. The only drawback to using a modeling agency is that you usually have to pay them.

There are some websites such as Model Mayhem, One Model Place or Models.com in which you can sometimes trade time for prints, but not always. I am beginning to realize that hiring a model pays off in the long run, just be sure to know what you want to shoot as most charge by the hour.

Posing Tip #1

When doing portrait photography, try to get the subject to laugh and feel comfortable before the shoot. Try to build a good vibe between the two of you. Poses won’t look as stiff and your pictures will come out much better.

Example Interior Pages of Posing Guide
Photography poses and notes.

First let me start off by saying I made the writing a little too big; most people’s writing won’t be this big unless they’re using a Sharpie pen. The image that you see above is what is in the majority of my notebook. I number each photography pose, draw the figure and then add a few notes. If your the type of person who takes a lot of notes you could always use one side for the sketch and the other for notes in which case you would only have room in you notebook for half as many photography poses.

What you put in your notes will depend on what you like and what type of photographer you are. I like to put whether the image would be better for a male or female (or both), lighting preferences, mood, emotional state of model and clothing ideas. Keep in mind that you don’t have to fill the page; a bare minimum of how you feel when you see the image is all that is really necessary in the beginning. I promise that you’ll add more as you use the poses on shoots.

Sketch Photography Poses
The perfect thing to use in a posing guide.

Although you could use photography poses cut out from a magazine (fastened by tape or glue), I like to sketch stick figures in mine. I found that when I used actual pictures I often sub-consciously copied the style and sometimes even the clothes. With bare-bones sketches you can truly create your own unique image.

If you are dead set on some color, why not use some colored pencils? I often put down what color I would like to use as a background against certain skin tones, and seeing as I don’t know all the proper skin tone names, pencils come in really handy. Use them sparingly, though, or your posing ideas could turn into a bunch of style ideas.

Posing Tip #2

This one is also about making your model feel comfortable. When going out on public shoots take with you some sheets or shower curtains and hangers so you can jury rig a place for your subject to change in private. You don’t want them to change out in the open.

11 Great Photography Poses

Great Photos That You Can Actually Own

Most photos that are actually being sold to the public are fantastic sources for inspiration not only for poses, but point of view and style as well. They will give you all kinds of photo shoot ideas and can help you become a better photographer if you’re willing to study them.

Lucinda in London, 1959 (12 x 12 in. Art Print)
Photo by Georges Dambier

Man Balancing in a Dance, Yoga Pose (16 x 16 in. Photographic Print)
Photo by Monsoon Images

Fashion Model Wearing Amazing Hat (22 x 28 in. Art Print)
By John French

Mountain Biker on Cliffs, Turnagain Arm, Alaska, USA
16 x 12 in. Photographic Print
Photo by Paul Souders

Little Ballerina (9 x 12 in. Art Print)
By David Handley

Cowgirl in Heaven (20 x 16 in. Art Print)
Photo by David R. Stoecklein

Woman Floating In Water / Weeki Wachee Spring, Florida
16 x 16 in. Photographic Print
By Toni Frissell

How to Make You Love Me by Elizabeth May
16 x 16 in. Photographic Print

Cowboy and Cowgirl Silhouetted on a Ridge in the Big Horn Mountains, Wyoming, USA
12 x 9 in. Photographic Print
By Joe Restuccia III

Marilyn Monroe – 24 x 36 in. Poster

Clint Eastwood – 14 x 11 in. Photo

Knowledge – 18 x 24 in. Art Print

A Great Place To Go For Posing Ideas

Wonderful ways to direct your subject.

Pose Maniacs is a website that has thousands of 3-D rendered models that you can actually rotate to get a full all around view of the pose you’re interested in. It is mainly used by artists learning to draw the human form, but I’ve found it perfect for getting good ideas for the camera as well. The only drawbacks are that the models have no skin (so you can see muscles) and in some of the poses there are only subtle differences. Despite this, the site is worth a visit. Below is the link.

Posing Tip #3

Never have more people than you need on a photo shoot and always allow the model to bring someone along if that makes them feel more comfortable. A comfortable model is always more photogenic and relaxed. You are also likely to get more natural poses from them than you would otherwise.

Want To Shoot In Low Light?

You need the right kind of lens.

Ever notice that when you take photos in low light that they are often not as sharp as they should be? One easy remedy to that is to use a lens with a lower f-stop. Either a 1.4 or 1.8 is recommended when shooting people less than ideal lighting conditions. This is the lens you’re going to need for when shooting at dusk, dawn or night, and when combined with a sexy pose will produce an amazing picture. You really won’t believe the difference until you experience it for yourself.

The best Camera shoulder strap reviewed

The best Camera shoulder strap reviewed

Carry your camera in comfort and style with a camera shoulder strap

Camera shoulder strap reviewed and compared. The camera shoulder strap is by far the best way to carry your digital SLR camera. SLR cameras are big, bulky and heavy and carrying one around all day is going to take its toll. If you want to carry your camera around with you all day, totally pain free the camera shoulder strap is the best option.

There are many different brands and models of camera shoulder strap available, but not all of them are worth buying. There are many cheap camera shoulder straps that are made out of inferior materials. A cheap camera shoulder strap will have no padding hence they are uncomfortable and will cut in to your skin, and will last about five minutes. A digital SLR camera is expensive and scrimping on a cheap camera shoulder strap that could break and let your camera hit the deck at any time, is not worth the risk and could end up costing you a lot of money. It is far better to pay a little more on a good quality camera shoulder strap in the first place.

So, what are the best camera shoulder straps? Carry on reading and you will soon find out since this article reviews and compares the top three camera shoulder straps currently available.

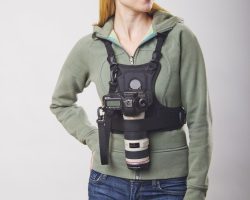
Best camera shoulder strap – Cotton Carrier

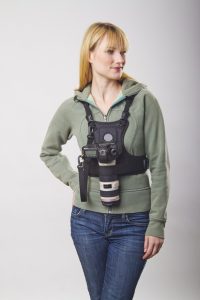
Cotton Carrier Vest System For 1 or 2 Cameras

The Cotton Carrier is a chest carrier that goes over your shoulders, but it isn’t a camera shoulder strap per se. Out of all the camera straps I have owned and used, and I have tried many different types, the Cotton Carrier is the best camera strap ever. The Cotton Carrier camera vest allows you to carry your camera safely on your chest, out of harms way, leaving your hands totally free. The Cotton Carrier can securely hold a fully gripped digital slr camera and large telephoto lens, such as my battery gripped 7d and Canon 100 – 400 lens. With the Cotton Carrier I can carry this heavy set up around with me all day, and totally pain free which is brilliant.

Releasing the camera from the Cotton Carrier is quick and easy, and simply involves twisting the camera and pulling upwards. It is possible to get the camera off the vest and up to your eye in a matter of seconds, which means you will never miss a shot.

The Cotton Carrier isn’t cheap, but it is worth each and every cent. Before I bought my Cotton Carrier I did lots of reading and research and was in two minds, partly because of the cost and partly because I couldn’t find many non-professional reviews about the product. However, I finally bit the bullet and purchased one, and I have never looked back. I only wish I bought one sooner, but then hindsight is a wonderful thing isn’t it.

In my opinion, the Cotton Carrier is the best camera holding system currently available and it is well worth buying, especially if you regularly use heavy camera and lens combinations.

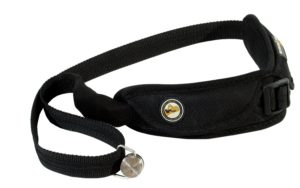
Best Camera shoulder strap – Sun Sniper

Sunbounce Sun Sniper Strap Pro, Black

The Sun Sniper is the original camera shoulder strap and, even today, it is one of the most popular amongst all types of photographers, and when you get to see and try the Sun Sniper camera shoulder strap you will soon see why.

The Sun Sniper has a wide strap, which means it doesn’t cut in to your torso. I can confirm the Sun Sniper is exceptionally comfortable to wear and use, even with heavy camera/lens combinations. The strap is made out of good quality materials and is tough and durable, which means it is a camera shoulder strap that is built to last.

The camera is attached to the strap using a small ring that is screwed in to the tripod plate screw of the camera. Once the ring is screwed in to the camera it is totally secure and won’t go anywhere. When using the Sun Sniper you can be sure your camera will remain safely attached to your body at all times. The ring on the strap is a loose fit, which means it easily slides along the strap with little effort. When using the Sun Sniper you can get your camera from your waist to your eye in a matter of seconds, so you will never miss a shot.

Compared to other camera shoulder straps the Sun Sniper is priced at the top end, but it is well worth buying. If you want a camera shoulder strap that will provide years of trouble free service the Sun Sniper is the camera strap for you. It really is an excellent product.

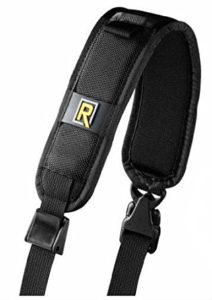
Best camera shoulder strap – Black Rapid RS

Black Rapid RS-7 Camera Strap, black

The Black Rapid is another popular camera shoulder strap amongst photographers. The Black Rapid, just like the Sun Sniper, has a wide strap meaning it won’t cut in to your shoulders, which in turn makes it very comfortable to wear. Even with the heaviest camera/lens combinations, the Black Rapid receives a lot of praise from its users. The Black Rapid is also made from top quality materials, that don’t fray, which means it is going to stand the test of time.

The camera is attached to the Black Rapid via the tripod screw, but unlike the Sun Sniper there is a quick release clip. Some photographers rave about the quick release system, however I am not so sure. I always have my doubts over quick release systems and always think they are going to fail. My camera and lenses are worth a lot of money and I would hate to see them hit the deck and break. As such, I steer clear of quick release systems regardless of how good and secure other users claim they are.

Would I recommend the Black Rapid over the Sun Sniper? Since I ended up buying the Sun Sniper I would have to say no, but I did try the Black Rapid camera shoulder strap. As I previously mentioned, I don’t trust quick release clips. In addition to this, I just found the Sun Sniper camera shoulder strap more comfortable with my set up. That said, there are many people that find the Black Rapid more comfortable than the Sun Sniper.

Other shoulder straps for your digital slr camera

In my opinion the Black Rapid, Sun Sniper and Cotton Carrier are the best camera shoulder straps currently available and having owned and use all three I can guarantee you would be happy with either of them. In order to cover ALL situations I recommend having a Cotton Carrier and the Sun sniper or the Black Rapid.

Best camera for macro photography

Best camera for macro photography

The best camera for macro photography for close up images

If you are looking for the best camera for macro photography you have come to the right place since this article focuses solely on the best macro cameras, and macro lenses, currently available to take your macro images to the next level.

Digital cameras, especially digital slr cameras, are expensive so if you want to buy the best camera for macro photography make sure you take a look at the rest of this article before shelling out your hard earned cash. After all, you don’t want to waste it right?

If you really want to get the most out of your macro photography there are other things you need to consider besides the camera. Lenses are one such consideration, and the best macro lenses are also covered in this article.

If your macro subjects consist of moving things, such as insects, butterflies and the like, the best macro camera needs a high burst rate. The top end Canon and Nikon digital SLRs are full frame and have a high burst rate but these are very expensive. Cheaper alternatives include crop sensor cameras with dual processors and these are the best value for money cameras.
macro shot of flower If you take macro images of static subjects, such as flowers and still life things, the best camera for macro photography need not have a high burst rate. In these circumstances the best camera for macro photography is the one with the best image quality, and highest number of pixels.

Point and shoot cameras and mirrorless cameras have a macro photography mode however these don’t capture “true” macro photographs. I would not recommend either a point and shoot or a mirrorless camera for macro photography, and the only real options are digital slr cameras, as detailed below;

Best camera for macro photography – Canon dslrs

Arguably you can use any digital slr camera for macro photography however many photographers claim the best camera for macro photography is a full frame slr camera since these have the largest sensors and produce some exceptional images. If you are capturing macro and close up images of flowers and still life subjects then I agree the best camera for macro photography is the full frame digital slr camera.

If, however, you are taking macro and close up images of insects I think the best camera for macro photography is one with the highest burst rate. Capturing images of insects can be tricky and to get the keeper shots you need to fire off a load of shots in quick succession and choose the best. You can buy full frame digital slr cameras with a high burst rate, such as the Canon 1D X, but these cost several thousand dollars and are out of reach of most enthusiasts. There are alternatives, but these are not full frame cameras.

Best camera for macro photography – Canon 5d

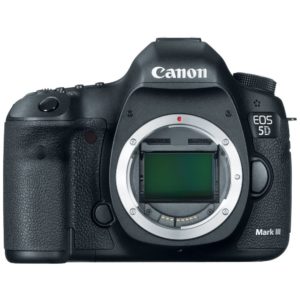
If you want an affordable full frame camera the Canon eod 5d is the camera of choice, which is Canon’s top selling digital slr camera of all time and when you get to have a go with this camera it is easy to see why. The 21MP sensor captures a lot of information and the image quality of the 5d is simply awesome. This camera captures images that will impress family and friends, and images that you can easily sell on and make some extra cash.

The Canon 5d is superb. It is a relatively small dslr camera that is tough, durable and well built. Like all Canon dslr cameras the Canon 5d is user friendly, intuitive and all the necessary controls are close to hand, which means you won’t have to go delving through the menu system.
The Canon 5d has a poor burst rate, but then given the cost of the 5d this isn’t surprising. Because of the poor burst rate the Canon 5d isn’t best suited to insect photography. If, however, you want to capture macro images of flowers and still life subjects the Canon 5d is the tool with which to do it.

Best camera for macro photography – Canon 7d

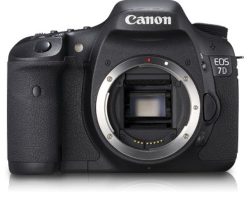
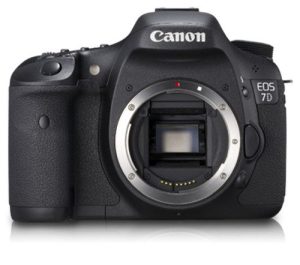
When I go chasing insects and mini beasts my camera of choice is the Canon 7d. With an 8 frames per second burst rate the 7d is ideal. The 7d has an 18mP sensor, and whilst it is not quite as impressive as that of the 5d, it is more than enough to capture some stunning macro images.
Like all Canon digital slr cameras the 7d is tough, durable and built to last. It also has a sensible menu system and user friendly interface, which makes it a doddle to use. All settings controls are close to hand, which means there is no need to go through the menu to change anything.
You can also use the Canon 7d for taking macro images of flowers and still life subjects, but it is insect photography where this camera is really good.

Best camera for macro photography – Nikon dslrs

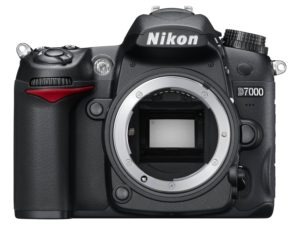
Nikon D7000

If you prefer Nikon branded cameras my recommendation is the Nikon D7000. The Nikon D7000 is a top rated, and very popular, Nikon dslr camera you can use for macro photography. The D7000 has a high burst rate, which makes it ideal for insect photography, however you can also use it for close up and macro photos of flowers and still life subjects.

Like all Nikon dslr cameras the D7000 is a top quality camera that is made out of high quality materials and contains great optics, which means this camera is built to last and is capable of capturing some stunning photographs. If you prefer Nikon branded cameras and need a camera that has a high burst rate the Nikon D7000 is a camera you should look at.

Top macro lenses to get the most out of your macro photography

Macro lens When taking macro images you have to remember that you need a decent macro lens to get the most out of your best camera for macro photography. Macro lenses are prime, i.e. a fixed focal length, fast and very sharp. The image quality of all macro lenses is simply stunning and you won’t be disappointed with any of them. Macro lenses are available in a range of focal lengths from 50mm to 150mm so there is something for all types of macro subjects. Below are the best macro lenses currently available.

Top Canon macro lenses


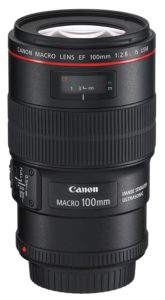
Canon 100mm f2.8L IS USM macro lens

If you shoot a canon dslr camera the Macro lens of choice is the Canon 100mm f2.8L IS USM lens. With a 100mm focal length this lens has a large working distance, i.e. distance between the end fo the lens and the subject, which gives you a lot of room to move and also makes lighting that much simpler.

Being an L series Canon lens the 100mm f2.8L IS USM is bullet proof and built to last. The image quality is second to none and many photographers claim it is Canon sharpest lens of all, and I have to say I agree. The image stabilisation technology helps to keep camera shake at bay, and this technology works exceptionally well. If you want the best macro lens to go on your best camera for macro photography the Canon 100mm f2.8L IS USM lens is the lens to buy.

Nikon lenses for macro photography

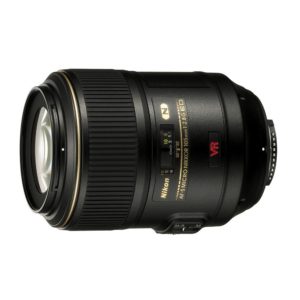
Nikon 105mm f2.8G ED-IF AF-S VR macro lens

If you shoot a Nikon dslr camera the top end macro lens is the Nikon 105mm f2.8G ED-IF AF-S VR lens. This top quality lens is simply awesome and if you are serious about your macro photography this is the lens to buy.

The build quality is great, the image quality is amazing and boy, this is one sharp lens. In fact, many people consider it Nikon’s sharpest lens and I would have to agree. This lens produces images that are tack sharp from the centre to the edges.

The 105mm focal length gives a big working distance, i.e. distance between the end of the lens and the subject, which makes it perfect for insect photography, although this lens can obviously be used for taking macro images of flowers and still life subjects as well. The vibration reduction “VR” technology keeps camera shale at bay and ensures images are tack sharp at all times.

If you want the best Nikon branded macro lens for your Nikon camera you have to have the Nikon 105mm f2.8 lens. It really is an awesome lens that won’t disappoint.

Top Sigma macro lenses

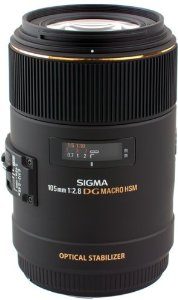
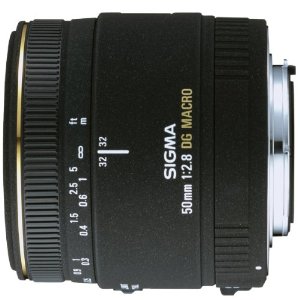
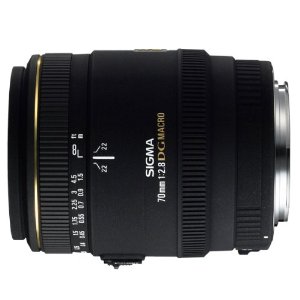
If you want an alternative to a Nikon branded or Canon branded macro lens there are a few third party manufacturers out there, but the best is Sigma by far. Sigma has some excellent lenses and all of them are available in both Nikon and Canon fit.

Sigma 105mm macro

Sigma 50mm macro

Sigma 70mm macroSigma 70mm macro