Tips for taking better photos of Inesct
My Macro or close-up insect photography experience is quite memorable for me. Today I would like to share those memorable experiences as well as some macro photography tips for beginners with you all. In fact I like taking picture of nature. As you know insect is part of our nature so once I was thinking to take some pictures of various insects.
With my Sony camera I photographed some insects photos that I have taken from around my home boundary environment as well as from other places. I will explain to you everything else when, where, how I captured all these insect photos.
What type of camera do you use usually? Is it a DSLR camera? If it is then make sure you have a good opportunity to have great photo shoot of tiny insects. Learn about photography and be like professional ones.
I hope you are going to enjoy all the photos I have posted here. I think some of these insects that I have captured are very familiar to you. Though you can separate them seeing their color, behavior and lifestyle. I did not photograph all these insect pictures in a short period of time. I took time, rested and slept!
To get all these photographs I needed enough time. My macro insect photography journey will not be ended because it just has started. As I am bookworm, here in this lens I have recommended some books related to insects. Let’s know about them since they are part of our nature. They help us to balance our Eco system. Enjoy my macro insect photographs!
I am a photographer but not a professional!
Do you like taking picture of many objects such as nature, faces, flowers, birds, river, trees? I personally like the subject photography. I have started taking picture of things from a long time ago with my camera, that was as a gift for me presented by my dad.
That camera had broken up, now I have a nice SONY camera. With this one I have photographed all these insects pictures. I did not zoom in-out my camera when taking all these pictures, that’s the main key characteristic of these photographs.
Well, I am just a non professional photographer. My friends say I am a good photographer though. What do you think of me? I think I still have to improve, have to learn photography tips more from others who take photos regularly.
I do want to shoot great photos of everything I see in this world. As I am an amateur photographer please if you don’t like these photos, I am sorry then. I tried my best to show you. I still don’t know whether I would become a professional photographer but I don’t think of being professional right now.
I just want to take photos and if I want to share photographs with you I would share them in the future as well. I hope I will not dissatisfy you with these pictures. Have fun!
Macro Insect Photography Tips – How to Capture an insect?
My top 10 tips that would help you to take awesome insects photos
As I told you before that I am not a professional photographer, it is just one of my hobbies. Though I would like to share some tips on how to take picture of insects. Actually macro or close-up photography is interesting. I like it very much. Don’t you? However, lets see the useful tips.
1) You have to have a nice camera and set your camera in recommended settings. Prefer Canon, Sony, Nikon, Panasonic DSLR cameras in order to have perfect quality photo.
2) You have to be interested in macro insect photography. I know having interest about something else will lead you to achieve your mission.
3) Don’t be afraid of any insect. If you be so then you even can’t reach toward an insect as a result you never can shoot better insect photo.
4) Be cautious every time you capture an insect photo. I guess you should always remember this tips because insects could be dangerous except butterfly.
5) Focus on an insect and have a great photo shoot. Sometimes it is hard but never give it up.
6) Try to reach closer toward insects before you take a shoot with your camera.
7) You have to be creative, so use creative angles most of the time.
8) Use proper lighting techniques if you need.
9) Sometimes Zoom in and out but I don’t care about this!
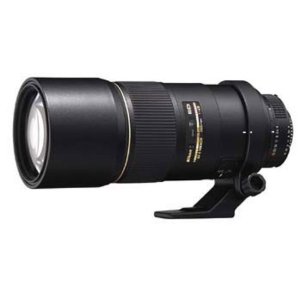
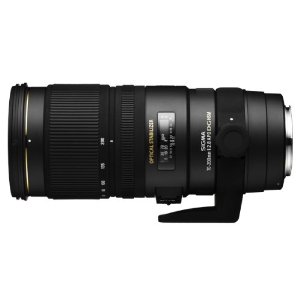
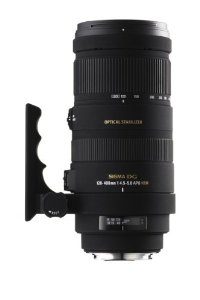
10) Finally, you need a macro lens in order to take nice close-up insect picture. I did not use a macro lens while taking my all these insects pictures.
Caterpillar
This is a caterpillar and it is totally different than the following one shown below. I captured this photograph just right after raining hard on July 13, 2012. I found this creature in our backyard.
At first I was looking at it for few minutes then decided to take some shoots. I thought it would be great to memories this dangerous caterpillar even when she is not existed next to me in the future.
I knew it was dangerous caterpillar so at first I searched a little stick. Really that stick helped me a lot while capturing.
What a cute caterpillar!
Is not it a cute caterpillar? I don’t know what you think but I say it is cute.
I found it in a sunny day in my garden. I did not have any gloves so I took a little stick and I gave her time to climb up so that I could capture her well.
Actually I was succeeded and that’s why now you see a nice picture of this caterpillar. I must tell you that I captured this one in this year winter.
A cute Caterpillar but Dangerous
Is not it a beautiful caterpillar? Very bushy right? Please just don’t touch it, even if you accidentally touch it then consult with doctor.
I am not kidding, don’t forget to consult with doctor! When I was a kid I accidentally touched one just like this caterpillar, indeed it was very painful for me and my parents brought me to doctor immediately and doctor did his job, I recovered soon though. Thanks god!
Caterpillars of Eastern North America: A Guide to Identification and Natural History
Do you want to know about Caterpillars? i guess It is great when you have some books on Caterpillars. If you want to research about Caterpillars then find some books from the market and get the best one which would help you to know many unknown facts of Caterpillars.
Black and Yellow Color Wasp
There is an interesting story behind this picture. On 05 May, 2013 I went to my uncle’s home.
Actually he (my uncle) invited me to attend on my cousin’s birthday. They have a beautiful garden, my granny takes care of it much.
I did not forget to take my camera because it was my cousin’s birthday so I needed to capture those great moments. I took many pictures on that day and the one I like most is this insect photo.
In fact did not think of photographing insect there but somehow while I was walking in the garden I found this guy. So who cares! I captured some great pictures of this beautiful wasp.
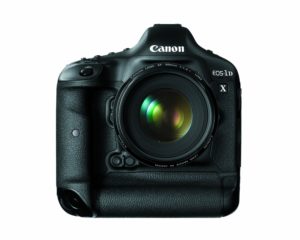
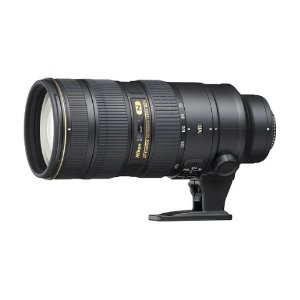
Best Cameras to Photographs Insect
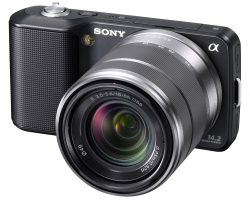
I took all these pictures with my Sony Camera
I don’t switch camera brand much. In fact Sony is the best camera producer that produces cool cameras for us. I am a very much loyal customer of it. I have never dissatisfied, it gives me great customer value through using its product.
Look below, there are the top 5 cameras I recommend to use in order to take macro photographs of insect, flowers, birds, nature or other tiny creature. You don’t have to worry about these quality, they are highly recommended but you have to choose the camera brand and price only. I hope you will be able to get yours. Please read all the reviews before purchasing them.
A caterpillar which is very colorful!
To be honest I have never seen like this type of Caterpillar before until I saw this for the first time on that day when I found this.
I am actually talking about the last year, when I first discovered this creature.
At first I thought it was something but not an insect later I asked my dad and he told it was a one kind of Caterpillar. I have no idea, how to explain this caterpillar!
Best Termite Control: All You Need to Know About Termites and How to Get Rid of Them Fast
Termite is a harmful insect in this world. Are you having problem how to control termite? Do you want to protect your home from Termite? Do you want to know 3 simple natural ways of controlling Termite? If so then i guess you need to know some very useful information.
Praying Mantis
I was amazed once I found this insect.
I don’t know its name until some Squidoo lensmasters have helped to recognize this insect.
Thanks to those lensmasters who told me its name! Yes now i know it is a praying mantis.
I captured this photo last month (November) of this year 2013.
My brother first discovered it and then called me to go there with my camera.
It was a great moment for both of us capturing an unknown insect.
A Happy Dragonfly!
I was very much happy taking this wonderful picture of a dragonfly. I really wanted to take some pictures of dragonflies and my dream came true one day.
It was a sunny day and it was a perfect day for dragonfly to enjoy its trip near my flower garden. I captured this in 2012, I have never ever thought that it would be very easy for me to capture some amazing photos of it.
It was actually very easy and I did enjoy my time while capturing this beautiful dragonfly. Even though I was very cautious! I like the head of this dragonfly, it is like a pilot!
Dragonflies and Damselflies of the East
I like taking dragonfly pictures. This is for what i have taken some great photos of it. Today i have shown some of them here in this lens. If you are interested to explore about dragonfly then you have to read books.
I have found this while visiting my uncle’s home
I already have told you about a wasp that I captured from my uncle’s home on his son’s birthday.
I did not only take wasp picture but this dragonfly too.
I was curious very much after taking the wasp picture and was finding some insect.
Luckily I found this dragonfly and captured it at once.
The Illustrated World Encyclopedia of Insects
Having an insect book at home as collection is not a bad idea. I have got a book based on insect which was presented by my uncle as my birthday gift.
Useful Insect Link List
Insect
Learn everything you need to know about insect.
Bugs, Bug Pictures, Insects – National Geographic
National Geographic is a great source of learning about wild life such as insect. Get more info, watch videos and articles on insect.
Insects – Kids Science Videos, Games and Lessons
Your little kids may be interested to know about insect so visit this site to help them learning on insect.
Black Color Butterfly
It is a Beautiful Butterfly!
Once I was telling Tipi (Former Squidoo Lensmaster) that I had missed talking picture of a black color butterfly on a particular day.
Yes I missed the black color butterfly that time but after 2 or 3 days later I found one, not far from my flower garden. I do think what I captured was great since everyone of us like seeing Butterfly and its picture.
“Hello Tipi, I did it finally! I was very glad and excited to capture this nice butterfly image. It was such a sunny day that I saw many colorful butterflies in my garden.” – takkhis
Butterflies & Moths
Who does not like butterflies and moths? I think everyone does like them. It is a beautiful creature that has colorful wings and they delight us with its beauty.
Yellow Color Butterfly
Look at this picture right now! What have you seen?
A beautiful yellow butterfly and its shadow, right? I am proud to be the owner of this image.
I thought it would be flying before I capture it but I was a lucky man on that day, in fact it did not fly.
It was steady in the place it sat so that made me crazy to take this photo. Sometimes it is hard to find yellow color butterfly!
A Spider – It looks great!
Are you afraid of a spider? Some spiders are dangerous some are not.
The one you see in the picture is not a dangerous spider. I touched this spider with my fingers. I used to read spider man comic a lot but now I don’t read it much but still enjoy reading new spider man comic.
I took this photograph last year in 2012 with my precious Sony camera.
There was a bamboo fence and this is where I found this spider. Honestly I used this photo as desktop wallpaper on my laptop.
Spiders
This is a great book!
Do you like spider or want to learn more about this creature? If so then you must have to have book on spider where you would find useful information. I am not afraid of spider, what about you? I know many of you are afraid of this creature.
Small Ant on a Red flower
I don’t know the English name of this flower but here it is popular and we like the flower color, it is very red in color.
One day when I was watering my flower plants I suddenly saw this small tiny ant on a flower.
Suddenly I ran toward my room and got back to my garden with my camera. I did not take much time to photograph some picture of this tiny creature. This occurred in January, 2013.
The Life and Times of the Ant
Ant could be a tiny insect but it is a hardworking insect. If you are interested to learn about all type of ant’s family then you can read this book.
Two Mosquitoes – Please don’t disturb us!
There are two misquotes on the marigold flower! I think they were resting at that time.
I photographed this in the early morning when I have a passion to walk. I walk everyday in the early morning and sometimes I take camera.
If it is rainy, just I don’t take it. To be honest I have never ever thought to capture this dangerous insect! However, I am proud of this photo because every time I look at it, I start laughing and think “how is it possible”!
Mosquito: A Natural History of Our Most Persistent and Deadly Foe
Mosquito is one of the most dangerous insects on earth. We must protect our body from mosquito bites. Millions of people die all over the world from malaria, yellow fever. If you want to know about this dangerous insect then look at the following book i am going to recommend you.
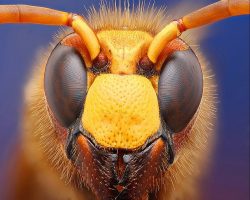
A Dangerous Wasp
Would you like to shoot a wasp just like the way I did? It was not easy for me.
I found this at our main gate, maybe it was wounded or something like that. I was afraid of this while getting closer to it because it has a stinger! Are not you afraid of wasp?
I am afraid of it and try not to get closer but somehow on that day I intended to photograph of this dangerous insect. Actually I did it and happy now for that.
Solitary Wasps: Behavior and Natural History (Cornell Series in Arthropod Biology)
As you know there are two categories of wasp, one is social and other one is solitary.
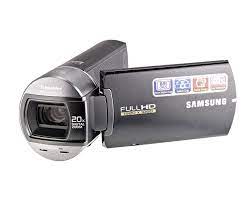


 Photo by RebelT3iOwner


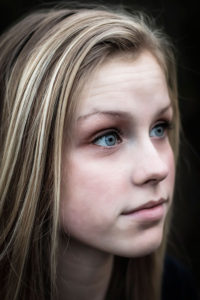
 GREAT NEWS!! You do not need a professional digital SLR camera to take awesome portraits. You can get super portraits with an inexpensive (cheap…)