My Black and White Photography Tips

My Black and White Photography Tips

Capturing the Beauty in Monochrome

Although most of the time I take photo in color, I sometimes also enjoy shoot in black and white. It is probably not as strong as color photo, but there is always classy, elegant, and romantic feelings produced from monochromatic photos. Thus, I would share some of my recent works in photography. All of the photos in this lens are in black and white, taken from different occasions and photo shoots. I also want to give some tips based on my own experience in taking monochromatic pictures. Please let me know about your opinion on my works, so I could improve my skill as a photographer.

When Should We Take Black and White Shots?

It’s all about timing
Based on my personal experience, I rarely set my camera in black and white format. I prefer to shoot in color, then later turn the image into black and white by using post processing software. However, there is a time when I want to do something more challenging, by immediately set my camera into monochrome mode so that I can directly take black and white images. The question is, when should we do it?

Street Photography
You may want to purely take black and white photos if you do street photography. There was a kind of unwritten rule among purist photographers that street photography should be taken in monochrome. It follows the example of the father of street photography, Henry Cartier Bresson.

Practically, turning your street photos into black and white can give more dramatic feelings, especially if you want to show an irony, sadness, or paradox in the society. Be sure that there are not too many objects in the frame so that the viewer can focus on your main subject.

Portrait
A normal portrait can look boring. Thus, to make them to be more interesting, you can turn the photos into black and white. It will make your portrait cooler and more elegant, especially if you can edit the shadows and highlights on the subject’s face. It would be more dramatic.

Creating black and white profile picture for your social network page is also a good idea. I always do this thing, because personally I perceived that people who put monochrome photos as their profile picture are more professional, wiser, and classy.

When you don’t have good source of light
Lack of good source of light in photography means that you have to increase the sensitivity of the camera (ISO). It means, you will have more “digital noise” in your photos. The noise can be visually reduced (if later you don’t have plan to edit the photos) by shooting in black and white.

Sometimes, when you find it to hard to focus your camera with auto focus (and you are not in possible moment to adjust the focus manually), you may want to set your camera in black and white photo as well. Blurry and out of focus photos umostly look better in black and white rather than in color.

When We Shouldn’t Convert Our Photos into Black and White

When your photo looks better in color
This is the simplest rule. If you are in a place with beautiful, colorful flowers, warm sunlight, and your model wears a dress that goes very well with the colors of the scenery, don’t shoot in black and white. Monochromatic photos tend to look colder, and if you want your images to look warmer you should keep it in color. Think as you are an artist because photography is just like painting with light. Then, decide which type of image would look better.

When the contrast between the subject and the background is too low
For example, when your subject wears light-colored plain dress (for example, yellow colored dress) and she stands in front of a plain, white background. You might want to keep the photo in color because if you turn it into monochrome it would look boring and not captivating.

When you shoot images for the sake of documentation or use it to complement factual news
If you shoot for an event, for example an annual day of your college and you want to publish it in college magazine later, don’t convert your photos to black and white. Although it may look more beautiful, the photo won’t seem factual. This is because the readers of the magazine see the photo as the complement of an article or a report of an event. They want to know how was the event, the real condition, and of course they prefer to see it in color. If you want to keep a documentation of important live events, such as wedding and birthday party, it is also better to shoot the image in color.

Tips to do black and white photo

Learn the basic concept of post processing software
Creating black and white photos means that you need to work a lot with the post-processing software. Thus, I recommend that you learn the basic concept of it. You don’t need to go for courses, just try to do some experiments and understand what will happen if you increase the contrast or decrease the brightness of the images.

Try to increase the clarity if it is necessary
In some of my black and white photos, I prefer to increase its clarity to the maximum level. It gives more visible detail to the texture of the objects, and can make you photo appear to be more impressive.

Vignetting
“Vignetting” is giving a shadow borders in the edges of your photos. It’s like framing your image with shadow. Sometimes, black and white photo can look more dramatic and better if you do this thing. Some software such as Adobe Lightroom can do the vignetting just in a second, and later you can adjust the intensity and volume of it for the best result.

Lotus – My Photography Work with Mirrorless Camera

Lotus – My Photography Work with Mirrorless Camera

Capturing the Beauty of Lotus

Lotus is one of my first project in the world of photography. When working on this project, I don’t even know some most basic terms such as exposure, aperture, or shutter speed. I merely worked with my instinct and try to manually tweak the lighting. I was very surprised to find out that the result is not as bad as I thought. However, I found a lot of weaknesses that should be improved in my photo. Through this lens, I would like to share my experience working on one of my first photography project. Hope you will enjoy it. I am looking forward for your feedback and comments.

The Concept of “Lotus”

The idea behind the photo shoot
The idea was actually very simple. I wanted to finish this project assignment as soon as possible. The lecturer assigned me to work with Pema, my beautiful friend from Bhutan. At that time, I was very busy with exam preparations and my final research. Thus, I wanted to do a project which I could finish in one day. I didn’t think I am good at poetry or painting, so I decided to do photography.

Surprisingly, this project was my first step to the world of photography. Because of this photo shoot, I developed an interest to photography and digital art. I finally found my passion to create something beautiful for the society.

The title, “Lotus”, came from the translation of the model’s name, “Pema”. “Pema” is a common name that we can find in Bhutan. In Bhutanese language (Dzongkha) it means “lotus”. I also borrowed some concept from a Pearl S. Buck novel’s titled “A Good Earth” where there is a very beautiful character with that name. As I had no experience working with a model before, I just told her to dress with something that can make her look mysterious, beautiful, and graceful at the same time.

The Photo Shoot

My first experience as a photographer
As I already had the concept, at first there was only one thing in my mind: to finish this work as fast as possible. I still had a lot of things to do, and I felt that this thing kind of slowed me down. I didn’t expect that later I really enjoy working as a photographer.

As I arrived in the location, I immediately started my work. During the first ten minutes of working, I felt an excitement that I have never experienced before when making a painting, writing a poem, or in any other art related activities. At that moment, I realized that I fell in love with the world of photography.

The next two hours of working was very fun for me. I enjoyed the moment when I framed the model into different scenes, took her photos from different angles and composition, as well as directed her to pose to fit with my concept. We tried different locations and outfits, and I even did some experiment with some simple properties that I found in the location, such as books, playing cards, and mirror.

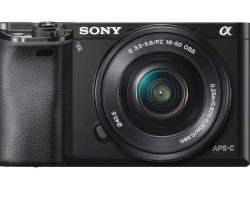
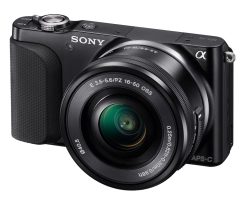
I worked with my Sony NEX-3 digital camera, which I am very satisfied with its performance. It can take beautiful images, almost as beautiful as DSLR camera and significantly more stunning compared to point and shoot camera. It also can be operated easily and requires very less knowledge in the world of photography. I set everything in “Auto Mode” as I was really blind about the basic concept such as exposure, ISO, aperture, shutter speed and so on. Later when I have complete understanding of those terms, I found that the image quality of “Auto Mode” for this camera wasn’t disappointing at all.

I completed my work in about four hours, with ten minutes break every hour. I spent about three hours to do little work with post processing. The result was satisfying. We got an “A”, and later some of the photos were featured in Bhutanese Girl Fashion Page.

Tips and thougts to do a photography with mirrorless camera

From an amateur point of view
Don’t hesitate to get a mirrorless camera
Because of the price that is significantly higher than point and shoot camera and slightly lower than DSLR, some people prefer not to buy this type of camera. Believe me, getting a mirrorless camera is a good investment. The image quality is comparable to DSLR, and it is much easier to operate. Moreover, it is cheaper and smaller. So, if you want to take good photos but don’t want to learn too much about technical aspects in photography, mirrorless camera is a perfect choice for you.

Use tripod
The image stabilizer in mirrorless camera is not as good as in DSLR, so using tripod during the photo shoot would significantly improve the quality of your photos. Some cameras such as Sony NEX series also hard to hold (as their center of gravity is in front part of the lens) so that you can get blurry and shaky images if you don’t use any tripod.

It is okay to use the “Auto Mode”
Especially if you are a beginner and don’t understand about when you should use flash, or when you should lower the ISO. The Auto Mode works very well in most of digital camera. Maybe later when you started to understand about some photography concepts, you can do experiment with Semi-Auto Mode or even completely Manual Mode.

Be confident
Although you have very less knowledge about photography, be confident that you can create good photos. Be confident with your camera, no matter how bad it is the quality. And, be confident to your model, trust her, and keep believing that both of you can create a good artworks. Believe it or not, this kind of positive thinking will influence the quality of your photos.

How to Transfer Pictures to Computer

How to Transfer Pictures to Computer

Need Help Getting Those Images to Your Computer?

If you’re new to digital photography you may have questions about how to download or transfer photos to computer where you can edit, save, or share them on the internet.

The process to transfer pictures from your digital camera to computer is usually very quick and simple but there are a couple of options, learn more about them here on this page.

The Primary Ways to Transfer Photos to Your Computer

Hear are the most common methods used to download or transfer photos to computer:

Connecting your camera to your computer via a USB cable or Firewire

Inserting the memory card from your camera into a memory card reader (or into your computer) and downloading directly from it rather than the camera.

Wireless transfer

How to Download Photos to Your Computer via USB Cable

A USB cable usually comes included with your camera purchase and is a fairly straightforward way to transfer pictures to computer.

In many instances, you’ll need to upload the image transfer software that came with your camera onto your computer.

Next you will need to connect your camera and your computer with the USB cable. Read your camera’s manual it will describe any specific instructions. For instance, some cameras need to be turned off when connecting and then turned on once the connection is made. Be sure to use AC power if you use this method to avoid draining the batteries on your camera.

Adjust the camera setting to allow image transfer. Again check the camera’s manual for the specific setting on that model.

At this point the computer will launch a wizard to walk you through the process of transferring the images.

For Windows XP owners this step by step guide for transferring images should be useful.

For Windows Vista owners there is this page about downloading and editing photos to help them.

For those with a Mac, here are helpful instructions for downloading pictures.

How to Download Pictures to Computer Using a Memory Card Reader

Memory Card readers can be a great way to transfer pictures to computer. They allow users to conserve their digital camera’s battery and make the transfer process even faster.

Users merely plug the memory card reader into the computer, remove the memory card from their camera, place it into the card reader, and transfer to the computer hard drive. This is very similar to moving files from a disk onto the computer hard drive.

The memory card reader can be attached one time and left in place so that each subsequent time you transfer pictures to computer there is no set up time involved.

Some newer computers also have a card reader built-in and allow the user to download by merely inserting the memory card directly into the computer.

Downloading Photos to Your Computer

Printing and Burning to Disk

How to Download Pictures to Your Computer Wirelessly

There are a couple of options that allow you to transfer pictures to computer without any wires or cable at all. Some digital cameras have WiFi cababilities or Bluetooth that allow the user to wirelessly download or transfer photos to computer through their wireless network. In fact, the photos can also be printed without the use of cables or a memory card reader.

For those without a WiFi digital camera, there’s also the Eye-Fi Share Memory Card. It has a built-in wireless connection and is able to transfer photos and video to photo sharing sites in the absence of any USB cables. The Eye-Fi Explore 2GB SD Card also adds geotagging information to images and the 2 GB Eye-Fi Home transfers wirelessly to a MAC or PC.

Eye Fi Memory Cards

Transferring Pictures from Your Cell Phone to a Computer

Images can be downloaded from your phone to a computer in much the same was as they are transferred from a digital camera.

Some camera phones have an appropriate USB cable to allow a connection in order to transfer photos to computer. These phones should also have the necessary software available to allow this downloading.

Some camera phones use memory cards to store images making transfer via memory card reader an option. A mobile media format card reader is often necessary, otherwise an adapter may be needed.

It depends upon the phone, but some Bluetooth capable phones allow you to transfer pictures to computer wirelessly.

Transferring Old Photos to Your Computer

If you have old photo prints that you would like to have in digital format you can easily do this with a scanner. Many modern printers offer a scanning function. In addition, affordable photo scanners are available if you have a lot of old photos, negatives, or slides.

After connecting the scanner, or your printer/scanner, you’ll need to be sure the glass is clean and you will want to select at what resolution you will scan the images. If you will be printing the images you will want a dpi of 300 or so. A lower resolution is acceptable if you will only be sharing these images online. As you scan the images you will want to name them so that they are easier to find. You can arrange them by year, by subject, or whatever suits your situation, but organization will be critical if you have many photos.

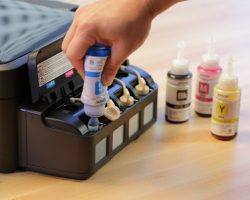
Is the Best Printer with Cheap Ink Still Exist?

Is the Best Printer with Cheap Ink Still Exist?

Printers must be the special thing for people who highly active with printing things. It must be disaster when the only one printer that you have is on bad-mood. In this situation, you have to check it and change anything that have not been budget before which means there will be some unpredictable budget that taken out. The disaster one again and again!

So, you need the truly best printer with cheap ink. There must be some affordable printer yet the ink still expensive. It becomes the trouble one, because what we use everyday is the ink that must be refilled not the printer which does not need to be refilled to when it ruined.

Read also: Best Sites for Couponing and Saving Money

As the highly recommendation as the best printer with cheap ink, you can have Epson. One of the famous brand, Epson can be predicated as the best printer. However, the price of its printer itself is more expensive than the other brand.

It can be said that Epson can be classified to the high-price printer. In the other hand, when we looking deeper that Epson has more benefits that the other. Although it has more expensive price for the printer, but Epson gives the more affordable price for its ink.

It can be said that Epson offers the best price while you give the big mount for the first, but in daily you can save more your money. The printer can be seen as the expensive one yet the ink must be the affordable one. Even you have to take much money at the first but you can get the low price for the daily need of your printer, in this point is the most special thing is ink. So, it means that the best printer with cheap ink is Epson. Expensive first, inexpensive later.

Best Sites for Couponing and Saving Money

Best Sites for Couponing and Saving Money

It is also an essential knowledge to do couponing to cut some unneeded budget for your grocery shopping. Yet, it can take a long time to know which sites to get certain types of items. Therefore, this article has done the research for you in finding the best sites for couponing. The following are some of the best websites to save money:

money-coupon

The Krazy Coupon Lady

This site is the number one website out there for anyone to save some cash. This option of the best sites for couponing offers many items for your monthly grocery shopping, such as food, toiletries, medicine, and even cooking utilities. Besides, this site offers the best prices from the best known stores worldwide. It is convenient for anyone to save the budget with so many offers in Krazy Coupon lady.

Diskonio

As alternative, another website for your money-saving habits is Diskonio.com. This is one of the best sites for coupons as visitors can easily get freebies, deals, and variety of coupons just by getting informed. This website is dedicated for extreme coupons, especially for mothers who like to cut some grocery budget. This site is one of the kinds as it gives step by step process of living a frugal lifestyle. Members of this site can be informed daily of all the savings they can get by adding their email into the newsletter archive.

Hip 2 Save

Hip 2 Save is a website created by and dedicated to the many frugal mothers who are looking for deals in their next trip to the grocery store. It was built by a dedicated mother named Collin Morgan who began the site when her first child was born. Morgan knew the hard economic situations that a family can get through day to day. Her frugal lifestyle and habits became a hobby to her, so she created a blog to spread her knowledge. A few years later, Morgan became every mother’s friend with all her deals and coupons being informed in her site. Therefore, this is one of the best sites for couponing as it will ultimately help you find great deals for your family needs.

She Saved

Another good option to go to find best deals on and offline is She Saved. This site is full of good deals from food choices to clothes. This website is unlike the other ones in this list as it is dedicated to not only help you saving money, but also save the time. The founder, Keri Lyn, wants to promote precious family moments. So, she offers the site of eight years to be a good source of information for the best shops and deals to help any parent to do their monthly shopping without a hassle.

Furthermore, this site even gives the other home related information, such as do-it-yourself articles and a budget traveling guide. Well, it is overall one of the greatest best sites for couponing. Yes, it is surely perfect for any mother or parent.

GoPro HERO4 BLACK Review : Make You Pro in An Instant

GoPro HERO4 BLACK Review : Make You Pro in An Instant

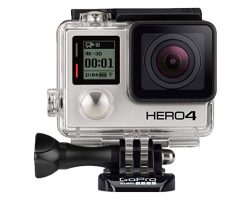
GoPro HERO4 BLACK is the new series of GoPro, that, as it names suggest, is a wrist camera that promise of making you a pro filmmaker in an instant. With GoPro it is easier to take picture and create video while doing activities.

GoPro Hero4 features a lens that can capture 4K quality picture. Unlike the previous model that seems to be an action cameras only, this is a flagship camera that promises of a high end camera with professional result worth for footage. GoPro Hero4 includes 12 megapixel camera, and 4K maximum recording resolution in 30 fps and in built microphone. The 1/2.3in CMOS sensor is better than the previous version and can capture picture in quick time.

Why You Should Choose This Product

GoPro HERO4 BLACK is excellent action camera to capture footage. It can be used to capture picture and footage that is not reachable with conventional camera. From sport event to wildlife footage, GoPro works the same as professional camera up to 4K quality. This is an incredible capability since its size is no bigger than matchbox. The in built microphone makes sure the audio is also captured well. The USB port let it be connected to bigger device and is built with editing software.  It is build with wide angle lens, making sure the footage taken is not limited by the space and the position where the camera is placed.

One thing that makes it a little bit difficult, especially for non pro user is it doesn’t include LCD and doesn’t have im built control unless it is connected to other device like smartphone, laptop, or smart watch. GoPro HERO4 BLACK has three versions and so far the Black one is more expensive than the Silver one but actually they don’t differ much. Buying the Silver one may more economical and this is probably not a good move from GoPro who named this device black. Even though it promises of an excellent work of capturing footage, the battery sadly doesn’t always support this. The battery life doesn’t last long.

Where You Can Buy GoPro HERO4?

GoPro is the pioneer of action camera and it is been improving its quality and change of market. This GoPro HERO4 BLACK is a flagship that is intended to live up to this higher improvement. And it does do a good job. The lack of screen may be a little bit hindering but it is all still tolerable, giving its tiny size. Get this GoPro for $404.06 for the Black version by clicking here.

Seiki SE42UM, An Affordable TV for High Quality 4K TV

Seiki SE42UM, An Affordable TV for High Quality 4K TV

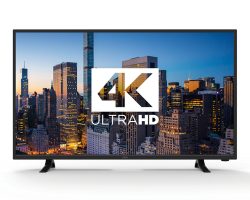
Seiki SE42UM is Seiki newest model of 4k tv. Seiki may not as popular as other massive brand like Sharp or Samsung but it does give good choice of tv selection. This model is an Ultra HD or 4K type of tv, which is a good thing. Its resolution is 3840 x 2160 pixels.

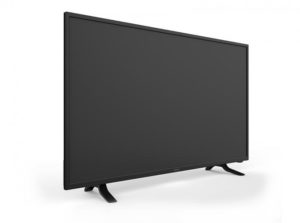
seiki-se42um-1

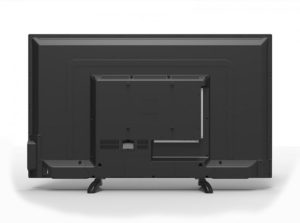
Seiki TV can br connected to PC to play games and there are extra setting for better adjustment in the quality of the program watched. The tv is 50 inch wide, which is quite a wide one for the price that is only $1300. The tv is designed in a simple but elegant looking design with thin bezel and clear from any brand names. There is LED light below the screen to show status of the tv.

seiki-se42um-2

The Price of Seiki SE42UM

With only $319.99, buyers can get a 4K Ultra HD. Usually, people need to have at least $5000 for this kind of television so Seiki SE42UM is quite affordable. With only third less price than usual brand like Samsung or even Sony, buyers get 50 inch wide tv. It also supports connection to other devices like laptop and PC. The design is simple and though not strikingly look special, the simplicity of the design helps to make the picture in the tv looks clearer with no brand name or any other button to distract the sight.

Unfortunately, price speaks its quality. Even though it is 4K Ultra HD, it cannot compete with other 4K Ultra HD brands in terms of quality. The quality is just enough for the resolution unless we get to watch the tv in a very close view. Moreover, there is still few tv programs that support 4K Ultra HD and it will eventually set to just full HD so it kind of waste to have an Ultra HD TV, that is not even in its maximum quality and probably better be competed with  1080p tv.

Conclusion

Regardless, for a 4K Ultra HD TV that is priced third less than the common tv in its class, people with low budget is at advantage to enjoy a 50 inch wide television in a 4 times higher resolution without much money. The design, though plain, isn’t as cheap looking as its price on the market. Price compensate quality but then it is up to buyers to think whether it is worthy or not. To order Seiki SE42UM, you can click here.

Sony DSCW800 Product Specification

Sony DSCW800 Product Specification

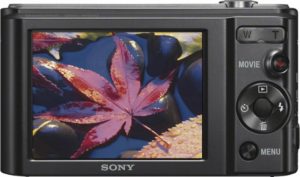
Capturing moments using camera is one way to capsule precious memories so that it will not be forgotten over the time which cannot be repeated twice, unless you have got some super power to travel back in time then it is going to be another topic to discuss. Sony DSCW800 is one to be talked about.

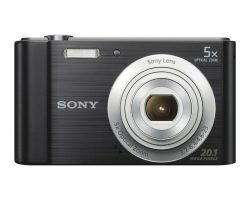
It is a cyber-shot camera released by Sony with a low price, but its exterior is designed with simplicity. Plus the size makes it easy to slip the camera into pocket. Talking about W800’s quality and performance, there are some cons and pros toward the product. Therefore, before you buy the product, it is better for you to review this specification first.

dscw800-1

Pros and Cons of Sony DSCW800

Let’s take a look to the pros. It is believed that the Sony DSCW800 has a good performance when you use it to take photos in a spot with good light. With a good light provided by nature, the result can be even better. Plus, the W800 is also said to have improved its manual control which now becomes easier to maneuver.

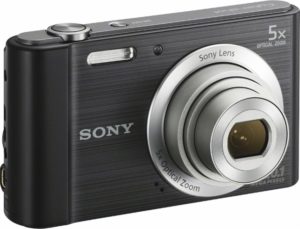
dscw800-2

If we see the size and weight, the W800 is suitable for those who hate heavy products, because W800 is lightweight and compact.

Jumping to the price, the shoot camera is on sale for a low price which is $89.99 on Amazon. Thus price completes the item with its goods such as the replacement battery, external charger, MC, and Deluxe starter kit, while if you buy the W800 that sits below price tag £79.50, you will not receive any goods mentioned previously; you will most likely to receive the Sony DSCW800 digital compact camera only.

So the price really does say something. However it also depends on where you buy the W800. Perhaps when you buy it, the coupons or discounts is happening so that you will be given even cheaper price.

But from the cons, the camera is also said to have a poor quality of lighting since it is only good when the nature provides its light, plus it can only zoom for five times. These cons are a few compared to many great quality you are getting once you buy the product. If you are curious and want to know more, with such a low price, it can be an opportunity to give it a try.

Interested in buying Sony DSCW800? Then you can effortlessly click below to order.