How to Get Practical Craft Experience

Turning hobbies into full time jobs is the dream of many casual crafters. It takes time, creativity and persistence. Another key element is experience. Rudimentary knowledge of your art / craft isn’t good enough if you’re selling goods to paying customers.

You need to have the knowledge to put out a quality product at a price that your customer will pay while still making enough money to cover both your business and personal expenses. Just starting out and not sure how to get that knowledge? Here are my suggestions for getting good, practical experience in running a craft business.

Working for Another Craft Business

Years ago when I first started giving seminars on starting a new business, getting good practical experience working for another similar type business was my number one suggestion. It still is. This is the best and most ideal of situations.

Working for another crafter not only teaches you the specific skill, it exposes you to the complete picture of the business aspects of selling crafts. Definitely, having prior experience working for a business in the same craft discipline to the one you want to start will be one of your major keys to success.

However, I know that for many, unless you are a student looking for an internship, this isn’t an option. You’re working 40 hours plus at your day job and the last thing you want to do is get a part-time job working for someone else in your craft field. Honestly, fast forwarding to today, it would be a difficult option for me to achieve too. So, what to do if putting in hours working for another arts / crafts designer just can’t be done?

Practice, Practice, Practice

It’s trite but practice is a very necessary part of gaining design and fabrication experience. Do you ever watch Project Runway? What always happens at the start of each show? These are trained designers with years of experience in the field, yet after they are given an assignment, they don’t just get out a pair of shears and start hacking up fabric.

They think about their particular design, sketch it out, carefully consider the right fabric and use muslin to make patterns prior to cutting the actual garment fabric. Sometimes they have to halt operations mid-stream when they see their design just isn’t going to pan out. As an inexperienced crafter, these are the basic steps you should follow – sometimes over and over and over again until a design or technique is totally worked out.

Until you’ve had a lot of practice, it’s really hard to have a 100% grasp on whether the materials you want to use are adaptable to your design. Also, it can take numerous prototypes to breakdown design elements into logical construction steps. Remember, developing well-honed techniques from hours of experimentation is necessary prior to announcing yourself to the world as a serious craft businessperson.

Yikes, all that material – it can be expensive – that’s why the clothing designers use muslin first. If possible, use the equivalent of muslin for your design prototypes.

Take Craft Business Courses or Seminars Tailored to Your Field

While this is a necessary part of running a business for experienced craft business owners, it’s exponentially important for the inexperienced. You should already have subscribed to and be reading trade publications. There are numerous craft seminars given convention style each year, hi-lighted in these publications, providing great information on many different craft related business topics.

Usually spanning two to three days, a variety of topics are normally covered and you’ll be able to pick and choose between the seminars you want to attend. If the seminars aren’t within driving distance, you’ll have the additional burden of airfare and lodging. However, lacking the time to get on-the-job practical experience, this is the next best thing.

Joining Craft Professional Trade Associations

What happens when you go out to lunch with people you work with? Don’t you invariable end up talking about your jobs – maybe getting the inside scoop on pending events? Well, that’s exactly the sort of interaction you’ll get when you join a local trade association. Attending these meetings is a great way to get experience vicariously as you find out about new tools, techniques, suppliers and legalities specific to your craft.

Getting experience working in the field is invaluable. You’ll have the priceless opportunity to see how an established business maneuvers around problems beyond their control and deals with supply, labor and customer issues. Lacking that opportunity, put aside time to practice your craft. Pair this with keeping on top of developing issues in your business by joining trade organizations and attending craft related seminars.

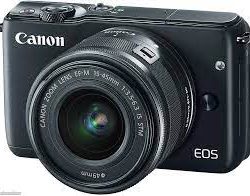
Canon EOS M10 Review

Canon EOS M10 Review

The Bottom Line

Canon has not chosen to make significant investments in the mirrorless interchangeable lens camera (ILC) market, sticking with focusing on its very popular DSLR camera models. But Canon isn’t completely abandoning the mirrorless market either, as shown by its recent release of the Canon M10. It’s very much a beginner-level mirrorless camera, as shown in this Canon EOS M10 review, and, as such, it has some drawbacks.

But the M10 fits in pretty well against other cameras that have a similar price point, as well as against other entry-level mirrorless ILCs. It’s one of the least expensive mirrorless cameras on the market, even after you purchase a lens or two. (Keep in mind that you cannot use the same lenses for Canon DSLR cameras as you can for Canon mirrorless models.)

With some of this camera’s drawbacks, I’d almost be tempted to go with an entry-level Canon Rebel DSLR model over this one, as the basic DSLRs are only slightly more expensive than the M10.

Rebel DSLRs have been around for decades, and provide strong performance levels and image quality. The M10’s biggest benefit versus those entry-level Rebels is its thin size of just 1.38 inches without the lens attached. Otherwise, Canon’s Rebels will provide a better experience for most photographers over the M10.

Specifications

  • Resolution: 18 megapixels
  • Optical zoom: NA, uses interchangeable lenses
  • LCD: 3.0-inch, 1,040,000 pixels (touch and tilt enabled)
  • Maximum image size: 5184 x 3456 pixels
  • Battery: Rechargeable Li-Ion
  • Dimensions: 4.25 x 2.62 x 1.38 inches
  • Weight: 10.6 ounces (including battery and memory card)
  • Image sensor: APS-C (22.3×14.9 mm)
  • Movie mode: HD 1080p

Pros

  • Low price for a mirrorless camera
  • Image quality is a bit above average versus other cameras in this price range
  • LCD screen is sharp and offers tilt and touch capabilities
  • Camera is easier to use than most interchangeable lens models
  • Movie recording is easy and full HD movies look great

Cons

  • Viewfinder is not included
  • No hot shoe for adding components
  • Camera’s image quality at high ISO settings is poor
  • Battery life isn’t as good as it should be, especially if you choose to use camera’s Wi-Fi
  • Shutter lag is a problem in some shooting situations

Image Quality

The Canon EOS M10 does a nice job with image quality versus other entry-level mirrorless cameras and versus other models in its price range. The M10’s images aren’t significantly better than its competitors, but they are above average. Personally, I like the image quality of Rebel DSLRs a little better than what’s found with the M10, but there isn’t a huge difference.

The Canon M10 does a nice job with indoor photography, nearly equal to its performance with outdoor photography in sunlight. This isn’t always the case with mirrorless cameras. The M10’s 18 megapixels of resolution and its APS-C sized image sensor allow for the good performance indoors.

However, the good indoor performance doesn’t continue if you’re shooting at a high ISO setting. Once you hit the midpoint of the M10’s ISO range — say around ISO 1600 — you’ll start to notice significant noise in the images, High ISO settings are not really usable with this camera. I’d suggest using the built-in flash unit wherever possible, rather than increasing the ISO past 800.

Performance

The Canon M10’s performance levels are impressive, as Canon gave this camera its DIGIC 6 image processor, which leads to some fast operational aspects. You can shoot between four and five frames per second in burst mode, which is a solid performance for a mirrorless camera. 

But I was a bit disappointed in the M10’s shutter lag, which can approach half a second in some shooting conditions where you’re unable to prefocus by holding down the shutter button halfway. At some point, you will miss some spontaneous photos because of this shutter lag issue. It certainly isn’t the type of shutter lag problem you’d experience with a basic point and shoot camera, but it is more noticeable than what you’d find with a Rebel DSLR.

Battery performance with this model is a bit below average, which is a disappointment. However, this is a common problem with thin mirrorless ILCs, as they must have a thin battery to fit the overall design of the camera. Just understand that if you choose to use the M10’s built-in Wi-Fi capabilities, the poor battery lifespan problem will be magnified.

Design

The thin camera body found with the Canon M10 gives it an advantage over the Rebel DSLRs. No DSLR can match the EOS M10’s 1.38-inch thickness measurement. 

Although you can use the M10 one-handed, it’s a little difficult to hold this camera with one hand because it has no right-hand grip area. The front of the camera body is smooth, so you have to try to hold it more like a point and shoot camera with a pinching grip, which can be difficult because of the way the lens protrudes from the camera body. It’s just easier to hold the camera with two hands.

Canon gave the EOS M10 tiltable and touch screen capabilities, which is great to find on a camera that’s aimed at inexperienced photographers. The camera also has very few buttons and dials, meaning you’ll be using the screen the majority of time to make changes to the settings, so having touch capabilities makes this model easy to use.

The build quality for the EOS M10 is very solid. There’s no loose parts or flimsy aspects to this Canon model.

Nikon Coolpix P900 Review

Nikon Coolpix P900 Review

The Bottom Line

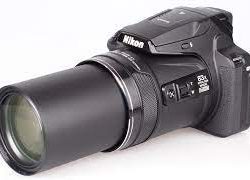
There’s no hiding the key feature that we’ll showcase in this Nikon Coolpix P900 review — an almost unbelievable 83X optical zoom lens. At the time of this writing, the 83X zoom lens is the largest one available in the fixed lens camera market, making the P900 a candidate for one of the best ultra zoom cameras. 

And there’s no hiding this feature because it makes the Coolpix P900 a camera that’s larger than even some of the best DSLR cameras on the market. This model weighs almost 2 pounds and measures about 5x5x5 inches with the zoom lens retracted. When the optical zoom is fully extended, the camera measures about 8.5 inches in depth.

So if you need a huge zoom lens, Nikon definitely delivers with the P900. But as with many ultra zoom cameras, sometimes that huge zoom lens can be a detriment. You may have a tough time holding the Coolpix P900 steady when the zoom lens is extended, just because the camera is so heavy and awkward to hand hold with the large zoom lens.

And Nikon only gave this model a 1/2.3-inch image sensor and 16 megapixels of resolution, which will limit your ability to create photos that will result in large and sharp prints. Still, versus other large zoom cameras, the Nikon P900 is a decent performer.

Then there’s the $500-plus price point for the P900. You might be able to find an entry-level DSLR or mirrorless ILC at that price, which will result in far greater image quality. So only those who are sure they need the 83X optical zoom lens will be able to justify the high price tag for this model.

Specifications

  • Resolution: 16.0 megapixels
  • Optical zoom: 83X (24-2000mm equivalent)
  • LCD: 3.0-inch, 921,000 pixels (tiltable)
  • Maximum image size: 4608 x 3456 pixels
  • Battery: Rechargeable Li-Ion
  • Dimensions: 5.5 x 4.1 x 5.5 inches
  • Weight: 1 pound, 15.8 ounces (with battery and memory card)
  • Image sensor: 1/2.3-inch
  • Movie mode: HD 1080p

Pros

  • Huge optical zoom lens at 83X
  • Reasonably good performance speeds even when optical zoom lens is fully extended
  • Offers electronic viewfinder
  • Articulated LCD screen
  • Numerous manual control features

Cons

  • Small image sensor limits image quality results
  • Images aren’t quite as sharp as they should be
  • Maximum ISO is limited to 6400
  • Extremely heavy and large camera
  • Price point is high, approaching that of entry-level mirrorless ILCs

Image Quality

When you think about spending more than $500 for a digital camera, you expect to receive very good image quality. Unfortunately, this is one area where the Nikon P900 lags behind its price point peers, which can include low-end DSLRs. 

The 1/2.3-inch image sensor in the Coolpix P900 is as small in physical size as what you’ll find in a digital camera. Models that cost less than $200 or $150 often have 1/2.3-inch image sensors. Because the physical size of image sensors plays such a key role in determining image quality, having such a small sensor in the P900 makes it tough to justify its high price tag. 

The image quality for the Coolpix P900 might be even worse, other than the fact Nikon gave the camera a very strong optical image stabilization system, which is an extremely important feature to find in an ultra zoom camera. It’s difficult to hand hold a heavy camera steady without a good image stabilization system. Even with such a good IS system, you’ll want to purchase a tripod with this model for best image quality.

Performance

Most ultra zoom cameras operate slower than other types of cameras, especially when the zoom lens is fully extended. You can expect to have problems with shutter lag and shot to shot delays, meaning such cameras don’t have great response times. 

The Nikon Coolpix P900 isn’t a fast performer either, but it does offer faster response times that what you’ll find with most ultra zoom cameras. In fact, the P900 has very little shutter lag when the zoom lens is not extended, which is impressive for this type of fixed lens camera.

Start-up is very fast with this model too, as you should be able to record your first photo a little more than 1 second after pressing the power button. And you can move through the entire 83X zoom range of this camera in about 3.5 seconds, which is an impressive level of speed for the zoom motor.

Battery performance is good with the P900, offering 300 to 400 shots per charge. However, if you choose to use the camera’s built-in GPS or Wi-Fi connectivity, you will receive less battery life.

Design

Nikon gave the P900 quite a few desirable design elements. The inclusion of an electronic viewfinder is great to find in an ultra zoom camera, as it can be easier to hand hold the camera steady when it’s pressed against your face, versus trying to hold it and look at the LCD screen.

If you choose to frame photos using the LCD screen instead of the handy viewfinder, Nikon gave the Coolpix P900 a sharp and bright display screen. And the LCD is articulated, meaning it’s easy to use this model when attached to a tripod by tilting the LCD to match the angle you need. You can even swivel the display screen 180 degrees to allow for selfies.

A mode dial on the top of the camera allows you to work quickly to pick the shooting mode you want. The P900 offers a range of shooting modes, including full manual control, fully automatic, and everything in between. 

There’s a popup flash unit, which is a key design feature for an ultra zoom camera, as it allows the flash unit to gain a good angle to the scene, even when the zoom lens is fully extended. However, Nikon didn’t give the Coolpix P900 a hot shoe to allow for adding an external flash unit.

Kodak Zi8 Camcorder Review

Kodak Zi8 Camcorder Review

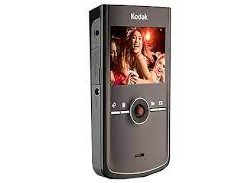
Kodak’s Zi8 is a high definition pocket camcorder that records 1920 x 1080p video at 30 frames per second (fps) in the H.264 format. The Zi8 competes with products such as Pure Digital’s Flip UltraHD and Sony’s Webbie HD. Kodak’s pocket camcorder has a few tricks that the others don’t – such as digital image stabilization, face detection, and an external microphone input.

Kodak Zi8 At a Glance

The Good:[ Excellent video quality, easy to use, strong feature set, large LCD screen.

The Bad: Slightly clumsy user interface, little internal memory.

Video & Photo Quality

Using a 1/2.5-inch, 5-megapixel CMOS sensor, the Zi8 records 1080p HD video.This is one of the first 1080p pocket camcorders on the market and the video quality is definitely impressive for a model in this class.

If you want to extend recording times, you can opt for one of three lower resolution settings: 720p/60fps mode (the faster frame rate is good for shooting motion), a 720p/30fps mode or a WVGA mode.

A nice addition to the Zi8 is face detection, which, when activated, can improve exposure around a face it detects in a frame. This function can be disabled as it will draw down the battery faster when it’s used.

The Zi8 also snaps 5-megapixel still photos when set to photo mode (it can’t snap them while you’re filming).

You shouldn’t expect much from these stills – with no flash and a fairly slow performance, it’s not going to wow you.

Design

Like other models in the pocket camcorder category, Kodak kept the functionality and buttons to a minumum. Four dedicated buttons on the back of the unit let you access menu settings, delete videos and still photos, return to filming and play back stored videos.

The menu, and quality settings, are navigated using a joystick at the center of the unit. All-in-all, a very intuitive design that just about anyone can figure out in short order, even if the buttons could stand to be a bit larger.

The Zi8 weighs in just shy of a svelte five ounces with battery. At 2.4 × 4.5 × 0.9 inches, it’s the size of a nice, lean point-and-shoot digital camera. You’ll have your choice of red, black and blue.

Removable Battery

Another nice design touch is a removable lithium ion batter (accessed by removing the unit’s faceplate). For longer trips where you can run low on battery, you have the option of swapping in a new one rather than finding a spot to recharge. You can charge the battery when the Zi8 is connected to a PC via its flip-out USB connector or by using the supplied AC adapter.

Menus

The menu in the Zi8 consists of nine icons for switching off image stabilization, engaging face detection and accessing other functions. Unfortunately, while Kodak had ample room to add some descriptive wording above each menu icon, in most cases they choose not to. None of the icons are that mysterious, but still, for a novice user it would be nice to use the generous LCD screen to its fullest potential.

Memory

The Zi8 comes with a meager 128MB worth of internal memory – barely enough to record a few seconds of HD video or a couple of still images. To enjoy recording of any length, you’ll need to use an SDHC memory card (not included). The Zi8 supports SDHC cards up to 32GB, which would give you close to five hours of recording at the highest quality setting.

The use of flash memory cards helps keep the price of the unit down, but that only helps if you already own a memory card.

Optics

Like all pocket camcorders, the Zi8 does not offer an optical zoom lens. Instead, it features a 4x digital zoom. The zoom itself is of limited utility and when it’s engaged, it isn’t terribly smooth.

The Zi8 also packs digital image stabilization. Again, it’s not as effective as the optical variety, but it’s also not as important a feature in a pocket camcorder because you don’t have an optical zoom lens. You can see it in action here. On the whole, it’s better to have some form of stabilization than none, so Kodak gets the thumbs up for adding it.

Kodak Zi8: A Powerful Pocket Camcorder

Kodak’s Zi8 manages to outdo most of its rivals in the pocket camcorder market by adding some feature-enhancements without burdening the camcorder with complexity. It could stand to tweak its interface, build bigger buttons and make the exterior more resistant to finger prints. If you have no interest in anything but the simplest pocket camcorder for creating Web-friendly videos, the Flip UltraHD would still give you the best bang for your buck. But if you’re thirsting for a pocket camcorder with equal (and in some cases, better) quality than the Flip with more features to boot, the Zi8 is the model for you.

DXG A80V Camcorder Review

DXG A80V Camcorder Review

DXG’s A80V is a low cost high definition camcorder capable of recording 1920 x 1080p video to SDHC memory cards. The $299 model features: a 10-megapixel, 1/2.3-inch CMOS sensor, 5x optical zoom lens, and a 3-inch touch-screen LCD.

DXG A80V at a Glance:

The Good: Inexpensive, decent HD video quality, lightweight, touch-screen.

The Bad: Bulkly, limited optics

1080P Video Recording on a Budget

The DXG A80V is one of the least expensive traditionally-styled camcorders to offer 1920 x 1080p HD video resolution. And unlike the even cheaper pocket camcorders that boast 1080p recording, the A80V has more features (although far less than comparably priced standard definition camcorders – more on that later).

The A80V’s video quality at 1080p is definitely on par with some more expensive HD camcorders (like the $499 Sanyo FH1) but you shouldn’t expect it to perform as well as the higher bit-rate AVCHD models from Sony, Panasonic and others. That said, colors reproduced accurately and crisply. The camera was a solid performer indoors as well, with less digital noise marring the video in lower light than you’d find in either FH1 and lower-cost pocket models like Pure Digital’s Flip UltraHD. Another nice bonus: it offers a built-in video light.

The A80V has several other recording modes beyond 1080p/30 frames per second (fps). You’ll also find a 1080i/60fps for shooting fast-moving subjects. (See a comparison between 1080p/30fps and 1080i/60fps – it’s modest, but nonetheless the motion is crisper at the faster frame rate). You can also bump the resolution down to 720p at either 30fps or 60fps.

There’s also a dual-record option, which records two versions of the same video: one in high definition (1080P) and the other in WVGA.

The thinking here, I guess, is that you can create a lower-resolution video file for easier uploading to the Web. Personally I found it extraneous – why clog up your memory card with an extra file when YouTube and other sites support HD uploads?

High Resolution Stills

The A80V can snap 10-megapixel still photos with a flash to aid in low-light photography. The camera itself isn’t super-responsive. You’ll have to wait a second or often two from when you press the shutter, but the photos it produced were serviceable.

Limited Zoom

The A80V offers a 5x optical zoom lens. That’s not a lot of optical punch in a $300 camcorder and a far cry from the 70x lens you can find on, say, a standard definition Panasonic. On top of that, it uses electronic image stabilization, which isn’t as effective as optical stabilization in curbing camera shake.

The camcorder does offer a manual focusing option (which you operate using the zoom lever). Another useful feature is the ability to set a focus point using the touch-screen LCD. While the overall performance of the touch-screen display was good (see below) I found it somewhat sluggish when it came to this touch-focus feature. It would take the camcorder a few seconds to relocate the focus box and lock-on to its target.

Modest Feature Set

To pack a 1080p camcorder into a $299 price you have to expect some trade-offs. Other than the lens, the other trade off you’ll make is with the feature-set. You’ll get more options than you would with a pocket camcorder, but you won’t enjoy the same breadth of features on similarly priced standard definition camcorders (for instance, no scene modes or shutter and aperture controls).

That said, it’s not totally bare-bones: you can adjust white balance and exposure, as well as choose to film in sepia or black and white.

Responsive Touch Screen

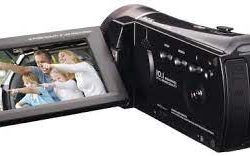
DXG packed the A80V with a 3-inch touch-screen LCD. That’s a larger screen than you’ll find on more expensive models (with or without touch-screen operation) and aside from the sluggish spot focusing, the overall touch-screen performance is very responsive. All the features you’ll need to access are represented as nice large icons on the screen.

When it comes to external, physical controls, you’ll find a small mode dial at the back of the camcorder for switching between video and photo mode. There’s also a small toggle joystick at the back for adjusting white balance and exposure. A small shutter button and zoom lever sit atop the camcorder while behind the LCD screen sit nicely-sized controls for the flash, video light, power and display buttons. All in all, the controls are well positioned, making the A80V quite easy to operate.

Since it’s a flash camcorder, the A80V is light weight at 10 ounces (without battery). It springs to life fairly quickly and can be powered up and down by opening the LCD or via a button behind the display. It is a tad bulkier than other flash camcorder at a little over 5-inches long, but it’s not very obtrusive.

The Bottom Line: The DXG A80V is a Good Budget Buy

At $299, the DXG A80V has very few competitors that can offer the same video resolution of 1920 x 1080p. You can spend about $70 less for a 1080p pocket camcorder, but you’ll lose out on a lot of the features the A80V has to offer. You could spend the same amount for a fuller-featured camcorder with a better zoom, but it would only offer standard definition resolution. So there’s your trade-off.

GE DV1 Camcorder Review

GE DV1 Camcorder Review

GE DV1 at a Glance

The Good: Low cost, durable, easy to use.

The Bad: So-so video quality.

Video Quality

The GE DV1 records 1080p HD video in the H.264 format via a 5-megapixel CMOS image sensor. Indoors, footage off the DV1 can get noisy but nothing out of the ordinary for a low cost pocket camcorder. There is some noticeable over-exposure, particularly in sunlight, but the colors reproduced crisply. All in all, the video is serviceable, but you shouldn’t expect it to compare with the more expensive Full HD camcorders on the market.

The DV1 offers several quality settings, from 1080p/30 frames per second (fps) to a useful 720p option at 60fps for filming faster action. You can also drop recording quality to 1440 x 1080 and 640 x 480, but there’s no practical reason to do so.

The DV1 also snaps 5-megapixel still photos. If you’re dealing with plenty of ambient light and a still subject, the photos are decent. Otherwise, it’s best to stick to video, as the images will blur. Fairly uniquely among pocket camcorders, the DV1 can also snap 2-megapixel photos while recording. These images are hit-and-miss and you can only take up to six, but the feature itself is nice to have.

Optics

The DV1 packs a 4x digital zoom lens with digital image stabilization. As with all digital zooms on pocket models, this one just ramps up the digital noise so it doesn’t add much.

Design

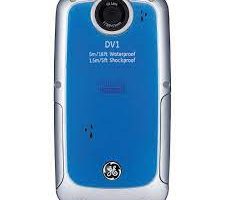
The big selling point with the DV1 is obviously the rugged and waterproof body design. As mentioned above, the DV1 can be submerged in up to 15 feet of water (that’s deeper than Kodak’s Playsport Zx3) but more than that, it can be dropped from a height of 5 feet and it’s sealed against dust.

This makes it one of the more rugged camcorders on the market. If you’re big into outdoor activities, it’s a good choice.

Obviously, a rugged camcorder will impose some trade-offs on the design. To wit: the DV1 is a bit bulkier and heavier than other pocket cams on the market – but not obtrusively so. It can still be slipped into a pocket or purse quite easily. The memory card port, flip-out USB plug and other connectors are housed securely behind latched doors to keep the elements out. But they open easily. While many pocket camcorders have jumped on the touch-screen bandwagon, the DV1 has nice, large tactile buttons for recording, playback, snapping stills, entering the menu and deleting photos. They can all be pressed easily while wearing gloves. The only exception is the power button, which sits rather flush with the side of the camcorder and might present a problem for a gloved hand.

Feature Set

The GE DV1 offers a pretty bare bones feature set, which isn’t surprising given its low cost. You’ll find settings for adjusting white balance (including an underwater mode), a high dynamic range mode for stills and video recording, exposure metering (stills and video), and a continuous shooting mode for photographs at 7fps.

Menu & Display

You’ll access what features the DV1 has through a bright 2-inch display (you can also adjust the brightness manually in the settings). The menu layout is straightforward and easy to navigate, though when you enter it, you’ll start with the still photo features, not the video, which is a bit odd.

While filming, the DV1 uses just the top portion of the display. The bottom is filled with a menu displaying your current settings – such as whether you’re in HDR mode and your resolution. It can also display a histogram while recording, which is pretty rare to see at this price.

Memory

The DV1 records to SDHC cards and comes with no built-in memory. So you’ll need to factor in the cost of a card to the DV1’s bottom line (unless you already have one).

Bottom Line

When it comes to camcorders that can be tossed into the water or survive a fall onto the concrete without shattering, your choices are pretty limited so the DV1 doesn’t have many direct competitors to compare it to. That said, it’s more rugged and can be dunked deeper than Kodak’s PlaySport Zx3 (cheaper too), but doesn’t offer Kodak’s video quality or feature set. So if you need a bare-bones camcorder for a trip to the beach or an outdoor adventure, the DV1 is a good option. At $129, it’s attractively priced to be a good companion video camera to those who don’t want to risk a higher-end model during their death-defying white water rafting trips.

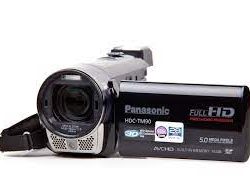
Panasonic HDC-TM90 Camcorder Review

Panasonic HDC-TM90 Camcorder Review

The Panasonic HDC-TM90 is a high definition camcorder that records 1920 x 1080 video in the AVCHD format. It offers 16GB of built-in flash memory, a 3-inch touch-screen display and a 26x zoom lens. It is also capable of 3D video recording with an optional 3D converter lens.

Panasonic HDC-TM90 at a Glance

The Good: Excellent video quality, solid feature set, light and compact design.

The Bad: Small external controls, clumsy menu interface.

Panasonic HDC-TM90 Video Quality

The Panasonic TM90 records video at 1920 x 1080 at 60 progressive frames per second via a 3-megapixel CMOS sensor at a maximum bit rate of 28Mbps.

This high bit-rate setting is not actually supported by the AVCHD format that the TM90 records in, so your video editing options are fewer (at least for now) than they would be if you dialed back to the AVCHD-supported 24Mbps.

Nevertheless, the video quality on the Panasonic TM90 is very impressive. We’re talking about extremely crisp motion, well-saturated colors and nice even exposure. In low light, the results were equally impressive, with very little visible noise, especially vs. other camcorders in its price range. Panasonic said they revamped their noise reduction system for a number of 2011 camcorders and it definitely shows.

In addition to the high-quality 28Mbps mode, you can dial back to 17Mbps, 13Mbps, 9Mbps and 5Mbps. On the still photography side, you can snap 5-megapixel still photos. While it’s no replacement for a still camera, it has a flash and a dedicated photo shutter, so it delivers enough functionality to fill in on the fly.

Panasonic TM90 Optics

The TM90 packs a 26x optical zoom lens.

Your magnification can be boosted to 40x with Panasonic’s “Intelligent Zoom” which basically crops your video to produce a “zoom” look. The TM90 offers both optical and digital image stabilization to reduce jitters as you move about or use the zoom. I found it quite effective, particularly as you zoom out.

Another nice optical feature: the TM90 offers a 28mm wide angle lens for getting more of your scene in the frame.

Design

The design of the Panasonic HDC-TM90 is something of a mixed bag. On the plus side, it’s very light and compact at 1.99 x 2.48 x 4.67 inches and .54lbs without battery and memory card. It has a plastic exterior, which contributes to its light weight but also makes it feel a bit cheap. The overall design is sleek – with the battery lodged nearly flush with the back of the camcorder, so it’s quite easy to drop in purse or pocket.

The design negatives come when you flip open the camcorder’s LCD display to reveal a set of small buttons (Intelligent Auto/Manual, image stabilization, and 1080/60p mode) that are flush with the camcorder body and are difficult to engage.

Feature Set

The TM90 offers an “Intelligent Auto” mode for automatically setting exposure settings to maximize video quality based on your shooting environment. Advanced users will like the automatic control over iris, focus and shutter speed. There’s also a pre-record function which will record up to three seconds of video before you actually press “record.”

The TM90 is also able to record 3D video with the use of an optional 3D converter lens ($350). After you attach the converter, the camcorder will automatically detect it and set you into 3D mode, along with instructions for properly adjusting the lens for the most accurate recording. The resulting 3D video won’t be high definition and can’t be viewed in 3D on the camcorder’s LCD display. If you own a 3D TV and glasses, however, you can enjoy the full 3D experience when connecting the camcorder via HDMI cable.

Menu & Display

With a 3-inch touch screen display, the Panasonic TM90 has a bit more room to navigate around on-screen menu items. Unfortunately, a lot of the on-screen menu icons are a bit vague. You can use an info button (marked as an ‘i’ on the bottom of the menu) to get a brief written description, but the info mode shuts off after one use – you’ll have to constantly hit it to learn about a particular function, which can be frustrating.

The touch screen itself is quite responsive and the display rotates around so you can alternate your viewing angles.

Memory

The Panasonic TM90 packs 16GB worth of internal flash memory alongside a slot for an optional SDXC card. It offers relay recording – a useful feature which automatically switches recording from internal memory to a card (if one’s inserted) when internal memory fills up.

You can store roughly two hours and 20 minutes worth of the highest quality HD footage on the TM90’s built-in memory and much more than that (up to six hours) if you dial back the quality.

Panasonic HDC-TM90 Bottom Line

Some design quibbles aside, the TM90 is a terrific camcorder for the mid-range of the HD/AVCHD market. It delivers fantastic video quality with a well-rounded feature set and a terrific zoom lens. If you get the hankering to shoot 3D video, the TM90 can accommodate you, although we wouldn’t recommend it for its 3D features alone (better to buy a dedicated 3D camcorder with a pair of image sensors and lenses).

10 Steps to Follow Before You Start a Crafts Business

10 Steps to Follow Before You Start a Crafts Business

Being self-employed is the dream of many people running that daily 9-to-5 treadmill. If you’ve been mulling over the possibility of starting a crafts business, check out my ten recommended steps to follow before starting your business.

1. Think About Why You Want to Start a Crafts Business

Maybe you want to turn a hobby into a moneymaking business. Perhaps you’re just fed up with your day job and want to make the transition from working for someone else to working for yourself. Are you spending too much time at the office and feel a home-based craft business will give you more time with your family? Whatever the reason, and you might have more than one, sit down and give this question some serious thought.

2. Get Good Practical Experience

Opening a crafts business, especially if you plan to use it to replace your day job, isn’t something that you just wake up one day and decide to do. If you want your craft business to be a success you need to have experience ranging from basic design to complete construction.

3. Go to School if You Need to Hone Your Craft-Making Skills

It’s never a bad idea to take a class in your field of arts or crafts to advance your basic skills. Watching the instructor and your peers just may show you a better way to set up your workbench, perform your craft or you may get a referral to a fantastic vender. It’s also a great way to network, which can be helpful when growing your craft business.

4. Select Your Business Entity

Every choice and necessary business action you take in the start-up phrase of your craft business can vary based upon the type of business entity you select. If you don’t have any prior experience working for yourself, it’s a hard decision. Luckily, you only have three choices from which to choose: sole proprietorship, flow throughs or corporation.

5. Identify Your Customer

Before you hit the drawing board you have to consider who your potential customers are. A starting point is the age old male versus female demographic. However, male or female is too broad – you can’t stop there. Take this further by considering exactly what type of product you wish to handcraft.

6. Narrow Your Focus

When you first start your business, don’t take on too much and be all over the map with your product line. Concentrate on what you do well and with time and experience expand from there.

7. Check Out Your Competition

If you have too much competition, you don’t necessarily have to abandon your dream – develop a niche that is not yet saturated. On the other side, if you don’t have any competition, this may not be a good thing. It could be there is not enough of a market for your art or craft to make it a viable business.

8. Find Vendors

You need to find vendors that have wholesales terms so you can buy with a discount and establish terms. You also need this information because if you don’t know how much your vendors are going to charge you for the raw materials to make your product, how can you set a reasonable retail price? This also helps you figure out many items you have to sell to realize your personal or financial goals.

9. Set Up a Work Space

The great thing about most craft businesses is that they are ideally suited to operate as a home-based business. If that’s your plan, look around your home and map out where you will store inventory, take care of the business details like bill paying and make your craft product. If you’re planning to rent a shop, this expense needs to factored into your cost of doing business.

10. Write a Business Plan

Many business owners think they only need to prepare a business plan to get outside financing from a bank or other lender. Not true. A business plan is your roadmap to success. All craft businesses should have one so you can anticipate problems and come up with solutions.

Business Plan Elements

Writing a business plan is both nerve-racking and exhilarating. It can be stressful to work through each section, dealing with problems and exploring alternative solutions. However, you’ll find that it’s positively thrilling to work through those problems and find out that yes, this is a doable proposition!

Most business plans have the following eight main sections; some also include an appendix. Keep in mind there is no right or wrong way to develop a business plan and your particular type of art or craft will shape its format.

1. Executive Summary

Consider the purpose of the business and briefly state how you intend to achieve that purpose. The objective here is to be direct and to-the-point. You’ll follow up on these basics in other sections of the plan.

2. Basic Company Info

List the contact information for your business here: name, address, and phone and fax number, how long you have been in business, hours of operation — you get the idea. Remember, the business plan is a work in process. Get the fundamental company facts down on paper now and you’ll find that updating the business plan in the future will be a snap.

3. Products or Services Offered

For example, let’s say you do leatherwork and create purses using authentic antique techniques such as Venetian lacquer. This section should contain a detailed description of the historical origins of your designs and the types of leather, components, and techniques you use. The Plan of Operations section will further elaborate whether you cut, dye and stitch the leather yourself, outsource the procedure, or hire employees to do it in-house.

4. Facts About Your Industry, Competition and Market

Using the prior example, discuss the leatherwork industry, particularly the historical replication niche in which you plan to place yourself. Address your competition and your customers, especially how you plan to beat the competition.

5. Management, Organization and Ownership

If this business is your baby and you’re handling all management aspects yourself, this section is brief. If you have a more elaborate setup, prepare a flowchart showing managers, the employees reporting to each manager and their job description. Ownership refers to choice of business entity and is one of the first decisions you need to make when starting a new business.

6. Marketing Plan

This is very important – how are you going to get your name out to your potential customers? If you’ve done your research, you should already have some basic ideas. Jot down bullet points and flesh out exactly how you plan to market your business.

7. Plan of Operations

This is your A to Z on how you plan to run your business. I find that it’s helpful to think about what you feel makes up a typical day in the life of an arts and crafts business owner. This section covers everything from researching and maintaining a potential customer contact list to deciding how you will manage your inventory.

8. Financial Projections

Until you have some sort of sales track record or signed contracts from customers, projecting gross receipts is guesswork at best. That’s why it’s crucial to take the prior sections of the business plan seriously. You use all the research and knowledge you gain by working through the business plan and calculate the unknowns in your financial statements with an educated guess.

9. Optional – The Appendix

My business plan also includes an appendix. This section contains all the legal and operational facts about my business such as my federal identification number, my bank account and credit card information, business license and sales tax certificate. It seems like I have to reference that type of information frequently so it’s handy to have it all in one place.

Setting Up Your Home-Based Arts and Crafts Office

If my clients are any indication of how arts and crafts businesses are managed, many arts and crafts businesses are home based. Even if you need to rent studio space to make your craft, you are probably managing the business aspect of your arts and crafts company out of your home.

If you are thinking about starting an arts or crafts business, operating it out of your home will save on overhead and reduce the amount of startup cash you’ll need. Here are some tips to running your craft business out of your home.

Converting a Spare Room

This is kind of the holy grail of home businesses – that much bally-hoo’d spare room! Many folks new to crafts start a craft business later in life preparing to segue into it full time when they retire. In that case, there just may be a child’s bedroom that is no longer in use that can be converted into a workroom.

I also once owned a house that had a weirdly-shaped two car garage that was very deep – giving an extra fifteen feet by the width of the garage at its front. The prior owners had installed ductwork to have it under heat/air making it a perfect workroom.

After I moved, I purchased a portable rolling floor air conditioner to convert the new garage space into a workroom. The unit was somewhat pricey but it’s paid for itself many times over for both the business and for home use when we’ve had repair issues. The one I purchased does triple duty as a dehumidifier and regular fan too. The only problem is that your garage must have a window to connect the exhaust tubing when using as an air conditioner .

Converting a Closet

Once again, most people just don’t have extra closet space. But if you do, taking the doors off a regular closet will allow you to fit a desk and other equipment inside (I know from experience!). A walk-in closet with a window is ideal.

I find working on my business paperwork without natural light somewhat depressing. I have a large Verilux light that I use at night.

Investigating Unused Space for the Home Office

Look around your home to see where you can setup operations in an unused corner. Here are some suggestions:

  • Basement – it’s been so long since I lived in a house with a basement I almost forgot about it. Still there is the lack of natural light problem. You could try using a Verilux or similar lighting solution.
  • Unused space on stair landing – install a drop-down shelf that leaps into action when you need it and folds flush to the wall when you don’t.
  • Laundry room – you could think about buying a full-sized stacking washer and dryer to free up enough space to install a workstation. Just about any washer/dryer that has a flat top can convert to stacking using the correct kit. Plus most kits have a pull-out shelf for folding the fresh laundry.
  • Stow and go desk – I was in the market for a stow and go work area last year. After hours of searching, I found this great one at Furniturexo.com. We had to put off moving for another year so I’m waiting to buy it until after the move. It seem ideal in many ways. Sturdy, lots of room for storage, somewhat attractive in appearance and folds to a minimal footprint.
  • Expand a windowsill – install a folding shelf to the sill itself or to the wall immediately beneath. This has the extra advantage of all that natural light. You can install sheers to block excess sunlight when the sun is directly at window height.
  • Weirdly walled space – if you have an area of your house that is between rooms anchored by two walls creating wasted space, considering putting your workspace in there and hanging a matchstick shade from the ceiling long enough to extend to the floor to hide the area when you are finished working.

For more ideas, check out your local bookstore magazine stand. Since living in small houses for the last ten years, I have noticed there is just a plethora of magazines devoted to organizing and living in small spaces.