11 Examples Of Template Videos That Crushed It (and Why They Worked So Well)

11 Examples Of Template Videos That Crushed It (and Why They Worked So Well)

When it comes to video creation, there are a lot of different ways to go about it. Some people prefer to start with a storyboard and then create the video based on that. Others prefer to start with a script and then figure out the rest. But whatever your preference, here are 15 templates that completely crushed it when it came to video creation!

There are so many different website to free template video download on the internet, it can be hard to decide which one to choose. But, if you want to get the best website to free template video download, then you should choose the one that is the most reliable and affordable. This website is very reliable and it has been tested and proven to be effective.

“How to Make a Simple Home Security Camera Video”

This one was a bit of a departure from the other templates on this list, but it was actually one of the most successful. This one starts by outlining the basics of home security cameras and then goes on to create a video that explains everything you need to know about them.

“How to Make a Custom Website Video”

This one is all about creating a video that is both visually appealing and informative. It starts by outlining the basics of website design and then goes on to walk you through creating a custom video for your website.

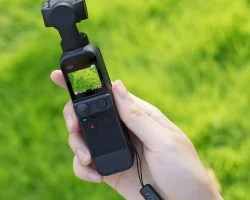
“How to Make a Custom Audio Video”

This one was designed for those who want to create custom videos for their website or social media. It starts by outlining the basics of audio production, such as filming and editing. Then, it goes on to create a video that is both informative and eye-catching.

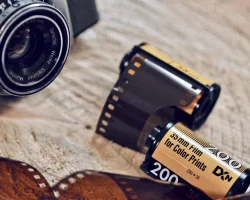
“How to Make a Custom Photography Video”

This one was created for those who want to create custom videos for their website or social media. It starts by outlining the basics of photography, such as shooting and editing. Then, it goes on to create a video that is both informative and eye-catching.

“How to Make a Custom Website Theme Video”

This one is designed for those who want to create custom videos for their website or social media. It starts by outlining the basics of website design and then goes on to walk you through creating a custom video for your website.

“How to Make a Custom Photography Session Video”

This one is designed for those who want to create custom videos for their website or social media. It starts by outlining the basics of photography, such as shooting and editing. Then, it goes on to create a video that is both informative and eye-catching.

“How to Make a Custom Holiday Video”

This one was designed for those who want to create custom videos for their website or social media. It starts by outlining the basics of holiday video creation, such as filming and editing. Then, it goes on to create a video that is both informative and eye-catching.

“How to Make a Custom Photography Session”

This one is designed for those who want to create custom videos for their website or social media. It starts by outlining the basics of photography, such as shooting and editing. Then, it goes on to create a video that is both informative and eye-catching.

“How to Make a Custom Holiday Video”

This one was designed for those who want to create custom videos for their website or social media. It starts by outlining the basics of holiday video creation, such as filming and editing. Then, it goes on to create a video that is both informative and eye-catching.

“How to Make a Custom Website Theme Video”

This one is designed for those who want to create custom videos for their website or social media. It starts by outlining the basics of website design and then goes on to walk you through creating a custom video for your website.

“How to Make a Custom Photography Session Video”

This one is designed for those who want to create custom videos for their website or social media. It starts by outlining the basics of photography, such as shooting and

The Ultimate Guide To Using Your Dji Pocket 2 Camera

The Ultimate Guide To Using Your Dji Pocket 2 Camera

Dji has released a new product called the Dji Pocket 2 Camera. This camera is a great addition to any drone enthusiasts tool kit. The Dji Pocket 2 Camera is a very compact camera that is able to shoot 4k video and 12mp photos. The Dji Pocket 2 Camera is also very lightweight and can be used with most drones that are on the market today. In this article we are going to show you how to get the most out of your Dji Pocket 2 Camera.

We are going to start of with the basics of the Dji Pocket 2 Camera. The Dji Pocket 2 Camera is a very compact camera that is able to shoot 4k video and 12mp photos. The Dji Pocket 2 Camera is also very lightweight and can be used with most drones that are on the market today. The Dji Pocket 2 Camera has a 1/1.7 CMOS image sensor and a f/2.0 aperture. The Dji Pocket 2 Camera is able to shoot 4k video at 60fps and 1080p video at 120fps. The Dji Pocket 2 Camera also has a 3-axis gimbal which helps to stabilize the video and photos.

The Dji Pocket 2 Camera is a great camera for anyone who is looking to get into drone photography or videography. The Dji Pocket 2 Camera is very easy to use and is very compact. The Dji Pocket 2 Camera is also very affordable and is a great camera for anyone who is just starting out in drone photography or videography.

Now that we have covered the basics of the Dji Pocket 2 Camera, let’s get into how to use the Dji Pocket 2 Camera. The first thing you need to do is to make sure that your drone is compatible with the Dji Pocket 2 Camera. The Dji Pocket 2 Camera is compatible with most drones that are on the market today. Once you have confirmed that your drone is compatible with the Dji Pocket 2 Camera, you will need to mount the Dji Pocket 2 Camera to your drone.

Most drone manufacturers will have specific instructions on how to mount the Dji Pocket 2 Camera to your particular drone. Once you have mounted the Dji Pocket 2 Camera to your drone, you will need to connect the Dji Pocket 2 Camera to your drone’s remote control. Once the Dji Pocket 2 Camera is connected to your drone’s remote control, you will then need to power on your drone and the Dji Pocket 2 Camera.

Once your drone and the Dji Pocket 2 Camera are powered on, you will then need to calibrate the Dji Pocket 2 Camera. The calibration process is very simple and only takes a few minutes. Once the Dji Pocket 2 Camera is calibrated, you will then need to select the video resolution and frame rate that you want to use. The Dji Pocket 2 Camera is able to shoot 4k video at 60fps and 1080p video at 120fps.

Once you have selected the video resolution and frame rate, you will then need to select the photo resolution that you want to use. The Dji Pocket 2 Camera is able to shoot 12mp photos. Once you have selected the photo resolution, you will then need to select the photo mode that you want to use. The Dji Pocket 2 Camera has three photo modes which are single shot, burst shot, and time-lapse.

Once you have selected the photo mode, you will then need to select the video mode that you want to use. The Dji Pocket 2 Camera has two video modes which are standard and high definition. Once you have selected the video mode, you will then need to select the video resolution and frame rate that you want to use. The Dji Pocket 2 Camera is able to shoot 4k video at 60fps and 1080p video at 120fps.

Once you have selected the video resolution and frame rate, you will then need to start recording. To start recording, you will need to press the record button on the Dji Pocket 2 Camera. Once you have started recording, you will then need to press the stop button to stop recording.

Once you have stopped recording, you will then need to transfer the video or photo to your computer. To transfer the video or photo to your computer, you will need to connect the Dji Pocket 2 Camera to your computer using the provided USB cable. Once the Dji Pocket 2 Camera is connected to your computer, you will then need to open the Dji Pocket 2 Camera’s software.

Once the Dji Pocket 2 Camera’s software is open, you will then need to select the video or photo that you want to transfer to your computer. Once you have selected the video or photo,

Tips And Tricks For Creating 3D Paper Art

Tips And Tricks For Creating 3D Paper Art

3D paper art is a type of art that is created by folding and cutting paper. This type of art is also known as origami. 3D paper art can be used to create a variety of objects, including animals, flowers, and other objects.

There are a few things that you need to know in order to create 3D paper art. First, you need to choose the right type of paper. You can use any type of paper, but you need to make sure that it is thin and strong. Second, you need to fold the paper in half. You can use a ruler to help you fold the paper correctly.

Once you have folded the paper, you need to cut it into the desired shape. You can use a variety of scissors to do this. Once you have cut the paper, you need to glue it together. You can use a variety of glues, but you need to make sure that the glue is strong enough to hold the paper together.

Once you have glued the paper together, you need to let it dry. Once it is dry, you can add details to the paper. You can use a variety of markers and pens to add details to the paper.

Once you have added all of the details to the paper, you need to cut it out. You can use a variety of scissors to do this. Once you have cut the paper out, you can glue it to a piece of cardboard.

You can also use a variety of other materials to create 3D paper art. You can use paper clips, ribbon, and other materials to create 3D paper art.

If you want to learn more about 3D paper art, you can check out a variety of books and websites. You can also attend a class or workshop.

3D paper art is a type of sculpture that is made by folding, cutting, and gluing paper. The finished product can be very intricate and detailed, and it can be used to create both two-dimensional and three-dimensional sculptures.

Here are some tips and tricks for creating 3D paper art:

-Start with a simple design. If you are new to 3D paper art, it is best to start with a simple design. Once you have mastered the basics, you can move on to more complex designs.

-Use a variety of paper types. You can use different types of paper to create different effects. For example, you can use construction paper for a more sturdy sculpture, or tissue paper for a softer look.

-Be creative with your folds. There are no set rules for how you must fold your paper. Get creative and see what kinds of interesting shapes you can create.

-Use a glue stick for a stronger bond. If you are using construction paper or another type of paper that is not self-adhesive, you will need to use a glue stick to hold your paper together.

-Let your imagination run wild. The possibilities are endless when it comes to 3D paper art. So let your imagination run wild and see what you can create!

The Best 35mm Cameras For Beginners

The Best 35mm Cameras For Beginners

35mm cameras are making a comeback in the world of photography. These cameras offer a lot of features that are perfect for beginners, including automatic exposure modes and easy-to-use controls. Here are our picks for the best 35mm cameras for beginners in 2019.

1. Canon EOS Rebel T6

The Canon EOS Rebel T6 is one of the most popular entry-level DSLR cameras on the market. It’s perfect for beginners because it offers a lot of features that are easy to use, including an auto mode that takes care of all the settings for you. The T6 also has a large selection of lenses available, so you can upgrade your kit as you learn more about photography.

2. Nikon D3500

The Nikon D3500 is another great entry-level DSLR camera. It has a similar feature set to the Canon T6, including an auto mode and a wide selection of lenses. The D3500 also has a few features that make it a great choice for beginners, including a guide mode that walks you through the basics of photography.

3. Sony a6000

The Sony a6000 is a great choice for beginners who want to move beyond entry-level DSLR cameras. It’s a mirrorless camera, which means it’s smaller and lighter than a DSLR. The a6000 also has a great autofocus system that’s perfect for beginners, and it comes with a built-in flash.

4. Olympus OM-D E-M10 Mark II

The Olympus OM-D E-M10 Mark II is another great mirrorless camera for beginners. It has a similar feature set to the Sony a6000, including a great autofocus system and a built-in flash. The E-M10 Mark II also has a few features that make it a great choice for beginners, including a guide mode that walks you through the basics of photography.

5. Fujifilm X-T100

The Fujifilm X-T100 is a great choice for beginners who want a mirrorless camera with a retro look. It has a vintage-inspired design, and it comes with a selection of Fujifilm’s X-series lenses. The X-T100 also has a few features that make it a great choice for beginners, including an auto mode and a scene mode that automatically adjusts the settings for different types of photos.

How To Create 3D Art From Scratch

How To Create 3D Art From Scratch

Creating 3D art can be a fun and rewarding experience, but it can also be a bit daunting if you’re starting from scratch. In this tutorial, we’ll take you through the basics of creating 3D art, from finding inspiration to choosing the right software to get the job done. By the end, you’ll be well on your way to creating your own amazing 3D art!

Finding inspiration for your 3D art

The first step in creating any kind of art is finding inspiration. When it comes to 3D art, there are a few different sources you can turn to for inspiration. One is other 3D artists, either online or in person. Another is 2D artists, since many of the same principles apply to both 2D and 3D art. You can also find inspiration in nature, architecture, or any other source that strikes your fancy.

Once you’ve found some inspiration, it’s time to start thinking about what you want to create. 3D art is a wide field, so it’s important to narrow down your focus a bit. Do you want to create a realistic or abstract piece? What kind of mood are you going for? What colors will you use? Answering these questions will help you start to form a vision for your piece.

Choosing the right software

Now that you have a vision for your 3D art, it’s time to choose the right software to bring it to life. There are a few different options available, but the two most popular choices are 3D Studio Max and Maya. Both programs are powerful and capable of creating amazing 3D art, so it really comes down to personal preference. If you’re just starting out, we recommend 3D Studio Max because it has a slightly more intuitive interface.

Once you’ve chosen your software, it’s time to start learning the basics. If you’re new to 3D modeling, we recommend checking out some tutorials online or in your software’s documentation. There are also a number of books available on the subject. Just make sure you choose a tutorial or book that’s geared towards your software of choice.

Bringing your 3D art to life

Once you’ve got the hang of your software, it’s time to start bringing your 3D art to life! Start by creating a basic sketch of your idea, then begin fleshing it out in 3D. As you work, keep your inspiration in mind and experiment with different techniques and styles. The beauty of 3D art is that there are no limits to what you can create, so let your imagination run wild!

Once you’re happy with your piece, it’s time to render it. This is the process of creating a final image or animation from your 3D model. Rendering can be a bit technical, but there are a number of tutorials available to help you get the hang of it.

And that’s it! Now you know the basics of creating 3D art from scratch. Just remember to have fun and experiment, and you’ll be creating amazing 3D art in no time.