How To Create 3D Nail Art

How To Create 3D Nail Art

Three-dimensional (3D) nail art is a type of nail decoration that adds depth and dimension to your nails. It can be achieved by using a variety of techniques, including layering, sculpting, and embossing. 3D nail art is a great way to add interest and drama to your nails, and it’s perfect for special occasions or simply when you want to stand out from the crowd.

If you’re new to 3D nail art, don’t worry – it’s not as difficult as it looks. With a little practice, you’ll be creating stunning 3D designs in no time. In this article, we’ll show you everything you need to know about 3D nail art, including how to choose the right products, how to create different 3D effects, and some top tips for perfect results.

What You Need

Before you start, you’ll need to gather together a few supplies. You’ll need a base coat and top coat of nail polish, as well as a color polish for your design. For the best results, choose a polish that is not too thick or too thin. You’ll also need some clear acrylic powder, a small brush, a dotting tool, and a toothpick.

If you’re planning on creating a lot of 3D designs, it’s worth investing in a few specialized tools, such as a 3D mold or a silicone mat. These can make it easier to create certain shapes and effects, but they’re not essential.

Creating a 3D Effect

There are lots of different ways to create a 3D effect on your nails. One of the simplest is to create a layered design using your chosen polishes. Start with a base color, then add a second color in a contrasting shade. Use a dotting tool or a toothpick to create dots or lines of the second color. Finally, use a dotting tool or your brush to slightly swirl the colors together.

If you want to add more dimension to your design, you can try sculpting with acrylic powder. Start by painting your nails with a base color and letting it dry completely. Next, use your dotting tool to apply a small amount of acrylic powder to your nails. Use a small brush to shape the powder into the desired design. You can create all sorts of shapes and effects, from flowers to geometric patterns.

Another way to add dimension to your nails is to emboss them. You’ll need a special embossing plate for this technique. Start by painting your nails with a base color and letting it dry completely. Place your embossing plate over your nail and use a dotting tool to apply polish to the plate. The polish will transfer onto your nail, and you can then use a brush to shape it into the desired design.

Top Tips

Here are a few top tips to help you get the best results from your 3D nail art:

-Start with clean, dry nails. Make sure your nails are free from any oils or residue, as this can interfere with the polish and cause it to chip.

-Take your time. Don’t try to rush your designs – the key to perfect 3D nail art is to take your time and be patient.

-Use a top coat. A top coat will help to protect your design and make it last longer.

-Be creative. There are no rules when it comes to 3D nail art, so let your imagination run wild!

With these simple tips, you’ll be creating beautiful 3D designs in no time.

How to Make Gorgeous Glitter Paper Butterflies

How to Make Gorgeous Glitter Paper Butterflies

Make Your Own Luxury Layered 3D Butterfly Embellishments from Paper and Glitter
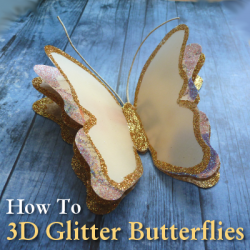

You can buy all kinds of pretty embellishments to adorn your handmade cards and craft projects but most of the time, I prefer to make my own. That’s because, embellishments like butterflies are fun to make and very inexpensive too once you already have a stock of paper and glitter powders to use. You can even opt to use newsprint, magazine pages or sheets torn from old books you no longer want in order to keep costs minimal.

Once you know how this technique works, each piece is easy to assemble. I do recommend making them up in bulk batches because it’s much quicker to make several at a time than just make a single piece each time you want a luxury 3D butterfly embellishment.

All Personal Images belong to the author of this article: Marie Williams Johnstone

First You Need Paper Butterfly Shapes

Use a Cutting Machine or Make Your Own DIY Templates
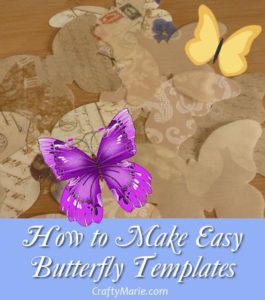
I prefer to make my own templates because this way I get the exact style and size of butterfly that I want for the project at hand which means I can fit the finished pieces to fit perfectly on handmade cards, as gift toppers, as DIY napkin rings for special occasions, hanging decor and more.

If you want to create your own beautiful butterflies, I show you a variety of ways which are the exact methods I use:

How to Make Butterfly Shaped Templates for Crafts

You can use paper punches but be aware that even large punches will tend to give you quite small pieces and this 3D, layered version that I’m showing you really is best on a bigger scale. The ones I make are often palm sized and bigger. Cutting machines are capable of making larger versions so this may be a better option if you do not wish to or cannot cut by hand.

The last option is to buy pre-cut paper butterfly shapes from a venue such as eBay or you may even find a seller on etsy that will provide you with what you need. Again, I’d prefer to make my own since I get full control over the paper and design being used.

Some of the Materials You’ll Need

These pretty paper embellishments do not need an abundance of materials in order to make them and you may already have most of what you need. The main component is paper and I like to pick out rather antiqued looking and vintage style papers in creams, pale browns and grungy colors. Extra fine glitter powder is an essential and you can buy large sets of these to use. The tubs they come in tend to look tiny but a little really goes a long way providing you use a tidy tray or paper to collect the stray powder to pop back in the jar – don’t throw it away! Zig glue pens are the ONLY wet glue pen I’d ever recommend because I’ve used these for years.

How to Make Layered 3D Paper Butterflies

In Vintage Style With a Gorgeous Glitter Edging on the Wings

These are the layered 3D butterflies that I’ve been making for a long time now – the shape may vary and the colors of the paper but the styling stays the same. This style screams luxury and they are ideal for topping special gifts and cards for occasions such as weddings, anniversaries, milestone birthdays and heartfelt thank yous. I like them in a antiqued vintage look but you can change this up with papers of your own choice to match the theme. Need to know how to make butterfly shapes? See How to Make Butterfly Templates

1.You need lots of butterfly shapes cut from the paper of your choice. I like to make my own templates for this and cut by hand but you can use a large paper punch to make smaller versions or a cutting machine. I like to use 4 cut pieces to make a single 3D butterfly but you can choose 3-6 pieces depending whether you want more or less layers. For the top layer of paper, I like to use Vellum which you can partially see through. It just gives a nice effect. With vintage style papers, I opt for a cream color vellum.
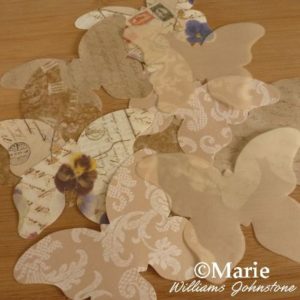
2.You can use another brand, but I absolutely recommend a Zig glue pen to draw around the edges of your wings so the glitter has something to stick to. I’ve been using these glue pens for many, many years so I know how good they are. Draw around the edges of one wing where you want with the glue and shake your choice of extra fine glitter over the top. Have a tidy tray or some paper underneath to catch the excess glitter. Turn the butterfly over and tap the back of the wing to remove excess powder.
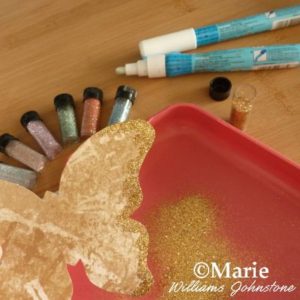
 

3.Add glittered edges to all the wings. Here’s a tip to save on using too much glitter. For the top layer which I like to choose vellum for, I will glitter all the way around the edges. For layers underneath, I just tend to add glitter right at the sides where it will be seen most. You can see the difference between images in step 2 and step 3.
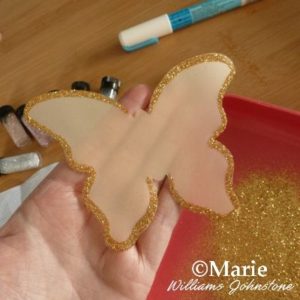
4.Leave all your pieces of paper to dry. This should not take very long with a Zig glue pen. I spread them out onto sheets of paper or a tray in case of stray glitter.
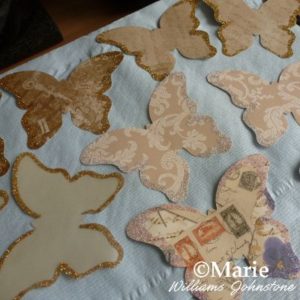
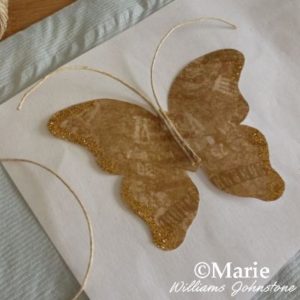
5.Choose a piece for your bottom layer as this needs the antennae stuck to it. For the antennae (or stalks as my daughter calls them) I use a hemp twine which works well with the vintage or antiqued styling. If you’re working with stronger colors, you can get colored cords instead. Cut off two same sized pieces, run some strong adhesive down the middle of the butterfly (I prefer a glue gun for this as it sticks pretty instantly) and stick in the ends of the cord or twine – be careful of hot glue if using a glue gun!
6.Now add on the rest of your layers for the piece. I use 4 altogether with vellum as the top layer. To add them, run a strip of glue or adhesive down the middle of the butterfly and stick the next piece down making sure it lines up with the previous layer.
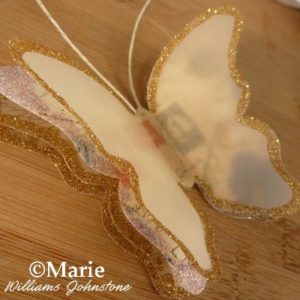
7.When all layers are in place, go back to your glue pen or Zig pen and add this over the middle area between the wings. Now sprinkle over your choice of glitter. If you have a dark brown or black, this can look quite dramatic. Once dry, carefully push up each layer of wings using your fingers underneath to push them up and out. You can see how beautiful the finished versions can look with a large image further down this page. I hope you’ve enjoyed reading my lens or article today, thanks for your visit. Don’t be afraid to change up the color scheme and use colors and patterns to match with the occasion. And have fun.
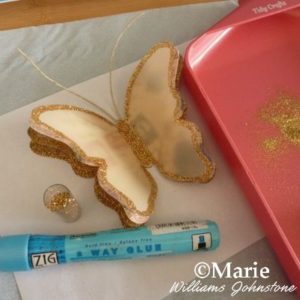
Tidy Tray Keeps Powder from Going Astray

Glitter powders are gorgeous on handmade crafts but you don’t want to get them anywhere else because they are a real pain to shift. When using these powders, I work over a tidy tray which catches all the excess powder as I work. When done, I use a brush to push the powder through the hole on one side of the tray and back into the glitter jar. If you pop a piece of paper under the jar and any powder misses the jar on its way back, you can pinch one end of the paper to a point and pour the rest in.

Extra Fine Glitters for Gorgeous Shimmer

But You’ll Really Need a Tidy Tray to Contain Them
Most of the time, I opt to use Stickles glitter glue because these little wet glue bottles are great at adding bits of sparkle to handmade projects. However, wet glitter glue when added in big and concentrated amounts, just like in this project all around the edges of the wings, can cause paper to wrinkle and buckle. Extra fine powder glitters are premium glitters and the absolute BEST I’ve ever come across for adding in a real shine and sparkle. They are worth using for special cards, gifts and projects like special celebration birthdays, weddings and where you need to make a real impact.

Some Finished Fluttering Embellishments

The Extra Fine Glitter Really Sparkles and Shines Beautifully
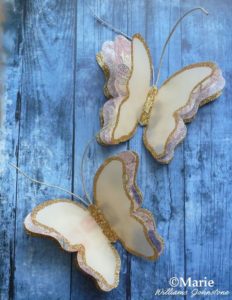
Layered vintage style paper and sheer vellum paper
butterflies with gorgeous glitter edges.

Butterfly Punches and Dies

Great Option if You Don’t Want to Hand Cut
If you’re not keen on paper cutting or you’d prefer a machine to do the work for you, there are options to use paper punches or die cutters for popular machines like the Sizzix. Bear in mind that, even with large punches, your cut shapes are still going to be quite small – the biggest I have found are around 2 inches. Cutting machines can go larger than hand punches. If size is a real issue then cutting your own may be the best option.
Brayer Techniques

Brayer Techniques

Brayer techniques in ink and acrylics for art journaling, mixed media, and collage work

My brayer is one of my favorite art tools – it’s incredibly versatile and can provide precision results and serendipitous beauty depending on what brayer technique I’m using. The brayer is an incredibly multi-purpose tool and I’d like to share with you all the brayer techniques I know – so far – and add to this page as I learn more about this amazing artistic tool.

What exactly is a brayer? A quick introduction to brayers…

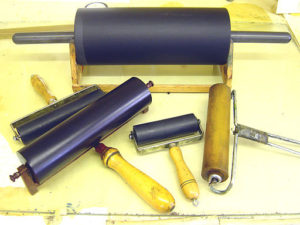
Basically, a brayer is a paint roller. Not the soft, fuzzy kind like for painting walls and ceilings, but similar. They are smaller, handheld tools that are frequently used for printmaking, but are growing in popularity as a scrapbooking, rubber stamping, and mixed media tool.

Mixed Media Brayer Technique with Kaleidacolor Inkpad

I made the colorful layered background on this art print in just seconds. It took me longer to photograph it than to create it! I used a simple brayer technique involving a specialty ink pad called Kaleidacolor. Each Kaleidacolor pad comes with five individual color that snap together to create a lovely rainbow striped stamp pad. The innovative design allows you to unsnap the colors when you’re not using it so that the inks don’t bleed together like they do with other multicolor ink pads.

TIP: Always store any ink pad upside down and wrapped with a rubber band to keep the lid tight. This increases the lifespan of you ink pad by allowing the ink to settle towards the top of the pad, and minimizing evaporation due to a loose lid.

An example of using the Kaleidacolor Brayer Technique

Here’s a video that some one made with a brayer technique very similar to how I created the rainbow poster. She is using a glossy cardstock and going for a smoother, more blended brayer technique but I purposefully left my colors a bit uneven and blocky and brayered on watercolor paper to get more texture and layers. (Also, she stamps a resist image before starting with her brayer technique.) Either way is very fun, and as you can probably tell there is a lot of room for playing around with this technique.

Acrylic Paint Brayer Techniques

Using a brayer with acrylic paints to create amazing layered texture
Acrylic Paints Acrylic paints are pretty much my number one pigment of choice, be it cheap craft paints or the higher-quality, artist-grade acrylic paints. I’m always on the lookout for new and exciting ways to use it. Using a brayer to apply acrylic paints to your artwork can have all kind of interesting effects – it’s a bit of an adventure because it can be very hard to predict exactly what will happen, but I’ve rarely been disappointed. (The only times were when I used too much paint – a little acrylic paint goes a LONG way with a brayer, it can be far too easy to use too much and end up with a muddy mess.)

Probably my first encounter with using a brayer with acrylic paint was during a the first annual retreat for my local ATC group. One of our members led about fifteen of us through the exercise “Mail Art To The Self” from the book Kaleidoscope: Ideas & Projects to Spark Your Creativity. The exercise was created by artist Juliana Coles and I can’t recommend it enough – I’ve done it several times since and it’s always invigorating. Part of the exercise involves applying paint to a large surface as fast as you can, and she suggests using a brayer for that. Our exercise leader let me borrow hers and I was thrilled with the results!

As you can see from the close-up on the left here, the white paint I brayered onto my project picked up and highlighted all the textures on the surface. To achieve that highlighting effect I used a very small amount of paint and not too much pressure when rolling the brayer. You can also see some interesting peaks and valleys in the paint, which I love the look of. That’s another great thing you get with brayering that you can’t really replicate with any other painting tool. The amount of peaks and valleys varies depending on how much paint you use, and thicker, high-quality paint will also give this effect more.

Note that this is an example of what brayering looking like with just one color – the browns and greens you see are the original cardboard surface and the paint I’d applied with brushes and my fingers before I got my hands on the brayer.

Click on the image, it will take you to the full image of this page so you can see all the details.

An art journaling video showing an acrylic paint brayer technique

For a while I ended up forgetting about my brayer – I learned so much in one weekend that it was hard to keep track of it all! But when a friend of mine posted this video to her blog it got me right back to it!

https://www.youtube.com/watch?v=A56wx1v0Fo8

Art Journal Page: Anecdotal Evidence

The art journal spread I created using my brayer and bright craft acrylics

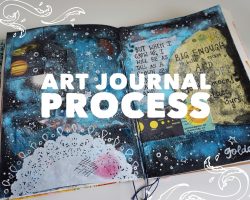
If you look closely, you may notice this is where the photo at the top of the page came from!

Here’s the journal spread I created after I watched the above video the first time. I grabbed a handful of my favorite bright colors of craft paint and dripped just a little bit of each color at a time, rolling the brayer back and forth at varying angles each time I added a new color. The brayering process smoothed the paint out so thinly that it dried very quickly and I could add more colors almost instantly without getting muddy results. It probably helped that it was a chilly day and my space heater made my studio nice and dry and warm!

Thanks for stopping by my brayer technique guide!
I hope you found the info you were looking for today, and that I’ve inspired you to go make fun and exciting new art and craft projects using your brayer. Please let me know what you think, and be sure to let me know if there are any brayer techniques I’ve missed! Thanks!