How To Choose The Right Body Camera For Your Needs

How To Choose The Right Body Camera For Your Needs

There is a lot to consider when purchasing a body camera. In this blog post, we will guide you through the process of finding the best body camera for your needs.

When it comes to body cameras, there are many factors to consider. The first step is to decide what type of body camera you need. There are three main types of body cameras:

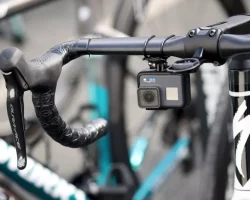
Action cameras: These are small, lightweight cameras that can be worn on your body or attached to your clothing. They are perfect for capturing action-packed footage, such as when you are playing sports or engaged in other outdoor activities.

Dash cams: Dash cams are cameras that are mounted on your vehicle’s dashboard. They are typically used to record footage while you are driving, and can be helpful in the event of an accident.

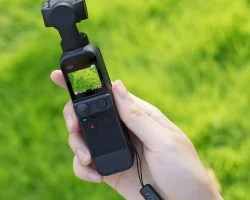
Wearable cameras: These are cameras that can be worn on your body, such as on your shirt collar or lapel. They are ideal for recording events or meetings.

Once you have decided on the type of body camera you need, the next step is to choose the right model. There are many different models of body cameras on the market, so it is important to do your research before making a purchase.

Here are a few things to keep in mind when choosing a body camera

Resolution: The resolution of a body camera is important if you want to capture high-quality footage. Higher-resolution cameras will produce better-quality images and videos.

Battery life: Depending on how you plan to use your body camera, battery life may be an important consideration. If you want to be able to record long videos, or if you plan to use your camera in low-light conditions, you will need a camera with a long battery life.

Storage: Most body cameras come with built-in storage, but you may want to consider purchasing a camera with expandable storage if you plan to record a lot of footage.

Price: Body cameras can range in price from a few hundred dollars to several thousand dollars. It is important to set a budget before you start shopping for a camera, so you can narrow down your options and find the best camera for your needs and budget.

Other features: Some body cameras come with additional features that can be helpful, such as GPS, night vision, and water-resistance.

Once you have considered all of these factors, you should be able to narrow down your options and find the best body camera for your needs.

Tips to help you makethe most of your camera

As body cameras become increasingly popular among police officers andother law enforcement professionals, it’s important to know how to getthe most out of this new technology. Here are 10 tips to help you makethe most of your camera:

Keep your camera charged and ready to go

Makesure your camera is always charged and ready to use. There’s nothingworse than having your camera die in the middle of an important call orsituation.

Keep your camera clean

Keep your camera clean and free of fingerprints and smudges. This will help ensure that your footage is clear and easy to see.

Make sure your camera is mounted securely

Make sure your camera is securely mounted to your uniform. This will help prevent accidental drops or falls.

Be aware of your surroundings

Beaware of your surroundings and pay attention to what’s going on aroundyou. This will help you capture important details in your footage.

Speak clearly and concisely

Whenyou’re speaking into your camera, be sure to speak clearly andconcisely. This will help ensure that your footage is easy tounderstand.

Avoid obstructions

Avoid obstructions, such as trees, bushes, or buildings, that could block your camera’s view.

Turn on your camera’s night vision

Ifyou’re working in low-light conditions, be sure to turn on yourcamera’s night vision. This will help you capture clear footage, even inthe dark.

Use the camera’s zoom feature

If you need toget a closer look at something, use your camera’s zoom feature. Thiswill help you capture clear and concise footage.

Review your footage

Be sure to review your footage regularly. This will help you catch any important details that you may have missed.

Follow your department’s guidelines

Be sure to follow your department’s guidelines for using body cameras. This will help you avoid any potential problems.

Best Action Cameras For Mountain Biking

Best Action Cameras For Mountain Biking

Mountain biking is a great way to get some exercise and fresh air, and it’s also a lot of fun. If you’re thinking about taking up mountain biking, or if you’re already an avid mountain biker, you may be wondering what kind of camera you should use to capture your rides.

There are a few things to consider when choosing a camera for mountain biking. First, you’ll want to make sure that the camera is durable and can withstand a few bumps and bruises. Second, you’ll want to choose a camera that is easy to operate while you’re riding. And finally, you’ll want to make sure that the camera you choose can capture high-quality video and photos.

The best action cameras for mountain biking

With those things in mind, here are a few of the best action cameras for mountain biking:

GoPro Hero7 Black

The GoPro Hero7 Black is one of the most popular action cameras on the market, and for good reason. It’s durable, easy to use, and it takes great video and photos. The Hero7 Black is also waterproof, so you don’t have to worry about it getting wet if you take a spill.

DJI Osmo Action

The DJI Osmo Action is another great option for a mountain biking camera. It’s durable, easy to use, and it takes great video and photos. The Osmo Action is also waterproof, so you don’t have to worry about it getting wet if you take a spill.

Sony FDR-X3000

The Sony FDR-X3000 is a great option for a mountain biking camera. It’s lightweight and easy to use, and it takes great video and photos. The FDR-X3000 is also splash-proof, so you don’t have to worry about it getting wet if you take a spill.

Yi 4K Action Camera

The Yi 4K Action Camera is a great option for a mountain biking camera. It’s lightweight and easy to use, and it takes great video and photos. The Yi 4K Action Camera is also splash-proof, so you don’t have to worry about it getting wet if you take a spill.

No matter which camera you choose, you’re sure to have a blast capturing your mountain biking adventures on film.

How to Choose the Best Action Camera for Mountain Biking

When it comes to mountain biking, having the right action camera can
make all the difference. After all, you want to be able to capture all
the amazing scenery as you speed down the trails. Not to mention, it’s
always nice to be able to re-live those moments of glory (or, let’s
be honest, embarrassing wipeouts). But with all the different action
cameras on the market, it can be tough to know which one is right for
you. Here are a few things to consider when choosing the best action
camera for mountain biking:

Whats Your Budget?

One of the
first things to consider when choosing an action camera is your budget.
There are a wide range of prices when it comes to action cameras, so
it’s important to find one that fits within your budget. Of course,
you’ll want to make sure that you don’t sacrifice quality for price,
but there are some great options out there that won’t break the bank.

What Features are Important to You?

When
it comes to action cameras, there are a lot of different features to
consider. Do you want a camera that’s waterproof? One with built-in
image stabilization? What about a camera that comes with a mount so you
can attach it to your bike? Think about which features are most
important to you and look for a camera that has them.

How Easy is it to Use?

You
don’t want to spend your time fiddling with your camera when you
could be out on the trails. So, it’s important to find an action
camera that’s easy to use. Look for a camera with a simple interface
and easy-to-use controls. That way, you can focus on your ride, not your
camera.

What Kind of Quality are you Looking for?

When it
comes to action cameras, there are a lot of different options when it
comes to quality. Some cameras can shoot in 4K, while others are limited
to 1080p. Think about the quality you’re looking for and find a
camera that can deliver it.

These are just a few things to keep in
mind when choosing the best action camera for mountain biking. By
considering your budget, the features you want, and how easy the camera
is to use, you can narrow down your choices and find the perfect camera
for your needs.

The Best Kids Art Tables For Small Spaces

The Best Kids Art Tables For Small Spaces

We’ve rounded up a few of our favorites that will help keep your little ones entertained without taking up too much space.

First, they’re small enough to fit into tight spaces, like a corner of a room. Second, they have a fold-down design that makes them easy to store when not in use. Third, they come with built-in storage for all of your child’s art supplies. Here are a few of our favorite kids art tables for small spaces:

Step2 Easel for Two

The first kids art table on our list is the Step2 Easel for Two. This table is perfect for small spaces because it’s compact and has a fold-down design. When not in use, the table can be stored upright against a wall. The Step2 Easel for Two also comes with built-in storage for all of your child’s art supplies.

Step2 Studio Art Desk

If you’re looking for a kids art table with a bit more storage, the Step2 Studio Art Desk is a great option. This desk comes with two large storage bins that are perfect for holding all of your child’s art supplies. The desk also has a chalkboard surface, which is perfect for drawing or writing. When not in use, the desk can be stored upright against a wall.

Little Tikes Tabletop Easel

The last kids art table on our list is the Little Tikes Tabletop Easel. This easel is perfect for small spaces because it’s compact and has a fold-down design. When not in use, the easel can be stored upright against a wall. The Little Tikes Tabletop Easel also comes with built-in storage for all of your child’s art supplies.

KidKraft 2-in-1 Activity Table

If you’re tight on space, you’ll need a kids art table that’s lightweight and easy to move. The KidKraft 2-in-1 Activity Table is a great option because it has a double-sided design that can be used for drawing or building. It also has a built-in paper roll holder, so your little ones can get started on their next masterpiece as soon as they’re finished with the first one.

Step2 Art Master Activity Desk

If you’re looking for a kids art table with plenty of storage, the Step2 Art Master Activity Desk is a great option. It has a large desk surface for drawing and painting, and the raised shelf is perfect for storing art supplies. The desk also comes with a stool, so your child can sit comfortably while they create.

Crayola 3-in-1 Double Easel

If you’re worried about art supplies making a mess, the Crayola 3-in-1 Double Easel is a great option. It has a chalkboard on one side and a dry-erase board on the other, so your child can use either chalk or markers. The easel also has a tray that holds markers, crayons, and other supplies, and it’s easy to wipe clean when your child is done.

No matter what your space is like, there’s a kids art table that’s perfect for it. These tables are all lightweight, have plenty of storage, and are easy to clean, so you can focus on enjoying the creativity of your little ones.

The Ultimate Guide To Using Your Dji Pocket 2 Camera

The Ultimate Guide To Using Your Dji Pocket 2 Camera

Dji has released a new product called the Dji Pocket 2 Camera. This camera is a great addition to any drone enthusiasts tool kit. The Dji Pocket 2 Camera is a very compact camera that is able to shoot 4k video and 12mp photos. The Dji Pocket 2 Camera is also very lightweight and can be used with most drones that are on the market today. In this article we are going to show you how to get the most out of your Dji Pocket 2 Camera.

We are going to start of with the basics of the Dji Pocket 2 Camera. The Dji Pocket 2 Camera is a very compact camera that is able to shoot 4k video and 12mp photos. The Dji Pocket 2 Camera is also very lightweight and can be used with most drones that are on the market today. The Dji Pocket 2 Camera has a 1/1.7 CMOS image sensor and a f/2.0 aperture. The Dji Pocket 2 Camera is able to shoot 4k video at 60fps and 1080p video at 120fps. The Dji Pocket 2 Camera also has a 3-axis gimbal which helps to stabilize the video and photos.

The Dji Pocket 2 Camera is a great camera for anyone who is looking to get into drone photography or videography. The Dji Pocket 2 Camera is very easy to use and is very compact. The Dji Pocket 2 Camera is also very affordable and is a great camera for anyone who is just starting out in drone photography or videography.

Now that we have covered the basics of the Dji Pocket 2 Camera, let’s get into how to use the Dji Pocket 2 Camera. The first thing you need to do is to make sure that your drone is compatible with the Dji Pocket 2 Camera. The Dji Pocket 2 Camera is compatible with most drones that are on the market today. Once you have confirmed that your drone is compatible with the Dji Pocket 2 Camera, you will need to mount the Dji Pocket 2 Camera to your drone.

Most drone manufacturers will have specific instructions on how to mount the Dji Pocket 2 Camera to your particular drone. Once you have mounted the Dji Pocket 2 Camera to your drone, you will need to connect the Dji Pocket 2 Camera to your drone’s remote control. Once the Dji Pocket 2 Camera is connected to your drone’s remote control, you will then need to power on your drone and the Dji Pocket 2 Camera.

Once your drone and the Dji Pocket 2 Camera are powered on, you will then need to calibrate the Dji Pocket 2 Camera. The calibration process is very simple and only takes a few minutes. Once the Dji Pocket 2 Camera is calibrated, you will then need to select the video resolution and frame rate that you want to use. The Dji Pocket 2 Camera is able to shoot 4k video at 60fps and 1080p video at 120fps.

Once you have selected the video resolution and frame rate, you will then need to select the photo resolution that you want to use. The Dji Pocket 2 Camera is able to shoot 12mp photos. Once you have selected the photo resolution, you will then need to select the photo mode that you want to use. The Dji Pocket 2 Camera has three photo modes which are single shot, burst shot, and time-lapse.

Once you have selected the photo mode, you will then need to select the video mode that you want to use. The Dji Pocket 2 Camera has two video modes which are standard and high definition. Once you have selected the video mode, you will then need to select the video resolution and frame rate that you want to use. The Dji Pocket 2 Camera is able to shoot 4k video at 60fps and 1080p video at 120fps.

Once you have selected the video resolution and frame rate, you will then need to start recording. To start recording, you will need to press the record button on the Dji Pocket 2 Camera. Once you have started recording, you will then need to press the stop button to stop recording.

Once you have stopped recording, you will then need to transfer the video or photo to your computer. To transfer the video or photo to your computer, you will need to connect the Dji Pocket 2 Camera to your computer using the provided USB cable. Once the Dji Pocket 2 Camera is connected to your computer, you will then need to open the Dji Pocket 2 Camera’s software.

Once the Dji Pocket 2 Camera’s software is open, you will then need to select the video or photo that you want to transfer to your computer. Once you have selected the video or photo,

Why The Honda Motocompo XL Bike Is The Perfect Choice For City Commuting

Why The Honda Motocompo XL Bike Is The Perfect Choice For City Commuting

There are a lot of things to love about the Honda Motocompo XL bike. For starters, it’s extremely lightweight and easy to maneuver, making it perfect for city commuting. It also folds up easily, so you can take it with you on public transportation or store it away in a small space.

But what really makes the Motocompo XL stand out is its unique design. The frame is made from aluminum, which makes it both strong and lightweight. And the unique suspension system ensures a smooth ride, even over rough city streets.

So if you’re looking for a bike that’s perfect for city commuting, the Honda Motocompo XL is a great option. It’s lightweight, easy to maneuver, and has a unique suspension system that makes for a smooth ride.

The Honda Motocompo XL bike is the perfect choice for city commuting for a number of reasons. First, it is extremely lightweight and compact, making it easy to maneuver in tight spaces and crowded streets. Second, it has a powerful electric motor that can help you zip through traffic with ease. Third, the Motocompo XL comes with a built-in GPS system, so you can always find your way around town. Finally, the bike’s comfortable seat and upright riding position make it a joy to ride, even during long commutes.

If you’re looking for a bike that can help you make the most of your city commute, the Honda Motocompo XL is the perfect choice.

If you’re looking for a bike that’s perfect for city commuting, the Honda Motocompo XL is a great option. It’s lightweight and easy to maneuver, so you can zip around town without any hassle. Plus, it’s equipped with all the features you need for a comfortable ride, including a suspension system that absorbs bumps and a comfortable seat.

The Motocompo XL is also a great choice if you’re looking for a bike that’s easy to store. When you’re not riding it, you can simply fold it up and stow it away, so it’s perfect for small apartments or homes.

Travel Tripod Guide | Ultralight Camera Tripods

Travel Tripod Guide | Ultralight Camera Tripods

Better Travel Photo Tip: Get a Small and Lightweight Tripod

Ever wonder why some travel photographers manage to take better travel photos than others? The easy answer is skill, and a lightweight travel tripod. Many experienced photographers would even suggest that a tripod is more important than what camera you have or your level of photographic skill.

Relying on steady hands, built-in stabilization, or cranking up (the grain-producing) iso simply won’t cut it when it comes to for example low light landscape photography. In many situations you want maximum depth of field and if you want the best image quality, you do not want to play with the ISO. The only solution is using a sturdy camera support. .

Until recently though, the problem with tripods was that they were bulky and heavy. Luckily, carbon-fiber and ultralight metals have come down in price and should be within reach of any enthusiast photographer.

of their images. Not being able to maximize depth of field is another big reason. Not taking time to compose and think the image through is another big reason for sloppy tourist snaps. All of these problems are helped by taking a tripod along as you travel.

You don’t have to use a full-size model, any camera support is better than nothing – just make sure that you get something that is built to hold your camera weight in a steady manner.

Tiny supports for compacts and smartphones

Some people think that the smaller the camera the easier it is to keep stable when taking a picture. The fact is that the lighter the camera – the more difficult it is to hold still and shake blur is very common with compacts and smartphones. The simple solution is a small camera tripod or support that fits in your bag – or even pocket!

The Best full Size Carbon Tripod for Travel

I use a Benro Travel Angel, the model that came out before this one and it has seen massive rugged use in the field. It still works like new. The compact Benro shown here is their latest carbon travel tripod which is similar to mine, but also has the feature of being a tripod and a monopod in one. The design is pure genius and you simply detach one of the legs and fasten the ball-head to it. This is also one of the few tripods that become flat when folded down for easier travel packing.

The Benro carbon Travel Flat II Tripod Kit is a extremely compact full-size model and folds down to a mere 16 inches. It takes 17 pound loads, offers almost any angle including ground level, and weighs just 3.4 pounds, which is very low weight for a full sized pro-quality tripod.

Flexible Joby Gorilla Tripods for Different Camera Types

The Gorilla tripods by Joby are extremely popular and the best travel tripod if you look at number of sales. Personally though, I prefer a full-size tripod but that is a matter of taste.

What makes the Gorilla pods so popular are the flexible legs that allow you to wrap around and seek support on almost any surface.

Having owned 2 of these ultra light weight tripods in different sizes, my tip is to not buy too small since the legs do sag a little bit with age. The weight difference is minimal so go for one size bigger than recommended.

See complete line of Joby Gorilla Tripods

Joby has recently also launched a new series of very compact camera micro tripods. Available in three different sizes, the biggest one show here supports cameras up to just under 2 pounds and is perfect for small hybrid superzooms and mirrorless system cameras such as Sony NEX, Olympus PEN and Pansonic G series.

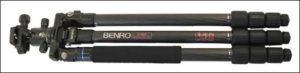
This latest micro tripod from Joby is designed to stay on the camera at all times, when you fold it down it fits under the camera base.
Weighing just 2.3 ounces, this may be the ultimate emergency tripod for all forms of adventure travel where weight and small size is important.