How To Take Portraits (For Beginners)
GREAT NEWS!!
You do not need a professional digital SLR camera to take awesome portraits.
You can get super portraits with an inexpensive (cheap even) DSLR camera. In fact, if you own a Canon Rebel T3i, you have in your hands an excellent tool for portrait photography.
The technology that Canon has built into its newest Rebel cameras is improved by leaps and bounds over what was available even a couple of years ago. Combine this inexpensive digital SLR with a even a so-so Canon Portrait Lens, and you have a combination that will get you some great portrait shots as well as lots of happy feedback from those you photograph.
Getting Ready To Take A Portrait
Begin with the basics.
Portrait Mode The first thing you MUST do is take your Canon Rebel T3i off the Auto setting (a gasp is heard from the crowd)..
Really! You might get lucky and get a decent portrait in auto mode, but if you want the best results, you will have to take drastic steps.
There are two choices here. First, you can use the Portrait Mode supplied by the camera, or you can use Aperture Priority (Av).
Since the simplest way to get started is to use the Portrait mode setting, let’s start with that.
Set your camera on Portrait Mode. See the picture on the right. When you do this, your Rebel will automatically use the largest aperture available for the lens you have attached to the camera.
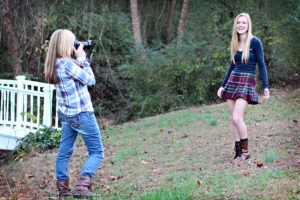 Photo by RebelT3iOwner
Say What?? (I am psychic; I know what you are thinking.)
Don’t worry. You don’t even have to know what an aperture is if you use the portrait mode.
The next thing to do is compose and take the shot. When you review your shot, you should see that the background is blurry. That is the sign of a good portrait.
So what if your background is not blurry? Well, here is how to make the background blurry.
First, use a lens with a longer focal length and step away from your subject (you can also accomplish this by using the zoom on your lens at its highest setting – on the kit lens, zoom to 55mm).
The second way to help out your background is to move the subject of your photo farther away from the background. In other words, put more space between the person you are photographing and the background. Do not have them standing with their back against a wall, for instance.
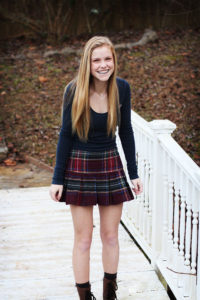
Using a tripod
If there is plenty of light, you can usually have good success with hand-holding your T3i, as long as you use good camera technique. However, using a tripod is never a bad idea for a regular portrait.
Tip For Getting Great Shots
Take shots when your subject is not expecting it. Most of us announce the timing with “Say cheese.” But if you want natural expressions, try taking spontaneous shots. Or, take several shots in succession after you do the “say cheese” thing. One feature that is enabled when you use Portrait Mode is Continuous Shooting. So, if you just hold down the shutter button, you will be taking up to 3.7 shots every second. Try it. You will get some surprisingly good shots that way.
Portraits Using Aperture Priority
Feeling adventurous? Try this.
Using Aperture Priority for Portraits When you take a portrait shot with you Canon Rebel T3i in Portrait Mode, the camera does all the thinking for you, including aperture, shutter speed, ISO.. all of it. That’s why the settings on “that side” of the dial are called Basic settings. The camera does all the thinking; all the photographer has to do is select the basic setting.
The settings on the “other side” of the dial are called Creative settings. This simply means that the photographer can take more control of what the camera does on a particular shot.
Taking portraits works very well when you choose the Av, or Aperture Priority, setting. Once in that position, simply select the “f-stop” you want to use (f-stop basically means Aperture setting). The one thing you have to remember here is that larger numbers mean smaller apertures and smaller numbers mean larger apertures.
Basically, you want to set your f-stop at the smallest number you can for the lens you are using. If you are using the kit lens (18-55mm), and you zoom to the 55mm length, you will choose f/5.6. Your Rebel will not let you choose a number any smaller than that. If you are shooting with your zoom lens at the 18mm length, you can choose f/3.5. This is because the lens has a variable aperture (the smallest aperture changes as the lens zooms to higher focal lengths).
OK, enough of the geeky stuff. Why would someone want to use Aperture Priority rather than Portrait Mode?
The simple answer is that there are those of us who believe that having as much control of the camera as possible gives us better final results (pictures). In aperture priority, you can set your own ISO in order to increase the shutter speed. You can also change the exposure compensation to add more or less contrast to the image.
Finally, and this is a real control thing, you can shoot in RAW rather than JPEG. If you choose to do this, you will definitely have to do some post-processing of every image in some photo editing program like Photoshop.
The intent of this article is not to be an entire photography course, so, let’s suffice it to say that if you want to venture into the realm of learning more about photography, use Aperture Priority. At least use it when the stakes are not too high. You can possibly mess up a photo op and not get the picture, so maybe save your experimenting for times when you can patiently learn how Aperture Priority works.
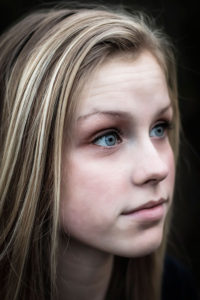
The photo above was taken using Aperture Priority. The light coming from the window gave some interesting effects. Using Portrait Mode gave would not allow me to take this without a flash, another reason to try Aperture Priority.
Photos by WRasku
Portrait Lenses For Canon
These lenses will go a long way toward making your pictures look GREAT!
Recommended focal length for portraits is about 75mm (plus or minus), but on a Rebel a 50mm lens is roughly equivalent to that because of something called the “crop factor.” So, any one of these lenses will qualify as an excellent choice for your future portraits.
Portraits With Props
Add Interest to portraits by adding unexpected items.
Canon Rebel T3i Portrait Sometimes you can get a great shot that grabs lots of attention by simply adding a hat or scarf. Simple things add so much interest if used in a way that develops a story along with the excellent quality of the Canon Rebel and the portrait lens you choose.
Recently, we were browsing in a downtown gift shop that had lots of hats, scarves, jewelry, and other great photo props. We ended up with some pictures that we normally would not have even thought to shoot.
..don’t stop after you get one shot. It sometimes takes a little time for the subject to start to relax..
Let your subject use her imagination when it comes to props like this. She will know what looks good on her (and, more importantly, she will know what she does not want to be seen in). The subject will also feel more at ease if he or she has some input into the setup of the shot. This can work very well with children as well as adults.
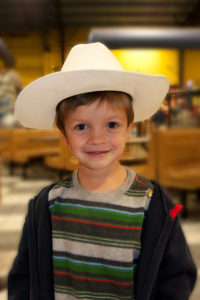
And don’t stop after you get one shot. It sometimes takes a
little time for the subject to start to relax and get into the mood. Also, don’t hesitate to show her (or him) the photos you are shooting. When she sees how good the pictures are turning out, she will be much more enthusiastic about the idea.
Another excellent way to generate excitement in this type of situation is to bring together two or three people who are friends. They will feed on each others excitement and enthusiasm.
You can even get good portraits in public places. In fact, this type of photo can add much more interest than using a standard photography background. Photographers use this quite often in senior portraits when the take their subject to stand by a tree or a covered bridge, but you can do the same thing at a restaurant or public square.
Photos by WRasku
Pet Portraits
Love taking pictures of your best friends?
Pet Portrait With Canon Rebel T3i Pets could be one of the most popular portrait subjects. After all, don’t we all love our dogs, cats, turtles, parakeets, etc, etc?
Yes we do!
The problem is, sometimes our beloved friends do not know how to cooperate.
In situations where getting the pet to look in the right direction, or just stay in one place long enough for you to get the shot, you will need a couple of things.
First, you need patience. Chances are you will have to take quite a few pictures before you get The One.
Someone to help you would also be helpful. You can enlist the help of another person who in intimate with the pet. (This is especially true if you are doing this for a friend, and the pet is not your own.)
This is where a good, fast lens comes in handy. Point and shoot cameras may get some good pet photos, but your Canon Rebel will shoot rings around a point and shoot in this situation, simply because you can choose the right lens for the shot.
Some other things that can help here are treats and toys. Most animals (even cats) respond to goodies. They also show interest in their favorite toys.. see the picture of Colby here.. he was looking intently at a treat.
Photo by WRasku
A Nifty Trick For Pet Photos
Pet wide angle portrait
Take a pet photo with a wide-angle lens.
This is Colby again. He is not the best model – hates to have his picture taken when he knows it’s going on the Internet. He’s so vain.
I did this with the kit lens at the widest focal length – 18mm. I got up really close – as you can see, his nose is out of focus, but the eyes are sharp. Sharp eyes are what separates an OK picture from one that has the possibility of being a WOW picture.
What happens in a picture like this is something called distortion. The lens distorts the actual image so that it looks a bit wonky. It will not make your wife (or husband) look like a super-model, but it’s fun for animals.
This one is not in the WOW category, but I was dealing with a moving target. You can take this technique and use it with your own pet. Farm animals like pigs and cows work perfectly with this method. Your fans, friends, and family will love it.
Using Your Canon Rebel T3i for Self-Portraits
Getting a bit lazy here. Rather than write about self portraits, I made a video.
With the Canon Rebel T3i’s articulating LCD, you can see yourself before you take the photo. All you need is a cheap remote shutter button.
Portraits That Tell A Story
The Canon Rebel T3i can capture the action.
Action Portraits With A Canon Rebel T3i Great portraits are not always a result of someone sitting on a stool in front of a photography backdrop with the camera man saying, “Cheese.” You can use a good digital SLR like the Canon Rebel T3i to capture some nice candid portraits like this one of the guitar player.
The truth is that your subjects will love the pictures when you are able to capture the personality of the moment. As the viewer looks at the photo, there is a story that emanates from the picture, or maybe it will be a question. But in either case, the picture gets the viewer involved, and that is one of the signs of a good photo.
Photo by WRasku
Use A Fast Canon Portrait Lens
Wide apertures help to blur the background.
Use A Fast Canon Portrait Lens Notice how the background is blurred in the photo above. The way that was accomplished was to use a Tamron 28-75mm f/2.8 lens set on Aperture Priority with the aperture set to f/2.8. This not only guarantees a blurry background, but it also gives you the fastest shutter speed possible in an indoor situation.
Nothing is worse than taking a killer picture of a great subject and having it totally messed up by some distracting background item that you didn’t even know was there.
Sometimes you can’t avoid background clutter, but you can blur it out using a wide aperture lens. One desirable feature of a Canon Portrait lens is a wide aperture.
Of course, it may also depend on the focal length of the lens to know whether an f/4.0 lens is wide enough to get that blurred background. If you can secure a lens with f/2.8 as its widest aperture, you will pretty much guarantee a nice blurred background.
Photo by WRasku
Edit Your Canon Rebel Portraits
Post processing adds punch to a photo.
Canon Rebel T3i Portrait Cropped Almost all digital photos can be “helped” with a little post-processing. You don’t need the most expensive photo-editing software to do this either. You can even use free online photo editing sites like GIMP or PICNIC to get your portraits looking good.
Sometimes all it takes is changing to black and white or a bit of cropping to make your portrait a real show-stopper.
Photo by WRasku
Keep Your Canon Rebel T3i In Plain Sight
Don’t be shy!
Don’t be shy with your Rebel T3i When you are at special events, you are in prime territory for portrait shots.
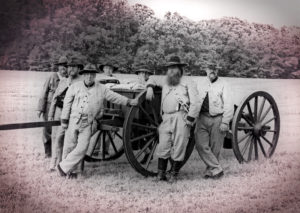
This shot was taken at a Civil War Re-enactment. These guys love interacting with their audience and having their photo taken. They will also give you all the details of their costume. It is very enlightening and rewarding.
The thing that will hinder you is your shyness. Even if they say “no,” which they won’t do, the worst thing that can happen is you don’t get to take their picture.
On the other hand, it is always a good gesture to ask if you can make their picture. Asking permission will not only get you the great photo, but you can also use it online when you have their consent. As a gesture of gratitude, you might even offer to send them a copy.
Group Portraits are awesome when there is a theme. At the Civil War demonstration, these gentlemen were very cooperative for the photographers. Then I took the picture into my editing software to add a vintage look to the photo. So much fun!
Photos by WRasku
Take Family Portraits
Family photos with Canon Rebel Every year, I use my Rebel for family photos that end up on or in Christmas cards.
This is one of the ones that was chosen.
Here is the data for this picture:
Camera lens: Tamrom 28-75 f/2.8
Mode setting: Av (Aperture Priority)
Aperture: f/2.8
Shutter speed: 1/320sec
ISO: 400
Focal length: 42mm
Flash: off
In-camera Effects
Edit Your Photos Without Expensive Software
There are several Canon T3i in-camera editing effects that you can use right in the camera. Once you select an effect, the software will generate a separate file so you don’t lose the original. Essentially, you can create many photos from a single shot.. without a computer!
The effects are:
Grainy Black and White
Soft focus
Fish-eye effect
Toy camera effect
Miniature effect
Example of Grainy Black and White
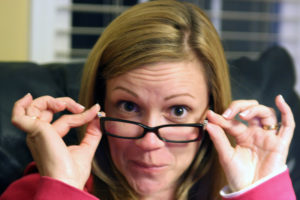

Example of Fish-eye Effect


 Photo by RebelT3iOwner


