The Best Furniture Cleaning Products On The Market

The Best Furniture Cleaning Products On The Market

When it comes to cleaning your furniture, you want to make sure you’re using the best possible products to get the job done right. There are a lot of different furniture cleaning products out there, and it can be tough to know which ones are the best.

To help you make the right decision, we’ve put together a list of the best furniture cleaning products on the market. These products have been carefully selected based on their ability to clean effectively, their ease of use, and their overall value.

Furniture Cleaner by Simple Green

This furniture cleaner by Simple Green is one of the best on the market. It’s highly effective at cleaning all types of furniture, and it’s very easy to use. Simply spray it on your furniture and wipe it clean with a cloth.

Furniture Polish by Pledge

This furniture polish by Pledge is another great option for cleaning your furniture. It’s very effective at removing dust and dirt, and it leaves your furniture looking shiny and new.

Furniture Stain Remover by Resolve

This furniture stain remover by Resolve is a great choice for removing stains from your furniture. It’s very effective at removing even the toughest stains, and it’s very easy to use. Simply spray it on the stain and wipe it away.

Furniture Cleaner by Mr. Clean

This furniture cleaner by Mr. Clean is another great option for cleaning your furniture. It’s very effective at removing dirt and dust, and it’s very easy to use. Simply spray it on your furniture and wipe it clean with a cloth.

Furniture Polish by Lemon Pledge

This furniture polish by Lemon Pledge is a great choice for giving your furniture a shine. It’s very effective at removing dust and dirt, and it leaves your furniture looking shiny and new.

The Best Way To Scrub Furniture

The Best Way To Scrub Furniture

Stubborn stains are the bane of every home owner’s existence. You try your best to keep your furniture clean, but somehow those pesky stains just won’t budge. If you’ve tried everything and the stain is still there, don’t despair – there are still things you can do.

First, identify the type of stain you’re dealing with. Is it oil-based or water-based? Water-based stains are usually easier to remove, but oil-based stains can be more difficult. Once you know what you’re dealing with, you can choose the best method for removal.

If the stain is water-based, you can try using a mild detergent or soap. Simply wet a cloth with the detergent or soap and blot the stain. Be sure to blot – don’t rub, as this can spread the stain. If the stain is light, you may be able to remove it completely with this method.

If the stain is oil-based, you’ll need to use a different method. One option is to use a dry-cleaning solvent. Be sure to test the solvent on an inconspicuous area of the furniture first to make sure it doesn’t damage the finish. Once you’ve tested it, apply the solvent to a cloth and blot the stain.

Another option for oil-based stains is to mix a solution of one part vinegar and two parts water. Apply this to the stain with a cloth and blot. You may need to repeat this process several times to remove the stain completely.

If the stain is still there after you’ve tried these methods, you may need to call in a professional. They will have the knowledge and equipment to remove even the most stubborn stains.

Stubborn stains don’t have to be the end of the world. With a little patience and the right method, you can get rid of them and enjoy your furniture again.

Stubborn stains are the bane of every furniture owner’s existence. Whether it’s a coffee spill, a wine stain, or a pet accident, these stains can be tough to remove. But don’t despair – there are ways to get rid of even the most stubborn stains.

For coffee stains, start by blotting up as much of the spill as possible with a clean, dry cloth. Then, make a paste of equal parts baking soda and water, and apply it to the stain. Let it sit for 15 minutes, then blot it up with another clean, dry cloth.

For wine stains, start by blotting up as much of the spill as possible with a clean, dry cloth. Then, pour a small amount of white vinegar on the stain, and blot it up with another clean, dry cloth.

For pet accidents, start by blotting up as much of the spill as possible with a clean, dry cloth. Then, mix together equal parts white vinegar and water, and apply it to the stain. Let it sit for 15 minutes, then blot it up with another clean, dry cloth.

With these tips, you’ll be able to get even the most stubborn stains out of your furniture.

Tips for Refinishing Hardwood Floors

I’m restoring a house from 1905, and as we worked on demolishing and removing what my husband calls “100 years of well-intentioned renovation,” I was excited to find some lovely hardwood floors underneath a few layers of old linoleum and glue. Luckily, the wood was largely in great shape — it just needed some sanding, and, in one room, some major scraping and sanding.

The kitchen had layers of old linoleum and glue on top of the original hardwood floors. I knew I needed some serious tools to expose those floors. I love that Home Depot has a Tool Rental department, and they had just the tools for the job. I found that there are different kinds of floor sanders — and choosing the right one is important. I’ll show you what sander I chose, why, and share some tips and tricks you’ll need to know — after the break!

As you can see in the preceding picture, the kitchen floor in the house was the worst. Once I scraped up the old linoleum layers, there was still some old backing paper and glue on top of the hardwood, and I knew that it was going to take more than a little effort to get it done. Before I even got started in the rental department, I stopped and picked up some of these:

I grabbed this kit because it had three essentials: a sanding mask, eye protection and ear protection. I’ve later found a style of mask I like even better — with a valved respirator (meaning it’s easier to breathe) — and that isn’t as hot (you can find it here).

You don’t want to breathe the sanding dust if you can help it. It’s just a bad idea to breathe a lot of sawdust to begin with, but it’s also possible that you might be allergic to something in the wood. Most frightening: some of the paints and adhesives used years ago may also contain asbestos, so it’s — again — better to be safe than sorry. Since I couldn’t identify exactly what it was on my wood floor — probably some old adhesive, possibly mastic, I felt it was best to be safe.

Once I had the safety supplies, I was off to the rental department.

The helpful gentlemen in my local Home Depot Tool Rental department asked me about the floors I was going to sand, and disabused me of the notion that I wanted to use a drum sander. I had thought I wanted to use one, but they pointed out my first important tip: unless I really knew how to use one, they are hard to control and likely to damage the floor. They suggested I was better off using a oscillating sander — so that’s exactly what I did.

Tip: Consider a oscillating sander to minimize damage to the floor, accidentally making lower and higher places in the floor, and to provide an overall more even finish.

They also had me pick up a variety of grits in the sanding pads. As you might imagine, it’s best to start with a coarser grit and work your way to a finer grit with each pass of the sander. I started with a very coarse grit — and went through a lot of pads — to remove the gunk from the floor; then moved to a finer grit for a semi-final pass.

Tip: Be sure to start with a coarser grit and move to a finer grit with each pass. This will give you a more even and smooth finish on the floor.

I picked up the full system, complete with a vacuum system I wore on a back harness. I had to empty the canister frequently to minimize the danger of fire. (The second time I rented the sander, the Home Depot folks recommended I just use my giant ShopVac, which I did.

As you can see from that day’s Instagram photo, I was ready to go and looked like a GhostBuster.

Rather than detail the “fun” I had getting all of the gunk off of this floor, I’ll simply say that it took most of a day to get that one room done with the thick coat of adhesive on top. The other two rooms I did went much faster and used up much fewer sanding pads because they didn’t have as many layers of gunk.

You can see that the random sander enabled me to go back over stubborn sections more than once without worrying about accidentally gouging or creating valleys in the floor.

Tip: You can use a mouse sander or other smaller hand sander to get particularly stubborn patches. Just don’t forget your mask!

Now, I’m not done yet. While we’ve done the major “gunk removal” process and gotten the floors nearly ready, we are still going to go over each of them with a handheld belt sander, with the grain and with a fine grit paper to help bring out the grain and make sure we’ve edged the room correctly.

Tip: Use a handheld belt sander with the grain, with a fine-grit sandpaper, as your final pass to help bring out the grain.

As a final pass, we’ll fill in any big gaps or gouges with stainable wood filler.

Finally, we’ll be putting down a nice dark stain — and we’ll probably have to custom-mix the stains for each room since the woods appear to be different in each.

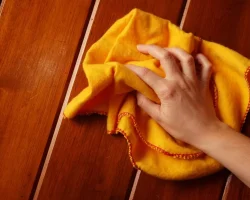
We expect to use a nice stain and polyurethane, like the fine Minwax products sold at Home Depot. I’m going to put on multiple coats of the oil-based polyurethane to help give each floor a thick, protective, glossy finish.

And don’t forget — it might be worth considering just installing a new hardwood floor instead if your floor is overly damaged or irreparable.

How To Create A Secret Fairy Garden And Attract Real Fairies This Summer

How To Create A Secret Fairy Garden And Attract Real Fairies This Summer

Fairies Do Exist

I couldn’t believe my eyes. For weeks, At first I thought it was a nest of fire flies. I never knew where they lived and I like taking pictures of bugs so I got out my camera and waited. For what seemed an eternity I hid behind the tree and was as quiet as I could be. Eventually the tree lit up and I snapped a picture quickly.

I nearly fell over when I saw what was on the screen. It was a real life Fairy and she was living in my tree. How lucky could I be.

If You Want To Attract A Secret Fairy You Must Give her A Place To Live – Fairy Cottages

Fairies love a nice place to live and if you want to attract a Fairy to come live in your garden you must provide a safe place to live. They love cute cottages and beautiful flowers. They are very shy so make sure it is in a spot that is quiet and private.

The Fairy Spoke For The First Time

The day after I gave her the blanket I peeked into the hole and she walked right up to the door. She smiled at me and I smiled at her. That’s when she spoke for the first time. She said “Thank you” and backed up into the tree. She didn’t know I had bought her a new house to live in.

I told her to come out and see what else I had for her. She was very shy, but came back to the opening.

I place a very cute cottage by the tree and told her it was for her. She lit up very brightly. She flew down to the house and walked inside. I could tell she was very excited. The next thing I knew she was flying back and forth between the hole in the tree and the new house. She didn’t own very much so it didn’t take long for her to move in. She told me her name was Madeline.

Next I Bought Her Furniture

Madeline loved all the new things I bought for her. She told me that Fairies live all over and she wasn’t the only one. She said that they are very shy and usually live in tree holes. She was the only Fairy she knew that had her own house. The other Fairies were very jealous so I bought a few more houses and hoped to attract more.

Fairy Furniture

Once you buy your Fairy a house you must get her lots of furniture. The cuter the furniture the faster a Fairy will choose your garden to live in

My Indoor Fairy Garden


Fairy Babies Love Driftwood


Fairies love drift wood so it’s no surprise that they would leave their babies sleeping peacefully on top of it or next to it. They love things that sparkle so if you really want to attract Mama Fairies with their little ones then you will love this.

I like to make the drift wood I put in my yard comfortable and keep it from drying out in the sun. I also don’t like bugs eating it so I get new piece I will sand it down, remove much of the loose bark, stain the wood with a soft cloth and some wood stain and then spray seal it. This will keep the wood from absorbing water from rain.

Once I am finished I add a drop of Rub N Buff to bring out the color. I love dark wood with a brass finish as in this photo.

New Cottages

These charming cottages are perfect for indoor or outdoor Fairy gardens. They are realistic and work well with any of the Primrose Fairy figures.

Fairy Number 3, Glenda

A month later Glenda moved in. She grew up with Tina and were friends since they were babies. Of course she had a house right next to Tina. Glenda is very out going. She loves to tease my dog and when he gets barking at her she giggles and throws cheese at him. I think my dog secretly likes the teasing because he gets very excited when he sees her.

Fairies Love To Garden

If you attract Fairies into your yard you can expect it to have a beautiful garden because it what Fairies do best. The love to make the garden grow. With Valentine’s Day on the way why not attract a bunch of Fairies for that someone special in your life.

This Little Fairy Looks Sad

This Fairy Is Only 1 Inch And Has All The Details Of Her Bigger Sisters

Do you believe in Fairies. Are they living in your garden. Let me know what you have done to attract them.