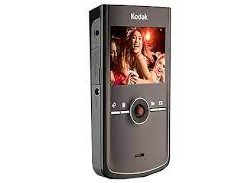
Kodak Zi8 Camcorder Review

Kodak Zi8 Camcorder Review

Kodak’s Zi8 is a high definition pocket camcorder that records 1920 x 1080p video at 30 frames per second (fps) in the H.264 format. The Zi8 competes with products such as Pure Digital’s Flip UltraHD and Sony’s Webbie HD. Kodak’s pocket camcorder has a few tricks that the others don’t – such as digital image stabilization, face detection, and an external microphone input.

Kodak Zi8 At a Glance

The Good:[ Excellent video quality, easy to use, strong feature set, large LCD screen.

The Bad: Slightly clumsy user interface, little internal memory.

Video & Photo Quality

Using a 1/2.5-inch, 5-megapixel CMOS sensor, the Zi8 records 1080p HD video.This is one of the first 1080p pocket camcorders on the market and the video quality is definitely impressive for a model in this class.

If you want to extend recording times, you can opt for one of three lower resolution settings: 720p/60fps mode (the faster frame rate is good for shooting motion), a 720p/30fps mode or a WVGA mode.

A nice addition to the Zi8 is face detection, which, when activated, can improve exposure around a face it detects in a frame. This function can be disabled as it will draw down the battery faster when it’s used.

The Zi8 also snaps 5-megapixel still photos when set to photo mode (it can’t snap them while you’re filming).

You shouldn’t expect much from these stills – with no flash and a fairly slow performance, it’s not going to wow you.

Design

Like other models in the pocket camcorder category, Kodak kept the functionality and buttons to a minumum. Four dedicated buttons on the back of the unit let you access menu settings, delete videos and still photos, return to filming and play back stored videos.

The menu, and quality settings, are navigated using a joystick at the center of the unit. All-in-all, a very intuitive design that just about anyone can figure out in short order, even if the buttons could stand to be a bit larger.

The Zi8 weighs in just shy of a svelte five ounces with battery. At 2.4 × 4.5 × 0.9 inches, it’s the size of a nice, lean point-and-shoot digital camera. You’ll have your choice of red, black and blue.

Removable Battery

Another nice design touch is a removable lithium ion batter (accessed by removing the unit’s faceplate). For longer trips where you can run low on battery, you have the option of swapping in a new one rather than finding a spot to recharge. You can charge the battery when the Zi8 is connected to a PC via its flip-out USB connector or by using the supplied AC adapter.

Menus

The menu in the Zi8 consists of nine icons for switching off image stabilization, engaging face detection and accessing other functions. Unfortunately, while Kodak had ample room to add some descriptive wording above each menu icon, in most cases they choose not to. None of the icons are that mysterious, but still, for a novice user it would be nice to use the generous LCD screen to its fullest potential.

Memory

The Zi8 comes with a meager 128MB worth of internal memory – barely enough to record a few seconds of HD video or a couple of still images. To enjoy recording of any length, you’ll need to use an SDHC memory card (not included). The Zi8 supports SDHC cards up to 32GB, which would give you close to five hours of recording at the highest quality setting.

The use of flash memory cards helps keep the price of the unit down, but that only helps if you already own a memory card.

Optics

Like all pocket camcorders, the Zi8 does not offer an optical zoom lens. Instead, it features a 4x digital zoom. The zoom itself is of limited utility and when it’s engaged, it isn’t terribly smooth.

The Zi8 also packs digital image stabilization. Again, it’s not as effective as the optical variety, but it’s also not as important a feature in a pocket camcorder because you don’t have an optical zoom lens. You can see it in action here. On the whole, it’s better to have some form of stabilization than none, so Kodak gets the thumbs up for adding it.

Kodak Zi8: A Powerful Pocket Camcorder

Kodak’s Zi8 manages to outdo most of its rivals in the pocket camcorder market by adding some feature-enhancements without burdening the camcorder with complexity. It could stand to tweak its interface, build bigger buttons and make the exterior more resistant to finger prints. If you have no interest in anything but the simplest pocket camcorder for creating Web-friendly videos, the Flip UltraHD would still give you the best bang for your buck. But if you’re thirsting for a pocket camcorder with equal (and in some cases, better) quality than the Flip with more features to boot, the Zi8 is the model for you.

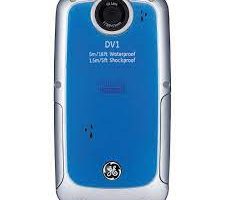
GE DV1 Camcorder Review

GE DV1 Camcorder Review

GE DV1 at a Glance

The Good: Low cost, durable, easy to use.

The Bad: So-so video quality.

Video Quality

The GE DV1 records 1080p HD video in the H.264 format via a 5-megapixel CMOS image sensor. Indoors, footage off the DV1 can get noisy but nothing out of the ordinary for a low cost pocket camcorder. There is some noticeable over-exposure, particularly in sunlight, but the colors reproduced crisply. All in all, the video is serviceable, but you shouldn’t expect it to compare with the more expensive Full HD camcorders on the market.

The DV1 offers several quality settings, from 1080p/30 frames per second (fps) to a useful 720p option at 60fps for filming faster action. You can also drop recording quality to 1440 x 1080 and 640 x 480, but there’s no practical reason to do so.

The DV1 also snaps 5-megapixel still photos. If you’re dealing with plenty of ambient light and a still subject, the photos are decent. Otherwise, it’s best to stick to video, as the images will blur. Fairly uniquely among pocket camcorders, the DV1 can also snap 2-megapixel photos while recording. These images are hit-and-miss and you can only take up to six, but the feature itself is nice to have.

Optics

The DV1 packs a 4x digital zoom lens with digital image stabilization. As with all digital zooms on pocket models, this one just ramps up the digital noise so it doesn’t add much.

Design

The big selling point with the DV1 is obviously the rugged and waterproof body design. As mentioned above, the DV1 can be submerged in up to 15 feet of water (that’s deeper than Kodak’s Playsport Zx3) but more than that, it can be dropped from a height of 5 feet and it’s sealed against dust.

This makes it one of the more rugged camcorders on the market. If you’re big into outdoor activities, it’s a good choice.

Obviously, a rugged camcorder will impose some trade-offs on the design. To wit: the DV1 is a bit bulkier and heavier than other pocket cams on the market – but not obtrusively so. It can still be slipped into a pocket or purse quite easily. The memory card port, flip-out USB plug and other connectors are housed securely behind latched doors to keep the elements out. But they open easily. While many pocket camcorders have jumped on the touch-screen bandwagon, the DV1 has nice, large tactile buttons for recording, playback, snapping stills, entering the menu and deleting photos. They can all be pressed easily while wearing gloves. The only exception is the power button, which sits rather flush with the side of the camcorder and might present a problem for a gloved hand.

Feature Set

The GE DV1 offers a pretty bare bones feature set, which isn’t surprising given its low cost. You’ll find settings for adjusting white balance (including an underwater mode), a high dynamic range mode for stills and video recording, exposure metering (stills and video), and a continuous shooting mode for photographs at 7fps.

Menu & Display

You’ll access what features the DV1 has through a bright 2-inch display (you can also adjust the brightness manually in the settings). The menu layout is straightforward and easy to navigate, though when you enter it, you’ll start with the still photo features, not the video, which is a bit odd.

While filming, the DV1 uses just the top portion of the display. The bottom is filled with a menu displaying your current settings – such as whether you’re in HDR mode and your resolution. It can also display a histogram while recording, which is pretty rare to see at this price.

Memory

The DV1 records to SDHC cards and comes with no built-in memory. So you’ll need to factor in the cost of a card to the DV1’s bottom line (unless you already have one).

Bottom Line

When it comes to camcorders that can be tossed into the water or survive a fall onto the concrete without shattering, your choices are pretty limited so the DV1 doesn’t have many direct competitors to compare it to. That said, it’s more rugged and can be dunked deeper than Kodak’s PlaySport Zx3 (cheaper too), but doesn’t offer Kodak’s video quality or feature set. So if you need a bare-bones camcorder for a trip to the beach or an outdoor adventure, the DV1 is a good option. At $129, it’s attractively priced to be a good companion video camera to those who don’t want to risk a higher-end model during their death-defying white water rafting trips.

Top Camcorder Trends

Top Camcorder Trends

Camcorders may not spring to mind when you think of cutting edge technology, but just because they’ve been around a while doesn’t mean technology isn’t constantly shaping, and reshaping, the camcorder market. In fact, thanks to new technologies, recording formats and designs, today’s camcorders are a far cry from models just a few years old. Here’s a look at some of the major trends:

Pocket Parade

Pocket camcorders – those portable, easy-to-use video cameras popularized by the Flip – have become all the rage of the camcorder market. And what’s not to like: they’re easy, cheap, offer decent quality and make sharing videos online simple. By some estimates they’ll make up about 2/3 of all camcorders sold.

This year, thanks to the success of the Flip, there are literally over a dozen competitors. That means these models were begin to diversify, with features such as water-proofing, infrared and optical zooms emerging to help distinguish these video cameras from a very crowded field.

It’s a High Def World

HD camcorders have been on the market for several years now, but this year they’re expected to cross over into 50 percent of the market. They’re still pricier than standard definition models (at least when talking about traditional – not pocket – camcorders) but those prices continue to fall sharply. You’ll find several feature-rich HD models, capable of 1920 x 1080 recording, for under $500.

Flash in the Pan

Flash memory cards, the type found in digital cameras, are rapidly becoming the recording format of choice for digital camcorders. Camcorders that use flash memory are lighter, use less battery power and can store more video than any other format except for hard drives.

The popularity of flash camcorders has all but crowded out DVD and tape formats, leaving only hard disk drives as an alternative.

Ultra-Portable

Thanks in no small part to the use of flash memory, camcorders are getting tinier and more portable. That means you don’t have any excuse not to carry one around with you wherever you go.

Web Friendly

What good is your video if you can’t share it, or turn it into 15 seconds worth of Internet fame? While the higher-end HD camcorders are less computer-friendly, a number are using the H.264 video format for easier editing and viewing on a computer. Together with built-in upload buttons that send video off to YouTube whenever the camcorder is connected to a computer, today’s camcorders are more Web-friendly than ever before.

Back-lit CMOS

While it’s not front and center in many of the specs, the type of image sensor used in a camcorder is critically important. In 2010, a new version of the CMOS image sensor will be more popular with higher-end models. The so-called “back illuminated” CMOS technology offers improved video quality performance where it counts the most: low light environments.

Wireless

Connecting your camcorder to a computer or TV isn’t the hardest thing in the world, but it could still stand to be easier. At least two camcorder makers thus far have introduce products with a form of wireless networking. Samsung has added Wi-Fi to a trio of high-end HD camcorders while JVC has announced a camcorder with built-in Bluetooth. Given that camcorder video files are very large, it remains to be seen whether wireless offers a viable alternative to the tangle of cables, but this is the year we’ll find out.

Toshiba Camileo S30 Review

Toshiba Camileo S30 Review

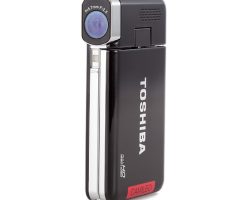
Toshiba’s Camileo S30 camcorder records 1080p HD video in the H.264 format to SDHC/SDXC memory cards. The $179 camcorder features a 3-inch touch screen display and 8-megapixel still photo capture. Full specs for the Camileo S30 can be found here.

Toshiba Camileo S30 at a Glance

The Good: Slim design, good features for the price

The Bad: Touch screen can be unresponsive

Video Quality

The Toshiba Camileo S30 records 1920 x 1080p video in the H.264 format via an 8-megapixel CMOS sensor. It has additional options to record at 720p at 30 frames per second (fps) or at 60fps for capturing fast-moving subjects.

The video quality is definitely passable for a budget camcorder. You’ll notice a bit of over-exposure in bright sun and high contrast areas, but otherwise the S30 holds its own with other low-cost models on the market.

The S30 does offer a video light, which isn’t typically found on models at this price point. It’s useful for closeups but doesn’t have much power beyond that. Plus, it’s placed almost directly where your finger wraps around the camcorder, so you’ll have to be careful to nudge your finger down before activating the light.

In addition to movies, the Toshiba S30 can snap 8-megapixel still photos. However, most of the shots I snapped suffered from a good deal of blur, even when holding the camcorder steady.

Toshiba S30 Optics

The S30 does not offer an optical zoom but there is a 16x digital zoom. However, like all digital zooms, the quality degrades as you use it, so it’s better to avoid it all together. There’s also digital image stabilization, although it’s ineffective for the stills and only marginally useful on the video.

Design

The S30 is one of the few upright camcorders left in the market. At .75 inches, it’s slimmer than a pocket camcorder and has a larger, swing-out LCD display (3-inches) not found on pocket models.

However, it’s a bit larger than some of the smaller models on the market – at 2.3 x 4.3 x .75 -inches. Nevertheless, it’s quite portable.

The controls of the S30 are clustered on the slender body of the camcorder, although they are responsive. At the top is a large shutter button, followed by a lever for the zoom and controls for menu and the video light. Flip open the display and you’ll find large buttons for power (opening and closing the LCD also powers on and off the camcorder), switching between photo and video mode and web button for uploading videos from the camcorder to the Internet when it’s connected to a computer.

Feature Set

The Toshiba S30 has a nice set of features for a camcorder at the price. There’s a motion detect mode, which will begin recording when the camcorder sees motion. There’s also a slow motion option, which will record lower quality video at slower speeds (good for capturing baseball swings to view on the computer but not great for viewing on the big screen). A pre-record function will start recording a few seconds of video before you actually press the shutter, to help you catch all of the action. Finally, a time-lapse feature will capture short bursts of video over pre-set intervals so you can capture change over time.

Menu & Display

The nice thing about the Camileo S30 is its large, 3-inch display. It’s a touch-screen so most of the camera’s features are accessibly through there. Unfortunately, while the menu icons are large enough, the display isn’t all that responsive, nor well executed. Each icon needs a double tap to enter a specific function and sometimes it’s difficult to tell whether you’ve turned something on or off. There are enough features on the S30 that you’ll need to scroll down on the screen with a flick of your finger, but it often takes several flicks to get there.

On the plus side, once you press an icon once a text description of what it is will pop up on the display, but the process of navigating around the menu is more clumsy and time-consuming than it should be.

Memory

The S30 records to SDHC and SDXC memory cards (up to 64GB) which provides ample storage for your video-taking needs. It contains 128MB of internal memory, which is enough for about a minute of HD footage, so a card is a must.

Toshiba Camileo S30: Bottom Line

If you’re in the market for a good budget camcorder, the Toshiba Camileo S30 is a nice choice. Unlike some of its pocket camcorder competitors, it has a larger, swing-out display, which makes it easier to frame your videos. The menu interface needs improvement, and you shouldn’t be expecting ultra-high quality high def recording, but the S30 makes up for it with a nice feature set and a slender, portable design.

Kodak Playsport Zx5 Review

Kodak Playsport Zx5 Review

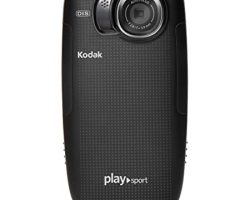
The Kodak Playsport Zx5 is a high definition pocket camcorder capable of recording 1920 x 1080p in the H.264 format. It is waterproof to a depth of 10 feet, can survive a drop of up to five feet and is sealed against dust and dirt.

It retails for $179.

Kodak Playsport Zx5 at a Glance

The Good: Slim, rugged design, good video quality.

The Bad:

Sticky center control, no built-in USB plug, mono mic.

Kodak Playsport Zx5 Video Quality

The Playsport Zx5 records 1920 x 1080 HD video at 30 frames per second (fps) in the H.264 video format via a 5-megapixel CMOS sensor. You also have the option to record 1280 x 720 video at 60fps for capturing faster moving action or at 720/30fps.

As with the previous Playsport, the video is quite appealing for a pocket camcorder. Occasionally, the colors would drift a bit but the effect is hard to notice unless you’re really parsing your footage. Compared with last year’s Zx3, the video appeared less noisy indoors, which is a plus.

In addition to video, the Playsport can also snap 5-megapixel still images. Unless you’re working with plenty of natural light and a very steady hand, the photo function mostly produces blurry pics.

Optics

The Playsport offers a fixed focal length lens with a 4x digital zoom. The zoom isn’t much help – it tends to simply ramp up the digital noise in your video, so it’s probably

best to avoid it all together. The Playsport offers digital image stabilization to help keep videos smooth during recordings. The video I shoot wasn’t particularly shake-prone, but it’s hard to tell if that’s the stabilization kicking in or the fact that the Playsport is so small that you can get a real nice grip on it.

One thing you’re likely to notice (and it’s reared its head on other pocket cams) is trouble with the auto-focus. Sometimes it’s slow to lock on, leaving you with a second or two of blurred video. It’s not unusual for a pocket camcorder lens, but it’s something to bear in mind.

Playsport Design

The Playsport isn’t the slimmest and trimmest pocket camcorder on the market, mostly because it’s designed to take a beating. Still, at 2.3 x 4.4 x .7-inches and 125g it’s still light and compact enough to slip into a pocket with hardly a notice. The corners of the Playsport are rounded off with a rubberized bumper which not only protects it from bumps but gives it a sturdier grip. While the camcorder seals away its memory card and connector ports to protect them from the elements, both click open easily so they’re quick to access.

The Playsport has seven external buttons – an on/off switch that sits rather flush on the top of the camcorder and is a bit difficult to engage. It’s backlit though, so you can notice when the Playsport is turned on (in case the live preview on the LCD display didn’t tip you off). On the back of the camcorder, you’ll find controls for switching between still and video, playback, trash, settings and a share button – which lets you tag videos for automatic emailing or uploading once the Playsport is connected to a PC. These controls are quite responsive. The record button sits at the center of a four-way controller, which is a bit less responsive than the other controls.

The Playsport comes in three color choices: red, blue and black. Aesthetically, it’s pretty sharp.

Playsport Zx5 Features

In addition to its rugged, waterproof design, the Playsport Zx5 has several video effects that can be applied to videos including vivid color, sepia, black and white, high saturation and “1970s film look” if you want a retro feel to your videos. There’s an underwater setting as well to optimize your exposure if you take the Playsport beneath the waves. You’ll also find face detection, and the aforementioned share button, which lets upload videos automatically to Facebook, Flickr, Kodak Gallery , Twitter, YouTube and several other sharing sites. The share function is definitely a plus, but the Playsport doesn’t have a built-in USB plug, so you’ll have to fish around for a cable when you’re ready to connect.

Menu & Display

Kodak has updated – and improved- the menu system from the Zx3 on the new Playsport Zx5. Good thing too, as the older menu was difficult to understand. The new menu trades vague icons for simple text. It’s not the most dynamic thing in the world, but it certainly gets the job done.

The Playsport’s 2-inch display features a glare-shield, which you can activate in the menu to compensate for bright sunlight. The display itself is bright but doesn’t have a great viewing angle, so you need to be holding it straight-on to get the sharpest preview of the video you’re recording.

Playsport Memory

The Kodak Playsport Zx5 comes with 128MB of internal memory so you’ll need to opt for an optional SD/SDHC card to record video of any length. The camcorder supports SDHC cards up to 32GB in capacity – enough to store about six hours of HD footage.

Kodak Playsport Zx5 Bottom Line

The Playsport Zx5 is a very versatile pocket camcorder – it not only takes sharp video but is designed to go underwater and take the odd fall off a table. Despite its sturdy build, the Playsport is sharply styled and not at all cumbersome to carry with you. The lack of a built-in USB plug and a lapse in autofocus top the very short list of quibbles with the Playsport Zx5, which continues Kodak’s tradition of leading pocket camcorders.

Samsung HMX-Q10 Camcorder Review

Samsung HMX-Q10 Camcorder Review

The Samsung HMX-Q10 is a high definition camcorder that captures 1920 x 1080 video in the H.264 to SDHC memory cards. It offers a 2.7-inch LCD display, 10x optical zoom lens with optical image stabilization and a unique grip which lets you flip the camcorder to film with both the right and left hands.

The Samsung Q10 retails for $299. Full specifications can be found here.

Samsung Q10 at a Glance

The Good: Strong video quality, responsive touch-screen, nice design

The Bad: Awkward zoom lever, no automatic lens cover

Samsung HMX Q10 Video Quality

Samsung’s HMX Q10 records 1920 x 1080 video in the H.264 format. It’s also capable of recording at 720/60 frames per second for capturing fast-moving subjects and at VGA resolution.

Given its lower price tag, the Q10 is competing more with pocket camcorders and it clearly exceeds them in the quality department. While there were instances of over-exposure, with bright sunlight washing out highlights, the Q10 captured mostly crisp, color-accurate video. It did well indoors as well. I took it into a dimly lit aquarium and after a second or two of blur as it sought to establish focus, the Q10 was able to resolve the scene quite well considering the challenging environment.

You can also snap 4.9-megapixel still photos with the Q10, although you should steer clear of taking stills with the Q10 as the results were unimpressive.

Optics

The Q10 packs a 10x optical zoom lens with optical image stabilization – a nice plus not usually found on lower-cost camcorders. There’s also a digital zoom, which, fortunately, can be deactivated. All-in-all, a nice optical package. The only draw back is that there’s no automatic lens cover. However, there is a built-in cover that flips open and closed using a switch on top of the lens barrel – that’s a far better option than a lens cap, but not as good as an automatic cover.

Samsung HMX Q10 Design

The design of the Q10 is pretty spartan, with few external controls outside of a zoom lever/shutter button on the back of the camcorder. Flip open the 2.7-inch display and you’ll see only a home button, which brings you into the camcorder’s internal memory.

With the Q10, Samsung introduced a design innovation called the “Swithgrip” – which essentially lets you film using either your right or left hand. When you switch from right to left, the menu items on the display will automatically orient themselves correctly. Since there are no external controls on the top of the camcorder to operate, the transition from right-handed to left-handed filming is seamless. Left-handed users, rejoice!

Thanks to the use of flash memory, the Q10 is quite light and compact, weighing in at .4lbs and sized at 4.7 x 2.1 x 1.7 inches. It certainly won’t be a drag to carry the Q10 around with you on long trips. Aesthetically it won’t turn many heads but is available in your choice of black and blue. The only real knock on the design is that wrist strap, which is kind of flimsy.

Q10 Features

You’ll find a nice selection of shooting options on the Q10, despite its budget price tag. You’ll have time lapse recording and a selection of digital effects to apply various filters to your video including black and white, sepia, negative, art, noir, western, dazzle, and ghost. You can switch between automatic and manual recording, where you’ll have the ability to focus manually, set white balance, adjust exposure, night mode, and backlit compensation. All in all a very strong feature set for a camcorder at this price.

The Q10 is loaded with Samsung’s Intelli-Studio software, which installs automatically whenever you connect the camcorder to a computer via USB.

Menu and Display

The Q10 offers a 2.7-inch touch screen LCD display. It’s quite responsive and it’s helped along with an icon-driven menu interface. Pop open the display and you’ll see a row of icons indicating your scene mode and then controls for switching between still and video capture, zoom and playback. It’s always better to have more real-estate on a display when working with a touch-screen, but Samsung keeps the number of icons on the display to a minimum so it’s easy to hit the ones you need with your finger. At any point you can hit the “home” key on the exterior of the display and get back into the main menu.

Samsung HMX-Q10 Memory

The Q10 records directly to SDHC memory cards, so you’ll need to factor in the cost of a memory card into your equation. The Q10 cannot record to newer, higher-capacity SDXC cards so you’re memory capacity is limited to 32GB (or eight hours of HD recording).

Bottom Line

If you’re in the market for a low-cost HD camcorder but are leery about the quality and limited feature-set of a pocket camcorder, the HMX-Q10 is definitely a solid choice. It’s slightly more expensive than most pocket models on the market at $300, but delivers a better zoom, better video quality and a more robust feature set. It’s unique “SwitchGrip” design gives both left and right-handed users the ability to hold the Q10 naturally and comfortably. All-in-all a good choice in the budget-end of the HD camcorder market.

Vivitar DVR 690HD Waterproof Camcorder Review

Vivitar DVR 690HD Waterproof Camcorder Review

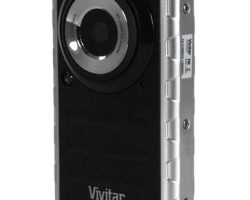
The Vivitar DVR 690HD is a high definition pocket camcorder capable of recording 1280 x 720p video in the AVI format to SD cards. It is waterproof to a depth of 10 feet and has a rugged housing to secure it against minor bumps and scrapes.

Vivitar DVR 690HD at a Glance

The Good: Low cost, large controls, easy to use.

The Bad: Mediocre video quality.

Vivitar DVR 690HD Video Quality

The Vivitar DVR 690HD records HD video in the AVI format at 1280 x 720p/30 frames per second. It’s not quite the 1080p video recording available on competitive models – but then again, those models don’t cost $60. Video recorded at 720p will serve in a pinch, but you shouldn’t consider the DVR 690HD a real memory keeper – the quality just isn’t there. As a second camcorder to toss in a backpack before you go white-water rafting, however, it should be serviceable. Just don’t bother with the DVR 690HD indoors as they’ll be ample noise in your video if you do.

Recording quality can be dropped to VGA or 320 x 240 – but really shouldn’t be. You can also snap 5-megapixel still photos. The quality here is lousy – but that’s no real knock on the Vivitar as very few pocket camcorders take decent stills.

Optics

The DVR 690HD has no optical zoom lens, but instead uses a 4x digital zoom. Best to avoid the digital zoom, however, as all it will do is ramp up some unsightly digital noise.

Vivitar DVR 690HD Design

The DVR 690HD is pretty bulky, even by the standards of rugged pocket camcorders. It’s a bit longer than a compact camera but as thin, if not thinner, than most point-and-shoots in the market. Keep in mind that it’s designed to go underwater (up to 1o feet) so the added bulk is for defensive purposes. That said, it’s aesthetically sharp with a 10 color choices and silver/metallic trim.

The controls on the back of the DVR690 are large and responsive. You’ll see buttons for power, mode, menu and trash surrounding a four-way controller with a shutter button sandwiched in the middle. The four-way controller feels a bit flimsy when you use it, but the rest of the controls are sturdier and easy to operate.The SD card and USB plug (no built-in USB arm here) are accessed via a latched compartment at the bottom of the camcorder. This compartment is very stubborn to open up, but it does keep the water out.

Features

When you spend $60 for a camcorder, you can’t expect to get a feature-packed model. That said, the DVR 690HD does offer face detection and digital image stabilization. You’ll also find several scene modes for optimizing exposure based on your shooting condition. There’s also an LED video light for low light shooting. Not a bad assortment, considering.

Menu and Display

You’ll frame your video via 2-inch LCD display. It’s not the crispest display on the market but served well enough underwater. The DVR 690HD’s menu is pretty basic but is straightforward enough that it’s easy to find what you need.

Vivitar DVR 690HD Memory

The 690HD has a scant 8MB of internal memory, so an SDHC card is a must. The camcorder supports cards up to 32GB in size so you’ll get a max of 3.2-hours of recording on a 32GB card.

Bottom Line

We’ll stipulate again that the Vivitar DVR 690HD should not be your camcorder of choice for preserving important family memories. Instead, think of it as a second camcorder that you don’t mind exposing to the elements to record your rugged thrills or day at the beach. It has competition on this front too – products like Kodak’s Playsport Zx5 offer superior video quality and feature set, but cost nearly two to three times what the DVR 690HD does. If budget and durability are top of mind, give the DVR 690HD a look.

Using Polymer Clay to Create a Fairy Figure

Using Polymer Clay to Create a Fairy Figure

You must be familiar with Peter Pan’s story. Maybe some of you have watched it with your child or told bedtime stories about the fairy story. Now you can bring your story to life again if you can make your own doll from a fairy, why not?

The Basic Needed

Courtesy : www.facebook.com/RealmofFroud

Creating a Fairy Figure with Wendy Froud certainly gives the viewer all the basics needed to work in this arts and crafts medium while providing instructions on what I consider to be a more advanced polymer clay topics. Like everything else in life, it’s a matter of practice and having a routine. Unexperienced in working with polymer clay, I paused the video many times to follow along. Anyone with experience working with polymer clay would be able to follow along in a more spontaneous, fluid manner.

Pros

Clear, easy-to-follow instructions

Written for the beginner, but also good for polymer clay artists not experienced in model-making

Excellent visual effects

Cons

Digital download process was time-consuming

Description

Courtesy : i.ytimg.co

Making an Armature – complete instruction on forming the skeletal framework for the figure using wire.

Sculpting the Figure – learn how to make all the separate body parts such as the head, torso and hands.

Fabricating the Body – after the pieces are finished and baked, you learn how to put the pieces together to form the figure.

Costuming the Figure – discusses selection of fabrics and coordinating hair.

Applying Hair – learn how to attach wool and other materials to the figure for a realistic head of hair.

Making Wings – crucial for a faery figure, not a necessity if only interested in making doll-like figures with polymer clay.

Finishing the Figure – completing all the minute details to wrap up the project.

Guide Review – Using Polymer Clay to Create a Fairy Figure

Courtesy :i.pinimg.com

Creating a Fairy Figure with Wendy Froud

I’m somewhat familiar with polymer clay as I interviewed a few jewelry artists who make their own beads from polymer clay while writing one of my books. The bit of knowledge that I retained the most was the fact that polymer clay is hardened by baking in the oven, instead of using a kiln, which seemed to me to be pretty handy as it eliminated the need for yet another piece of craft-making gear (although all serious artists use a separate oven since there are safety concerns with keeping food and clay separate).

However, I’ve never used polymer clay myself so I figured a good litmus test for a video is if a crafter who is handy in other crafts can follow along with instructions for another somewhat related type of craft. In this case, I’ve worked in paper mache in the past, which uses armature and paper constructing technique.

While my faery was far from perfection, this video really delivers on the instructional aspect. An artist or crafter with the right tools and patience will get all the knowledge they need to work in this medium from this video – regardless if they are interested in fantasy figures.

You can read artist Wendy Froud’s bio on the Gnomo Workshop website. Pretty impressive, she worked on both The Muppet Show and The Empire Strikes Back. The two-DVD set is 240 minutes in total and is also available via digital download.

The Gnomon School website show an approximately two minute sample clip showing the artist fabricating the model’s eyes. This clip is representative of the quality and type of instruction running through the entire 240 minutes.

When need be the filming of the dvd is close up on the artist’s hands. Ms. Froud moves very slowly, explaining each step as she goes giving alternatives on how to perform some of the tasks. For example, while constructing the hands of the faery she advises that she prefers to not wire the hands since she likes to really manipulate the digits after she attaches them to the main base of the palm of the hand.

Polymer clay is very easy to manipulate and forgiving. The artist many times removed and added clay while constructing the model. Using the special polymer clay tools, it’s easy to add clay to the basic shapes to add features, fingers and the body.

At the time of this review, the polymer clay lesson cost $49 (plus shipping if not going the digital download route – downloading will save you the shipping cost of $10 to $15 for most items.) Considering the length of the dvd and the soup to nuts presentation of the topic, a very good value.

GPS Camcorders: A Guide to GPS Camcorders

GPS Camcorders: A Guide to GPS Camcorders

The current technological sophistication that quite amazes me is they can know where you are. That is a very rapid progress in my opinion. This technology is very beneficial for some sectors of life, be it the business world or even for those of you who love to travel.

The same global positioning system (GPS) that helps you navigate around town in your car has started to appear inside digital camcorders.

The first GPS camcorders were introduced in 2009 courtesy of Sony and include the HDR-XR520V, HDR-XR500V, HDR-XR200V and HDR-TR5v.

What Does An Internal GPS Receiver Do?

Courtesy : /images-na.ssl-images-amazon.com

The GPS receiver collects location data from satellites circling the Earth. Sony’s camcorders use this data to automatically adjust the unit’s clock to the proper time zone. Not much use if you’re filming the backyard barbeque, but certainly a convenience for international travelers.

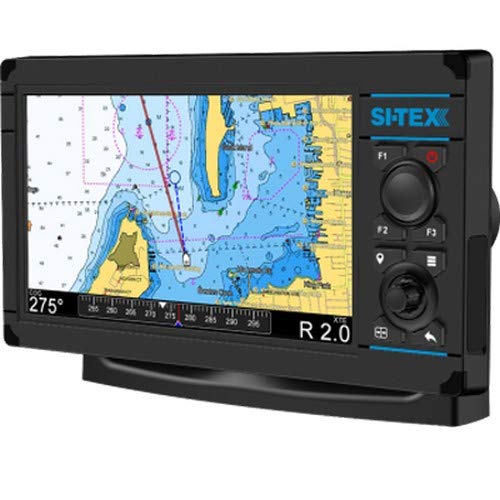
The camcorders also use GPS data to display a map of your current location on the LCD screen. Don’t confuse these GPS camcorders with navigation devices, though.

They won’t offer point-to-point directions.

A New Way to Organize Video

Courtesy : /assets.pcmag.com

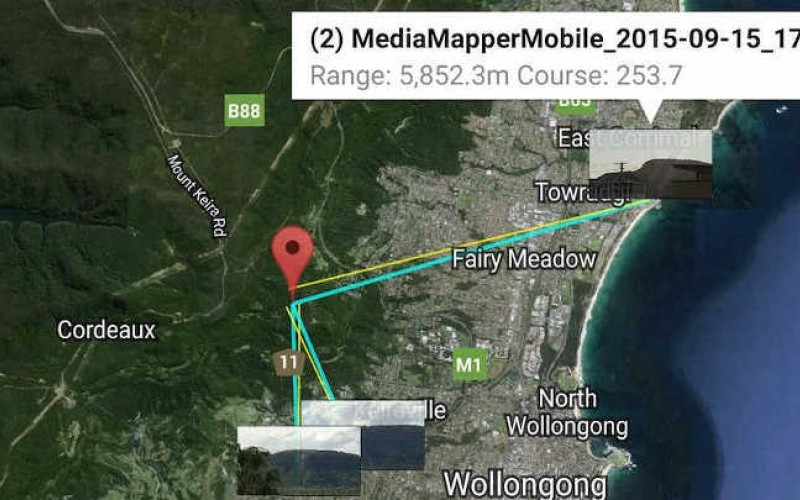
The real benefit of the GPS receiver is that it saves location data as you film. With this information, the camcorders will create a map on the LCD display with icons marking all of the locations where you shot video. Rather than search for saved video files by time or date, you can use this “Map Index” function to find your videos by location.

When you’ve transferred your video to a computer, Sony’s Picture Motion Browser (PMB) software will automatically merge the location data from the GPS receiver with the appropriate video clips and then plot those clips on a map as tiny thumbnail images. Click on a thumbnail in a given location, and you can view the video you filmed there. Think of it as new way to organize and visualize your saved video files.

Can You Geotag Videos Like Photos?

Courtesy : redhensystems-1634.kxcdn.com

Not quite. When you geotag a digital photograph, you embed location data inside the photo file itself. This way, when you upload photos to websites like Flickr, the GPS data goes with it and you’re able to use Flickr’s mapping tool to view your photos on a map.

With these camcorders, the GPS data cannot be embedded into the video file. If you were to upload video to Flickr, the GPS data would stay behind on the computer. The only way to plot your videos on a map is on your personal computer with Sony’s software. That’s definitely a limitation.

Do You Need a GPS Camcorder?

Courtesy :nerdtechy.com

If you’re a very active traveler who’s comfortable working with video files on a computer, the added functionality made possible by GPS technology is definitely beneficial. For casual users, GPS alone shouldn’t motivate you to buy these camcorders.

The true promise of GPS inside a camcorder will be realized when you can embed the GPS data inside the video file itself. Then you’ll be able to avail yourself to third party applications and websites that support location organizing and the mapping of videos.

What To Expect From The Software That’s Packaged In Your Camcorder

What To Expect From The Software That’s Packaged In Your Camcorder

If you just bought a camcorder, the manufacturer has put the default software in it to use video editing. Even though it is simple, it is enough to help you edit the video that you take.

These days, you’re just as likely to view your camcorder videos on a computer as on a TV (if not more so.) That’s why every camcorder is packaged with some basic video software that will let you perform some routine tasks with your camcorder video. Here’s what you can expect:

Basic Editing

Courtesy:http://reneescheltema.com

While you shouldn’t expect to edit your Hollywood blockbuster on the included software, the basic editing features are usually there – some color corrections, trimming, along with the ability to add titles and transition effects.

Sharing

Whether you want to post your videos to Facebook or YouTube or send them to friends and family via email, the software included in your camcorder usually contains tools for Web sharing.

Transcoding

Courtesy : www.wowza.com

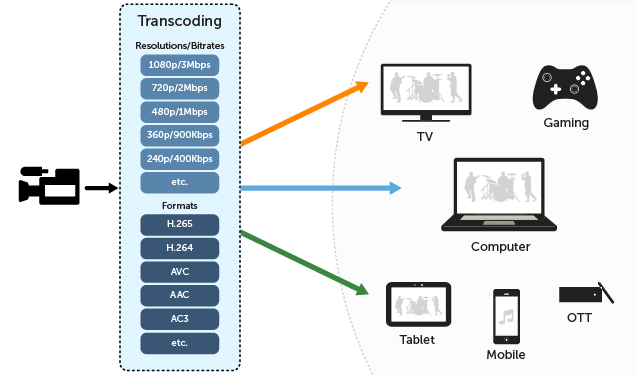
If you want to watch your home movies on DVD, smartphone, portable media players or even a PlayStation Portable, you may need to transcode your video – i.e. turn it into a file format that can be recognized by these devices. Most bundled software will have an option to output your video file for viewing on various platforms.

Organize

The more videos and photos you record with your camcorder, the harder it is to keep track of all your digital files. Included software will offer a basic organizer that will let you keep track of your ever-growing digital library.

DVD Burning:  One of the most routine tasks you’ll need to perform with your camcorder’s software is burning an archival disk of your footage (read about how to archive your camcorder videos here). If it does nothing else, your software should allow you to burn DVDs of your home movies.

Perform Specialized Tasks: Some high-end camcorder features can only be accessed through specialized software applications not found on off-the-shelf software.

Sony’s GPS camcorders are a case in point: you can only access map views and “geo-tagging” if you use the company’s included software to organize your files.

Built-in Software

There’s a growing trend among camcorders (particularly pocket camcorders) to ditch the CD-Rom and load their software directly into the camcorder itself. The software will typically install itself on your computer the first time you connect the camcorder to the computer. The virtue with the built-in approach is that you can upgrade computer (of suffer a hard drive wipe out) without worrying about losing your software.