Webcomics…
You read them, you love them, and now you want to make them. But where do you start?
Hey all! I’m Kit, co-creator of the webcomic Strawberry Syrup. Since starting my webcomic in July of 2007, I’ve learned a lot of things about the process, and I’m here to share them with you – from the way my partner and I create our comic to some great sites that will help you on your way.
So, have a look around, and good luck with your webcomic!
Getting Started
The Basics
BrainstormingAlright, so you’ve decided to give webcomicking a try. Now what?
Well, there are a few basic things you need to get started.
An Idea. What’s your webcomic going to be about? Who’s the main character (or characters)? What does he or she want, and who or what stands in their way? Where or when does it take place? Whether you’re doing a slice of life comic or a full-fledged epic fantasy, now’s the time to grab your sketchbook and start brainstorming. Keep asking yourself questions until you feel like you’ve got a good handle on your story, and read the section on Prep Work: How Much Should I Do?
A Sketchbook. It could be an actual sketchbook, a folder full of loose-leaf paper and Post-It Notes, or a digital folder on your computer, so long as you have somewhere to experiment with styles, practice your characters, and keep your ideas together. When you have a story idea, jot it down. Explore it a little. And, of course, practice, practice, practice!
A Format. Will your webcomic be like newspaper comic strips, with each strip being a few square panels all in a row? Western comic books? Or maybe manga’s more your thing? Check out webcomics similar to yours and see how they handle things like panel format and page size. Choosing and committing to a format beforehand will help give your comic a cohesive, professional look.
The Right Materials. How will you be drawing your comic? With pencil and ink on a sheet of paper, or in a program like MangaStudio or Photoshop? Which way you choose determines what materials you’ll need. For all webcomics, you’ll need a scanner and some basic image editing software at the very least. Read more about it in Getting Technical: How Do You DO It?
This is kind of an important part of webcomicking. Where will you host your comic? If you’ve got the money and some programming skills (or know someone who does), you can host it on your own website. Otherwise, there are a whole slew of sites made to host webcomics or can be used to host them. Look around and see which option would work best for you, and be sure to read all terms of service and small print. Read more in Where to Host Your Webcomic.
So, those are the bare basics for what you need to start a webcomic. Now, let’s get into a little more detail…
Getting Technical: How Do You DO It?
Traditional Versus Digital
So, you’ve fleshed out your idea, done your prep work, and are all set to go. There’s just one little problem: exactly how are you doing to draw it?
It’s a pretty basic question, but an important one. Fortunately, you have options! Depending on how you work best and what technology you have access to, the most common ways are:
The Traditional Way. Take a sheet of paper, grab a pencil, and go to town! If you don’t have a graphics tablet, this is probably the way you want to go – nothing invites a headache like trying to draw with a mouse. Things you’ll need: paper, pencil, eraser, pen, ruler, compass, possibly markers, a scanner, and basic photo editing software. Draw your page, scan it in, make the necessary changes in whatever software you use to resize things, and you’ve got your page all set to go.
The Digital Way. If you’ve got a tablet or are just that good with a mouse, you can make the whole process digital. It can really take some of the blood, sweat and tears out of webcomicking. Use whichever graphics program you’re comfortable with, whether that’s Adobe Photoshop, Corel Painter, Manga Studio, SAI, or just good old MS Paint.
Half-and-Half. This may be the most common way. Draw your line art by hand, scan it in, then add your tones or color digitally with your graphics program.
Creating quality webcomics mean finding what works best for you and still works within your budget. If the only scanner you have access to is Aunt Selma’s ancient museum piece from the mid-nineties, you might want to consider going all-digital. Likewise, if you’ve got a fantastic scanner, but your only graphics program is MS Paint, you might want to stick to doing it by hand.
Manga Studio
Software to Help You Out
If you’re looking for the best software out there dedicated to comic creation, it’s Manga Studio EX. Plan, sketch, ink, and tone your work, all in one place. You can work on individual page files, or group them together in stories (an option I use to keep my chapters of Strawberry Syrup together). With a variety of pens and a whole library of screen tones, you’ll definitely find what you need to make your comic look professional here.
Artists familiar with Photoshop shouldn’t have any problem navigating Manga Studio or its layer system, but if you’re new to it all, playing around for an hour or so will get you familiar with it pretty quick (of course, you could also read the manual). You also need to figure out what page size works best for you and play around with the guidelines. Manga Studio is set up for creating comics for print, but if you don’t want to deal with safe zones and bleeds and all that technical stuff that doesn’t really apply to webcomics, you can just turn the guide layer off.
I love Manga Studio’s pencil tool. It really simulates a physical pencil for me, and makes sketching easy and smooth. The pen tool provides a nice, smooth, solid black line. The tones take some getting used to, but they do make your comic look professional. Manga Studio also makes it easy to add text and word bubble to your comic.
If you’re looking for a program to color with, I would not suggest Manga Studio, but for digital sketching and inking, I don’t think you can beat it. I use it to organize, sketch, and ink all my comic pages, then export them into Photoshop to shade and resize them. I’ve also taken to sketching many of my stand-alone drawings in Manga Studio before transferring them over to Photoshop for coloring. Working together, they’re ideal for me.
If you’re looking for the single best program for doing a black and white comic, then definitely check out Manga Studio EX. Or, try Manga Studio Debut for a cheaper option. Fewer features, but you can always upgrade later.
Tools of the Trade
What You’ll Need To Make Your Webcomic
Whether you’re a traditional pen and paper, scan-it-in webcomicker or a member of the digital art world, there are a few things you’ll need.
Helpful Stuff from the Web
Here’s some sites offering either advice or products that will help you on your way.
Blambot Comic Fonts
The home of great fonts on the web. So long as you aren’t planning on pitching your comic to TokyoPop or another big publisher, you can download and use most of these fonts for free.
The Psychedelic Tree House
This place has a lot of links to blogs full of helpful information to help you with your webcomic. Plus, the largest collection of webcomic logos that I’ve ever seen!
Statcounter
The free way to track traffic to your webcomic.
Prep Work: How Much Should You Do?
Before you launch your comic…
A Little Planning Now, Far Fewer Headaches Later!It’s a common question: before you launch your new comic, how much work should you do?
Answer: If you want a good, high-quality comic that updates regularly, a lot. However, some types of webcomics involve more forethought and prep work than others.
If you’re planning on a non-sequential strip, where each strip can stand alone and still be enjoyed, you’ll have a lot less work to do. Typically, this form takes less planning than others. If your strip has recurring characters, spend some time designing them and refining their look before your first strip goes up. Also keep track of strip ideas, either in a Word doc or notebook. That way, you’ll never have to struggle for what to draw when the inevitable brain block kicks in.
But what if you’re doing something with story arcs, where the tale unfolds page by page, week after week? If that’s the case, there’s a few things you should do before your comic ever sees the light of the internet:
Outline your story. Write out all your major plot points. You don’t need to hit every single twist and turn – some will likely surprise you – but work out the general idea of where you want to go and Big Twists or Events that need to happen.
Think of it as mapping out a road trip. You know where you want to end up each night, but you may make unexpected detours and run into great surprises (or a few hang-ups) along the way.
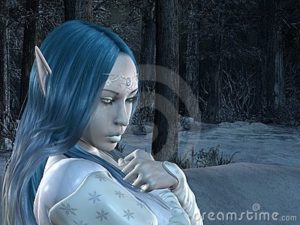
Flesh out your world. For fantasy stories, that means world maps and a lot of set work. Figure out what the main places look like. Does your story take place in a mystic forest, a quaint village, an epic city, or all three? Draw those places and work out the gist of how they should look. Is your setting based on an ancient culture? Medieval Europe? Asia? Victorian England? Is it a magical world? Steampunk? Pull out the research books, determine your technology level or your magic systems, and define your world’s cultures in – at the very least – some broad strokes.
The more time your characters are going to spend in an area, the more time you need to spend developing it. It will add a feeling of depth and dimension to your webcomic.
Develop your main characters. Your characters are your connection to the readers. Readers will forgive a lot in terms of webcomics, but if you don’t have characters they can get invested in, they’ll stop reading.
So, don’t just refine their visual design or say, “Okay, he’s a mage. He uses magic. Ta-da!” Give him a backstory. Figure out where he’s from, who his family is, his likes and dislikes, and so on. How did he learn magic? A royal academy? The village shaman? Self-taught? How does his family feel about his magic? Do they support him? Did they disown him? How does HE feel about his magic? Blessing? Curse? Maybe he always wanted to be a florist instead.
Thinking about these things will help you create fresh, original characters that won’t feel like cookie-cutter products to your readers and will help you tell a better overall story.
Thumbnail. Thumbnails range from small, quick doodles to detailed drawings, but they all do they same thing: they help you visualize how each page should look and work out any layout kinks before you draw the actual page.
If you have the attention span, you could thumbnail your entire comic before ever starting the first page, but I suggest at least doing your first chapter or two, and try to keep at least a chapter ahead of where you are in the comic. Doing so will help you spot any immediate kinks in your plot and let you work out plot holes before you trap yourself in a corner.
Modern world storytellers, don’t think you get our of all the work! All of these steps apply to you, too. Draw out the main locations you’ll be using in your comic: their school, their houses, their workplace, their favorite hang-out. You also need to put just as much thought into your characters and do your plotting and thumbnailing, too.
A little forethought and planning goes a long way towards giving your comic a high-quality feel and insuring your readers are enjoying the best possible story you can give them… not to mention, saves you on plot-based headaches later!
Keep a Sketchbook
And Keep It Handy!
One of the best things you can do as an aspiring webcomicker is to get yourself a good sketchbook. While there’s nothing wrong with digital sketch files, there’s something to be said for putting pencil to paper and letting your creativity run wild – and it’s definitely a plus when you’re brainstorming and working out story details! Plus, it’s a lot harder to just delete a sketchbook page, and you never want to do that – an idea that doesn’t work out now may come in handy later or spur on a new, completely awesome idea when you least expect it.
A few things to look for in a good sketchbook:
Binding. How is it bound? Spiral-bound books lay flat, but it’s a lot easier to tear pages out – whether you wanted to or not. Stitch-bound books don’t always lay flat and take up more room, but they tend to be more durable. I’ve used both kinds, and about all I can say is that it really depends on which one suits you better, personally.
Size. Sketchbooks come in all sorts of sizes, from ones that can easily fit in a back pocket or purse to ones larger than you typical printer paper. The pocket-sized ones are great if you tend to get a lot of ideas on the go, but for most of my brainstorming, I prefer the medium-to-standard-sized ones. They give you enough room to really explore ideas and draw everything from characters to cityscapes, plus all the notes you’ll want to jot down. Plus, if you’ve got a scanner, you’ll want a page size that will actually scan in one pass.
Paper. Do you like working in pencil? Pen? Marker? Watercolors? If it’s one of the latter, you’ll want to make sure the paper is thick enough to handle your medium of choice without bleeding through to other pages. Make sure the paper is acid-free; that means it’s meant to last and preserve your work without turning yellow or crumbling after a few years. Other than that, you’ll want paper of the right texture and thickness that best suits you. Most good sketchbooks have the paper weight marked on them. I personally prefer a paper weight of around 70 lbs., with a little bit of texture. Not so much that your average micron pen can’t draw a straight line, but still some texture. Other people prefer the extremely smooth feel of Moleskine sketchbooks.
Finding the best fit for you may take a little trial and error, but once you get used to working out your ideas visually, you’ll be glad you found one that works for you. To get you started, here are a few suggestions.
mportant!
Have a Buffer!
That means finishing pages before the first one ever goes up. I suggest having either your first chapter or at least 20 pages (or strips) done before launching your comic.
Why Do You Need a Buffer?
Build Your BufferI know, I know – you’re eager to introduce your webcomic to the world as soon as the first page is done, but trust me on this one. Sometimes, real life will just whack you upside the head. Family emergencies, technical failure, or author burnout may demand you take some time off. By having a buffer, you’ll be able to take the time to deal with life as it comes up and still not miss an update.
Readers are, as a whole, fairly forgiving with webcomic artists. That said, if you keep missing your updates, you’re going to lose readers. With a buffer, you can go weeks without drawing a page and still keep updating.
If you do need to miss an update or two, be honest and upfront with your readers. If you’re sick, tell them. If it’s a family emergency or technical issues, let them know that, too. You don’t have to go into detail, but your readers are invested in your comic – and they’re invested in you. If you disappear for a few weeks without a word, they start to worry about you.
Be nice to your readers. You don’t have to share every detail of your life with them (because, hello, creepy +TMI is not a good combination), but keep them in the loop.
Should you have to go on hiatus (an extended period without updates), here are a few tips on how to handle it in our All About Hiatuses post.
Other Helpful Guides
Never Hurts to Have a Sign Post…
The best way to get the hang of doing webcomics is to read a lot of webcomics and regular comics or manga… and to draw a lot. But it never hurts to have a reference, and that’s what these books are – great references. Check them out and see if they’re something that might help you!
Note: Most of these are in manga-style – mainly because that’s the style I use and the style I like. But there are many different styles of manga, and the basics are still the same for crafting a great comic, no matter what kind of comic you’re doing.
Where to Host Your Webcomic
Finding Your Home Online
Alright, so you’ve done your prep work. You’ve practiced drawing your characters til your fingers went numb, filled an entire sketchbook with settings sketches and ideas and plot twists, and you’ve built up a nice buffer of fully finished pages, ready to share with the public. Now, it’s time to take the plunge and put your comic online.
This is the part that makes turns your comic into a webcomic, but this could be the most perplexing part: where, exactly, do you host your webcomic?
You’re in luck! These are great times to be a webcomicker, and you’ve got plenty of options. Here are a few of them.
Build your own website. Have you got some programming skills and some extra cash? Then creating your own website might be the path for you. This is the only way to have complete control over every aspect of your comic. You choose the layout, add special sections like Character Bios and World Information, put up your commission prices (if you’re offering them), integrate a blog or a forum – your imagination’s the limit! Well, that, and your budget.
Pros: Complete control, your own domain name, and the ability to craft an entire website devoted to your masterpiece.
Cons: You’re completely in charge, which means you have to wear a lot of hats – programmer, graphic designer, marketing exec, publicist… You’ll have to decide if you’re going to have ads, where to put them, and how to manage them, along with keeping all the content up to date and figuring out how to build your fanbase. It’s the most work-intensive of the options.
Use a webcomic publishing site. There are several sites out there devoted entirely to building communities of webcomics. You might not be able to customize the total look the way you could if you had your own website, but you also don’t have to worry about doing everything. Some even have ways for you to make money off your comic.
Pros: No programming experience needed! You also get to be part of an established community, which helps guide new readers to your work. Each site/community has their own personality, so check them out to see which one fits you best. Another pro is that many of them are free (although some have special features for “premium” users).
Cons: Less control over the total package, and you have to play nice with the rest of the community. Be sure to read all terms and conditions before signing in. Pay especially close attention to restrictions and make sure you retain all rights to your work.
Use deviantArt. It’s not a comic-specific site, but it is an art community site and there are plenty of people who use it to host their comics.
Pros: deviantArt has a large community already built in. With their gallery system, you can separate your comics and extra are into different folders. There isn’t direct advertising (and please, don’t be a spammer), but when someone favorites your work, other people can find it through those people’s favorites. And, as a recent addition, deviantArt has added the ability to sell premium content.
Cons: It’s not a webcomic community, and it is massive, meaning it could be hard to find your work. Also, some features are only available on Premium accounts, and while there are ways to customize your front page, you can only do so much.
Those are a few of the options available for hosting your webcomic. If you haven’t found a good fit for you, be creative! If a blogging platform suits your needs, use a blog. It all depends on how much work you want to put in, the benefits offered, and which site you like best. Just be sure to read all the terms and conditions first.
Webcomic Hosts
There are several sites out there devoted to hosting webcomics. These sites have built in communities with readers eager for new, quality webcomics. Here are a few of the ones I check out when I’m looking for new comics to read.
MangaMagazine.net
A free site that works on a tier system. Be sure to read their terms, as they require certain tiers to post on their site before any others (If, ya know, you’re going post your comic in a few different places).
Tapastic
Another free site, this one with a pretty cool format for webcomics. It lends itself well to both traditional and more experimental “visual stories.” You’ll have to check it out to see what I mean.
Smack Jeeves Webcomic Hosting
One of the longest-running webcomic hosts out there, this old standby has stayed current and competitve with their features. The basic level is free, while there is also a premium version with special features – for a fee, of course.
On the Topic of Partners…
A Little Advice for Those Not Going It Alone
Awhile ago, one of my readers asked me how the whole comic thing works with a partner, as she was thinking about starting a webcomic with a partner. Well, the short answer is: it depends on the partners.
Hear me out before you dub that the cop-out answer. There are numerous ways for people to work on webcomics together. For example, a group might decide to do things the Western way, with one person writing, one penciling, one doing flats, and one doing the coloring. Teams of two might have one writer and one artist – if you go to OnlineComics.net, you’ll see a lot of postings looking for either a writer or an artist in the forums. It’s a great way for writers who have a great idea for a comic but perhaps not the most talent in the art department or an artist really wants to do a webcomic but can’t write. Other teams may have less defined roles.
When it comes to Koni and myself, Koni’s role is that of “creative collaborator.” Essentially, she’s my muse. When I need a sounding board, get stuck on something, or need to work out the story lines, I turn to Koni. Waaaaay back in 2006, Strawberry Syrup got its start when Koni and I were watching a vampire anime and wondered why all the half-vampires always side with the humans. From there, one thing led to another, and next thing we know, we were in the nexus of creative fusion. We tossed out a lot of story ideas back then, ones I still have to get to. My role is to then take those ideas, flesh them out into chapters with dialogue and plots, and then do all the art.
Some things to consider when you take on a partner or partners for a webcomic:
Make sure everyone understands and is comfortable with their role.
Make sure this is someone you can work with for the long haul if you plan to do a long-run webcomic. Consider doing a trial run – a short one-shot story of 10-20 pages to make sure the two of you can work together. It’s also a good idea with groups, to make sure everyone’s happy with their roles.
Make sure everyone understands and is capable of meeting the deadlines. Your writer has to have the final draft of each page to the artist in enough time for the artist to finish the page in time for that week’s post. Having a sizable buffer will help here.
Be flexible and open to change. If your partner has some ideas regarding your area, at least listen. It could make your webcomic all the better.
Consider a legal agreement defining who owns what and how any profits will be split. This is especially important when you don’t know your partner, only have a professional relationship with them, or have plans to get your comic published. The last thing you want is for legal squabbling to get in the way of things.
Those are just a few of the things to keep in mind when starting a webcomic with partners. And remember, webcomics are supposed to be fun! Whenever more than one person is involved in a creative project, chances are there will be conflicts. Just try not to let them get too blown out of proportion, and you’ll be fine.
Places to Promote Your Webcomic
Or Check Out Your Competition!
Once you have your webcomic up and running, you’ll need to get some readers… and the best way of getting readers is webcomic communities and lists! Here are a few of the ones you’ll want to be on.
OnlineComics.net
This site gives you your own forum, advertising possibilities, and the ability to see how many fans you have and what they like to read. You’ll need at least 10 pages done before you’ll be listed here.
buzzComix
This site lists comics by popularity through voting. You can even offer incentives to get people to vote, like extra art or even pages. You’ll need a banner to join this site.
Top Web Comics
Pretty much the exact same thing as buzzComix, but hey, the more exposure, the better!
The Belfry Webcomics Index
Another list of webcomics. It’s geared towards furry comics, but it allows other kinds to join, too.
Comixpedia
The Wikipedia for Webcomics. List your comic here and make yourself a nice page – you might snag some new readers!
The Webcomic List
Yet another webcomic listing. If you don’t add yourself, one of your readers just might!
Start Your Own Squidoo Lens!
That’s right, Squidoo’s a great place to promote your webcomic, too! Build a lens dedicated to your characters, give readers an introduction to your story, put up polls, and don’t forget to add a guest book, all for free!
Kit’s Favorite Webcomics
The Ones I Love To Read
If you want to make your own webcomic, you probably have a list of ones you love. I know I do, and these are some of my favorites.
Strawberry Syrup
Shameless plug time! Yep, this is my own webcomic. Strawberry Syrup is the story of Sammy, a half-vampire severely lacking in the traditional angst catagory, and Hunter, his own personal (and kind of inept) Van Helsing. If you’re looking for a deep, dark, serious story questioning the meaning of existence… you might want to look elsewhere. XD
No Rest for the Wicked
Follow an insomniac princess, Little Red Riding Hood, and Puss in Boots on a quest through a land of fairy tales more like the original Brothers Grimm than anything you’d ever find in a Disney movie. Delightfully dark with a sense of humor, this well-written and stylishly drawn comic will pull you from page to page and leave you wanting more.
Looking For Group
Are you a fan of MMPORPGS? Love poking fun at them and time-treasured fantasy tropes? Then you’ll love this comic. It will have you laughing out loud.
Lackadaisy
Fantastically drawn fuzzy comic from the gangster era. The art will leave your jaw on the floor… and the characters are great, too.
Inverloch
One of those webcomics to make it onto the shelves of your local bookstore. Beautiful artwork, compelling characters and storyline, and better yet, it’s complete – no waiting for more pages or worrying about the author going on hiatus! Be sure to check out her other comic, The Phoenix Requiem, too!
ps238
In a world populated with superheroes, there is the inevitable issue of… what to do with all the little superkids. Aaron Williams answers this question with ps238, a secret public school geared towards educating the next generation of superheroes. But what happens when the son of the two most powerful superheroes in the universe HAS no powers? While it starts off a little slow, this comic’s got humor, time-travel, super-powered hijinks, and some honestly touching moments.
Runewriters
Another high fantasy one, featuring demonic aberrations, a possibly corrupt holy order, and a shapeshifting runewriter who screwed up a spell and is now trying to fix that with the help of his deaf friend. Great art, great story, and some great humor make this a great read.


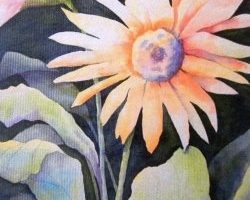
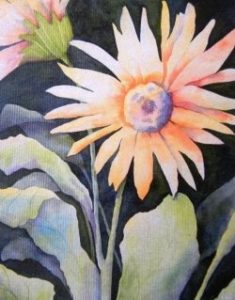 Photos of artwork by Gayle Dowell
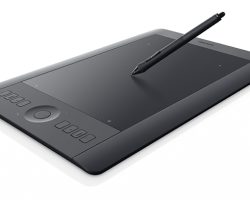


 Photo by RebelT3iOwner


 GREAT NEWS!! You do not need a professional digital SLR camera to take awesome portraits. You can get super portraits with an inexpensive (cheap…)