Today I’m going to show you how to create an epic lyric video with Premiere Pro. This video will be a mixture of action and comedy, and it will be a great advertisement for your product.
Choose a video title
The first thing you want to do is choose a title for your video. This will give you a catchy, memorable name to use for your video. It’s important that you choose a title that is easily remembered and will help people find your video.
Choose the right tools
Next, you’ll want to choose the right tools to help you create your video. You’ll need a video editor, a graphics program, and a video mixer.
Choose your distribution method
Now that you’ve chosen the tools and distribution method, it’s time to start planning your video. You’ll want to create a timeline, choose a location, and choose the right shots.
Edit your video
Now that you’ve chosen your video content and edited it, it’s time to start editing your video. You’ll need to choose the right shot, choose the right timing, and choose the right effects.
Publish your video
Finally, you’ll need to publish your video. You’ll need to choose a distribution method, choose a location, and choose the right shots. You’ll also need to put together a great video marketing campaign to promote your video.
There are many ways to get the perfect wedding lUT in Photoshop. However, the way to get the best results is to use a reliable lUT tool. Here are some tips on how to get the perfect wedding lUT in Photoshop:
Use a reliable lUT tool
A reliable lUT tool will help you get the best results. Make sure the tool you choose is reliable and has a lot of features.
Choose the right wedding lUT
When choosing a wedding lUT, make sure you choose the right one. There are many different lUTs out there, so choose the one that is best for your needs.
Edit the lUT file
Once you have chosen a wedding lUT, you need to edit it. Edit the lUT file to get the best results. Editing the lUT will help you get the perfect wedding lUT.
If you’re planning your wedding and want the best looking photos possible, you’ll want to use a bride’s lip sync software. This software can help you get the perfect wedding lip sync in Photoshop.
Looking to add that extra bit of professionalism to your wedding photography? Well, look no further than Photoshop. With its power and versatility, there are a range of ways to get the perfect wedding lUT. Here are a few tips to help get the most out of your photo editing software:
Start by choosing the right photo editor.
When selecting a photo editor, it’s important to consider the type of photography you want to produce. If you want to produce professional-quality photos, then a photo editor like Adobe Photoshop is the best choice. However, if you want to make your wedding photos feel more personal and intimate, then a software like Adobe Camera Raw may be a better option.
Choose the right photo editing tools.
When editing photos, it’s important to choose the right tools and techniques. For example, if you want to add borders and shading, then you’ll need to use a photo editing tool like Adobe Photoshop or an editor like Adobe Camera Raw. However, if you want to just add basic photo editing features, then you’ll need to use a more basic editor like Microsoft Paint or a free software like GIMP.
Use photo editing software wisely.
When using photo editing software, be sure to use it for the right purpose. For example, if you’re editing photos to be used as negatives, then you should use a photo editor like Photoshop to create the final images. However, if you’re just creating final images for display on your website, then you should use a more basic editor like Microsoft Paint or a software like Adobe Photoshop.
Wedding photography is an art form, and like any other art form there are a few things that must be done in order to get the perfect wedding lut. Here are a few tips to get you started:
Choose the right camera. A camera is the most important tool in wedding photography and must be chosen with the specific needs of the wedding in mind. For example, if you are shooting a destination wedding, a Nikon camera is ideal. If you are shooting a more intimate wedding, then a Canon camera is better.
Choose the right software. Photoshop is the most popular wedding photo EDITOR on the market, and it is key to use the software correctly in order to get the best results. It is important to use the correct features in order to get the best results. For example, use the “LUT” feature in Photoshop to create a custom wedding look.
Get familiar with the software. There are a lot of different wedding photo software options out there, and it is important to find the one that is best suited for your needs. For example, if you are a beginner, then using a software like Adobe Camera Raw may be the right choice. If you are more experienced, then using a more advanced photo editing software like Photoshop may be the best choice.
Practice. The best way to get better wedding photos is to practice. Take photos of your wedding event, and then practice making the lUT changes that you need to make to get the perfect result. This will help you to become more comfortable with the software and get the perfect results.
Video compression algorithms have become more and more popular in recent years as they offer significant improvements in file size and video quality. However, they can also introduce undesirable artifacts into your video footage, which can make it difficult to create a high-quality wedding video. Here are five tips to help get the most out of free wedding video LUTs:
Choose the right compression algorithm
Before choosing a compression algorithm, it is important to understand the effects that different algorithms have on video footage. If you want to use a lossy algorithm, such as MPEG-4 Lossless, your footage will likely be smaller but with poorer video quality. Conversely, if you want to use a HEVC algorithm, your footage will likely be larger but with better video quality.
Use a good video editor
If you want to create wedding videos with your own video editor, you will need to be careful about the codecs and format that you use. MPEG-4 video is a popular codec and is commonly used in wedding videos. However, it can be difficult to create high-quality wedding videos with MPEG-4, so it is best to use a more robust codec such as H.265.
Use a LUT
Another important step in creating high-quality wedding videos is to use a LUT. A LUT is a lookup table that stores the brightness and color information for a set of video frames. This allows you to easily change the brightness and color of individual frames in your footage.
Use a good audio editor
If you have audio recordings of your wedding, you will need to use a good audio editor to dub them into wedding videos. This will help to improve the quality of the audio and make it easier to lip-sync the audio for each individual video frame.
Use a mastering service
If you want to ensure that your wedding videos are ready for release, you will need to use a mastering service. This will help to ensure that your videos are properly mastered and that any artifacts are removed from the footage.
Welcome to our blog post about 5 tips for getting the most out of free wedding video LUTs.
First and foremost, always consult with a professional video editing company to get the best results for your wedding. There are a variety of different LUTs to choose from, and each has its own unique strengths and weaknesses.
Next, be sure to choose the right video editing software for your needs. Some of the most popular options include Adobe Premiere, Sony Vegas, and Apple Final Cut Pro. Make sure to read the tutorials and reviews before making your decision, as each software has its own quirks and preferences.
Finally, be sure to get plenty of practice footage before your big day. This will help you to better prepare and edit your clips, and will also help you to get a feel for how your footage looks on-screen.
With all of these tips in mind, you’re on your way to a great wedding video experience!
– Make sure that you are properly trained in how to use free wedding video lUTs.
– Be sure that your wedding video lUTs are of high quality.
– Use a quality audio mixer to combine your audio and video components.
– Make sure that your wedding video lUTs are properly captioned.
– Use a quality software program to create and edit your wedding video lUTs.
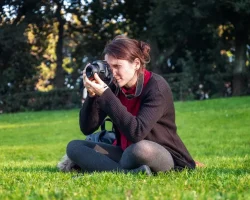
In this day and age, it’s all too easy to get caught up in the technology of our digital SLR cameras and overlook the basics of photography.
Here are a few tips to help you get the most out of your digital SLR camera:
1. Read the manual
This may seem like an obvious one, but you’d be surprised how many people never bother to read their camera manual. Your digital SLR camera is a complex piece of equipment and it’s important to understand how it works before using it.
2. Use the right lens
One of the great things about digital SLR cameras is that you can interchange the lenses depending on what you’re trying to photograph. If you’re shooting a landscape, for example, you’ll want to use a wide-angle lens. But if you’re trying to photograph a close-up of a flower, you’ll need a macro lens.
3. Shoot in RAW
If your digital SLR camera has the option to shoot in RAW, do it! RAW files are much larger than JPEGs but they contain all the information your camera captures when you take a photo. This gives you much more flexibility when editing your photos later on.
4. Use a tripod
If you want to avoid blurry photos, use a tripod. Tripods are especially important when shooting in low light or using a long lens.
5. Know your camera’s limits
Each digital SLR camera has its own strengths and weaknesses. Some are better in low light, while others have faster shutter speeds. Learn about your camera’s capabilities and limitations and you’ll be able to take better photos.
By following these tips, you’ll be able to get the most out of your digital SLR camera and take better photos.
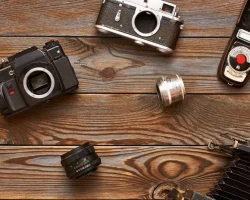
Before you start shooting on film, it’s important to get to know your camera. Read the manual and familiarize yourself with the different features and settings. This will help you get the most out of your camera and avoid any potential problems.
2. Use a tripod
Using a tripod will help you avoid camera shake and ensure that your photos are sharp and blur-free. It’s especially important to use a tripod when shooting in low light conditions or when using a long focal length lens.
3. Use a remote shutter release
A remote shutter release allows you to take photos without touching the camera, which can help prevent camera shake. If your camera doesn’t have a remote shutter release, you can use the self-timer setting.
4. Use a low ISO
Using a low ISO will help you avoid image noise and produce sharper, higher-quality photos. It’s especially important to use a low ISO when shooting in low light conditions.
5. Use a fast shutter speed
Using a fast shutter speed will help you freeze action and avoid blur. It’s especially important to use a fast shutter speed when shooting sports or other fast-moving subjects.
6. Use a narrow aperture
Using a narrow aperture (higher f-stop number) will help you achieve a greater depth of field, which means that more of your photo will be in focus. This is useful for landscape photos or photos with multiple subjects.
7. Use exposure compensation
If you’re shooting in manual mode, exposure compensation can be used to make your photos lighter or darker. This is useful if the scene you’re photographing is very bright or very dark.
8. Shoot in RAW
Shooting in RAW will give you the most flexibility when editing your photos. RAW files contain all of the data captured by the camera’s sensor, which gives you more information to work with when editing.
9. Use a filter
Using a filter can help you achieve a specific effect or look in your photos. Common filters include polarizing filters, which reduce glare and increase contrast, and ND filters, which reduce the amount of light entering the lens.
10. Experiment
Don’t be afraid to experiment with different settings and techniques. This is the best way to learn and find what works best for you.
Hopefully these tips will help you shoot better on film. If you have any questions, feel free to leave a comment below.
Arlo Pro 2 is a versatile camera that can be used for a variety of purposes.
Here are some tips on how to use your Arlo Pro 2 Camera to take better pictures:
1. Use the right settings.
There are a few different settings that you can use on your Arlo Pro 2 Camera to take better pictures. If you’re taking pictures of a person or object that is in motion, you’ll want to use the “Action” setting. This setting will help to freeze the action and prevent blurring. If you’re taking pictures of a still object, you can use the “Still” setting. This setting will help to capture all the details of the object.
2. Use the right lens.
The Arlo Pro 2 Camera comes with two different lenses: a wide-angle lens and a telephoto lens. The wide-angle lens is great for taking pictures of large groups of people or objects. The telephoto lens is great for taking pictures of distant objects.
3. Use the right lighting.
The Arlo Pro 2 Camera has a built-in flash that can be used to take pictures in low-light conditions. However, if you’re taking pictures in bright sunlight, you’ll want to use the “Sun” setting. This setting will help to reduce the amount of glare in your pictures.
4. Use the right composition.
When you’re taking a picture, you’ll want to make sure that the subject is in the center of the frame. This will help to ensure that the subject is the focal point of the picture. You’ll also want to make sure that there is some space around the subject. This will help to create a more pleasing composition.
5. Use the right editing tools.
After you’ve taken a picture, you can use the editing tools on the Arlo Pro 2 Camera to make some final adjustments. These tools can be used to crop the picture, adjust the exposure, and even add some special effects.
By following these tips, you can use your Arlo Pro 2 Camera to take better pictures.
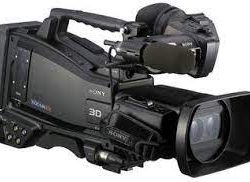
Camcorders and TVs have a symbiotic relationship (like those birds that pick food off of a rhino’s back). When TVs converted to high definition, it wasn’t long before high definition camcorders appeared. So it’s no surprise that with a new generation of 3D HDTVs hitting the market, 3D camcorders have trotted along behind. Here’s what you need to know about them.
How 3D Camcorders Work
To get a true 3D image or video, you need a camcorder that uses two lenses and two image sensors to capture two sets of images.
This creates the “stereoscopic” effect that fools our brain into thinking we’re seeing depth on the screen. In some cases, these two lenses are built into the camcorder itself. In others, a double-lens kit is sold as an accessory: it can be attached to the camcorder when you want to film in 3D and removed when you want to film in 2D.
Since two lenses and two image sensors can add cost and bulk to a camcorder, some manufacturers have opted to do 2D-to-3D conversions using software inside the camcorder. Many purists would object to the use of software since it’s not creating a full-resolution 3D image, but if you only want to dabble with 3D on occasion, the software conversion minimizes your costs.
Will You Pay More for 3D?
The short answer is basically yes, for now. There aren’t many 3D camcorders on the market as this is written, but based on the selection currently available, you’ll definitely pay more for a camcorder that offers 3D functionality than one without (there are exceptions: see this roundup of 3D camcorders for the latest prices and models).
Do You Need Glasses to View Your 3D Videos?
That depends. Some camcorders offer special LCD screens that can display 3D footage without the use of glasses. The technology is called a Parallax Barrier: it basically embeds the polarized glasses that you’d typically wear on your face, on the display itself.
If the camcorder does not require glasses to view your videos in 3D it will typically work with a dedicated media viewer – basically a small digital frame – that uses the same parallax barrier technology found in the camcorder’s display.
Other camcorders require you to output your video onto a 3D capable TV via an HDMI cable, where you will indeed need glasses to view your videos in 3D.
Can You Edit 3D Video Files?
Yes. Some of the major video editing programs such as Adobe Premiere Pro and Sony Vegas Pro have added 3D video editing options already. Software included with Panasonic’s first 3D camcorder also allows you to edit the 3D video file as you would a 2D file.
3D Doesn’t Mean HD
It may seem a bit obvious, but don’t assume that a 3D camcorder is recording in high definition. Some 3D camcorder models currently on the market record in standard definition.
Do You Need a 3D Camcorder?
You should definitely not consider buying a 3D camcorder unless you already own a 3D HDTV. Otherwise, you’re only other choice to view 3D movies will be on a small 8-inch media viewer – and that’s not the ideal viewing experience for your home movies. You should also steer clear of 3D camcorders if 3D footage makes you ill. For now at least, most consumers would be better off taking a wait-and-see approach with 3D.
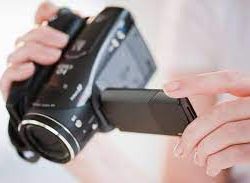
These days, you’re just as likely to view your camcorder videos on a computer as on a TV (if not more so.) That’s why every camcorder is packaged with some basic video software that will let you perform some routine tasks with your camcorder video. Here’s what you can expect:
Basic editing: While you shouldn’t expect to edit your Hollywood blockbuster on the included software, the basic editing features are usually there – some color corrections, trimming, along with the ability to add titles and transition effects.
Sharing: Whether you want to post your videos to Facebook or YouTube or send them to friends and family via email, the software included in your camcorder usually contains tools for Web sharing.
Transcoding: If you want to watch your home movies on DVD, smartphone, portable media players or even a PlayStation Portable, you may need to transcode your video – i.e. turn it into a file format that can be recognized by these devices. Most bundled software will have an option to output your video file for viewing on various platforms.
Organize: The more videos and photos you record with your camcorder, the harder it is to keep track of all your digital files. Included software will offer a basic organizer that will let you keep track of your ever-growing digital library.
DVD Burning: One of the most routine tasks you’ll need to perform with your camcorder’s software is burning an archival disk of your footage. If it does nothing else, your software should allow you to burn DVDs of your home movies.
Perform Specialized Tasks: Some high-end camcorder features can only be accessed through specialized software applications not found on off-the-shelf software.
Sony’s GPS camcorders are a case in point: you can only access map views and “geo-tagging” if you use the company’s included software to organize your files.
Built-in Software
There’s a growing trend among camcorders to ditch the CD-Rom and load their software directly into the camcorder itself. The software will typically install itself on your computer the first time you connect the camcorder to the computer. The virtue with the built-in approach is that you can upgrade computer (of suffer a hard drive wipe out) without worrying about losing your software.
Thanks to technology today that make everybody can make videos and share them online. They can have memories and has an online drive that helps them save them as long as they want it.
When it comes to using video in the cloud, Google is ahead of the curve with ways to watch, edit, and share videos online. It offers a service called Google Play that’s similar to iTunes and iCloud – it lets you rent or buy HD movies, music, and TV shows and stream them to any Google device such as Android phones, tablets, and Chromebooks. In addition to this streaming media function, Google has partnerships with three different video editing apps – Pixorial, WeVideo, and Magisto – that let you edit video in the cloud using Google Drive. With Google’s cloud services, you can watch, edit and access your video from anywhere!
Using Google Play:
Courtesy:encrypted-tbn0.gstatic.com
Google Play <https://play.google.com/store> is conveniently divided up into Music, Books, Magazines, Movies and TV, Android Apps, and Devices.
Similar to the iTunes store for Apple devices, any of the media you rent or purchase can be stored in the GooglePlay cloud so that you can access it at your convenience, and it also doesn’t take up any hard disk space on your PC, tablet or mobile device.
The Google Play streaming movie and TV service is a pay-per-view service like Amazon Instant Video. Rather than use the subscription-based model of Netflix and Redbox, Google Play banks on the fact that it’s going to have the title you want, and you’ll rent or buy it for a competitive price. Google has partnerships with Fox and Paramount, and its selection of available movies competes with Amazon and beats out Redbox and Netflix.
You can use Google Play on Android tablets, Android phones, and Linux, Windows, and Mac personal computers. Make sure you’re equipped with the latest version of Flash Player and an up-to-date browser before you begin streaming. Most titles are available for streaming in HD, but whether or not you’ll be able to do this depends on your internet connection and device capabilities.
The download speeds for Google Play rentals are pretty fast, and I experienced no problems with hiccups while streaming. As the biggest data player of the internet, Google definitely has the power to create a fast on-demand service.
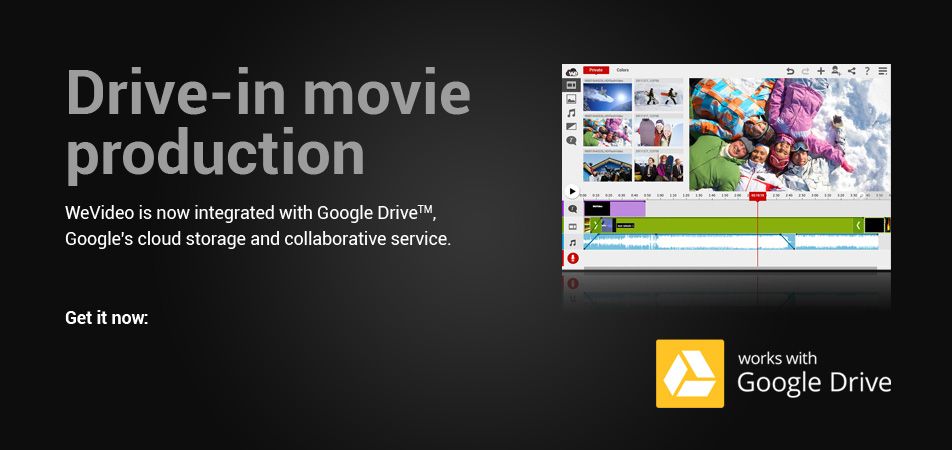
Video Editing in the Cloud with Google Drive:
Courtesy:/i.pinimg.com
Three online video services – WeVideo, Pixorial, and Magisto – have partnered with Google Drive to let you upload, edit and share video entirely in the cloud. You’ll need a Google account to access these features, which you may already have room using Gmail, Drive or a Google Mobile Device. Log into Google, and then look for the “Drive” tab at the top of the screen. Go to the “Create” button in your Drive directory, and then choose “Connect More Apps”. WeVideo, Pixorial, and Magisto will all be included in the list of apps that are available for add-on.
Once you’ve connected the editing app you choose, it will appear in the “Create” drop-down menu as the default app for creating videos. In addition, you can make this app the default app for opening up video files that are already in your Drive. Google Drive gives you 15GB of free cloud storage. There are different ways to access video files for editing depending on the video application you choose. WeVideo lets you connect to Facebook, Instagram and Google Drive so you can edit videos and photos that are already on those sites. Magisto lets you edit and export video files on your Google Drive, and Pixorial comes with 7GB of app-specific storage, and also has the option to connect to your Google Drive space.
In all three cases, you’ll need to upload the video to your Google Drive to edit videos. Uploading video to Drive is simple and efficient – just click the up arrow in your Drive directory and choose the file from your hard drive you’d like to add to the cloud. The upload will automatically begin. Drive accepts most video formats so you don’t have to worry about converting your files before you upload, but as always, it’s a good idea to compress video for faster upload times. Once the video is uploaded, it will appear with your other documents in your Drive, and when you open it Drive will do so with the default video application you’ve connected to your account.
Google Drive is a versatile and useful tool, and with video editing integration, it’s the most video-friendly cloud service on the web today. If you haven’t tried editing in the cloud, give it a go with Google Drive!
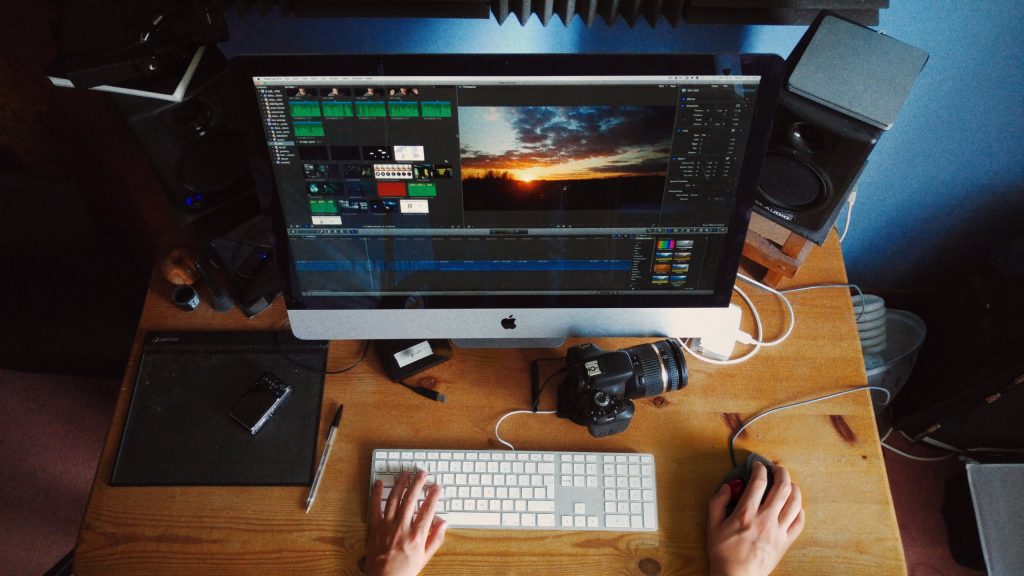
If you just bought a camcorder, the manufacturer has put the default software in it to use video editing. Even though it is simple, it is enough to help you edit the video that you take.
These days, you’re just as likely to view your camcorder videos on a computer as on a TV (if not more so.) That’s why every camcorder is packaged with some basic video software that will let you perform some routine tasks with your camcorder video. Here’s what you can expect:
Basic Editing
Courtesy:http://reneescheltema.com
While you shouldn’t expect to edit your Hollywood blockbuster on the included software, the basic editing features are usually there – some color corrections, trimming, along with the ability to add titles and transition effects.
Sharing
Whether you want to post your videos to Facebook or YouTube or send them to friends and family via email, the software included in your camcorder usually contains tools for Web sharing.
Transcoding
Courtesy : www.wowza.com
If you want to watch your home movies on DVD, smartphone, portable media players or even a PlayStation Portable, you may need to transcode your video – i.e. turn it into a file format that can be recognized by these devices. Most bundled software will have an option to output your video file for viewing on various platforms.
Organize
The more videos and photos you record with your camcorder, the harder it is to keep track of all your digital files. Included software will offer a basic organizer that will let you keep track of your ever-growing digital library.
DVD Burning: One of the most routine tasks you’ll need to perform
with your camcorder’s software is burning an archival disk of your
footage (read about how to archive your camcorder videos here). If it
does nothing else, your software should allow you to burn DVDs of your
home movies.
Perform Specialized Tasks: Some high-end camcorder features can only
be accessed through specialized software applications not found on
off-the-shelf software.
Sony’s GPS camcorders are a case in point: you can only access map
views and “geo-tagging” if you use the company’s included software to
organize your files.
Built-in Software
There’s a growing trend among camcorders (particularly pocket
camcorders) to ditch the CD-Rom and load their software directly into
the camcorder itself. The software will typically install itself on your
computer the first time you connect the camcorder to the computer. The
virtue with the built-in approach is that you can upgrade computer (of
suffer a hard drive wipe out) without worrying about losing your
software.


. When TVs converted to high definition, it wasn’t long before high definition…)
 That’s why every camcorder is packaged with some…)