Portrait Photography Tips ~ Use A Canon Rebel T3i For Portraits

Portrait Photography Tips ~ Use A Canon Rebel T3i For Portraits

How To Take Portraits (For Beginners)

GREAT NEWS!!
You do not need a professional digital SLR camera to take awesome portraits.
You can get super portraits with an inexpensive (cheap even) DSLR camera. In fact, if you own a Canon Rebel T3i, you have in your hands an excellent tool for portrait photography.

The technology that Canon has built into its newest Rebel cameras is improved by leaps and bounds over what was available even a couple of years ago. Combine this inexpensive digital SLR with a even a so-so Canon Portrait Lens, and you have a combination that will get you some great portrait shots as well as lots of happy feedback from those you photograph.

Getting Ready To Take A Portrait

Begin with the basics.
Portrait Mode The first thing you MUST do is take your Canon Rebel T3i off the Auto setting (a gasp is heard from the crowd)..

Really! You might get lucky and get a decent portrait in auto mode, but if you want the best results, you will have to take drastic steps.

There are two choices here. First, you can use the Portrait Mode supplied by the camera, or you can use Aperture Priority (Av).

Since the simplest way to get started is to use the Portrait mode setting, let’s start with that.

Set your camera on Portrait Mode. See the picture on the right. When you do this, your Rebel will automatically use the largest aperture available for the lens you have attached to the camera.
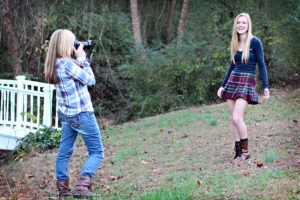
 

Photo by RebelT3iOwner

Say What?? (I am psychic; I know what you are thinking.)

Don’t worry. You don’t even have to know what an aperture is if you use the portrait mode.

The next thing to do is compose and take the shot. When you review your shot, you should see that the background is blurry. That is the sign of a good portrait.

So what if your background is not blurry? Well, here is how to make the background blurry.

First, use a lens with a longer focal length and step away from your subject (you can also accomplish this by using the zoom on your lens at its highest setting – on the kit lens, zoom to 55mm).
The second way to help out your background is to move the subject of your photo farther away from the background. In other words, put more space between the person you are photographing and the background. Do not have them standing with their back against a wall, for instance.
Using a tripod
If there is plenty of light, you can usually have good success with hand-holding your T3i, as long as you use good camera technique. However, using a tripod is never a bad idea for a regular portrait.

Tip For Getting Great Shots
Take shots when your subject is not expecting it. Most of us announce the timing with “Say cheese.” But if you want natural expressions, try taking spontaneous shots. Or, take several shots in succession after you do the “say cheese” thing. One feature that is enabled when you use Portrait Mode is Continuous Shooting. So, if you just hold down the shutter button, you will be taking up to 3.7 shots every second. Try it. You will get some surprisingly good shots that way.

Portraits Using Aperture Priority

Feeling adventurous? Try this.

Using Aperture Priority for Portraits When you take a portrait shot with you Canon Rebel T3i in Portrait Mode, the camera does all the thinking for you, including aperture, shutter speed, ISO.. all of it. That’s why the settings on “that side” of the dial are called Basic settings. The camera does all the thinking; all the photographer has to do is select the basic setting.

The settings on the “other side” of the dial are called Creative settings. This simply means that the photographer can take more control of what the camera does on a particular shot.

Taking portraits works very well when you choose the Av, or Aperture Priority, setting. Once in that position, simply select the “f-stop” you want to use (f-stop basically means Aperture setting). The one thing you have to remember here is that larger numbers mean smaller apertures and smaller numbers mean larger apertures.

Basically, you want to set your f-stop at the smallest number you can for the lens you are using. If you are using the kit lens (18-55mm), and you zoom to the 55mm length, you will choose f/5.6. Your Rebel will not let you choose a number any smaller than that. If you are shooting with your zoom lens at the 18mm length, you can choose f/3.5. This is because the lens has a variable aperture (the smallest aperture changes as the lens zooms to higher focal lengths).

OK, enough of the geeky stuff. Why would someone want to use Aperture Priority rather than Portrait Mode?
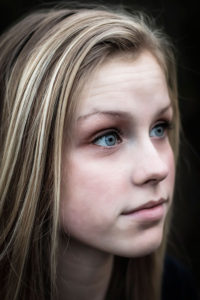
The simple answer is that there are those of us who believe that having as much control of the camera as possible gives us better final results (pictures). In aperture priority, you can set your own ISO in order to increase the shutter speed. You can also change the exposure compensation to add more or less contrast to the image.

Finally, and this is a real control thing, you can shoot in RAW rather than JPEG. If you choose to do this, you will definitely have to do some post-processing of every image in some photo editing program like Photoshop.

The intent of this article is not to be an entire photography course, so, let’s suffice it to say that if you want to venture into the realm of learning more about photography, use Aperture Priority. At least use it when the stakes are not too high. You can possibly mess up a photo op and not get the picture, so maybe save your experimenting for times when you can patiently learn how Aperture Priority works.

The photo above was taken using Aperture Priority. The light coming from the window gave some interesting effects. Using Portrait Mode gave would not allow me to take this without a flash, another reason to try Aperture Priority.

Photos by WRasku

Portrait Lenses For Canon

These lenses will go a long way toward making your pictures look GREAT!

Recommended focal length for portraits is about 75mm (plus or minus), but on a Rebel a 50mm lens is roughly equivalent to that because of something called the “crop factor.” So, any one of these lenses will qualify as an excellent choice for your future portraits.

Portraits With Props

Add Interest to portraits by adding unexpected items.

Canon Rebel T3i Portrait Sometimes you can get a great shot that grabs lots of attention by simply adding a hat or scarf. Simple things add so much interest if used in a way that develops a story along with the excellent quality of the Canon Rebel and the portrait lens you choose.

Recently, we were browsing in a downtown gift shop that had lots of hats, scarves, jewelry, and other great photo props. We ended up with some pictures that we normally would not have even thought to shoot.

..don’t stop after you get one shot. It sometimes takes a little time for the subject to start to relax..
Let your subject use her imagination when it comes to props like this. She will know what looks good on her (and, more importantly, she will know what she does not want to be seen in). The subject will also feel more at ease if he or she has some input into the setup of the shot. This can work very well with children as well as adults.
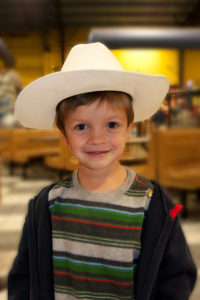


And don’t stop after you get one shot. It sometimes takes a

little time for the subject to start to relax and get into the mood. Also, don’t hesitate to show her (or him) the photos you are shooting. When she sees how good the pictures are turning out, she will be much more enthusiastic about the idea.

Another excellent way to generate excitement in this type of situation is to bring together two or three people who are friends. They will feed on each others excitement and enthusiasm.

You can even get good portraits in public places. In fact, this type of photo can add much more interest than using a standard photography background. Photographers use this quite often in senior portraits when the take their subject to stand by a tree or a covered bridge, but you can do the same thing at a restaurant or public square.

Photos by WRasku

Pet Portraits

Love taking pictures of your best friends?

Pet Portrait With Canon Rebel T3i Pets could be one of the most popular portrait subjects. After all, don’t we all love our dogs, cats, turtles, parakeets, etc, etc?

Yes we do!

The problem is, sometimes our beloved friends do not know how to cooperate.

In situations where getting the pet to look in the right direction, or just stay in one place long enough for you to get the shot, you will need a couple of things.

First, you need patience. Chances are you will have to take quite a few pictures before you get The One.
Someone to help you would also be helpful. You can enlist the help of another person who in intimate with the pet. (This is especially true if you are doing this for a friend, and the pet is not your own.)
This is where a good, fast lens comes in handy. Point and shoot cameras may get some good pet photos, but your Canon Rebel will shoot rings around a point and shoot in this situation, simply because you can choose the right lens for the shot.

Some other things that can help here are treats and toys. Most animals (even cats) respond to goodies. They also show interest in their favorite toys.. see the picture of Colby here.. he was looking intently at a treat.

Photo by WRasku

A Nifty Trick For Pet Photos

Pet wide angle portrait

Take a pet photo with a wide-angle lens.

This is Colby again. He is not the best model – hates to have his picture taken when he knows it’s going on the Internet. He’s so vain.

I did this with the kit lens at the widest focal length – 18mm. I got up really close – as you can see, his nose is out of focus, but the eyes are sharp. Sharp eyes are what separates an OK picture from one that has the possibility of being a WOW picture.

What happens in a picture like this is something called distortion. The lens distorts the actual image so that it looks a bit wonky. It will not make your wife (or husband) look like a super-model, but it’s fun for animals.

This one is not in the WOW category, but I was dealing with a moving target. You can take this technique and use it with your own pet. Farm animals like pigs and cows work perfectly with this method. Your fans, friends, and family will love it.

Using Your Canon Rebel T3i for Self-Portraits

Getting a bit lazy here. Rather than write about self portraits, I made a video.

With the Canon Rebel T3i’s articulating LCD, you can see yourself before you take the photo. All you need is a cheap remote shutter button.

Portraits That Tell A Story

The Canon Rebel T3i can capture the action.
Action Portraits With A Canon Rebel T3i Great portraits are not always a result of someone sitting on a stool in front of a photography backdrop with the camera man saying, “Cheese.” You can use a good digital SLR like the Canon Rebel T3i to capture some nice candid portraits like this one of the guitar player.

The truth is that your subjects will love the pictures when you are able to capture the personality of the moment. As the viewer looks at the photo, there is a story that emanates from the picture, or maybe it will be a question. But in either case, the picture gets the viewer involved, and that is one of the signs of a good photo.

Photo by WRasku

Use A Fast Canon Portrait Lens

Wide apertures help to blur the background.

Use A Fast Canon Portrait Lens Notice how the background is blurred in the photo above. The way that was accomplished was to use a Tamron 28-75mm f/2.8 lens set on Aperture Priority with the aperture set to f/2.8. This not only guarantees a blurry background, but it also gives you the fastest shutter speed possible in an indoor situation.

Nothing is worse than taking a killer picture of a great subject and having it totally messed up by some distracting background item that you didn’t even know was there.

Sometimes you can’t avoid background clutter, but you can blur it out using a wide aperture lens. One desirable feature of a Canon Portrait lens is a wide aperture.

Of course, it may also depend on the focal length of the lens to know whether an f/4.0 lens is wide enough to get that blurred background. If you can secure a lens with f/2.8 as its widest aperture, you will pretty much guarantee a nice blurred background.

Photo by WRasku

Edit Your Canon Rebel Portraits

Post processing adds punch to a photo.

Canon Rebel T3i Portrait Cropped Almost all digital photos can be “helped” with a little post-processing. You don’t need the most expensive photo-editing software to do this either. You can even use free online photo editing sites like GIMP or PICNIC to get your portraits looking good.

Sometimes all it takes is changing to black and white or a bit of cropping to make your portrait a real show-stopper.

Photo by WRasku

Keep Your Canon Rebel T3i In Plain Sight

Don’t be shy!
Don’t be shy with your Rebel T3i When you are at special events, you are in prime territory for portrait shots.

This shot was taken at a Civil War Re-enactment. These guys love interacting with their audience and having their photo taken. They will also give you all the details of their costume. It is very enlightening and rewarding.

The thing that will hinder you is your shyness. Even if they say “no,” which they won’t do, the worst thing that can happen is you don’t get to take their picture.

On the other hand, it is always a good gesture to ask if you can make their picture. Asking permission will not only get you the great photo, but you can also use it online when you have their consent. As a gesture of gratitude, you might even offer to send them a copy.

Group Portraits are awesome when there is a theme. At the Civil War demonstration, these gentlemen were very cooperative for the photographers. Then I took the picture into my editing software to add a vintage look to the photo. So much fun!
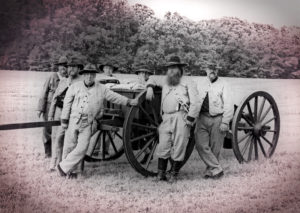
Photos by WRasku

Take Family Portraits

Family photos with Canon Rebel Every year, I use my Rebel for family photos that end up on or in Christmas cards.

This is one of the ones that was chosen.

Here is the data for this picture:
Camera lens: Tamrom 28-75 f/2.8
Mode setting: Av (Aperture Priority)
Aperture: f/2.8
Shutter speed: 1/320sec
ISO: 400
Focal length: 42mm
Flash: off

In-camera Effects

Edit Your Photos Without Expensive Software

There are several Canon T3i in-camera editing effects that you can use right in the camera. Once you select an effect, the software will generate a separate file so you don’t lose the original. Essentially, you can create many photos from a single shot.. without a computer!

The effects are:

Grainy Black and White
Soft focus
Fish-eye effect
Toy camera effect
Miniature effect

Example of Grainy Black and White
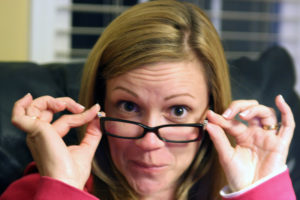
Example of Fish-eye Effect
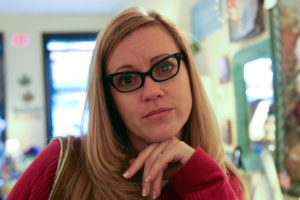
Free 3d Models for Cinema 4D

Free 3d Models for Cinema 4D

Everyone Can Learn CGI

Maxon’s Cinema 4D software allows anyone to easily learn CGI (Computer Generated Imagery). The Pixar movies are probably the most famous example of this technology but the same software programs that are used to make Buzz and Woody are also used to create Megatron and many other special effects.

You Don’t Need to be a Geat Modeller
The best thing about the wide-spread use of programs like C4D is that it has brought together a whole community of artists who want to support each other and help each other. You don’t need to build your own models because there are THOUSANDS of great modellers out there who are already sharing their models for free! See the Iron Man image to the left? Someone built that and shared it with us all for free. I colored it, textured it and posed it in a scene and an animated short film. All for free. (note: the image quality shown here is poor but the actual model is crisp and movie-quality)

Make Anything You Can Imagine

Alien vs Star Wars

Free Scifi 3d Models

STMC (Star Trek)
A great library full of Star Trek 3d models, all free.
NASA
OK so, strictly speaking this one is not science fiction but science fact but, if you’re making a scifi piece, the you might want a realistic model of a real space craft and this is the resource to get it from.

Free 3D Vehicle Models

DMI Car 3D Models
Great quality models and a lenghty list of other vehicle models resources too
3D Cool
A large selection of vehicles including cars, trucks, boats, airplanes (as well as other model types too).
3Dup
Nice selection but seems to be inactive now

Free 3D Models

General 3D Models

TurboSquid
Easy to search, this is one of the best sources for 3D models on the internet
The Free 3D Models
Excellent 3D modelling resource.
Archive 3D
Household objects, cars, bikes, people and more.
3DXtras
Big selection, some very good models
Artist 3D
GREAT models but it’s a little difficult to search
3diva
Assorted models. Some great, most are pretty rough.
3D domawe
I just found this site today and it is AWESOME!
3D Universe
Some very slick models here.
3Delicious
Good models but I wish it had categories

3D Furniture and Building Models

3D Model Free
Not a large selection but some good quality models
Mr Furniture
Chairs, etc.

Free Art Tools Online

Free Art Tools Online

Art Resources

Who has time for art? While I love art, it’s inconvenient to take out all my supplies, paint, and clean up. Not to mention, my kids want to participate too. I spend so much time teaching them how to create things that I don’t get to fully enjoy my own work or time. It just leaves me frustrated.

There is an easier way to find your inner artist

Free Resources
Several places online offer a variety of ways to create graphic art with just the click of a mouse. Most programs load right into your web browser and are easy to pick up. Other, more complex, programs need to be downloaded, installed, and learned.

Convenient
Art is at the tip of your fingers. A few minutes of art every day spent creating art is entrancing. Don’t you deserve a few minutes each day?

Harmony

Harmony Harmony is one of my favorite programs online.

*Free to Use and Save
*No Registration Required
*Several Drawing Styles
*Simple Layout (uses most of the page to draw on)

PsykoPaint

PsykoPaint PsykoPaint is a site that you can create paintings from your own photographs even if you don’t know how to paint.

*Register is Required for many features
*Able to use with Wacom or digital tablets
*Send a postcard with your art
*Send a digital card by email

Flash Paint

Flash Paint Flash Paint is an online paint tool that uses Flash in your web browser

*No Sign Up Requirements
*Save your images
*Share images in the Gallery
*Simple Tool Set

OdoSketch

OdoSketch OdoSketch is a unique online Flash drawing application.

*Paper Background
*Easy tool system
*Account Required to save images

Bomomo

the Bomomo One of the simplest web browser art generators out there is Bomomo

*Works only with Firefox and Safari
*18 drawing tools to experiment with
*Save finished work to your hard drive
*Nothing to sign up for or download

My Oats Draw Tool

My Oats My Oats is an online, web browser art generator.

*Advanced Editing Tools
*Share with the community if you want
*Save your images (must make an account)
Great Art Resources on Amazon

ToonDoo – Make Comic Strips

ToonDoo ToonDoo is the fastest way to create comic strips online.

*Registration Required
*Draw Characters – Create different looks for each character
*Choose Comic Layout
*Use the DoodleR to add personal touches
*Create Books of your comics
*Print your creations on T-shirts, posters, cloth, mugs, mousepads, keychains and more!

Sketchpad

SketchPad SketchPad is a more complex drawing tool that offers a variety of patterns, brush options, and shapes to create with.

*A little more difficult to learn than some of the others
*Easy to save
*No Sign-up Required

Draw.To

Draw To Draw.To lets you draw anything you like and share it instantly via email, instant messaging, Twitter, Facebook and more!

*No Registration Required
*Embed drawings in your blog or website
*Add to existing drawings
*Works in your web browser, no downloads required
*Also works on iPhone, iPad and iPod Touch

The Image Mixer

Image Mixer If you love abstract art, try experimenting with the Image Mixer. It’s a web based generator. Unfortunately, you can’t add your own photographs. There are a lot of great patterns that you can create as well as a gallery from other users.

Generate abstract images in your web browser
Generate as many images as you desire
Customize the size, color, patterns, shape, opacity and scattering

Modern Art Generator

Modern Art Generator The Modern Art Generator

*Create abstract drawings online in your web browser
*Experiment with different color palettes
*Adjust opacity and image size
*Save your images

Brushter

Brushter Brushter is an online painting machine for all ages. This Shockwave interactive includes more than forty brushes and customizable size, transparency, texture, and stroke options. A rainbow palette, along with a toolbox of special effects that blur, ripple, smudge, blend, and fragment your designs help make BRUSHster a full-feature painting program.

*No Registration Required
*Save work to your computer
*Auto Draw Mode
*Requires Shockwave Payer (Free Download)

Sumo Paint

Sumo Paint Sumo Paint is an online image editor and digital paint program.

*No Sign up required
*Several Tools to choose from
*Extensive “How To” section
*Filters to create effects on your work
*Browse other community art for inspiration

Sketch Swap

Sketch Swap With Sketch Swap, you can draw images online and trade it with another person. It’s all anonymous, so there’s nothing embarrassing to worry about.

*Runs in your web browser
*Nothing to download
*Simple pen tool
*Redraws another person’s art after you submit yours

FlockDraw

FlockDraw Flockdraw is a free to use online whiteboard based painting & drawing tool.

*Draw online free with multiple people for fun or business
*Have unlimited people in a room
*See drawing changes in real time
*Use different colors, shapes and text
*Signup Required

ScribLink

ScribLink Scriblink is a free digital whiteboard that users can share online in real-time. Sorta like pen and paper, minus the dead trees, plastic, and the inconvenience of being at the same place at the same time.

*No Registration required
*Privacy: the board is all yours, open only to the people you choose to invite
*Dynamic Tools: use shapes, hundreds of colors, a size bar, a text feature, and a grid to help guide your drawings
*File Options: gives you the ability to print, save, and email your work
*Image Uploader: upload an image onto the whiteboard as the background, allowing you to share it, mark it, deface it, or highlight key elements
*In-Screen Chat: when working with others, no need to sign in to third party software, simply use our in-screen chat
*VOIP Conferencing: if you have a mic for your computer, you can automatically connect with your collaborators (no software necessary) and talk for free for as long as you like
*File transfer: when emailing is too much of a hassle, simply transfer files directly to anyone you’re working with

Online Color Palette Generator

Color Palette Generator The Color Palette Generator is an amazing tool for any digital artist.

How many times have you needed to pick up the colors on your images to create a color pallets? The color dropper tool is effective, but it’s slow. Also, if you’ve used the dropper you’ve noticed how each pixel can be slightly different. This generator find the number of colors you need for an image. Just upload a sample image under 100KB and select your color palette grid size.

You can use .png, .gif, .jpg, and .jpeg formats
No Limits on the amount of palettes you generate
Create precise or average color palettes.

Gaffiti Playdo

Graffiti Playdo Graffiti Playdo uses adobe flash player and allows you to paint on a wall with cans of spray paint. Draw graffiti together with your friends! Save your art to your album and share with your friends. With multiplayer functions so you can paint together in real time.

*No Registration Required
*Connect with Facebook to save, share, and draw with friends

ArtisanCam – Graffiti Art Board

ArtisanCam ArtisanCam provides an insight into the lives of contemporary artists. Using a mixture of video and interactive activities, we introduce children to the world of contemporary visual art before encouraging them to have a go themselves in fun and exciting ways.

*No Registration Required
*Much more art content than the graffiti paint program”

Kerpoof

Kerpoof Kerpoof is a fun program for both children and adults. It’s simple enough for the young users but versatile enough for adults to fully enjoy. The website is owned and operated by the Walt Disney Company.

*Flash and Java browser
*Free to use and to download JPEGs
*Must have an account to save unfinished work
*Make artwork (even if you aren’t good at drawing!)
*Make an animated movie (really! it’s easy!)
*Earn Koins which you can trade for fun things in the Kerpoof Store
*Make a printed card, t-shirt, or mug
*Tell a story
*Make a drawing
*Vote on the movies, stories, and drawings that other people have made

Draw Here

Draw Here Draw Here allows you to draw on any web page. If you save your drawing, other Draw Here users will be able to see what you’ve drawn. Use it to share your artwork, comment on web pages, or just doodle while you are browsing.

*Free to Join
*Free to use
*Highlight parts of a webpage
*Doodle while you read
*Write notes right on the screen
*Deface your photos just for the fun of it

Draw Island

Draw Island Draw Island was just launched early Feb. 2012

*Iphone version , Minimalist version
*Draw online : change sizes, colors and use shapes like rectangle, round,…. and save result
*Generate animations (see button) with your drawings…(max size 400×400 pixels with 10 frames max)
*Video Tutorial

**Updates Coming :
– new options(Import Image)

Favicon Icon Drawing

Favicon Favicon is a drawing program to create a 16×16 pixel icon in 16 colors with optional transparency.

*No Registration Required
*Generate Icon button to save the icon to your hard disk
*The icons you generate are not recorded anywhere

Scribbls

Scribbls Scribbls – Bees plus flowers gives you honey. Pie and rat together make “pirate.” Putting any two things together is bound to have an interesting, even hilarious, effect-or outcome. At Scribbls, you can combine thousands of different drawings to create an infinite number of outcomes.

*Registration Required (Free Sign Up)
*Collaborative drawing community
*Uses Flash Player
*Occasional Contests

The Scribbler

The Scribbler The Scribbler takes simple vector based input (in the case of the online toy, your drawing) and creates its own drawing on top of it based on a number of simple rules. When a new scribble line is created it chooses a few numbers at random that eventually determine what sort of line it will draw.

*No Registration Required
*No Save Option (Take a screenshot)
*Experiment with different colors and line thicknesses
*Change colors during the scribble process

Deviant Art Muro

Deviant Art Muro Deviant Art Muro is a free online painting tool that offers both a pro version (layers) and basic version.

*No Registration Required
*Wacom Tablet Usability
*Purchase additional brushes
SketchPAN SketchPAN is an online drawing community where anyone can participate and share their art.

*Use Drawing PAN to record your drawing process
*Animation PAN lets you create flip books
*Together PAN lets you create something with others
*Shop PAN lets you start with something more than blank paper

Queeky

Queeky Queeky is an online drawing community.

*Save your work either on Queeky.com, or on your local computer
*Publish your work to the galleries
*Vote and Comment on other art
*Import photos, Blur Tool, Select Tool, custom gradient fills, multiple windows, layer effects and many more
*Premium Version Option
*Share your work and comments on Facebook
*Study the technics and workflow of your favorite artists

Pencil Maddness

Pencil Maddness Pencil Madness a free online sketching tool. PencilMadness is a Flash application that lets you draw and publish images in our gallery.

*Save images as jpg or Scalable Vector Graphics (SVG) directly to your computer
*Sign Up is Not Required

Penolo

Penolo Penolo is a simple sketching tool where you can post results to Twitter if you want.

*No Registration Required (Unless using Twitter)
*Simple Tools
*Tons of Color Choices
*Easy enough for kids to use

Pixlr – Online Photo Editor

Pixlr Pixlr enables web developers to use Pixlr applications on their own site. Everything that is done on this site can be done on yours. Added advanced image editing capabilities is very easy.

*Completely free
*Uses Flash
*3 applications in our suite: Pixlr Editor, Pixlr Express, and Pixlr-o-Matic
*Uses Layers
*Color Effects

FREE Digital Image Editing and Painting Programs

There are a variety of 2D graphics software products useful for creating art, manipulating photographic images, or to just experimenting with for the purpose of gaining insight. Most of these programs need to be downloaded and installed to your computer. All have free versions.

Free Programs Include:

Gimp
GIMP is a versatile graphics manipulation package. GIMP allows you to customize the view and behavior the way you like it. Starting from the widget theme, allowing you to change colors, widget spacings and icon sizes to custom tool sets in the toolbox. The interface is modulized into so called docks, allowing you to stack them into tabs or keep them open in their own window. Pressing the tab key will toggle them hidden.

My Paint
MyPaint is a fast and easy open-source graphics application for digital painters. It lets you focus on the art instead of the program. You work on your canvas with minimum distractions, bringing up the interface only when you need it.

mtPaint
Easily create pixel art and manipulate digital photos.

Pencil
Pencil is an animation/drawing software for Mac OS X, Windows, and Linux. It lets you create traditional hand-drawn animation (cartoon) using both bitmap and vector graphics. Pencil is free and open source.

Helios Paint
HeliosPaint is a feature-rich, easy-to-use and powerful paint program for editing photos, drawings and icons. It runs on Microsoft Windows, Apple Mac OS X, Linux and Unix. Helios Paint utilizes Java. While it’s a simple program, it does offer a lot of tool options.

Real World Paint
Draw, Retouch Photos, and Animate Gifs with this program. You won’t have to leave your old projects behind. Real World Paint can import and export native image files of other popular image editors. Images are imported or exported with layers. Real World Paint installs or requires NO additional packages on your computer.

Dia
Dia can be used to draw many different kinds of diagrams. It currently has special objects to help draw entity relationship diagrams, UML diagrams, flowcharts, network diagrams, and many other diagrams. It is also possible to add support for new shapes by writing simple XML files, using a subset of SVG to draw the shape.

Inkscape
An Open Source vector graphics editor, with capabilities similar to Illustrator, CorelDraw, or Xara X, using the W3C standard Scalable Vector Graphics (SVG) file format. Inkscape supports many advanced SVG features (markers, clones, alpha blending, etc.) and great care is taken in designing a streamlined interface. It is very easy to edit nodes, perform complex path operations, trace bitmaps and much more. We also aim to maintain a thriving user and developer community by using open, community-oriented development.

Project Dogwaffle
It’s a light, yet powerful tool for artistic expression. It’s a fully functional version with some new features too. It is not save-disabled, there’s no time-limit, no need to register, and there’s no spyware or adware coming with it.

Twisted Brush
The free edition of TwistedBrush with most of the great features of TwistedBrush except for brush editing and with a just handful of very fine brushes with the option to add additional collections of brushes. layers, realistic media, photo cloning, tracing, masks, particles, filters, script recording, scripts to AVI, drawing tablet support, brush shapes, patterns, textures, Adobe compatible plug-in support, integrated scanner support, image brushes, drawing guides, reference image views, dirty brushes, scratch layer, dynamic palettes and a whole lot more.

Free 3D Editing Programs

Sketchup

You can build models from scratch, or you can download what you need. People all over the world share what they’ve made on the Google 3D Warehouse. Redecorate your living room. Invent a new piece of furniture. Model your city for Google Earth. There’s no limit to what you can create with SketchUp.

DAZ

DAZ|Studio is a free software application that allows you to easily create beautiful digital art. You can use this software to load in people, animals, vehicles, buildings, props, and accessories to create digital scenes. DAZ|Studio includes two pre-configured scenes ready for you to Load & Render within DAZ|Studio. Just double-click on the scene thumbnails inside of DAZ|Studio, and everything will come on screen posed, lit, and ready for you to create a stunning digital image. Click here to view a sample scene render from DAZ|Studio using the included content. With DAZ|Studio, you can turn your 3d dreams into reality.

Bryce

Bryce 7 gives you the ability to work faster and create more realistic environments than ever before. From the new Instancing Lab and totally redesigned bridge to DAZ Studio, to the improved skies and clouds, updated HDRI and advanced lighting, Bryce 7 will breathe new life into both your future and existing Bryce scenes. Whether you are a professional designer, or a recent 3D graphics enthusiast, Bryce provides you with the tools to literally create a world of your own.

My Black and White Photography Tips

My Black and White Photography Tips

Capturing the Beauty in Monochrome

Although most of the time I take photo in color, I sometimes also enjoy shoot in black and white. It is probably not as strong as color photo, but there is always classy, elegant, and romantic feelings produced from monochromatic photos. Thus, I would share some of my recent works in photography. All of the photos in this lens are in black and white, taken from different occasions and photo shoots. I also want to give some tips based on my own experience in taking monochromatic pictures. Please let me know about your opinion on my works, so I could improve my skill as a photographer.

When Should We Take Black and White Shots?

It’s all about timing
Based on my personal experience, I rarely set my camera in black and white format. I prefer to shoot in color, then later turn the image into black and white by using post processing software. However, there is a time when I want to do something more challenging, by immediately set my camera into monochrome mode so that I can directly take black and white images. The question is, when should we do it?

Street Photography
You may want to purely take black and white photos if you do street photography. There was a kind of unwritten rule among purist photographers that street photography should be taken in monochrome. It follows the example of the father of street photography, Henry Cartier Bresson.

Practically, turning your street photos into black and white can give more dramatic feelings, especially if you want to show an irony, sadness, or paradox in the society. Be sure that there are not too many objects in the frame so that the viewer can focus on your main subject.

Portrait
A normal portrait can look boring. Thus, to make them to be more interesting, you can turn the photos into black and white. It will make your portrait cooler and more elegant, especially if you can edit the shadows and highlights on the subject’s face. It would be more dramatic.

Creating black and white profile picture for your social network page is also a good idea. I always do this thing, because personally I perceived that people who put monochrome photos as their profile picture are more professional, wiser, and classy.

When you don’t have good source of light
Lack of good source of light in photography means that you have to increase the sensitivity of the camera (ISO). It means, you will have more “digital noise” in your photos. The noise can be visually reduced (if later you don’t have plan to edit the photos) by shooting in black and white.

Sometimes, when you find it to hard to focus your camera with auto focus (and you are not in possible moment to adjust the focus manually), you may want to set your camera in black and white photo as well. Blurry and out of focus photos umostly look better in black and white rather than in color.

When We Shouldn’t Convert Our Photos into Black and White

When your photo looks better in color
This is the simplest rule. If you are in a place with beautiful, colorful flowers, warm sunlight, and your model wears a dress that goes very well with the colors of the scenery, don’t shoot in black and white. Monochromatic photos tend to look colder, and if you want your images to look warmer you should keep it in color. Think as you are an artist because photography is just like painting with light. Then, decide which type of image would look better.

When the contrast between the subject and the background is too low
For example, when your subject wears light-colored plain dress (for example, yellow colored dress) and she stands in front of a plain, white background. You might want to keep the photo in color because if you turn it into monochrome it would look boring and not captivating.

When you shoot images for the sake of documentation or use it to complement factual news
If you shoot for an event, for example an annual day of your college and you want to publish it in college magazine later, don’t convert your photos to black and white. Although it may look more beautiful, the photo won’t seem factual. This is because the readers of the magazine see the photo as the complement of an article or a report of an event. They want to know how was the event, the real condition, and of course they prefer to see it in color. If you want to keep a documentation of important live events, such as wedding and birthday party, it is also better to shoot the image in color.

Tips to do black and white photo

Learn the basic concept of post processing software
Creating black and white photos means that you need to work a lot with the post-processing software. Thus, I recommend that you learn the basic concept of it. You don’t need to go for courses, just try to do some experiments and understand what will happen if you increase the contrast or decrease the brightness of the images.

Try to increase the clarity if it is necessary
In some of my black and white photos, I prefer to increase its clarity to the maximum level. It gives more visible detail to the texture of the objects, and can make you photo appear to be more impressive.

Vignetting
“Vignetting” is giving a shadow borders in the edges of your photos. It’s like framing your image with shadow. Sometimes, black and white photo can look more dramatic and better if you do this thing. Some software such as Adobe Lightroom can do the vignetting just in a second, and later you can adjust the intensity and volume of it for the best result.

How to Transfer Pictures to Computer

How to Transfer Pictures to Computer

Need Help Getting Those Images to Your Computer?

If you’re new to digital photography you may have questions about how to download or transfer photos to computer where you can edit, save, or share them on the internet.

The process to transfer pictures from your digital camera to computer is usually very quick and simple but there are a couple of options, learn more about them here on this page.

The Primary Ways to Transfer Photos to Your Computer

Hear are the most common methods used to download or transfer photos to computer:

Connecting your camera to your computer via a USB cable or Firewire

Inserting the memory card from your camera into a memory card reader (or into your computer) and downloading directly from it rather than the camera.

Wireless transfer

How to Download Photos to Your Computer via USB Cable

A USB cable usually comes included with your camera purchase and is a fairly straightforward way to transfer pictures to computer.

In many instances, you’ll need to upload the image transfer software that came with your camera onto your computer.

Next you will need to connect your camera and your computer with the USB cable. Read your camera’s manual it will describe any specific instructions. For instance, some cameras need to be turned off when connecting and then turned on once the connection is made. Be sure to use AC power if you use this method to avoid draining the batteries on your camera.

Adjust the camera setting to allow image transfer. Again check the camera’s manual for the specific setting on that model.

At this point the computer will launch a wizard to walk you through the process of transferring the images.

For Windows XP owners this step by step guide for transferring images should be useful.

For Windows Vista owners there is this page about downloading and editing photos to help them.

For those with a Mac, here are helpful instructions for downloading pictures.

How to Download Pictures to Computer Using a Memory Card Reader

Memory Card readers can be a great way to transfer pictures to computer. They allow users to conserve their digital camera’s battery and make the transfer process even faster.

Users merely plug the memory card reader into the computer, remove the memory card from their camera, place it into the card reader, and transfer to the computer hard drive. This is very similar to moving files from a disk onto the computer hard drive.

The memory card reader can be attached one time and left in place so that each subsequent time you transfer pictures to computer there is no set up time involved.

Some newer computers also have a card reader built-in and allow the user to download by merely inserting the memory card directly into the computer.

Downloading Photos to Your Computer

Printing and Burning to Disk

How to Download Pictures to Your Computer Wirelessly

There are a couple of options that allow you to transfer pictures to computer without any wires or cable at all. Some digital cameras have WiFi cababilities or Bluetooth that allow the user to wirelessly download or transfer photos to computer through their wireless network. In fact, the photos can also be printed without the use of cables or a memory card reader.

For those without a WiFi digital camera, there’s also the Eye-Fi Share Memory Card. It has a built-in wireless connection and is able to transfer photos and video to photo sharing sites in the absence of any USB cables. The Eye-Fi Explore 2GB SD Card also adds geotagging information to images and the 2 GB Eye-Fi Home transfers wirelessly to a MAC or PC.

Eye Fi Memory Cards

Transferring Pictures from Your Cell Phone to a Computer

Images can be downloaded from your phone to a computer in much the same was as they are transferred from a digital camera.

Some camera phones have an appropriate USB cable to allow a connection in order to transfer photos to computer. These phones should also have the necessary software available to allow this downloading.

Some camera phones use memory cards to store images making transfer via memory card reader an option. A mobile media format card reader is often necessary, otherwise an adapter may be needed.

It depends upon the phone, but some Bluetooth capable phones allow you to transfer pictures to computer wirelessly.

Transferring Old Photos to Your Computer

If you have old photo prints that you would like to have in digital format you can easily do this with a scanner. Many modern printers offer a scanning function. In addition, affordable photo scanners are available if you have a lot of old photos, negatives, or slides.

After connecting the scanner, or your printer/scanner, you’ll need to be sure the glass is clean and you will want to select at what resolution you will scan the images. If you will be printing the images you will want a dpi of 300 or so. A lower resolution is acceptable if you will only be sharing these images online. As you scan the images you will want to name them so that they are easier to find. You can arrange them by year, by subject, or whatever suits your situation, but organization will be critical if you have many photos.

GoPro HERO4 BLACK Review : Make You Pro in An Instant

GoPro HERO4 BLACK Review : Make You Pro in An Instant

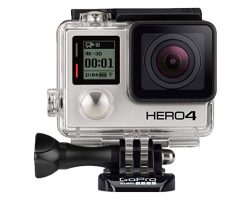
GoPro HERO4 BLACK is the new series of GoPro, that, as it names suggest, is a wrist camera that promise of making you a pro filmmaker in an instant. With GoPro it is easier to take picture and create video while doing activities.

GoPro Hero4 features a lens that can capture 4K quality picture. Unlike the previous model that seems to be an action cameras only, this is a flagship camera that promises of a high end camera with professional result worth for footage. GoPro Hero4 includes 12 megapixel camera, and 4K maximum recording resolution in 30 fps and in built microphone. The 1/2.3in CMOS sensor is better than the previous version and can capture picture in quick time.

Why You Should Choose This Product

GoPro HERO4 BLACK is excellent action camera to capture footage. It can be used to capture picture and footage that is not reachable with conventional camera. From sport event to wildlife footage, GoPro works the same as professional camera up to 4K quality. This is an incredible capability since its size is no bigger than matchbox. The in built microphone makes sure the audio is also captured well. The USB port let it be connected to bigger device and is built with editing software.  It is build with wide angle lens, making sure the footage taken is not limited by the space and the position where the camera is placed.

One thing that makes it a little bit difficult, especially for non pro user is it doesn’t include LCD and doesn’t have im built control unless it is connected to other device like smartphone, laptop, or smart watch. GoPro HERO4 BLACK has three versions and so far the Black one is more expensive than the Silver one but actually they don’t differ much. Buying the Silver one may more economical and this is probably not a good move from GoPro who named this device black. Even though it promises of an excellent work of capturing footage, the battery sadly doesn’t always support this. The battery life doesn’t last long.

Where You Can Buy GoPro HERO4?

GoPro is the pioneer of action camera and it is been improving its quality and change of market. This GoPro HERO4 BLACK is a flagship that is intended to live up to this higher improvement. And it does do a good job. The lack of screen may be a little bit hindering but it is all still tolerable, giving its tiny size. Get this GoPro for $404.06 for the Black version by clicking here.