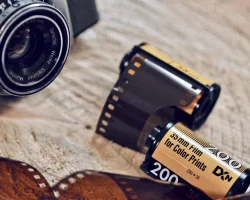
The Best 35mm Cameras For Beginners
35mm cameras are making a comeback in the world of photography. These cameras offer a lot of features that are perfect for beginners, including automatic exposure modes and easy-to-use controls. Here are our picks for the best 35mm cameras for beginners in 2019.
1. Canon EOS Rebel T6
The Canon EOS Rebel T6 is one of the most popular entry-level DSLR cameras on the market. It’s perfect for beginners because it offers a lot of features that are easy to use, including an auto mode that takes care of all the settings for you. The T6 also has a large selection of lenses available, so you can upgrade your kit as you learn more about photography.
2. Nikon D3500
The Nikon D3500 is another great entry-level DSLR camera. It has a similar feature set to the Canon T6, including an auto mode and a wide selection of lenses. The D3500 also has a few features that make it a great choice for beginners, including a guide mode that walks you through the basics of photography.
3. Sony a6000
The Sony a6000 is a great choice for beginners who want to move beyond entry-level DSLR cameras. It’s a mirrorless camera, which means it’s smaller and lighter than a DSLR. The a6000 also has a great autofocus system that’s perfect for beginners, and it comes with a built-in flash.
4. Olympus OM-D E-M10 Mark II
The Olympus OM-D E-M10 Mark II is another great mirrorless camera for beginners. It has a similar feature set to the Sony a6000, including a great autofocus system and a built-in flash. The E-M10 Mark II also has a few features that make it a great choice for beginners, including a guide mode that walks you through the basics of photography.
5. Fujifilm X-T100
The Fujifilm X-T100 is a great choice for beginners who want a mirrorless camera with a retro look. It has a vintage-inspired design, and it comes with a selection of Fujifilm’s X-series lenses. The X-T100 also has a few features that make it a great choice for beginners, including an auto mode and a scene mode that automatically adjusts the settings for different types of photos.


 for your home, here’s a quick guide…)