How to Find Arts and Crafts Supplies

About 20 years ago, I was playing around with the idea of buying a florist business. I eventually didn’t go through with it as I was breaking the cardinal rule of owning a business – that of having good practical experience. My total amount of floral experience was limited to occasional purchases from the area wholesale florist. During my interview with the owner, I asked her how I could find floral-related vendors. Her response:‘Don’t worry – they’ll find you!”.

If you’ve been in business any length of time, you know how true this is. However, you need to scare up some potential arts and craft supplies vendors and request price lists before you start your arts and crafts business. There is no way you can take even the first step towards starting a business unless you know how much it’s going to cost you to make your product.

Arts and Craft Supplies Instructor Referrals

Instructors at arts / crafts classes or seminars are great referral sources for tools, art supplies and craft materials. Since the instructor has so much experience in the field, they should have an encyclopedic knowledge of the best vendors in your arts/crafts area. Most likely, they’ll have a handout addressing this issue they’ll distribute the first night of class.

Arts and Crafts Books and Magazines

Flip through any arts/craft specialty magazine and you’ll see numerous advertisements by arts and crafts supplies vendors. The more tailored the magazine to your particular area of interest, the more useful the advertisements. Check them out – but keep in mind that as your business grows you’ll want to find vendors selling wholesale. Most advertisers in these magazines gear themselves towards the casual hobbyist.

Most arts/crafts books have a resource section in the appendix listing supply vendors. You don’t have to lay out the money to purchase many different books. Pay a visit to your local library and borrow the books or use the library copier to make copies of the applicable info. Make sure the book is current (my suggestion – published within the last year) so you don’t waste your time tracking down a bunch of defunct vendors.

Online Arts and Crafts Supplies Vendors

Your first online search should be the Guide who writes about your craft. Most Guides have resource links with plenty of vendor suggestions. For example, check out Painting Guide Marion Boddy-Evans’ What Art Supplies Do You Need to Start Painting? article.

Do a key phrase search by Googling ‘wholesale xxx supplies’ and see what comes up. I’ve not found that Googling is the best way to find full service arts/crafts vendors but it’s worth a shot. I also occasionally check out suppliers selling through eBay, Etsy and ArtFire.

Finding Arts and Crafts Supplies Vendors Through Trade Organizations

If you haven’t already, you should join some of your industry arts/crafts organizations. Besides keeping up with your industry, they are a great place to find wholesale vendors. You’ll also find links to other online resources serving your particular art/craft.

For example, The Ganoksin Project has a resources page with a comprehensive guide to industry websites . While tailored to the jewelry making industry, many of the vendors listed provide materials and supplies for other types of arts/crafts also. The Society of American Silversmiths also has fantastic resources for artists such as technical information and how to purchase hard-to-find goods and services.

I know from experience that it can be just plain hard to find exactly what you’re looking for. Worse yet is when you find the perfect vendor only to find out they won’t sell to your business because it’s too new or unknown or their minimum order is too big. My best advice is to just keep on looking until you find what you need, go to as many trade events as possible and make industry contacts by joining trade organizations.

Setting Up Your Home-Based Arts and Crafts Office

If my clients are any indication of how arts and crafts businesses are managed, many arts and crafts businesses are home based. Even if you need to rent studio space to make your craft, you are probably managing the business aspect of your arts and crafts company out of your home.

If you are thinking about starting an arts or crafts business, operating it out of your home will save on overhead and reduce the amount of startup cash you’ll need. Here are some tips to running your craft business out of your home.

Converting a Spare Room

This is kind of the holy grail of home businesses – that much bally-hoo’d spare room! Many folks new to crafts start a craft business later in life preparing to segue into it full time when they retire. In that case, there just may be a child’s bedroom that is no longer in use that can be converted into a workroom.

I also once owned a house that had a weirdly-shaped two car garage that was very deep – giving an extra fifteen feet by the width of the garage at its front. The prior owners had installed ductwork to have it under heat/air making it a perfect workroom.

After I moved, I purchased a portable rolling floor air conditioner to convert the new garage space into a workroom. The unit was somewhat pricey but it’s paid for itself many times over for both the business and for home use when we’ve had repair issues. The one I purchased does triple duty as a dehumidifier and regular fan too. The only problem is that your garage must have a window to connect the exhaust tubing when using as an air conditioner .

Converting a Closet

Once again, most people just don’t have extra closet space. But if you do, taking the doors off a regular closet will allow you to fit a desk and other equipment inside (I know from experience!). A walk-in closet with a window is ideal.

I find working on my business paperwork without natural light somewhat depressing. I have a large Verilux light that I use at night.

Investigating Unused Space for the Home Office

Look around your home to see where you can setup operations in an unused corner. Here are some suggestions:

  • Basement – it’s been so long since I lived in a house with a basement I almost forgot about it. Still there is the lack of natural light problem. You could try using a Verilux or similar lighting solution.
  • Unused space on stair landing – install a drop-down shelf that leaps into action when you need it and folds flush to the wall when you don’t.
  • Laundry room – you could think about buying a full-sized stacking washer and dryer to free up enough space to install a workstation. Just about any washer/dryer that has a flat top can convert to stacking using the correct kit. Plus most kits have a pull-out shelf for folding the fresh laundry.
  • Stow and go desk – I was in the market for a stow and go work area last year. After hours of searching, I found this great one at Furniturexo.com. We had to put off moving for another year so I’m waiting to buy it until after the move. It seem ideal in many ways. Sturdy, lots of room for storage, somewhat attractive in appearance and folds to a minimal footprint.
  • Expand a windowsill – install a folding shelf to the sill itself or to the wall immediately beneath. This has the extra advantage of all that natural light. You can install sheers to block excess sunlight when the sun is directly at window height.
  • Weirdly walled space – if you have an area of your house that is between rooms anchored by two walls creating wasted space, considering putting your workspace in there and hanging a matchstick shade from the ceiling long enough to extend to the floor to hide the area when you are finished working.

For more ideas, check out your local bookstore magazine stand. Since living in small houses for the last ten years, I have noticed there is just a plethora of magazines devoted to organizing and living in small spaces.

Top Gifts for the Artist

Top Gifts for the Artist

Need a Gift for an Artist? Find One Here.

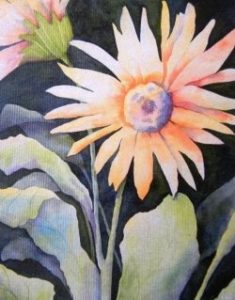
Photos of artwork by Gayle Dowell

What gift does someone get the artist friend or relative? I’ve listed a few ideas here. As an artist, I’ve always enjoyed getting gifts on holidays that I can use in my creative work. I’ve been a watercolor artist for 15 years. I’ve painted in oil, acrylic, and have created collage work. I’m now working with metal and creating jewelry. I find that a new book or new art medium can give me inspiration in work that I’m currently working on. On this page, I’ve listed the top gifts for artists of all mediums. You can vote or add your ideas as well. Leave your gift ideas in the comments section at the end of this page.

Sketchbooks

The Gift that Bridges All Mediums
No matter what medium your gift recipient works in, they can use a sketchbook to draw out their ideas, whether it be for planning a painting, a jewelry piece, or a sculpture, or to journal. My most cherished sketchbooks are those with quality paper that will hold up to both pencil and paint. They also have spiral binding so that I can bend back the cover when I’m outside which makes it easier to sketch without a table or drawing surface. It must also have a hard cover to withstand abuse. Here is my favorite sketchbook.

A Gift that Gives Year Round

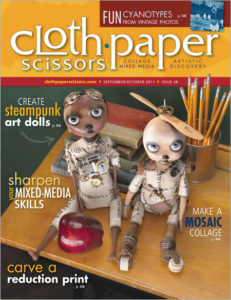
A subscription to a great inspirational magazine that came to the recipients mailbox throughout the year, would be a great gift for an artist. I know of no other inspirational magazine that could top, “Cloth, Paper, Scissors”. I keep my back copies to look at whenever I need an art idea or to get me motivated to create.

A Camera?

A good camera may not come to mind as a great gift for an artist. But I use mine all the time. I’m constantly taking pictures of possible scenes to paint, textures to use in my designs or color combinations I want to remember. I love a good digital camera so that I can download pictures of my work to my blog or my online shopping site.

A Collection of Decorative Paper

I collect decorative paper. I use paper all the time in my design work. I do collage, scrap booking, greeting cards, experiments in watercolor painting…all requiring different types of decorative paper. When inspiration strikes, an artist needs different papers on hand.

A Book on Creative Living

This book by author Julia Cameron is the one I turn to first whenever I need to be reminded of how to live creatively. It is easy for an artist to live day to day and miss opportunities to keep their minds thinking creatively. This is a must have for those wanting to live a creative life.

Wacom Bamboo Create Tablet Review

https://www.youtube.com/watch?v=z8CfxqIj4iQ

Wacom Bamboo Create Tablet review by Melonie Mac

Adobe Photoshop Elements 12

With Photoshop Elements I can do more than just enhance my photos, I can manipulate them to make digital artwork. Photoshop Elements also gives me tools to edit and combine my videos clips to produce a finished movie. My daughter recently used this software to create a how-to video using digital video clips she took and combined them with music. I edit my artwork and handmade jewelry photos before I upload the photos online. Great tools for the price.

Packing And Shipping Art

Packing And Shipping Art

How To Pack & Ship Art

As an artist you will have to embrace shipping as a necessary part of your business in order to increase sales potential Many artists with whom I’ve spoken are afraid of shipping. Having a wonderful one of a kind piece of artwork destroyed in transit is a is something every artist loses sleep over. I know I do and I have been shipping my artwork all over the US and occasionally out of it form many years..

As a gallery owner I do a lot of shipping. They key to get your artwork from you to it’s future home is all in the packing. A well packaged item should arrive in mint condition provided something truly unpredictable doesn’t happen with the carrier. I have never had something arrive damaged and need to be replaced. However I’ve had plenty of things arrive at my gallery in a shambles because the original owner just stuck it in a box and handed it over, trusting the carrier to not toss it around like a sack of potatoes.

What You’ll Find On This Page
* Packing & shipping informations regarding using tubes, envelopes and boxes.
* Shipping Supply Companies
* How To Make Your Own Shipping Boxes
* Where To Find Free Recycled Supplies

Common Carriers In The US For Shipping Artwork

Shipping Companies For Your Artwork
Packing and Shipping Supplies I have an order or preference for shipping which is basically relevant to how much they charge to move my package. So my favorite carrier company which is Speedee, just also happens to be the cheapest. But they also make requesting a package pickup, the easiest and they offer services like 24 hour delivery at no extra fee. The downside to them is they only cover part of the country. They deliver to only 6 six states in the Midwest.

So here’s a list of all the carrier companies I do business with regularly, complete with links and what I like about each.

USPS United States Postal Service
usps.com
I actually use the post office for most of my smaller shipping needs. Priority costs are reasonable enough as long as the overall dimension (circumference completely around the width of the package) does not exceed 108″. Once you get past that size the cost go up exponentially and it is in your best interest and pocket book to to find another carrier. And if you want to track a package shipped with USPS click here.

FedEx Federal Express
fedex.com
This has become my second national carrier of choice. I used to do everything with UPS but they had a serious rate increase a year or so back and most days FedEx is about 30% cheaper than UPS when shipping the same package. I almost always check both carriers to see who’ll do the job for the least amount of money. And If you want to track a package via FedEx click here

UPS United Parcel Service
ups.com
This is usually my last choice in carriers these days though I have shipped literally hundreds of packages with UPS and other than them being the most expensive most days, I was very happy with their service. And if you want to track a package with UPS

Speedee Delivery Shipping Carrier

Companies For Shipping Your Artwork

And here’s a little known but excellent carrier for the Midwest
Speedee
speedee.com
I love these guys and ship everything I can with them. They are cheap and they are good. Exactly the combination I like The only downside is they only cover a few states. Iowa, Wisconsin, Minnesota, North Dakota, South Dakota, Parts of Nebraska and Illinois. And if you want to Track a package via Speedee click here

But if you live in this little circle of heaven these are just the guys to move your art and do it well.

Specific Benefits To Using Speedee
* They don’t have any extra fees for home delivery
* I’ve yet to ship a package so large as to incur oversize fees (both FedEx and UPS will charge me extra for the same size that Speedee handles.)
* They will pick up at any location for just $10. And trust me you save far more than that by using with them.)
* The almost invariably deliver within 24 hours again at no extra cost.,

A Story About Carrier Rates To Illustrate My Point
I had three large boxes that needed to go to Rapid City SD from my home town in Iowa. I first took them to UPS. The cost was $94 for all three. I checked out FedEx and it was around $70. I then called Speedee as I hadn’t shipped with them before this. All 3 packages to Rapid City by the next day for $32 and that included the $10 pick up charge from my gallery. Yup been a loyal fan ever since.

Shipping With Mailing Envelopes

Using Mailing Envelopes For Small Shrinkwrapped Artwork or Prints

Shipping artwork using mailing envelopes Shipping small prints either with or without matting is a fairly simple affair. In the above photo I’m using a USPS Priority mailing envelope which is made of a durable yet flexible material. I like these because of the size, which is 11×14. I mat many of my small collectible prints to fit this standard framing size so the envelope is the perfect fit. These come with the price set of usually around $5, so if you have a smaller print (say something that fits in a 9×12 envelope) that doesn’t need to go priority mail you can use your own envelope and save a little money. I tend to do that with ebay sales or sales of that nature. Generally just regular first class is about $2 to give you a comparison.

Shipping With Mailing Envelopes

Using Mailer Envelopes:
* Have print mounted to stiff backer board and shrinkwrapped or put in a protective sleeve. This is not only to prevent moisture damage but also protect the print while being handled.

* Apply a piece of cardboard or backer board over the face of the artwork,* Slip into envelope with invoice.

* Be sure to either write “Do Not Bend!” or apply labels to that effect. You might think that a postmaster would never attempt to bend a stiff envelope but I have had them do so despite the extra cardboard and labels.

Protecting Your Artwork With Sleeves or Shrinkwrapping

Packing Materials And Supplies

Having your artwork covered with either shrinkwrap or a protective sleeve is always a good idea whether your shipping them or not. Once protected your art is now easily handled without fear of damage dents, creases, scratches and dirty hands. Also when in transit a shrinkwrap or sleeve may keep moisture from doing any damage.

These clear envelopes are a great idea for do-it-yourself kind of shrinkwrapping. They come in a variety off sizes and are pretty cost effective, especially if you’re buying in bulk quantities.

My Favorite Supplier Of Protective Sleeves & Envelopes
One of my favorite supplier s for the is www.clearbags.com They have a staggering array of sizes as well as all sorts of packaging and marketing solutions for artists and craftsman. If you have a large variety of sizes to your product line these guys are a great company. I’ve been getting my supplies from them for many years and have always been happy with both the products and the service.

Padded Envelopes and Bubble Envelopes

Packing and Shipping Supplies & Materials
I don’t use these a whole lot because I tend to ship most of my items priority postal so I just use their envelopes. However these have that add little extra cushioning which is always great for mailing your artwork. Despite this you must still be sure to have some sort of cardboard covering on both from and back of your artwork to protect it during transit.

Rugged Mailers

Packing and Shipping Supplies & Materials
Rugged Mailers are also a really good alternative and they come in a nice assortment of sizes. Be aware that they can still get bent but it’s a rarity. Never hurts to add a little extra support of cardboard if there’s room, to these as well.

Packing Larger Shrinkwrapped Artwork or Prints Flat

Once again how much effort you put into packing your larger prints will depend mostly on how badly you want it to arrive at it’s destination in mint condition. If your mailing a one of a kind item that can’t be replaced or even an item that is costly to you to replace go, do the extra effort necessary to ensure it’s chances of arriving safely.

For a print in most cases it is sufficient to just have several layers of cardboard on both top and bottom. Cut these pieces at least 2″ larger than the size of the object being shipped. This is minimally what you’ll want to do to ship a larger shrinkwrapped print flat. This amount of packing will allow for minor denting of the cardboard both on the corners and on the face of the cardboard. It also makes bending pretty much impossible.

The Steps For Mailing Artwork Flat Are:
* Make sure the artwork is sealed in shrinkwrap or a protective sleeve.
* I then slip this in an additional bag with the invoice (on the back side of the backer-board, not on the face of the artwork) tucked in with it.
* Cut a piece of foam or thin bubble wrap to size of the object being shipped. I prefer the foam but bubble wrap will work as well.
* Cut at least 4 pieces of cardboard 2″ larger than object being shipped. Tap lightly to hold everything in place.
* Slip into an additional box frame for extra support.

Now if it’s an important piece of work I may slip a sheet of two of mat board in with the cardboard. Mat board is incredibly dense (unlike cardboard) so it is better at deflecting dents and stabs.

Using Mailing Tubes For Packing Artwork

How To Pack Artwork Using Tubes.
packing and shipping art using mailing tubes *Note: The art print featured in this photo is by Marion Gunderson Arts and was used with permission.

Whenever possible using tubes is my preferred method of shipping prints.
Most of the time I send my medium sized prints (say paper size) flat and in shrinkwrap as this not only makes for a nicer presentation when the customers opens the box, it also helps keep the art in mint condition until either being gifted or framed. But for prints ranging in larger sizes I send in a tube. It’s fast and nearly effortless. 5 minutes time is about all it usually takes.

What You’ll Need To Mail In A Tube
* The Mailing Tube (obviously)
* Plastic bag. (for packing option listed at the bottom)
* Sheet of paper slightly larger than the artwork being shipped. Usually a 1″ allowance all the way around is adequate and cut to fit the tube.

Using Heavy Duty Mailing Tube

The First thing to do is to roll up the print.
Lay your print in the center of you sheet of paper and roll them up together simultaneously. Slip this into the tube. DO NOT tape the paper roll. Just slip into the tube and allow it to expand to fit tightly inside the tube.

The paper serves a couple of functions
* First he keeps the print from sliding back and forth in the tube and potentially denting the print.
* Second most folks really don’t think about how clean their hands are when opening up a package. By having a bit of the paper surround it helps keep the print clear when being removed from the tube.

Be Sure To Include An Invoice Or Address On the Inside Of The Tube
It’s always recommended to have the destination included on the inside of any package you are shipping just in case it gets torn open and become separated from the original shipping contained.

Apply Label And Tape Shut
I always tape my tube ends securely no matter how snugly I think they are sealed.

Using A Reinforced Carriers Light Weight Tube
I have used USPS Priority Mail tubes (as is) for hundreds transit jobs and never had a problem. But then there was this one time that it arrived to the purchaser completely trashed and flattened. It’s rare but it does happen. So if you’re shipping something that’s not easily replaced either use your own heavy duty tube or modify the carrier’s tube.

Since Wild Faces Gallery is also a giclee publishing house we have plenty of extra heavy duty tubes from our rolls of paper. They are of course no end-caps so they are kinda useless as shipping tubes on their own. However they are exactly the extra durability I need when using one of the carriers triangular tubes. So the steps are pretty much the same as above.

The First thing to do is to roll up the print.
Lay your print in the center of you sheet of paper and roll them up together simultaneously. Slip this into the tube. DO NOT tape the paper roll. Just slip into the tube and allow it to expand to fit tightly inside the tube.

Affix Mailing address or label to the outside of the inner stabilizing tube

Slip tube into plastic bag
This has to do with common carrier cardboard triangular tube are made of a light weight cardboard. Occasionally a postal delivery person may leave the tube outside of someone’s home. The bag is just that little bit of extra insurance that if it rains, the print will arrive in perfect condition. And yes this has happened to me.

Slip tube into carrier triangular shipping tube And tape the ends shut.

Packing Framed Artwork

Packing and Shipping Framed Artwork

A Few Things To Consider
I have shipped large framed items from one end of the country to the other and have yet had anything arrive broken. That being said the amount of work involved in shipping a large framed piece of work is substantial and as an artist you must figure out whether the cost of packing materials coupled with the amount of time involved is the worth the “net” value on what you’re earning with framing charge. You may find it is much easier to simply sell only unframed items.

Since we have a full service frame shop in out gallery our net on framing is pretty good so we do ship framed prints and on rare occasion framed originals.

Note: Whenever shipping framed originals I replace the Conservation Clear glass that all my artwork is framed in, with a conservation grade picture framing acrylic. This won’t shatter (unless the shipper runs over it or something, and then you’ve got bigger worries) in transit. Broken glass inside a packing parcel will slice and shred as the box is handled.

Since Conservation grade framing acrylic is expensive you can also use just regular acrylic or plexiglass. Another less desirable option would be to put some sort of masking tape of film over the glazing so if it does happen to break the broken glass won’t be slipping around the box.

Steps For Packing Framed Artwork

Apply Cardboard Corners to the Frame This is sort of an optional step because if you’ve done your job correctly you won’t need them at all.

Wrap The Frame Artwork in copious amounts of bubble wrap How much depends on the kind of bubble wrap your using. If using large pocket bubble wrap you can use less, and the tiny bubble pocket bubble wrap you should use more of. I generally like a good 3″ inches of bubble wrap surround.

Wrap This In An Additional Layer of Either Flexible Foam Wrap Or Corrugated Cardboard Role I use the cardboard role primarily because it’s what I have on hand. The purpose is to add a firmer shell to the bubble wrap and create a tight package.

Write Address or Include it On The Package Once again it’s always wise to include the mailing address inside the package in case the contents ever get separated from the packing box. (Heaven forbid)

The Box Needs To Be Sufficiently Larger than The framed item Most shipping companies like to have a stabbing depth of a couple of inches so bear this in mind when packing. You should have a durable product that will hold your framed item in the center of the box. I often use styrofoam for this as it’s lightweight, stab resistant and cuts easily to fit my needs.

* Cut two sheets foam the size of your box
* Lay Foam Sheet In Bottom of Box
* Set wrapped framed artwork in center of box.
* Cut Strips to tightly fit between package and box wall. If you think it necessary tape in place so package won’t slip.
* Apply Other styrofoam sheet over top
* Put Lid On Box

Tape Shut and Add Mailing Label Packing is very easy to do but rather time consuming. Judge for yourself if it’s worth the effort.

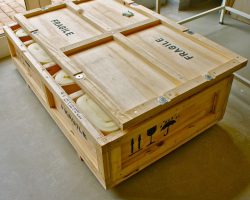
Note: Many art exhibit require you to ship your artwork not only to them but then they need to use the containers and wrapping to return it back to you. And if it’s a traveling exhibition the packing materials need to be sturdy enough to be reused time and again. This often means you need to build a special wood crate. I won’t go into how to do this specifically since different galleries and shows have different requirements for this. Just be aware that simplicity and durability are what is required above all else for this kind of packaging.

Earth Friendly Ideas For Packing Your Art

Recycling Products For Shipping Your Art
Packing & Shipping materials In this economy it forces people to rethink how they can better save money in areas where they won’t feel the pinch. Packaging your artwork is one of those areas. I pack and ship a fair amount of stuff, (about 100 good sized boxes a year) which could potentially be a huge expense in packing materials. Not to mention we’re all getting more Earth conscious and knowing that so much packing materials just wind up in the landfill after just one use. This strikes me a kind of appalling.

Anyone who has ever bought a role of bubble-wrap at your favorite business supply store knows that boxes, and bubble-wrap can add big costs to your bottom line if you do ship often. So I’m going to share a little free packing supply secret …well it’s not really a secret, it’s just no one ever asked me) Yup I get much of my packing and shipping stuffs free.

So I’m going to share a little free packing supply secret … (well it’s not really a secret, it’s just no one ever asked me.)I reuse much of the packing materials that I get in my gallery most of which comes in from my framing orders. But the bulk of my packing supplies comes from other sources. The absolute best place for excellent packing materials that are free? A furniture store.

At one time I had an artist friend who worked at a furniture store and when he was doing a delivery in my home town, he’d pull the truck around and drop off a truckload (literally) of huge sheets of bubble-wrap and flexible foam sheeting. Most furniture stores throw tons of it away and it just sits in our landfills. The furniture store he worked for was thrilled because that was a little less that they had to pay to get hauled to the landfill. And of course I was thrilled because it saved me fortunes (the savings of which I passed on to my customer.) And frankly, I have no way of buying huge sheets of wrap like that. (Picture blanket sized for wrapping up beds and couches. Lovely, glorious packing stuffs.)

Also, our local vet clinic is very green oriented. They get in heavy duty air packing pillows and sheets that from their delicate bottles of medicine they receive. Our small local vet clinic can usually supply me a 30 gallon garbage bag full of the stuff in a week. These tend to be smaller bits which work well for shipping smaller works or dimensional items.

So I guess the point of this is if you are looking to save a little money and are willing to be creative with who you approach, you may well save a substantial amount in your packing materials costs. Plus a little less goes in the landfill because it was recycled at least once. This way the landfills, the furniture store, my customers and I, all win.

Free Shipping Supplies Sent To Your Door

Free Materials & Supplies Available From The Common Carrier Companies
The big name shipping companies like UPS and USPS provide free boxes and envelops that will be delivered to your door … yes for free.

Shadow box ideas for weddings, babies and other children

Shadow box ideas for weddings, babies and other children

Shadowbox are great for storing life’s precious moments

There are several shadow box ideas that you could choose from whether you want it for a wedding, baby or kids. I personally like shadowboxes. I remember when I first was introduce to them when I worked at a frame shop.
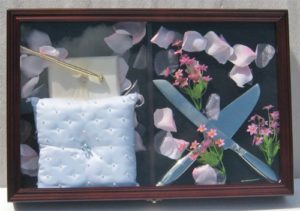
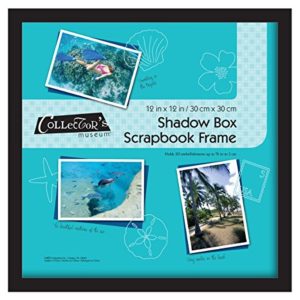
The great thing about a shadowbox frame is that you could put three dimensional items into it or objects that would not normally fit into a frame.They are a good way to store keepsakes.

There are books such as The DIY Bride: 40 Fun Projects for Your Ultimate One-of-a-Kind Wedding for those who like to do crafty projects that would include organizing something that will keep their memory of their big day alive.
Here I will introduce you to some shadow box ideas for storing your wedding or kids memories in.

Shadow box ideas for babies

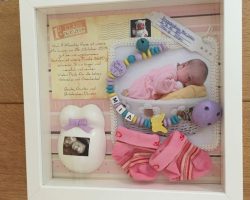
What better way than store your baby’s memories into a shadow box. You could put booties in them. A baby’s first onesie could go into it. Also you could include different stages of their life that occurred during their first year. The box could include shoes. It could also include the child’s first dress up outfit.

Also as an idea, you could include a collection of baby shoes from the time that the baby was a newborn to 36 months.
Also, you could include things from when your child was born such as your child’s umbilical cord stump into the shadow box.

Pick out the shadow box that suits your need

Shadow box ideas for weddings
You could include many things within a shadowbox to hold your cherish moments of your first year of marriage. You could include flowers, wedding invitations, or a veil. Also, the shadowbox could hold promise rings, wedding vows, and lockets that include the couples pictures.

Ravenna Table Easel with Drawer

Ravenna Table Easel with Drawer

Table Top Easel

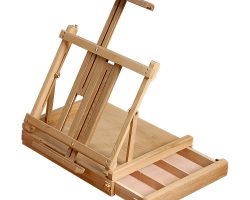
If you are a part time artist or even a full time artist with limited painting space, I can’t think of a better idea than buying one of these compact, portable table top easels.

This compact artists easel is a great choice for any artist that is looking for a convenient and easy to way to store their art supplies!

If you are like many artists, your work space is also part of your living area. This easel is an easy way to help keep your artistic hobby from over running your living area.

If you have a family and like to work at home, keeping your artwork stored away safe, especially if you have children around, may be the best way to protect your work in progress.

I also like the idea that it’s portable and this makes it so easy to take your art materials wherever you fancy. A portable easel makes it easy to take on trips and work on your artwork outdoors. This portable unit is also humbly priced making it easy to afford even for struggling artists.

When I was in high school, my plan was to go to art school after graduation. My sister’s girlfriend had some family issues and she came to live with us for a few months. She also was forced to drop out of her art classes. She was trying to raise some money and she sold her portable wooden drawing board to my parents for me.

I loved that drawing board. It folded up like these portable easels. I had a place to keep my pictures, erasers and pencils. I’d set it up in the living room or bedroom and it was so handy. Gotta leave the house – fold it up and you’re done. Like most teens, I was lazy so that was important.

If you are forced to store away your artist’s materials when not in use, a portable table top easel such as the Ravenna is an excellent choice!

Tabletop Easel

Storage for Paining Supplies This artist’s easel has a roomy drawer for storing paint brushes, paints, and other drawing materials. The one drawer has multiple dividers to keep everything separated.

This easel is not lacking in craftsmanship. The Ravenna table easel is sturdy and strong and built with quality wood but yet is light and easy to carry.

Another feature that customers liked was the ability to choose an angle for the board. Use it in a flat position or with a steep incline.

This particular portable model is also a great way to introduce an artistically talented child to new supplies and art forms. It’s not a large investment but a young artist will be thrilled with an adult like tool to experiment with.

Which graphics tablet?

Which graphics tablet?

What’s the difference anyway?

One question I get asked again and again is, ‘What is the best graphics tablet?’ as I’m a digital artist, it seems only natural to ask me.

It’s easy to understand why this is perhaps the most frequently asked question to not just me, but every digital artist. The reason for this is because graphic tablets are a unique and confusing technology!

So, the first step to finding the right graphics tablet for you is to understand the technology that’s being offered!

Thank you to Nekoni for her thoughts as an artist on graphics tablets.

First I’ll explain the words that are used

Then look further down, to find out about sizes.

At the end, I’ve recommended the best tablets, in my opinion, depending on various types of artwork.

Important!

What is a graphics tablet?

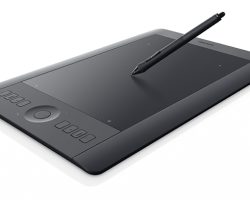
The graphics tablet (or ‘digital design tablet’) is an input device (like a mouse, or keyboard) which acts like a giant and highly accurate touchpad, controlled by a stylus (digital pen). It allows artists to draw directly into their graphics programs on PCs, Macs and Laptops.

What can one do?

TRON – speedpainting by SaZo

Pen-specific technobabble:

The language that is used by graphics tablets sellers is very confusing.

Here is a list of the most popular phrases used in relation to the graphics tablet pens and what they actually mean!

“stylus”
The term specific for digital input pens used with graphics-tablets and other hardware. It’s not always used, but is the actual term. (imagine if you were told your new ipad came with a free ‘pen’? Why would you want a pen? Now imagine you were told it came with a free ‘stylus’? Awesome!)
“ergonomic pen” “grip pen” “easy to hold pen”
Almost all graphic tablets today come with a comfortable, easy to use variety of stylus (the exact shape and features vary). These don’t affect the quality of your digital artwork, but they do affect how comfortable you are while using them, and there’s no ‘right’ choice.
“cord/cable/wired stylus”
Refers to a stylus that is attached to its tablet by a cable. The stylus is therefore slim and light. It’s pretty rare today, as wireless is the standard for most models.
“battery operated stylus”
Sends a signal from the pen to your tablet. The stylus needs to be large enough to contain a AAA battery, but is shaped in a way so that it’s narrower at the point at which you hold it.
“battery-less stylus”
The tablet powers the stylus via electro-magnetic resonation, which means these styluses are slimmer and lighter than the battery powered alternatives.
“tilt sensitivity”, “tiltability” “rotation””tilt recognition”
What most artists are looking for when they chose a stylus with one of these descriptions is a stylus which has a sense of ‘right way up’ and ‘upside-down’ so that it can make more complex digital brush strokes (this is a great feature, especially for painters!). But these terms also may simply mean that the stylus still works when you’re holding it at an angle, (and I’ve never found a stylus that doesn’t). For this stylus it’s best to rely on reviews, as less scrupulous retailers and second-hand sellers who don’t understand the terms can easily use the wrong term, and lead you to disappointment if you don’t know what you’re buying.
“levels of pressure sensitivity”
The range of pressure sensitivity starts at 256 levels of pressure, and reaches 3000. 1024 levels of pressure can be registered by most graphics programs, and only the newest and more advanced programs can register anything higher. Levels of pressure sensitivity literally explains how sensitive your pen is, the more sensitive pens will be able to tell the difference between different pressures, but this will only be shown to have an effect if you’re using extremely large brush sizes (upwards of 1000 pixels, in the latest software), or, in some cases, very light pressure (the quality of the pen’s nib and the drawing surface can effect the pressure you need to apply just as much). I suggest 256 and 512 for the beginner or sketcher, 1024 for the student or professional artist, and 2048 or above for the super-professional or any artist who uses a tablet for poster-sized art-work.
“Interchangeable right and left-handed pen”
This is one of those marketing oddities, I assume the companies must say this in order to assure left-handed individuals that they too can use graphics tablets… though I’ve yet to find any evidence of a left-handed pen having ever existed.

Tablet-specific technobabble:

So now you know what they’re saying about the pens… how about the tablet themselves.

The tablets are all important and have their own range of specialist phrases.

Here’s a list of the phrases and their meanings.

“programmable hotlinks/ buttons/ scrollers / wheels?”
Most artists find the wheels/scrollers to be useful for controlling the zoom in graphics programs, and for rotating canvas in those that allow it. But neither they nor programmable hotlinks are a actually a required function on any tablet, they’re more of an extra feature that you can use, if you like, to save time.
“lines per inch” or “accuracy”
Much like dpi or dots per inch, this is the sensitivity of your graphics tablet and how accurately it recognizes the location of your pen. Unfortunately, not only is this rarely mentioned, but the effect this number has also changes depending on your computer’s settings, and the size of the tablet itself. The end result is that the pen does not follow the path you draw exactly, or makes your lines jagged. The way to avoid this is to read customer reviews, even if a number is given, and bear in mind that the cheapest of these tablets usually come with this disadvantage. For the beginner, or casual artist, or someone who does not intend to use their tablet for fine art, this isn’t much of a problem. It can usually be compensated by working zoomed in, but that has the disadvantage of letting you see less of your artwork at once, and takes longer to draw the same lines.
“work area/ live area”
Pay attention to this, a graphics tablet will be described as 10 by 15 inches, but the actual numbers you need to actually pay attention to those of the ‘work’ or ‘live’ areas, the space on which you can draw, which measure much less- say 5 by 8 inches. These numbers are possibly the most important thing when it comes to buying a tablet! What you need to look for is a graphics tablet that matches the size and ratio of your screen as much as possible.

What happens when you buy a tablet that is much smaller than your screen?

It’s very simple, when you draw in real life, say, on a piece of paper, you draw to a scale of 1:1. The motions you make with your hand equal the size of lines you end up with on paper exactly. When you draw on a graphic tablet, these sizes never match completely, but it’s best to get as close to reality as you can.

An example of a size mismatch:
Here is a small tablet and a large screen. You can see the actual line which is input into a tablet, then the line that comes up on screen.
imput: what is drawn in real life. result A mismatched size also has the disadvantage of being less sensitive.

If your tablet is half the size of another tablet, but only has the same level of sensitivity, your small tablet is only half as sensitive. Then add to that the fact your hand is only so accurate, and you are in effect trying to draw, really, really tiny.

If you’ve ever tried to draw a nice picture, but really, really tiny, then you can see the obvious flaw with that. There’s a limit to just how accurately you can control your hands.
There are ways to compensate for a small tablet, as you can simply zoom in until the size matches, or you can set your tablet to only represent a smaller part of your screen.

However, drawing on a smaller part of your screen has obvious flaws…andjust like with a tablet with low accuracy, drawing while zoomed in isn’t a flawless solutution either.

As well as being unable to see what you’re doing in relation to the rest of your artwork, or being unable to edit it quickly, you will end up taking slightly longer and each and every line. Proffesional artists should try to avoid this.
My own screen is actually 18 by 12 inches, and the tablet is smaller (around 12 by 7.5 inches of work area) but it is a much closer match and easier to draw with than my other tablet, which only has 5 x 3.5 inches of work area.

Another thing to take into account is screen ratio. I have a widescreen monitor. And so, I have a widescreen tablet.

Some tablets allow you to set a ratio for you to use, but remember, they can not ‘expand’ the work area outwards if you need a wider area to match your screen; they can only narrow it, vertically. If you anticipate keeping your screen for a long time, and it’s an unusual shape, try and buy accordingly.

My favorite paint brushes that can be purchased online

My favorite paint brushes that can be purchased online

Find Artist Brushes and Why I Like Them.

I had joined the Rocket Moms group on Squidoo, and our second weekly assignment was to write about a prized possession. We were to take a walk around the house and determine what was really valuable to us.

I’m glad I took that walk. My first thought of what I thought would be my most prized possession, while still sitting in front of the computer, was different than what I actually picked.

So walking around the house, I opened up to what it could possibly be.

I browsed upstairs. There was the piano which I very occasionally play. No, that wasn’t singing to me. Could it be the great knives on the dining room table that I purchased as part of a new selling program I was going to do? No, that wasn’t cutting it. So I took a trip downstairs to the basement. Ah, I saw it! My art studio. That’s where I get creative; other than when I’m making lenses on Squidoo. What is it that I would take with me. My artist brushesartist brushes. I have a bunch, and I have favorites, ones that are my first choices to use. Yes, I would pick my artist brushes. They are one of my favorite tools of creativity.

The Rounded Art Brush

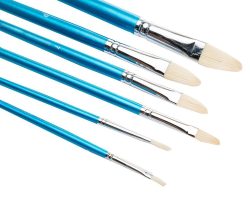
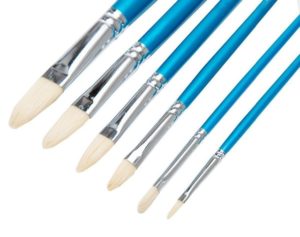
My first favorite is a flat filbert brush. It is a flat brush with a rounded edge. It comes in great for laying down backgrounds, and blending colors while having a more rounded touch to the background. They’re great for creating clouds.

I also use it for filling in and adding successive layers. I really like that rounded touch.
I have this brush in at least four sizes, that I can think of right now.

Filbert Paint Artist Brush

The Liner Brush

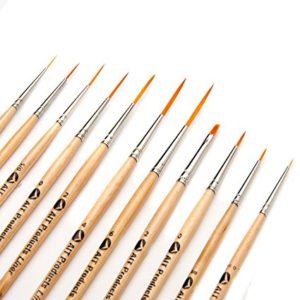
My next favorite brush is the liner brush. I use it a lot for adding details and fine lines, Teeth just wouldn’t be the same without a liner brush! Huh, you’d have to take that smile to the dentist! Yes, I do like the liner brush. Oh, I probably have a good six or so liner brushes. Lines do come in various sizes, you know.

Liner Paint Brush

Paint Brush Cleaning Tips

Use cool to cold water for cleaning paint brushes.
Finish with a bit of soap to press on the end to help maintain the shape of the brush.

The Painting Knife
My next favorite isn’t a brush at all, it’s my painting knife. Sad to say, I haven’t used it much for painting at all, at least not up to this point. I use my painting knife quite a bit for mixing the paint.

I used to use a brush, but then I had to rinse the brush, and watch wasted paint get diluted in the water. Heaven forbid! I wanted my paint to last longer than that! Then I started using my knife for mixing. This one with the rounded part of the handle works great. I’ve also used painting knives that were flat, handle and all, and the handle laid too close to the mixing surface. The rounded stem of the handle keeps my fingers up off the painting, mixing surface, and the narrow tip allows me to grab just the right amount of paint color that I want to mix into the other.

So two thumbs up for the painting knife being a mixing knife! I can also dab paint right off the knife with my brush. Aaah, I get to use my extra paint up. Now, that’s a sweet song in my heart.

This is the whole kit and kaboodle!

Except for the one’s I’ve recently used. I lay them out flat to dry before adding them back into the mix. I keep them sorted, all the rounded brushes together, all the liner brushes together, all the straight edge brushes together, etc.

I have my painting knives in the smaller container. I received that little flower container as a pencil holder when I was a clerical person. I think it’s much happier now holding my artist painting supplies. : )

Best Drawing Tools

Best Drawing Tools

Only the Best Materials Needed for Drawing

This is a list of my best drawing tools. This collection is by no means the Cadillac of art supplies, but in the mid to high range price point. While I don’t have the money for the super expensive stuff, I don’t like to compromise on quality.

I’ve drawn most of my life and have been perfecting my craft for years. As time goes on and I try new stuff I may tweak the list a bit.

I also believe that most of these drawing supplies are great for beginners. My reasons, there’s no use in handicapping yourself with crumby equipment. Thankfully, drawing isn’t like oil paints in that even the best doesn’t cost a fortune. Aside from that, experimenting with a variety of supplies always gets the creative juices flowing.

The Best Pencil For Sketching And Travel

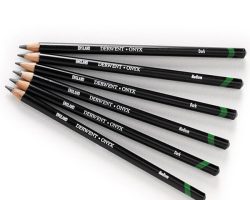
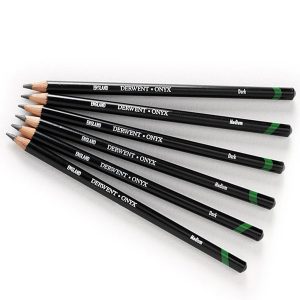
Derwent’s Onyx pencils

The best sketching pencil so far, that’s not

even the best as pencils go, is the Derwent onyx pencil.

It’s remarkably strong, and it’s capable of some pretty black shades. No, not as good as carbon or charcoal because it is still graphite that will get shinny if you overdo it.

I’ve used it in serious finished work, like this here Anubis puppy, and I thought it was an ok serious pencil, but I haven’t made up my mind yet. It’s kind of an odd ball, or “black sheep” of my pencils.

One thing I want to note, I don’t think it would make a good pencil to learn how to draw with. Only reason is that it doesn’t give me that feeling a soft graphite does. I wouldn’t want someone to miss that experience because of my recommendation. It’s just too hard of a lead that I think would make an absolute beginner frustrated.

Now, on the doggie drawing over on the right, a good many of pencils came into play to create this, including my woodles pencils, but I wanted to state where I used the onyx. The little scratching texture effect on the blanket. Those are the little wispy lines. There is also a great deal on his snout, and pretty much any of the blackest blacks that are in the work.

The Best Drawing Pencils

CreateAcolor Graphite Pencils

The pencils that stuck out the most for me were the CreateAcolor’s professional grade pencils. They just seemed a cut above Derwent, although I’ve used derwent for years and it’s not a bad pencil.

They create beautiful, smooth lines, I don’t think I’ve ever experienced any gritty spots.

I no longer need to buy the big tin, just single pencils to replace the ones I’ve used up, but if you buy the big tin of 24 there is a schematic on the top of the lid, much like a box of whitman’s chocolates. This has pictures of pencil marks to show you how dark that particular pencil grade gets. This is one of those things I wish I had when I decided to quit dabbling and really learn to draw.

Sadly I haven’t been able to find the 24 count tin in my travels in a good while. If you happen to find it, better hop on that sucker, or if you find that the 12 count tin has the awesome schematic, please let me know. 🙂

The Best Drawing Paper

Portrait drawing on stonehenge paper, created by, Shannon FleetLet’s get down to the foundation of sketching and drawing. Paper is oftentimes more important than people think. Drawing can be done on just about any paper, or with any tool that makes marks, but good paper makes a huge difference, sometimes the difference between success and failure depending on which drawing media you’re using.

On the flip side, the best paper makes for a better creative experience. Your pencil will also respond differently to different paper, this will either be frustrating, or give you a wonderful feeling. For artists who work with colored pencils, they need a paper with enough tooth to build layers of color that doesn’t fill up too fast. On the other hand, artists who use charcoal or pastels need a paper that is super toothy or else the powder particles won’t hold.

The paper I speak of here is the stuff you want to create finished work on, I have and use several different varieties since I’m hopelessly addicted to art supplies, but here is both of my favorites.

This drawing was created using Stonehenge paper.

The Best Hand Held Pencil Sharpener

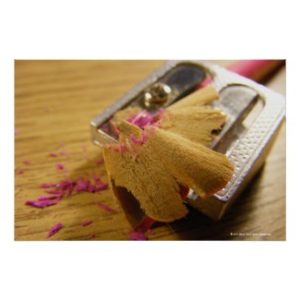
Pencil Sharpener Print by WallJewelry

Those pencils aren’t going to sharpen themselves! This particular issue has always been a problem with me. I’ve tried everything in the past.

I’ve always had romantic notions of the artists that use a knife to hone their pencil tips with care. This, I’ve been told and read is the best way to sharpen your professional pencils. I’ve never liked it.

For me the convenience of a regular, no frills pencil sharpener and a sand paper block was all I could deal with. I just want to get back to work!

Convenient, yes, but sadly most pencil sharpeners suck. They wear out super fast, and when they do wear out they chew rather than sharpen. This creates a ton of waste and frustration. I’ve been known to rage when it snaps the tip off of my lead causing me to stop and grab a 9H pencil to dig it out.

Even worse they are deceptively cheap, so one doesn’t notice the added cost and waste of having to buy a new sharpener just because the blade has worn out. This cost adds up over time.

Of course, there are electric pencil sharpeners. I give you an unprofessional “LOL” at this. You can’t take them with you.

The Best Artist’s Erasers

Some of My Erasers, Plus Some Improvisation

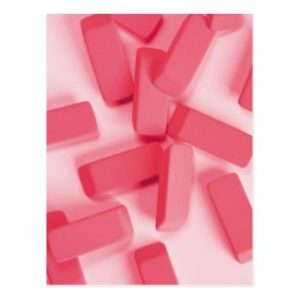
Pink Rubber Erasersby FallSeason

The eraser is also a great drawing tool that’s often overlooked. I use it for the obvious, to fix mistakes, for pulling out graphite from the tooth to lighten the tonal value of an area, and finally I actually use it to draw with.

I like to use three types:

The Kneaded, well it’s not exactly a traditional kneaded, but I’ll explain in a minute. Your trusted kneaded putty will do all sorts of stuff. Clean up, pull out graphite or charcoal, clean any smudges, create shapes. It’s the one that I use the most.

The regular white plastic eraser. For all of those general tasks that the other erasers can’t do. It’s ok to not have the best here, provided it’s not one of those pink erasers. You don’t want it to destroy, or otherwise flatten the tooth of your paper, or even worse, to rip it to shreds. But, the best does exist! I’ll show you below.

The last, is my trusty clicker eraser. The one I like to use is the tuff stuff stick. I used to use the fatter clickers, but they were terrible to draw with, yet not big enough to erase large areas. Plus, with my old clicker if I bore too hard on it I would nip off the top! Took me a long time to find tuff stuff.

UHU’s White Or Blue Tac As An Eraser

Better than any kneaded eraser on the market
Let me explain my substitute for the kneaded eraser. I like to use white tac. It can be pretty hard to find and you have to get it from the UK. lol. It’s the same as blue tac and you can use the blue too! Either one you can get your paws on.

It comes in a larger quantity than real thing, which also makes it cheaper. It’s stronger, lasts longer, and picks up more graphite and charcoal. It makes me hate to have to use the old kneaded putties. This is why I crowned it the best.

About Best Drawing Tools

The drawings and sketches were created and copyrighted by Shannon Fleet. That would be me!

The other images relate to Zazzle and are copyrighted by the artists who created them. A link is provided to the Zazzle site if you’d like more information on their work.

Safe Crayons for kids: Non-Toxic Crayons

Safe Crayons for kids: Non-Toxic Crayons

Go Green – buy soy and beeswax crayons for kids

Crayons make great gifts, but make sure the ones you give are safe – Soy and beeswax crayons are! Even in today’s health-conscious society, many wax crayons contain lead pigments and non-organic products such as petroleum. The same goes for inks, dyes and paints including face paints used by children. In contrast soy and beeswax crayons are completely natural and non-toxic while retaining strong colour that will satisfy your budding artist.

Children are particularly susceptable to ill effects created by petroleum based wax crayons because their organs are still developing. The same goes for high levels of heavy metals that can sometimes be found. It is as well to remember that even when companies tell you their product is completely non-toxic, you should check the content for yourself. If in doubt, ask them!

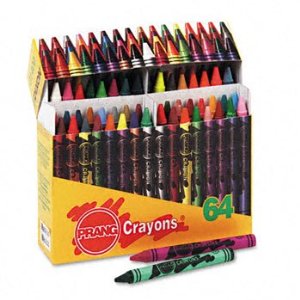
Prang is a well known name in crayons and these are their best soy ones

These safe crayons are make primarily from soy bean. Manufacturer Prang says these crayons are ‘brighter and smoother’ than paraffin wax crayons. These are certainly non-toxic and they come in a variety of colors and in packs of different amounts.

Praise for soy and beeswax crayons

safe crayons for kids

Most people who have purchased these crayons have nothing but praise for them. The colors seem to be bright and older children found they blend well together for more sophisticated art projects. They seem to work well on different surfaces.
Reservations soy crayons
The biggest complaint I have found about soy crayons is that they are more brittle than petrol-based crayons. However, they are easily rejoined by holding both ends over a low heat. Not much of a price to pay I don’t think.

However, what isn’t clear from all manufacturers is how much if any of the soy bean used is GM.

Why you should buy beeswax crayons

They smell better for a start! Paraffin based crayons smell there is no getting away from it, while beeswax smells sweet and natural with no chemicals or additives.

They also feel nicer to the touch.

Because the color is blended with wax it gives kids drawings a more subtle look than other crayons, in fact because you can produce many more effects with beeswx candles, some professional artists use them too.

The colors stay bright and are light resistent and the wax gives a kind of transparency much like that of watercolor paints.

Stockmar beeswax crayons for sale

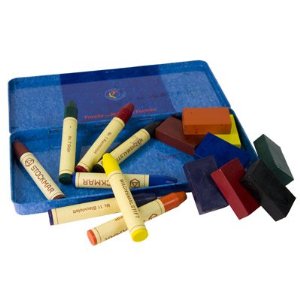
Stockmar produce natural beeswax crayons as either conventional stick crayons or as block crayons which can be used flat to create wide sweeps of color or end on to produce finer lines and numbers.

Stockmar Block/Stick Beeswax Crayon Tin

Best beeswax crayons from Faber-Castell

safe crayons for kids
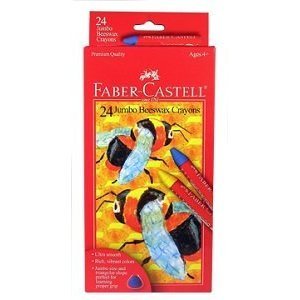
It pays to go for well-known and well-respected brands when you are buying – especially if you want the very best quality. You may pay a bit extra on crayons like these from Faber-Castell but it is worth it.

24 Faber-Castell Beeswax Crayons

Beeswax crayons

safe crayons
Beeswax crayons are getting good reviews right now. They smell nice and,with no petroleum, are non-toxic for little hands. Buy the triangular shaped ones for toddlers as they are easy to hold. The colors are bright and they seem to blend well.
They arn’t cheap but they last a long time if taken care of when packing away.