Balance by Nik Wallenda: Family & Faith

Balance by Nik Wallenda: Family & Faith

A review of Nik Wallenda’s astonishing story

Nik was just two years old when he started walking on a tightrope in his back yard. He was simply doing what his parents – circus performers – did. Two years later, when he was four years old, he watched the video of his great-grandfather, Karl Wallenda, fall to his death from a highwire.

Karl and the famous Wallenda family

Karl was seventy three years old when he fell. He was promoting his show – not enough tickets had been sold – and he fell 120 feet; the video still exists and can be seen below.

A very honest, open tale of faith & family

Although I have been fascinated by the Wallenda family since I was child, I was truly surprised and how moving and inspirational this book is. Nik, far from being a conceited celebrity, is a humble and loving man.

He’s dedicated to improvement – not just improving his professional life and abilities but also his own self-improvement as human being and his spiritual life.

I was moved to tears

Strangely enough, that wasn’t when I was reading about the tragedies that have befallen the Wallenda family. (Seven of the family have been lost in aerialist accidents.) No, it was the man himself, his humility, his faith and his determination to carry on his family’s tradition, plus honouring the achievements and the fortitude of his great-grandfather.

From the backyard to the Grand Canyon & Niagara Falls

Nik is well-known now for his stunning feats such as walking a high wire above the Grand Canyon and the Niagara Falls on live television. These, and other fantastic feats are reason enough to read this book plus, of course, the history of the family.

Videos

The video of Karl falling is horrible, but I’ve included it here. Skip it if you wish. But I do recommend that you watch the others, especially the one where Nik and his mother complete the walk Karl never finished. There’s a heart-stopping moment.

Open Mic Do’s and Don’ts: How to Have a Good Performance & Make a Good Impression

Open Mic Do’s and Don’ts: How to Have a Good Performance & Make a Good Impression

Make the Most of Your 10 Minutes

Open mics are a great way for performers to share their songs, build chops, try out new material, network and have fun! For a first-timer, the thought of getting up to play and sing in front of a room full of people can be more than a little intimidating. While every open mic is a little bit different, depending on the host, the venue, the sound system and even the time of day, there are some aspects of open mic performing that apply no matter what, and this lens looks to address the factors that will help your open mic experience be a success!

Be Prepared

Before You Go

So you’ve got a handful of songs you’ve been working on at home and they sound pretty good to your mom but you want to find out how they’ll go over from a stage? An open mic night is the perfect place to try your material on a live audience.

First things first, do your research! Look up when and where your local open mics are happening and find out as much as possible about how they work. You may even want to just go watch the first time to get familiar with the space and how the evening is run. If you haven’t been there before and can’t tell if the info on the venue website is current, you may want to call and confirm that open mic is still happening and the time is the same. Busy cafes and restaurants don’t always have time to update their website info on a regular basis. (On the busy note, be sure not to call and ask questions during peak meal hours if you don’t want to have a rushed or cranky conversation!)

Depending on the space and how many people are signed up to play, you may end up performing between 1 to 4 songs, though 2 or 3 seems to be the most common. Some open mics encourage original songwriting and frown on cover songs, some are for original songs only and some don’t care what you play. Some open mics have you play your songs in a row and some are round-robin style where each person goes around the circle playing one song at a time. Also some open mics will include poetry and stand-up comedy, or will be predominantly for poetry or comedy but allow musicians to play as well. Some venues have a full PA system with monitors and others are completely unplugged acoustic. These are all good things to know ahead of time if possible so you can be prepared.

Open Mic Do’s and Don’ts

The Difference Between Being a Dud and a Delight

DO: Bring the gear you need to perform well – tuner, cables, picks, capo, etc
DON’T: Assume the venue or the host will have things like a music stand or a second microphone or guitar cable if you’re performing with someone else.

Yes, with a lot of other musicians performing in the same space, chances are high that you can end up borrowing anything from a guitar to a pick, but if there is something you absolutely need to play your songs, bring it with you!

DO: Come early to sign up and stick around to hear the other performers.
DON’T: Show up late, play your slot and leave.

We all have life, schedules, transportation issues and other things to deal with. There will be nights where you get there late or have to leave early for whatever reason. But while you are in the room, do your best to be respectful and listen to the other performers. People notice whether you pay attention or not. Even if a particular performer is not your cup of tea, you can probably still relate to what it took for them to get up on the stage, and honor them with 10 minutes of your time for their bravery and commitment to sharing their craft. Plus, if you leave early you are missing out on the opportunity to network with other musicians and potential new fans! You never know when you are going to meet your next band member, co-writer, producer or friend. Bring some simple business cards to trade and a small notebook to take down websites, email or other contact info of new folks you’d like to learn more about and stay connected with.

DO: Introduce yourself to the host and let them know you are there to perform.
DON’T: Hold the host up with lots of questions and conversation, especially at the start of the night.

Hosting an open mic can be quite the challenge, from setting up the room and the PA, to juggling dozens of performers with different needs and levels of experience, to constant adjusting of the sound system, and overall handling the flow of the evening. A brief, friendly introduction to let the host know you are there is appropriate, especially if it is your first time performing at that particular open mic, as well as letting them know if you have anything out of the ordinary in terms of your set up. General chit-chat is best saved for the end of the night when they have less on their mind, and even then, be mindful that they may be needing to pack up and get home.

DO: Make sure your instrument is in tune before you get on stage.
DON’T: Tune in the middle of someone else’s song.

If you tune your instrument before leaving the house, chances are it will be pretty close when you get to the venue and just need a little tweaking. It’s not uncommon to step out of the room or go to the back a song or two before your turn to check your tuning and center yourself before going on stage. (A word of caution, if you leave the room to someplace that is a different temperature, that can throw your tuning out of whack and you’ll just have to re-tune when you come back!)

DO: Be ready to go when it’s your turn.
DON’T: Start getting ready only after your name is called, or walk out of the room and miss your slot.

Have your instrument out, tuned, and if appropriate, discretely and respectfully work your way toward the stage when it’s almost your turn. The time between performers is the most boring for the audience, and they’ll notice if you are taking a long time before you start singing. The more you are able to minimize the transition, the more the audience and the host will appreciate your professionalism.

DO: Let the host know if you prefer to sit or stand.
DON’T: Adjust the mics and cables yourself unless they give you the go-ahead.

The host wants to accommodate you to perform in the way you feel most comfortable, so let them know your preference. It’s usually best to position yourself the way you normally would and then let them adjust the equipment to you. Not only do they know their equipment best, it may be delicate or expensive and you don’t want to be the one to ruin it!
Remember to breathe!

If you’ve got a case of butterflies in your stomach, it may help to remember that everyone performing is either as nervous as you, MORE nervous than you, or can remember the time when they were as nervous as you. So breathe, smile and do your best!

DO: Check in with the host or sound person before plugging in or unplugging your instrument.
DON’T: Unplug immediately after playing, or walk off stage with the cord still plugged in.

It’s natural to be nervous at first and until you get more used to performing, often times you’ll want to get off stage as soon as possible after you sing. But you’ll probably be even more embarrassed if you make a loud screeching noise through the sound system by unplugging your guitar too early, or if you trip off the stage because the chord is still attached! So when you are done with your songs, take a deep breath, smile and then look to the person running sound to get the go-ahead to unplug.

DO: Thank the host and the sound person (if there is someone other than the host running the sound), the venue and the staff.
DON’T: Complain or give them a hard time.

The venue, staff and host are providing a great service to you of a space to play and treating them with respect is just the right thing to do. Along with that, consider that each interaction you have with them is potentially an audition for if you ever want to play a full show at that venue in the future. Having a good relationship with the decision makers can give you a competitive advantage down the road. It’s definitely good form to make a purchase, even if it’s a small one, and be sure to tip your server. You never know when they may end up running the open mic down the road or managing the booking!

DO: Have fun!
DON’T: Take yourself too seriously.

While it may be a really big deal for you to get up on stage in front of other people and bare your soul by sharing your personal songs, it’s good perspective to keep in mind that it’s only about 10 minutes of your life, and all the other performers there are in the same situation. There will always be someone better than you and someone worse than you out in the world, so stop letting that worry you and just go for it! Someone with years of experience has been in your shoes before and can remember their first open mic, and there may be someone in the audience who has never played a song out before and is admiring and jealous of you for getting up there. The most important thing to do is have fun and enjoy!

What Makes People Laugh?

What Makes People Laugh?

Understanding Comedy

If you are interested in pursuing a comedy career, such as being a stand up comedian like Andy Williams, it is essential that you learn what makes people laugh. According to theorists and medical professionals, such as those that specialize in biology, psychiatry and psychology, laughter is considered to be an important part of what is referred to as the “Human Vocabulary”.

This means that regardless of a person’s ethnic background, their socioeconomic status, or their location in the world, they are born with the ability to engage in laughter. Research has established that laughter is an activity that provides a wealth of insight into the unconscious mind. It is triggered by numerous thoughts, beliefs and sensations.

If you want to pursue a comedy career, it is crucial to learn how to write comedy and as much as you are possibly able to regarding laughter. Throughout this guide, you will be introduced to several facts about laughter.

What is Laughter?

Laughing In order to succeed at comedy, you must not only understand what makes people laugh, but you must also have a solid understanding of laughter, in general. According to studies conducted on this human expression, laughter is typically described as a reaction towards certain types of stimuli that an individual is introduced to, subjected to, or personally experiences.

In most instances, laughter is considered to be a visual or outward expression associated with joy, happiness, acceptance, relief or even embarrassment. Specialists that work in Neurophysiology have concluded that laughter is seemingly activated by a part of the brain identified as the “Ventromedial Prefrontal Cortex”. When this section of the brain becomes active, endorphins are produced.

The endorphins that are released may assist in alleviating pain throughout the body.
The immune system becomes stronger because laughter assists in creating the antibody cells that assist in strengthening the health of the T-cells.

Based on the information contained here, we can conclude that laughter makes people feel good – inside and out. Laughter is a positive experience that stems from positive stimuli. There are numerous health benefits associated with laughter. If you have an interest in a comedy profession, such as stand up comedy, it is important to understand that benefits of laughter and the feelings that it induces.

By doing so, you will have a higher interest in learning what makes people laugh and will want to take strides to ensure that you are capable of producing laughter in others. Comedy is all about helping others enjoy themselves.

Styles of Humor

If you have an interest in specializing in comedy, it is imperative that you learn about what those in stand up comedy refer to as the “Humor Spectrum”. By knowing what styles of humor are available, you will have a more detailed understanding of what makes people laugh. The following represents the most common humor styles:

Stand Up Comedy

The first type of humor takes life and makes it funny. It could be a normal situation or event. You would simply take it and turn it into a joke. Many refer to this as the “Laugh at Life” humor style. If you want to succeed at humor, you should work on your ability to find the humor in typical life situations and express that humor to others.

The next humor style is the sarcastic type. This type of humor involves being a bit dark, sharp and even a little on the biting side. When watching those in stand up comedy that specialize in sarcasm, you will find that their expressions, their words and the way that they present themselves make the sarcasm extremely funny. For some, sarcastic comedy is simple. For others, it takes practice.

The third most popular type of humor is pointing fun at the expense of others. You should be especially cautious when doing this and make it general, unless you have previous consent from the individual that you will be poking fun at.

A band being Blue Man Group for Halloween

A band being Blue Man Group for Halloween

How we turned a band into Blue Man Group for Halloween

This page shows how one of my bands went dressed as Blue Man Group for Halloween. It starts with the background, tells some of the issues we ran into, tells how we did the makeup, and more! This is a reprint off my website www.susanszoocrew.com

The beginning.

We were scheduled to play at a big Halloween party and were told we *had* to play in costume. Only makes sense to play in costume at a Halloween party, right? We wanted to do something where all three of us were the same theme but couldn’t decide. It had to be something we could relatively comfortably play/sing in, that wouldn’t get all over our instruments, and that didn’t require a huge outlay of time since we had to set up equipment and all. This is a little harder than it may seem to come up with! At our last practice before the gig I was showing a video of Blue Man Group doing part of one of the songs we were covering. My guitar player looked at it and say, Hey, that’s it! Let’s go as the Blue Man Group! Considering that two of us are women, and all three of us play guitar, it was a bit of a stretch! Blue Men with figures and no PVC tubes? Well, we all have a good sense of humor so that sounded like fun! In the days before the gig it rained…and rained..all around town outdoor gigs were being cancelled or shortened. So I didn’t have high hopes for staying dry at the party even though we were on a covered porch. As it turns out, the porch faced west and the rain would come from the east so even in the rain we would be dry. Wet costumes and equipment would not have been fun! To our collective delight, the rain held off for the rest of the night and we stayed nice and dry.

We had decided that setting up equipment is hard enough working without trying to keep makeup on, so we headed out and set up the equipment first. This ended up being a really good idea, allowing us to just come in and start playing. We did discover one bad feature about a house that was between the river and the ocean: bugs. Not just bugs, but biting bugs. I’ve lived in Florida almost my whole life and have never been eaten alive by no-see-ums so fast! They were even eating through bug spray! After being nibbled on for a while, we were finally all set up.

Makeup!

For the rest of this story, Keith = guitar player and Evelien= the singer. 🙂

Then it was back to the house to put on the makeup. Keith had ordered liquid latex from an online supplier, with the idea that it would be flexible and we could paint our faces and the bald caps with it at all once. We all changed into our outfits (black long sleeved turtlenecks and black pants) and got ready to put on the makeup. When Evelien and I opened the jar, we were wondering what the layer was on top%u2026 then we realized that it was dried latex. Hoping that what was underneath was useable, we pushed aside the top layer. What was underneath was chunky and definetly not liquid, more of a cream-not good. We tried using it anyway, even tried diluting some of it with water-no go. The brand new, freshly ordered paint was no good! Here it is, almost time to leave, and no latex and no blue men/women.

Luckily, since none of us knew how the liquid latex would stay on while singing, we had a backup plan. I had bought two cakes of blue greasepaint and brought with me a can of blue spray paint that matched the greasepaint. Keith and Evelien picked up some hair dye spray in case that worked better. I had some experience with grease paint from watching clowns do their makeup and participating in talent contests, so I knew a few methods of working with it and knew we’d be able to play and sing in it.

We decided to put on the baldcaps first, which took a bit of doing. Cutting out the ear holes was a bit of an adventure in trying not to give unexpected haircuts to each other! We decided to do Evelien’s costume first, so with a few dabs of spirit gum and judicious tucking in of hair, Evelien had her bald cap on. Keith went off to figure out which paint would work best, figuring we’d spray the other two caps before putting them on. Meanwhile, I painted Evelien a nice shade of blue%u2026 ears and all! The hardest part is getting the paintee to relax while fingers are smearing makeup around near their eyes.

Working with greasepaint isn’t bad, you just have to watch how much you put on. The fun part was setting the makeup..you use baby powder and pat it all over the greasepaint. Evelien wasn’t quite sure how baby powder was supposed to work and seemed a bit reluctant at having it put on. As we were running out of time, there wasn’t much room for discussion. So, I got to poof Evelien’s face with baby powder%u2026%u2026.judiciously! It was a bit tricky keeping it off the black turtlenecks, even with a towel, but it brushes off pretty well. Just make sure that the person brushing off the baby powder isn’t the same person applying the blue greasepaint or you’ll have black and blue clothing (oops). Also make sure the powderee doesn’t breathe in while being powdered, powder between breaths.

Keith came back with the paint results during the powdering process-we’d have to paint the caps after they were on or the paint would flake off. Keith asked why Evelien was blue and white- I explained that the powder sets the top layer of makeup but not the bottom so it stays flexible and doesn’t crack; although we might have to repowder as we sweat because it will get shiny. I showed Evelien how to flick off the extra powder and pretty soon she was all blue with no white. Powder discussion over, it was time for painting Evelien’s baldcap… soon to be another lesson in trusting the people doing your makeup.

We quickly found out four hands are better than two, one person holds a sheet over the parts you don’t want to paint while the other carefully but quickly sprays the baldcap%u2026 and the paintee holds their breath so they don’t breathe fumes. We ended up using hands to covers ears but a bit of blue spray paint on our fingers just added to the costumes. We managed to keep most of the spray paint off Evelien’s skin. Once Evelien was done, we surveyed the results%u2026%u2026.not bad! Then it was mine and Keith’s turn. We had a bit trickier of a time with putting on the bald caps due to having long hair. We ended up not gluing the backs down and just ran our ponytail/braid down the backs of the turtlenecks. Long hair makes the spraypainting harder too, the flap of cap down the back has to be sprayed away from the hair. Somehow my cap was a different construction than theirs and had a lot less side flap-this worked out fine because I needed to wear my glasses and the extra material would’ve made this tricky. We quickly got our makeup on and powdered each other up. I did learn it’s easier to powder someone who is sitting down than someone who is standing up when they are taller than you!

By now it was time to go, so we grabbed the spirit gum in case anyone came loose and everyone piled into the truck.

The gig!

We quickly got to the party, and since it was time to play walked straight on stage and grabbed our instruments. Our percussionist was a friend named Andy who had come in a giant bunny costume. So we had three blue men/women and a bunny! Bunny didn’t last too long because Andy couldn’t see to play, so we used the dolly and set it up next to the bass amp. We did find one awesome side effect of our costumes-since there wasn’t much skin exposed the bugs pretty much left us alone, attacking only bare parts of the feet.

The show itself went off well and everyone had a great time. It was funny to see how many people mixed up Evelien and I in the blue faces when talking on breaks%u2026..considering that I wear glasses and she doesn’t you wouldn’t think it was possible! The makeup ended up working out well, the caps stayed on and only needed minor touchups at the end of the night behind the ears mostly. By the end of the night some of the blue makeup had worked its way onto the turtle necks, but not as much as I had thought we would have had. It was rather amusing watching grownups dancing around in costumes%u2026..watching men dressed as fairies sing along %u2026.. people trying to drink / eat through masks%u2026

After the show we packed up the equipment and headed out to a local place (Jetty Lounge) to join the rest of the crowd. Once we were through there (the full moon brings out some interesting people%u2026) we headed back to the house to remove the makeup. It had been a while since I had to take the makeup off, but I knew I’d always used baby wipes, baby oil, and baby shampoo-I just couldn’t remember which order. Evelien was first, and the baby shampoo didn’t do much. Then I remembered the right way, and we finished getting the makeup off. You take a baby wipe, dump a little oil on it, and smear it on the makeup. Pass number two wipes off the makeup and you repeat until wipe is full of color. Grab another one and keep going! The hardest part is getting it out of your ears%u2026..I think we all had some left over the next day.

All in all we had a great time, learned a few lessons along the way (always have a backup plan!) and got to play some awesome music for appreciative people and friends. What more could a band ask for? Except fewer bugs that is ….. 🙂

ool Floating Coolers To Keep Drinks Cool-Playing or Swimming

ool Floating Coolers To Keep Drinks Cool-Playing or Swimming

Pool Floating Coolers for Cold Drinks

Pool floating coolers have become very popular over the last few years. I know we love ours and use it every time we go for a swim. I put cold drinks and snack in it to keep the chilled while I swim or float around on my chair. I also take it out with me when we swim in the river by our summer camp. Every one enjoys a cold drink while we play in the hot sun.

Since the cooler floats it can be easily attached to your inflatable chair while float in your pool and relax. I sometimes use mine when we are having a party as an extra cooler on the table. It keep everything cold and is also very decorative. The kids like to take it with them while they swim and play games. I like it when they do because they don’t have to come back into the house with wet feet every time the want something cold.

My husband and I like to have the neighbor over up at the cottage and we use the floating cooler when we swim. He likes to keep it filled with adult beverage to share with his buddies. Some days they play beach volleyball and keep the cooler in the water near where they play. I am planning to buy another one to give as a gift to my cousin. She was so excited when she saw our I knew it would be a great gift for her. An inflatable cooler allows you to keep you drinks nearby when you are in the water. Since my cousin is a swimmer and lives in her pool I am sure that a beer cooler will make the perfect gift. The coolers floats in the water and beverages are served in the pool.

It floats

Carnival in Trinidad and Tobago

Carnival in Trinidad and Tobago

It’s CARNIVAL time again!!!

Carnival in the country of Trinidad and Tobago, is one of the best experiences one can have the pleasure of having.

It originally started in the country between 1783 and 1838. An has since evolved into a worldwide phenomenon. It is the type of cultural event that brings people of all creeds and races together from all over the world for a magnificant 2 day celebration.Decades later in the year 2011, the masquerade bands have increased in quality and quantity. The costumes are spectacular and accompanied by pulsating music that fuels the party engine day into night.

Trinidad and Tobago Carnival is often described as the greatest show on earth. It’s beauty and grace is welcoming and alluring to people all around the world.

For the natives, this celebration starts immediately after boxing day and ends Ash Wednesday. For tourists it’s the 2 infamous days, which this year is the 7th and 8th of March or better known as “Carnival Monday and Tuesday.”

So, what happens after people stuff there faces for christmas with ham, lamb, and jam….lol….is a massive dash for the gym. Yes….the gym!! and also any savannah, park or clear street available, so that everyone can get in shape to fit into the very seductive and beautiful costumes of the season and parade down the streets.

Another great happening when the season starts is an array of parties. Night club come alive and the native music SOCA comes out in all it’s glory in the name of the season. Massive competitions such as “The International Soca Monarch and Chutney Soca Monarch’ gets into full swing. People start showing support to there favourite soca songs and registration to the masquerading bands begin and sell out in no time at all.

WELCOME to an explosion of colour, music and creativity. Truely nothing on earth can truely rival this, the original event.

About Trinidad Carnival Costumes

Trindad carnival costumes are always bright, colourful, and seductive.

They are made for men, women and there is even kiddies carnival. The costumes are an artful and creative combination of mostly features and beads in the most festive of colours.

Each band chooses a theme every year to design their costumes after. Each general theme is given sub themes or sections, and each section has it’s very own colour and design of costume. Literally thousands of people comprise each section.

Each band section has a section leader in a gigantic costume sometimes supported by wheels, that they lead the section with as they parade around the capital of the country.

Carnival Make-up

Of-course the costume is not a costume without equally glamourous makeup. The makeup for the season is done in bold colours and sometimes over multiple areas of the body. It is an accentuation of the costume and adds to the beauty of the masquerader.

Because it’s the tropics it’s nice to have the makeup be sweat proof and shine resistent as muc has possible. The heat and fun of the festivities is sure to have you breaking an immense sweat even if you don’t dance much.

So be sure if you’r eplanning on enjoying the festivities to make your makeup as beautiful an indestructable as possible…:)
Kiddies Carnival

For the little ones to enjoy in the festivities as well there is kiddies carnival. Similar to the adult celebrations except the costumes comprise of alot more clothing…..lol…

It’s cute though, they have fun and enjoy in the festivities….:)

Bands for Carnival 2011

“HARTS”

The theme this year for the Harts masquerade band is ” Planet Rock” Check out there some of their costumes.
The Legacy Masquerade Band

It’s that time again Carnival 2012 in Trinidad and Tobago

Come celebrate Carnival 2012 in Trinidad and Tobago.
A sneak peek of whats to come!!

While the rest of the world is anticipating Christmas in December, in the beautiful twin island of Trinidad and Tobago, it’s people are already planning and anticipating Carnival.

Mas Bands are getting ready to launch their lines of costumes that will be worn by thousands of participants world wide on the 2 most exciting days of the Carnival season Carnival Monday and Tuesday. Though we aren’t sure what dates it would be yet, this does not stop us from preparing for it like some places prepare for a hurricane! 🙂

Stay with me folks as I bring you ball by ball comentary on the launches and all the happenings for the upcoming Carnival season in Trinidad and Tobago……..

*Here are the dates for the Band Luanches*:

Spice – July 9
TRIBE – July 23
Oasis Carnival – August 5
Island People – August 5
Dream Team – August 6
Fantasy Carnival – August 6
Harts – August 12
YUMA – August 13
Ronnie & Caro – August 18
Trini Revellers – September 17
Legacy – October 15

Paul Zenon- Street magician

Paul Zenon- Street magician

Paul Zenon- the original street magician

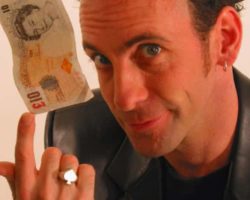
Paul Zenon is a British street magician, he has had several TV programs on UK television and he performs what has become known as street magic, made famous in America by David Blaine amd Dave Angel . Paul Zenon’s performing style is cheeky, funny and streetwise without the cheese that many magicians seem to slide into.

In his television specials he performs, close up, under the nose magic in pubs, clubs and in the street to random people- there are no camera tricks and he specialises in sleight of hand magic using everyday objects such as cards, dice, cigarettes and bottles.

Sometimes he does magic in bars and spends some time with the audience he entertains, other times he does “hit and run” magic where he does a quick trick then smartly walks off leaving a load of amazed people in his wake- this is the type of magic I sometimes do and it’s great fun to blow people’s minds then get away before either they repeatedly ask you how you did it or you do too much more- it’s better to leave the audience wanting to see more.

Paul Zenon also performs stand up comedy and has been a croupier and a “psychic”, its clear he got his street wise style by actually being streetwise! Paul also knows when to talk and when to allow the magic to speak without words- something some other magicians could learn to do more of!

Paul Zenon- UK street magician

Five streetwise reasons he’s cool!
Paul Zenon looking cool

He was one of the first “street magicians” on television.
He doesn’t take himself too seriously.
He performs sleight of hand magic flawlessly and without cheese!
He used to perform for the “space rock” band Hawkwind.
He keeps close up magic in the spotlight in the UK.

UK magician Paul Zenon stuff from Amazon USA

Learn street magic and entertaining scams

If you want to learn street magic, entertaining scams and challenges- Paul Zenon has written some excellent books revealing secrets that were only available in advanced magic books previously, all his books are clearly illustrated and written in an entertaining and easy to follow style so that you could be the next David Baline or Criss Angel in next to no time. Better still- once you learn these tricks you can develop your own style.

Paul Zenon from child swindler to comedy magician!

Hustler to street magician

At the tender and “innocent” age of only eight years old Paul started his devious path by selling fake lottery tickets to neighbours (there was no prize and no one won, except Paul)! His fascination with deception and fame led him to skive off school to appear on stage and as a teenager he worked in a magic and joke shop called “The House of Secrets” picking up the skills of magic and entertainment that have stood him so well. He developed his style and appeared at the London Comedy Store and has performed to entertain the British army in far flung places. He has had television showcases on British television – on both the BBC and commercial channels. He is also the founder of The Wonderbus- a not for profit organisation that takes older people out to see live entertainment.

Theater For Children

Theater For Children

Kids Performing Art!

Theater is one of the most exciting and most educational projects you can to do with kids.

Developmentally, it’s hard to top theater. Drama can teach word skills like reading, writing, imaginative composition (fiction they call it, or drama), plus a feeling for the spoken music of words and poetry. Not to mention a smattering of history and literature.

Socially, drama teaches both cooperation AND independence, recognizing and dealing with emotions, empathy, plus the practical skill of speaking in front of an audience. Public speaking is a skill many adults wish we had developed. Music. Dance. Magic tricks. Almost any skill or interest can find a home onstage. There’s a whole branch of theater called improvisation: always useful to learn how to think on your feet. And as children get more involved in what’s called “technical theater” – all the props, costumes, sets, lights, sound etc. – math skills, visual and spacial skills, and handicrafts all come into play. Plus innovation. There’s a LOT of problem-solving in theater.

There’s also a great deal of comradery and joy.

Start small and easy: goof around with puppets, make masks, recite a poem, act out the Three Bears – – – Have fun onstage.

The picture? A set from a children’s production of “Charlie and the Chocolate Factory.” Since I happen to have an abundance of factory-themed children’s sets to decorate this Lens, let’s think of it as a big Drama-Fun Factory! I’ll point out some of the gears and levers that will help you make your own at-home theater. It’s also a factory-in-progress (as all my Lenses are), so please visit again to see what new gears have been added.

Puppet Theater

Always popular with kids
There is something fascinating about puppets. They combine the make-believe and miniature joy of dolls with the expression and story-telling of people – while, best of all, shy performers can hide behind them like a mask. (More on masks later.) Any child can say more, a lot more freely when using a puppet. (As psychologists know.) Puppets are freedom and wild improvisation.

It’s most fun to build your own puppets and puppet theaters, but store-boughten is fun too.

Do It Yourself Puppets

Punch. Where’s Judy? PAPER BAG PUPPETS – Maybe the simplest puppet is the paper bag puppet. Take a plain brown lunch bag and have your child draw the puppet’s eyes and nose on the bottom, so that the fold (where the bottom folds flat) becomes the inside of the puppet’s mouth. Colored markers or poster paint (not too wet!) will look bolder and more effective than crayons or pencils. Adding cut paper elements will make the puppet more exciting: a red construction paper tongue for a snake maybe or great big ol’ cow licks; the cow’s horns or moose antlers; arms and hands; or perhaps a silly mustache or paper wig. Scraps of fabric or fur can be fun. Anything, really. Go to the movies and watch the crazy puppets in the Fandango ads.

Now, how about adding a huge grocery store bag puppet to play the giant?

SOCK PUPPETS – Just as easy to make if you’re up for a little simple sewing: buttons for eyes, scraps of fabric for tongues, ears, hands; wool for hair.

GLOVE PUPPETS – One woolly glove becomes a quintet of actors. Or cut the fingers off (roll-hem the cut edges) and create five separate prima donnas. You could experiment with wool versus cotton versus rubber glove fingers (rubber for aliens maybe? add little teeny antenae) or roll your own finger tubes from any fabric or even stiff paper.

POPSICLE STICK PUPPETS – Almost any picture can be either printed onto stiff card-stock paper or mounted onto cardboard and glued to a popsicle stick. I suggest either adult-applied spray mount (flattest most permanent) or child-applied glue stick for the picture to cardboard gluing, then white glue like Elmers or hot glue (adult again or old enough child) for the picture to stick attachment. Try cutting out arms or heads separately and attaching these to the puppet’s body with old fashioned brass brads so you can change their poses. Suddenly they can emote!

OTHER “STICK” PUPPETS – As with popsicle sticks, almost any stick-like object can turn into a puppet. Try decorating wooden spoons or toilet paper tubes (which make finger puppets). Or how about – new! clean! – toilet plungers? Or spatulas or decorated pencils or pool noodles with drawn-on permanent marker faces?

SHADOW PUPPETS – These can be cut out cardboard shapes very similar to popsicle stick puppets. They needn’t be decorated with color unless you want to, but “decorations” made by cutting holes can be fun. Bring out the hole punch! I imagine you might be able to cut out small areas and then fill these with colored tissue paper or translucent plastic for a stained glass effect. Obviously you’ll need a shadow screen – stretched white fabric or paper – and a strong light to make these work.

MARIONETTES – These are more complicated puppets, but all you absolutely need are two flat sticks fixed together in an X with strings from the four ends that tie to the puppet’s arms, head, and legs or rear (whichever is funnier). The “puppet” could be any loose jointed doll – made of cloth or wood or cardboard tubes.

For older kids with advanced skills and a LOT of patience – and an interest in video – you could try making your own short film. Film puppets in action! (Watch a Muppet movie. Like that.)

Or if VERY patient and motivated, try making clay “puppets” to shot-by-shot act out a brief Claymation film. (Watch a Wallace and Grommet movie to see how masters do this!) But this stop motion filming technique is only for the extremely motivated and patient!

Puppet Videos

Scottish Falsetto Sock Puppet Theatre – Romeo and Juliet Part I
Rated PG – Extra Silly
Meant for older kids as it gets a bit, slightly, um, vulgar as the Bard and Scottish Sock Puppets are so apt to do. Make a nice antidote to classroom reading of this classic! The other vids are suitable for younger children.

Masks

Using and making masks for children

Poof! You’re someone (or something) else. Masks seem magical – a natural development of the baby’s game of peekaboo.

Masks can be made from almost any material: a paper grocery bag; a paper plate plus string; cut cardboard, felt, or craft foam plus elastic; paper mache (lots of goopy fun); or, if you’re ambitious, leather etc.; or there are lots of mask kits, where you start with a pre-formed face shape and decorate and add to it.

PAPER MACHE – Amazingly cheap and simple, though time consuming. Tear or cut newspaper into strips, the thinner, the more detailed you can get. Mix flour and water to make a thick paste, soak the paper in this till sticky but not soggy, then slowly build up your shape. It’s easier if you have a shape to lay the strips over. A kid’s-face-sized balloon can work or a plastic mask. You can add in cardboard to reinforce protruding pieces like ears or tusks – make sure these are well integrated into the face proper so they won’t rip off easily. Allow several days for the paper mache to dry before trying to paint or decorate it.

Circus Museum in Sarasota

Circus Museum in Sarasota

John and Mable Ringling Circus Museum

The Ringling Brothers Circus used to winter in Sarasota, Florida. John and Mable Ringling built a mansion here. The Ringling mansion, Art Museum, Circus Museum and a beautiful Rose Garden, all on a 66 acre estate, were left to the State of Florida on John Ringling’s death. The property is managed by Florida State University and is open to the public.

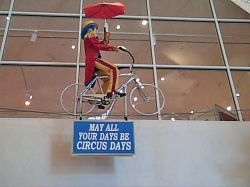
The photo here is a dummy on a bike on a wire at the entrance to the Circus Museum’s Tibbals Learning Center. High wire circus performers did a lot of things on the wire. Some did ride bikes, others juggled, and some sat on chairs. All videos and all photos except the circus wagon close-up on this lens were made by me. The one exception was made by my husband.

The Greatest Show on Earth Movie

Circus Museum gallery exhibit honoring the movie “The Greatest Show on Earth”. Cecil B. DeMille produced, directed, and narrated the movie. At the 25th Academy Awards it won the Oscar for Best Picture.

The movie featured Charlton Heston, Jimmy Stewart, Tony Curtis and Betty Hutton among other movie stars. The movie was made in Sarasota, Florida, and the real Ringling Bros. and Barnum & Bailey’s Circus’ 1951 troupe of 1400 people and hundreds of animals appear in the film. The gallery has a wall of still images captured during the making of the film.

The movie can be seen on a tv set up in the display. “The Greatest Show on Earth” shows what it is like to live the circus life. I saw the movie when it was first released and really liked it.

John and Mable Ringling

John was one of seven brothers that started The Ringling Brothers Circus in 1884. The small circus began in Baraboo, Wisconsin. They quickly became a financial success because of their reputation for honesty. The ticket sellers were not allowed to short change the customers. The Ringlings didn’t have games of chance that conned customers, either.

The decision to buy two railroad cars in 1889 allowed the circus to travel between big cities and skip the small towns. That gave them larger audiences and increased the profits. The Ringlings bought the Barnum & Bailey Circus and merged the two circuses in 1919. At that time their winter quarters were in Bridgeport, Connecticut. During those early years John Ringling was the advance man and Charles Ringling was the manager.

John and Mable Burton were married in 1905, but never had children. The last of John’s brothers died in 1926 leaving him the sole owner of the circus. The following year he moved the winter headquarters to Sarasota, Florida, where he and his wife had a winter home and a museum building for their art collection. The Ringlings named their 30 room mansion Cà d’Zan which means “The House of John” in a Venetian dialect.

Ringling lost almost all his fortune during the Great Depression in 1929. His wife Mable died in 1929 and he died in 1936. Ringling left Cà d’Zan, the museum, and his art collection to the state of Florida.

Ringling Circus Museum Gallery

This gallery is a large room with several circus wagons, some circus railroad cars, and some circus animals used on merry-go-rounds. The circus wagons were pulled by horses and carried all the belongings of circus performers. They also carried everything the circus needed to set up their “city” as they moved from place to place to perform. This video was made May 5, 2009.

Circus Wagons

Many of the circus wagons were a work of art themselves. This photo we made today at the Ringling Circus Museum shows one of the fabulous wagons. The wood wagon, pulled by a team of horses, was decorated with raised sculptures like these women. All was painted and then gold gilt paint was also applied.

The Human Cannon Ball

Ringling Circus Museum gallery with more circus wagons, the human cannonball truck, and a map of the winter circus grounds in Sarasota, Florida. The map shows one main road through a large tract of land with tents set up for every business you would find in a city.

I always thought circus people would use the businesses and facilities like blacksmiths and doctors in the towns they worked. But, that was wrong. The big circuses like Ringling, were a world unto themselves. They carried huge tents for everything from kitchens, diningrooms, and blacksmiths to doctors.

Circus Side Show Posters

These large posters in my video showed the people with birth defects and abnormalities known as “Circus Freaks”. There was no medical cure for them in the 1800s and early 1900s. The people found a home with the circus and earned a living, too.

Human Cannonball and Circus Side Show

Lets see how many of us have seen the extreme exhibits of a circus. The Side Show had acts like sword swallowing and knife throwing as well as people born with physical abnormalities. They included the bearded woman, extremely tall people, midgets, grossly obese people, the man with three legs, and Siamese twins (conjoined). They were all displayed in the Side Show.
Ever see a human cannonball or circus sideshow?

Circus Winter Quarters in Sarasota, Florida.
This map, hanging in the Circus Museum building, shows the Ringling Circus winter quarters in Sarasota, Florida. You can see the railroad tracks in the lower right corner. That was the circus’s means of transportation out of Florida to the big cities where it performed.

It amazed me that the circus had its own hospital, upper left corner of map, Aviary, middle right of map, wagon building facilities and canvas waterproofing facilities, middle left of map. They could even repair their railroad cars themselves. The circus was a city within a city.

Tibbals Learning Center, Sarasota, Florida (2 of 2 buildings)

Howard Brothers Miniature Circus

The Howard Brothers Circus took Howard Tibbals 50 years to build. It is the world’s largest miniature circus with 8 main tents, 152 circus wagons, 1,300 performers and workers, 800 animals and a 59 car train. It occupies 3,800 square feet. This video that shows the Posters on the Side Show tent and the way people moved down the Midway to the Main Tent.

Another Look at the Miniature Circus

The theme for Howard Tibbals miniature circus is a day in the life of the circus. Tibbals based it on the real Ringling Bros Circus. The lights dim and go off to simulate an actual day. It’s fun to see all the circus people relaxing and going about daily lives as well as performing.

Cool Magic Tricks for Beginners

Cool Magic Tricks for Beginners

Easy-to-perform magic tricks for the beginner

While all magic tricks, if they are well performed, seem hard to do, many of them require no special skill or expertise, just a thorough rehearsal of the steps involved.

The best magic tricks are real crowd pleasers, and a few magic tricks, if performed in the right context, will not be out of place at most gatherings.

Magic tricks can be surprising, amusing, and can make people think. Many are based on scientific principles, although most people don’t associate magic with science. The best effects are based on simple premises.

Many of the best magic effects create disbelief and astound the audience. Most people want to know how a magician performs all of those incredible, fascinating effects and illusions. Most magicians realize that wanton exposing of magic tricks merely to satisfy people’s curiosity is bad for the art, but teaching those who have a sincere desire and interest in learning magic is admirable.

The tricks taught here were chosen because their effects are good and they are easy to learn. The equipment required, such as bottle caps, matchbooks and matchboxes, can be found easily around the household.

While these tricks can be read and learned in just a few minutes, you are well advised to practice all of them a few times before performing them for anybody, even for your friends and family. Even the simplest tricks have pitfalls and these can only be learned by doing a few practice sessions. A little practice will also give you the self-confidence in performing that is essential for every effective magician.

The most important thing to remember is that the success of any magic trick depends on its presentation. The simplest trick can be turned into a magical masterpiece with a bit of showmanship. Learn to perform these tricks and all those you learn in an entertaining manner and you’ll soon discover why magic is such a great hobby.

The Flower In The Buttonhole

A nice trick for the stage
cool magic tricks and how to do them This is a good trick for more formal magic shows with a larger audience, such as a talent show. Walking on stage, you comment that there seems to be something missing from your appearance. What you need is a flower in the buttonhole of your jacket’s lapel. You simply snap your fingers and a flower instantly and visibly appears in your buttonhole!

What you need:

A suit jacket, a length of black elastic and an artificial flower.

How you fix it:

Attach the artificial flower to the piece of elastic and thread the other end of the elastic through your buttonhole. Next, tie a safety pin onto the other end of the elastic (don’t make the not too tight, as you may need to experiment with the length of the elastic).

Run the elastic through the buttonhole and then behind your right lapel down towards the bottom. Pin the safety pin as far away from the buttonhole as possible while still being hidden behind the lapel. This will give the elastic a bit more “stretching room.” The elastic should be taut. Shorten and adjust the length of the elastic as necessary so that the flower stays in place.

How you do it:

Before walking out on stage, you pull the artificial flower over to your armpit and hold it there by pressure of your arm. When you are ready to perform, walk out on stage, comment on your needing a flower, and release the pressure of your arm, allowing the flower to fly to your buttonhole. Wear a dark suit so the elastic will not be noticed.

The Three Rattle Caps Game

You show three plastic caps from milk cartons, all the same color. One of them has a steel ball inside, which you demonstrate by rattling the cap. Now you mix the three caps around by rearranging them in a few moves on the tabletop. Even though an audience member tries to keep a close eye on the caps as you mix them, they always guess wrong as to which one rattles.

What you need:

Four plastic caps from milk cartons, a piece of cardboard, a small steel pellet and glue, such as contact cement, that will adhere to plastic.

Preparation:

Trace around one of the caps with a pencil four times on the piece of cardboard to create templates for four cardboard discs. Cut them out along your outlines. Glue a disc to the open side of each of the four milk carton caps, placing the steel ball in one of them before you do so.

Before the trick begins, attach the cap that rattles to your left arm with a rubber band under the sleeve of your shirt so nobody can see it.

How you do it:

Tell the audience that a common trick that carney operators and street hustlers use is the three shell game, and that you would like to demonstrate this with your own version.

Place the three caps on the table and “demonstrate” to the audience that only one of them rattles by lifting it off the table and shaking it slightly with your left hand (the hidden cap is actually what rattles).

With your right hand, slide the caps around on your table three or four times, so that the audience still thinks that they can keep track of the cap that rattles. Have the audience member point to the cap that they think has the rattle. With your left hand, lift up a different cap and show that it is the one that rattles.

You can repeat this a couple of times, and the audience member will unsuccessfully guess which rattles every time. It is a good idea to stop after two or three times so that the audience doesn’t notice that you use the same hand to shake the caps each time.

The Disappearing Matches

You pick up three matchboxes from the table one at the time and shake them. The audience can clearly hear the sound of matches rattling in each box. Wave your hand over the boxes and then open each one. Show that the matches have vanished and that each contains a differently-colored ribbon or silk handkerchief.

What you need:

Four matchboxes, three differently colored ribbons or pieces of cloth and a rubber band.

How you fix it:

Empty all of the matches out of three of the matchboxes and half the matches out of the fourth matchbox. Place a square of colored cloth or a differently colored ribbon in each box. With the rubber band, attach the half-filled matchbox to your left arm under your sleeve so that no one can see it.

How you do it:

This trick works on a similar principle to the preceding one. Pick up the boxes on the table one at a time with your left hand and shake them. The audience hears the matchbox hidden up your sleeve and thinks it’s the matchbox you are shaking that is making the sound.

Wave your right hand over the boxes to make the matches “vanish,” and then open each one, showing the silk or colored ribbon inside. The audience can look at the matchboxes all they desire and they will not discover the secret. Reach up your sleeve behind your back and remove the hidden matchbox.

Now here are the REAL secrets of magic!

Here’s how to become a true Master Magician, by the author of this lens!

The Zombie Finger

magic tricks revealed You show a box that you say you found in a strange antique shop. Lifting the lid, you show a very realistic human finger inside, which you invite the viewers to touch. When they bend in close, the finger suddenly jumps at them!

What you need:

A small cardboard jewelry gift box, the type that has a layer of cotton batting inside, and the lid.

Preparation:

With a pointed pair of scissors, cut a small hole (just large enough to slip a finger through) slightly off center in the bottom of the box. Also, make a small hole in the cotton at about the same place. Make sure you can slip your finger through the hole(s). Place the lid back on the box.

If you slip your middle finger through the hole at the bottom of the box and bend it towards you while straightening out your other fingers, it will look for all the world like a real finger laying inside the box.

Put the lid back on the box and place the box inside or behind another object on the table or in your pocket.

How you do it:

Grab ahold of the box with your right hand, while at the same time slipping your finger through the hole in the bottom and bending it toward yourself. You should be able to do this with the lid still on the box.

Bring the box out into view and tell the story of finding it in an antique shop. At the proper moment in your story, lift the lid and show the finger inside the box. To make the finger seem to “jump,” you simply straighten out the finger in a quick movement.

Tip: You can apply makeup effects to your middle finger to give it a more ghoulish appearance before the trick begins.

Eyes Behind Your Back

You hand a member of the audience three or four matchbooks, each containing a different printed design or advertisement on the cover. You turn your back and have them mix up the three matchbooks and hand them to you behind your back. You are able to announce the cover design or advertisement of each and bring them out from behind your back without looking.

What you need:

A belt, two sets of identical matchbooks with different printed cover designs, a jacket or sports coat.

Preparation:

Hang the duplicate matchbooks on the back of your belt in a memorized order as shown. Under cover of your jacket, no one will be able to see these.

How you do it:

When the audience member hands you the match packs, you simply place them into your rear pants pocket behind your back. In announcing the printed design of the matchbook you are about to bring forward, you really reach under the back of your jacket and remove the corresponding matchbook from your belt. Be sure to keep your other hand behind your back so the audience thinks you are still holding the matchbooks. Like most magic tricks, this should only be done only once for the same audience.